Design a playful DIY Polymer Clay Monster Christmas Tree with this fun project, ideal for adding a unique and creative touch to your holiday decor.
Christmas crafts are always a fun and cheerful activity, and adding a spooky twist can make them even more unique! If you love creating quirky holiday decorations, this project will help you design a playful and unusual Christmas tree with monsters made from polymer clay. It’s a creative way to combine festive spirit with a touch of humor, making your decorations stand out from the usual holiday decor. Whether you’re crafting alone or sharing this activity with family, this project promises plenty of fun and laughter.
DIY Polymer Clay Monster Christmas Tree + Tutorial
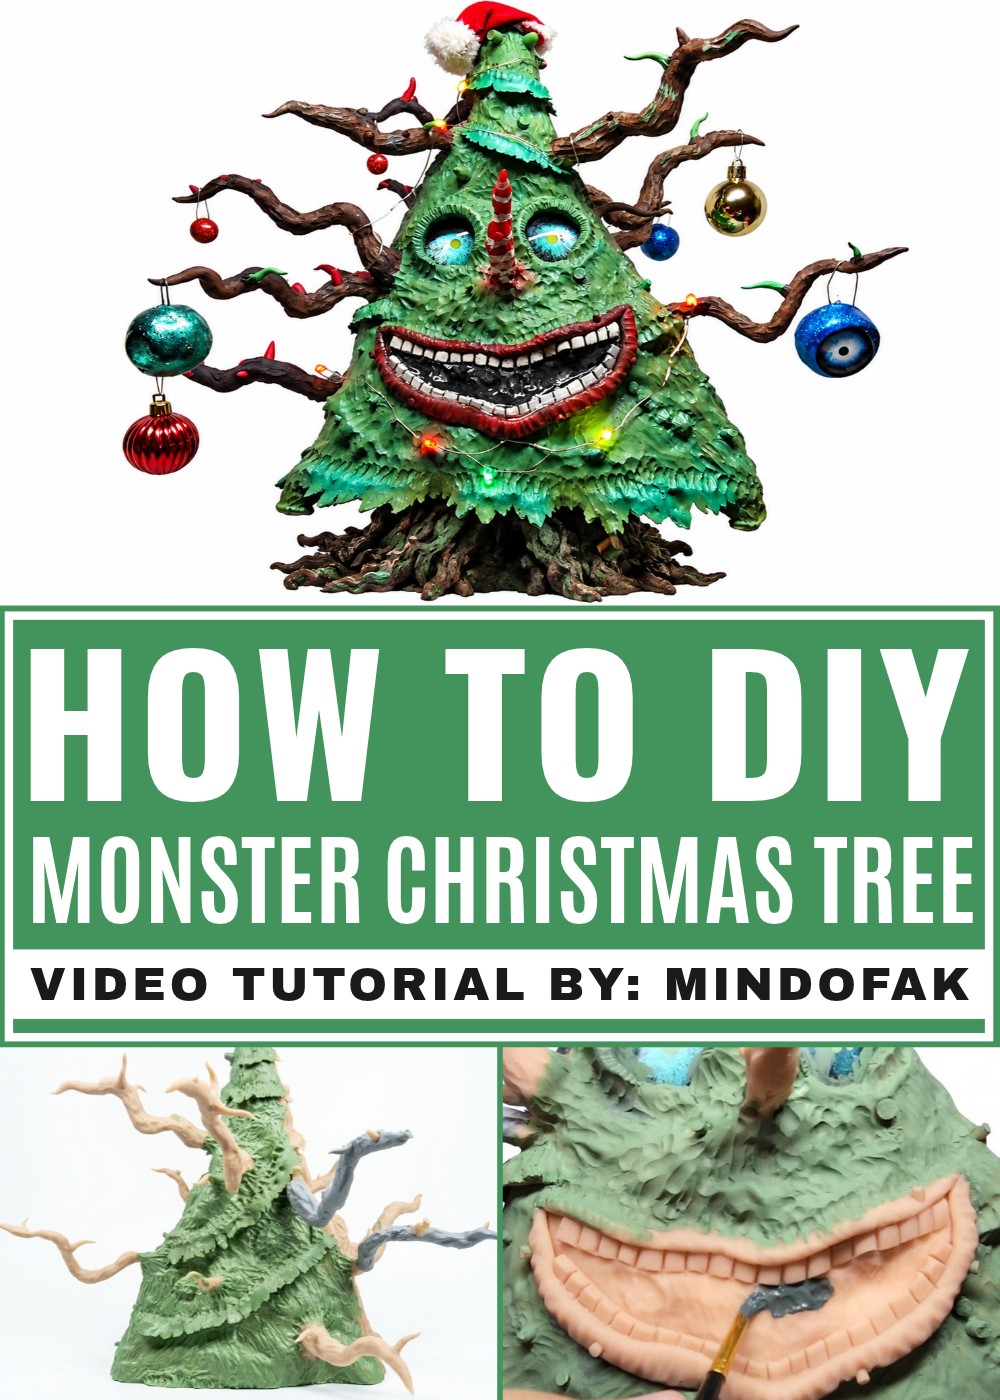
Using polymer clay as your material, you can sculpt cute or silly monsters to place on or around your miniature Christmas tree. From wobbly eyes to toothy grins, there’s no limit to how wild your designs can get. After shaping the monsters, bake the clay to set their forms, and then arrange them on the tree as ornaments or toppers. You can also experiment with colors and textures to make your monsters extra vibrant and unique.
The DIY monster Christmas tree is perfect for anyone looking to try something different this holiday season. It’s ideal for craft lovers who enjoy mixing creativity and fun themes into seasonal decorations. The final result will be a one-of-a-kind tree full of character and charm, making your festive setup memorable for both kids and adults.
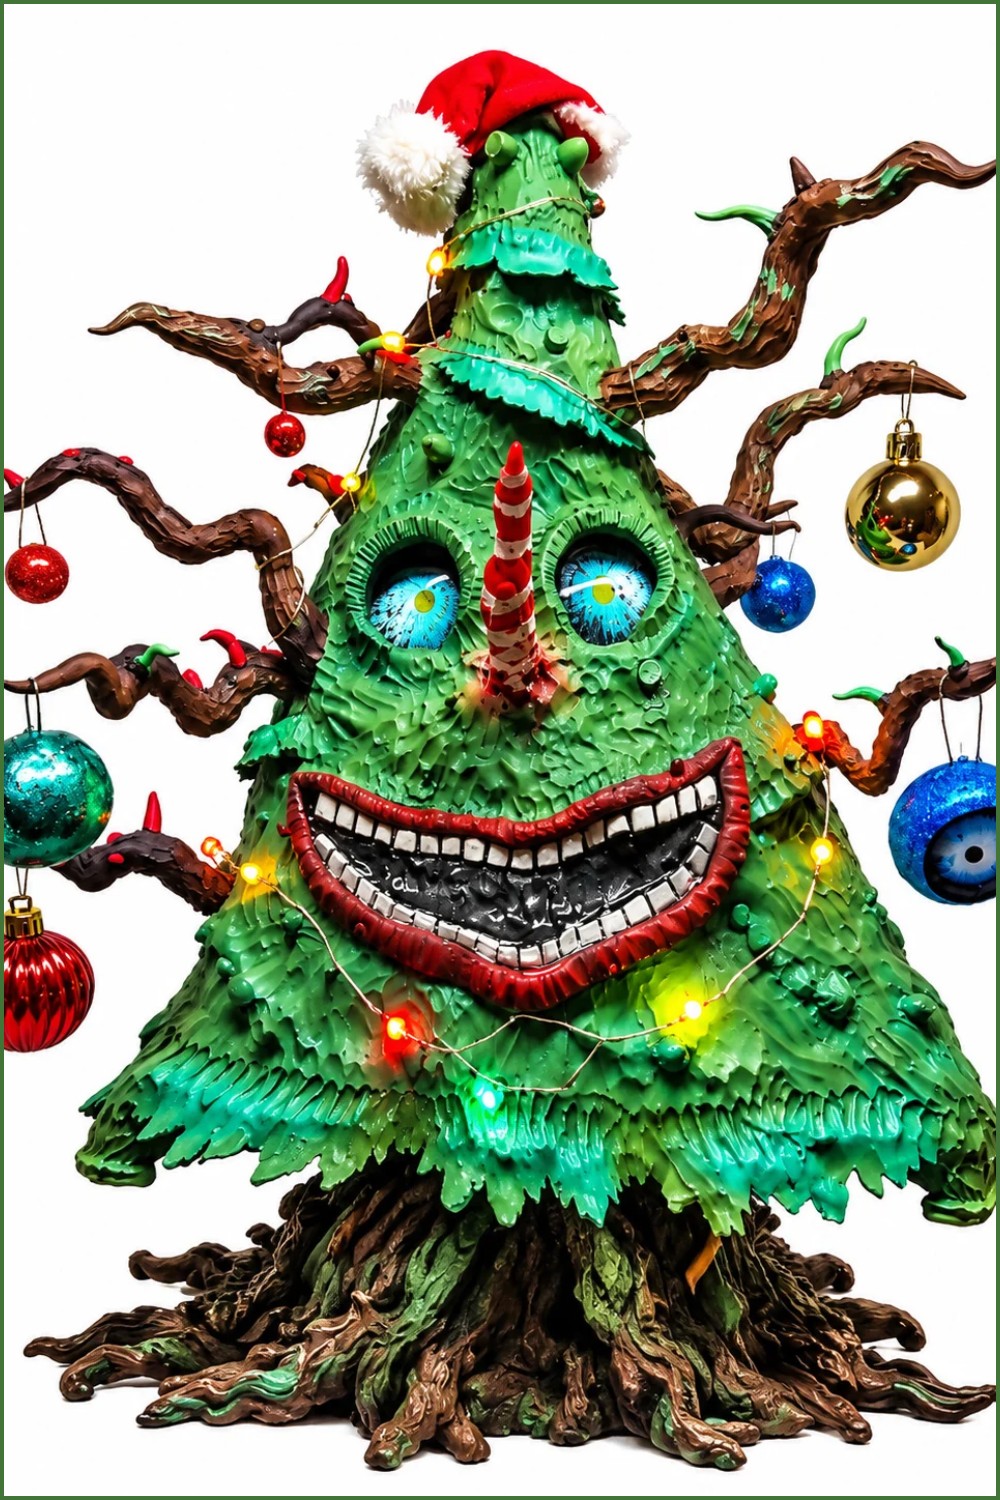
Monster Xmas Tree Sculpt
Create a three‑sided “Monster Xmas Tree” sculpture featuring two distinct characters (Pinenell and Mintsley) on a shared dowel rod armature, a textured plaster base, custom glass‑eye cabochons and lightweight ornaments. This guide follows the video’s workflow: structure, base, sculpting, ornament making, painting/detailing, and final assembly.
What You’ll Need
- Dowel rod (large for trunk) and a smaller wooden piece for the crown insertion
- Aluminum foil (large sheets)
- 20 mm glass cabochons (painted red and green for the two eyes) and several 5 mm cabochons for extra ornaments
- Super Sculpey Ultralight and Super Sculpey Original (for bulk and detail)
- Aluminum wire (standard gauge for branch armature)
- Plaster de Paris, Mod Podge Hard Coat, and gloves
- Apple Barrel, DecoArt, FolkArt ColorShift acrylics (various colors listed below)
- Glow‑in‑the‑dark glitter (optional)
- Wooden rod or skewers (for feet or small structural bits)
- Small wooden cubes (for gifts)
- LED string lights (small battery string)
- UV resin, top coat nail polish (for wet gloss inside mouths / tongues)
- Basic tools: drill, craft knife, sculpting tools, brushes, spoons, bowls, sandpaper, clamps, glue (PVA/hot glue), oven dedicated to craft use
Prepare the Materials
Safety & setup
- Gather everything on a clean, ventilated work surface.
- Pre‑paint glass cabochons (red for Pinenell, green for Mintsley) and set aside to dry.
- Preheat oven only when instructed and follow each material’s baking temperature/time. Use a craft‑only oven or bakeware.
- Wear gloves when mixing plaster and work in ventilation if using Mod Podge or resin.
Tools And Equipment
Essentials
- Drill with appropriate bit to hole the top of the dowel
- Oven (craft‑only) and baking tray/ceramic tile
- Sculpting tool set and needles/toothpicks for detail
- Mixing bowls, spoons, measuring cups for plaster mix
- UV lamp (if using UV resin)
Project Details
Scope & scale
- Multi‑character sculpture on a single dowel; three display faces (two monsters + mountain side).
- Base: textured plaster ground with garland ring and decorated presents.
- Lightweight ornaments made from foil and Ultralight to avoid tipping.
Preparation
Frame & armature planning
- Cut/prepare dowel lengths so the trunk is stable; plan placement for cabochons and branch wires.
- Pre‑measure where the two characters will sit, and decide placement for ornaments and LED string.
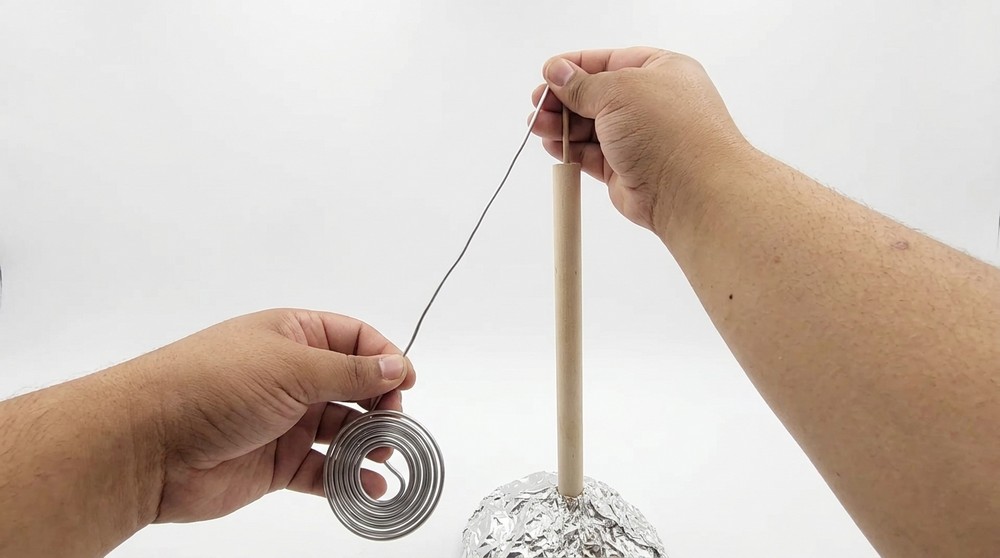
Assembly Walkthrough (alternate heading for “Making of Project”)
Step‑by‑step construction
- Build the internal trunk:
- Wrap the bottom of the large dowel rod with large sheets of aluminum foil to bulk out the base form.
- Drill a hole at the top of the dowel and insert a smaller wood piece to serve as the tree “crown” anchor.
- Reinforce with glue if needed and ensure the trunk stands straight and stable.
- Add bulk with Super Sculpey Ultralight:
- Cover the foil armature with Super Sculpey Ultralight to block out the tree mass.
- If footage is missing, follow prior Ultralight blocking techniques: press on evenly, smooth seams, and maintain intended silhouette.
- Bake per Ultralight instructions (follow manufacturer temp/time).
- Set the glass eyes:
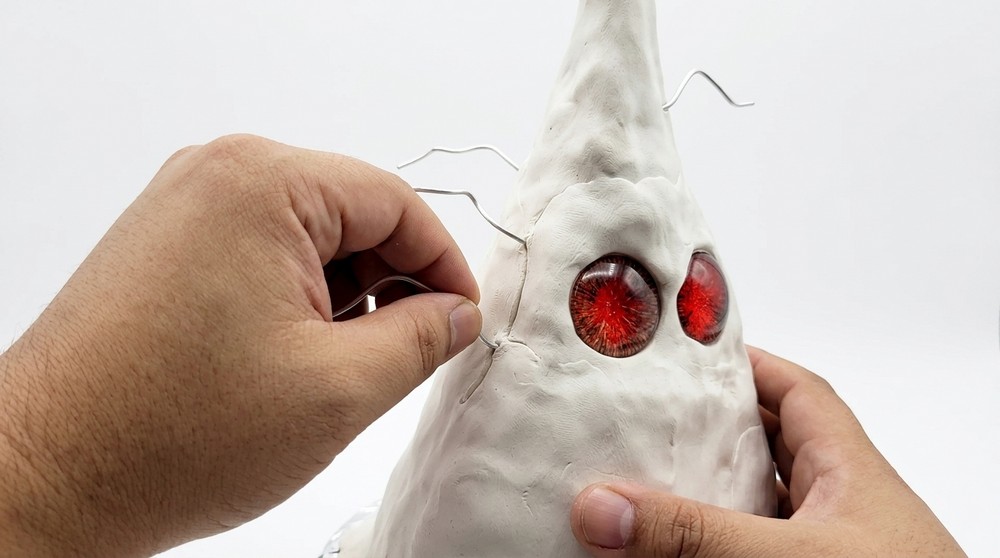
- After the base Ultralight layer is set, press custom‑painted 20 mm cabochons into two opposing sides for Pinenell (red) and Mintsley (green).
- Branch armature & detail:
- Shape several aluminum wires as branches; insert sporadically into the trunk where desired.
- Wrap or bulk these later with foil and clay to form long noses, wicked branch shapes and roots.
- Create the plaster base:
- Mix ½ cup plaster de Paris with black, tan and brown acrylics, a drizzle of Mod Podge, and ½ cup water; add glow glitter if desired.
- Stir to consistency, then smear the “venom goop” onto the base; allow ~1 hour to cure due to additives.
- Note: plaster normally sets in 20–30 minutes; extend cure time when mixing additives.
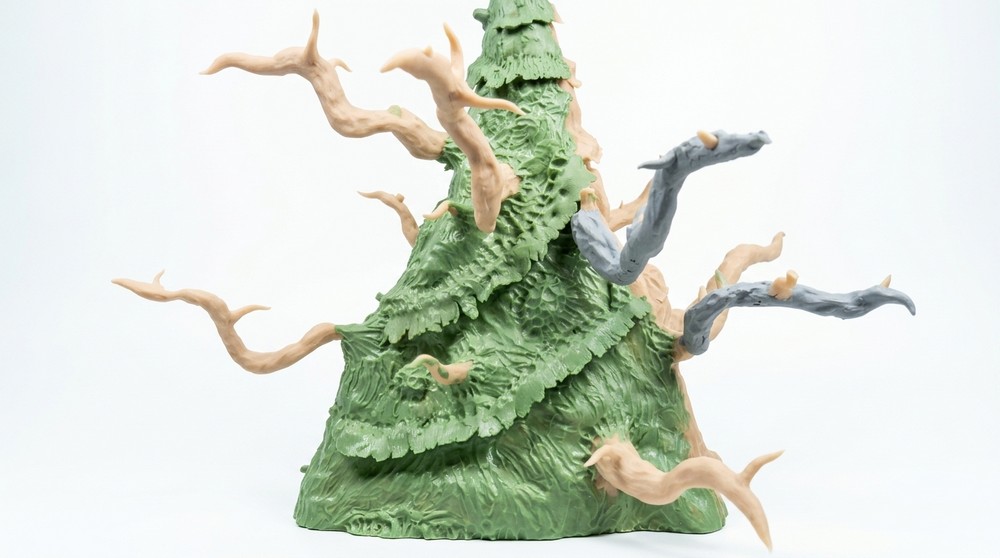
- Sculpt with Super Sculpey Original:
- Cover the entire frame and branches with Super Sculpey Original for detailing.
- Add branch textures: wrap with foil, layer clay ropes as leaves, blend thin ropes diagonally, and refine shapes.
- Sculpt facial features:
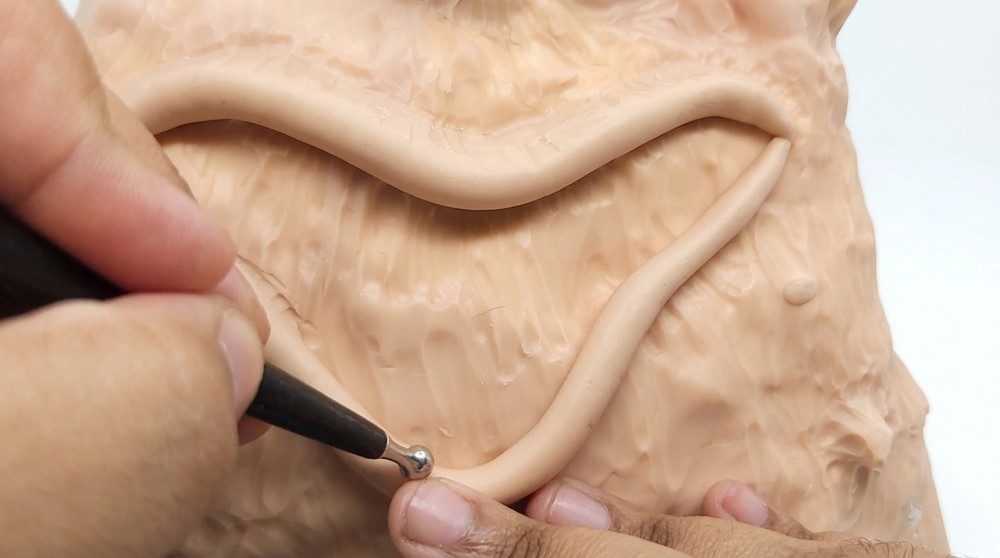
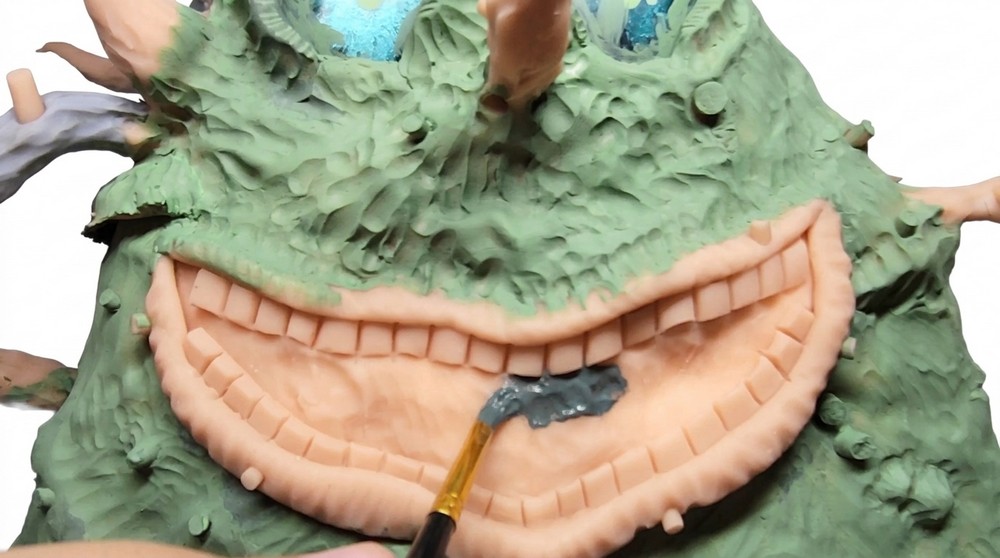
- Plan and measure mouth placements; sculpt large mouths, lips, and teeth (make some teeth off camera if desired).
- For Pinenell: make an oversized tongue from foil shaped and covered with thicker clay, blended into the mouth.
- For Mintsley: sculpt a softer mouth, smaller nose, and simpler teeth.
Making custom ornaments
Lightweight orbs & cabochons
- Form small foil balls, wrap in Ultralight, punch holes and insert ornament hangers.
- Bake these at 275°F (135°C) for 20 minutes (follow Ultralight guidance).
- After cooling, paint and seal. Use aluminum + Ultralight to keep them light.
Painting and detailing
Layered color & texture
- Use Apple Barrel, DecoArt, FolkArt ColorShift paints. Mix recipes from the video:
- Mintsley base: DecoArt Green Tree + Apple Barrel off‑white + touch of matte black.
- Pinenell: darken with more matte black + FolkArt cinnamon for a greyish green.
- Mountain/third face: lighten Pinenell color with off‑white.
- Apply branch and root colors with burnt umber + black, dry brush with FolkArt cinnamon and ColorShift greens on leaves.
- Detail lips, noses, teeth: use washes, dry brushing, and tiny highlights. Paint tiny candy‑cane stripes on Mintsley’s nose as shown.
- For wet effects: scratch paint on eyes with a toothpick, apply UV resin in mouths/teeth and cure; add nail polish top coat inside mouths for glossy finish.
Final assembly
Base finishing & accessories
- Dry brush cinnamon & green tree across the plaster base; matte black around the perimeter.
- Glue pine garland in a ring along the base edge.
- Paint small wooden cubes as presents and glue them onto the base.
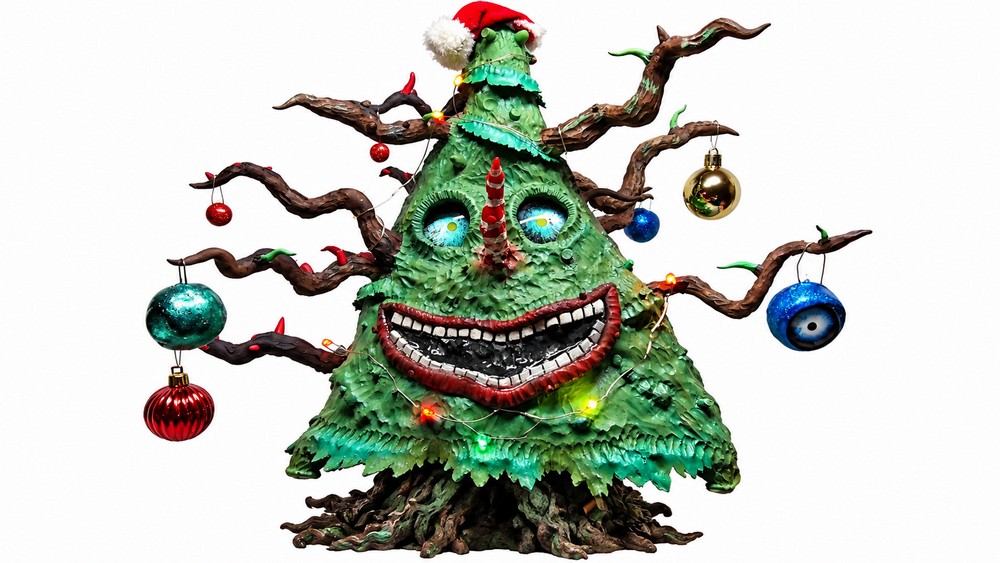
- Attach the two‑character tree to the dowel base, wrap a painted LED string around branches (red/green paint on bulbs if desired), and secure all loose elements.
Finishing Instructions
- Ensure all paints and glues fully cure.
- Seal delicate paint with a matte varnish on body areas and gloss where wet look is desired (mouth, resin).
- Rebalance weight if needed—add internal counterweight or reposition base materials.
Tips & Techniques
- Keep ornaments light to prevent tipping—use foil + Ultralight, not solid clay.
- Test paint mixes on scrap to match tones.
- Work in layers: block, detail, bake, paint, then seal.
- Use a craft‑only oven and follow manufacturer temps.
Common Problems & Solutions
- Tipping sculpture:
- Add more mass to the base or reduce ornament weight.
- Plaster cracking:
- Mix to correct water ratio and avoid overworking; give extended cure time if additives used.
- Paint chipping:
- Sand lightly before painting and use sealer after paint cures.
Creative Ideas & Variations
- Make single‑sided or multi‑character trees; change color themes for different holidays.
- Swap glass cabochon sizes and colors for more eyes.
- Use glow‑in‑the‑dark paint in the base mix for eerie night display.
Final Result
- A three‑faced Monster Xmas Tree featuring two distinct characters, lightweight custom orbs, a textured plaster base, painted details, glossy wet mouths/tongues, garland and gifts—ready for display and holiday spotlight. Follow the steps, respect curing times, and adjust colors/details to personalize your monster tree.