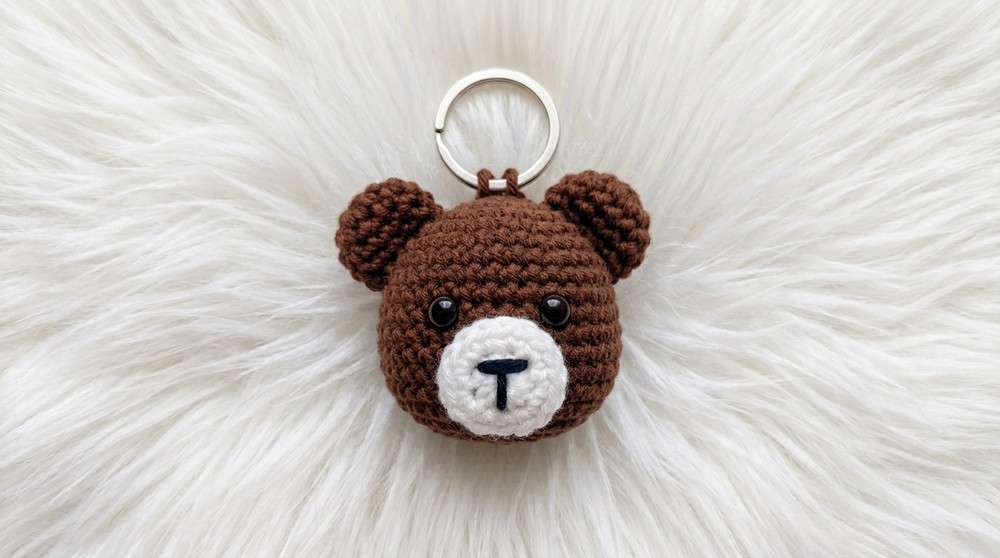
Stitch an adorable crochet teddy bear keychain with this free pattern that's a quick project to add handmade charm to your accessories or gift to loved ones.
There's something extra special about making your own accessories, and a little teddy bear keychain is a perfect place to start! Using a Free Crochet Teddy Bear Keychain Pattern, you can easily create the kind of handmade charm that brightens up your bag, keys, or even a gift for someone you care about.
What I love most about these tiny teddy bears is how cute and friendly they look. With their round faces, small ears, and soft snouts, each bear turns out with its own sweet personality. Many patterns allow you to pick your favorite yarn colors, so your teddy can wear a classic brown, a playful pastel, or even something bright and bold.
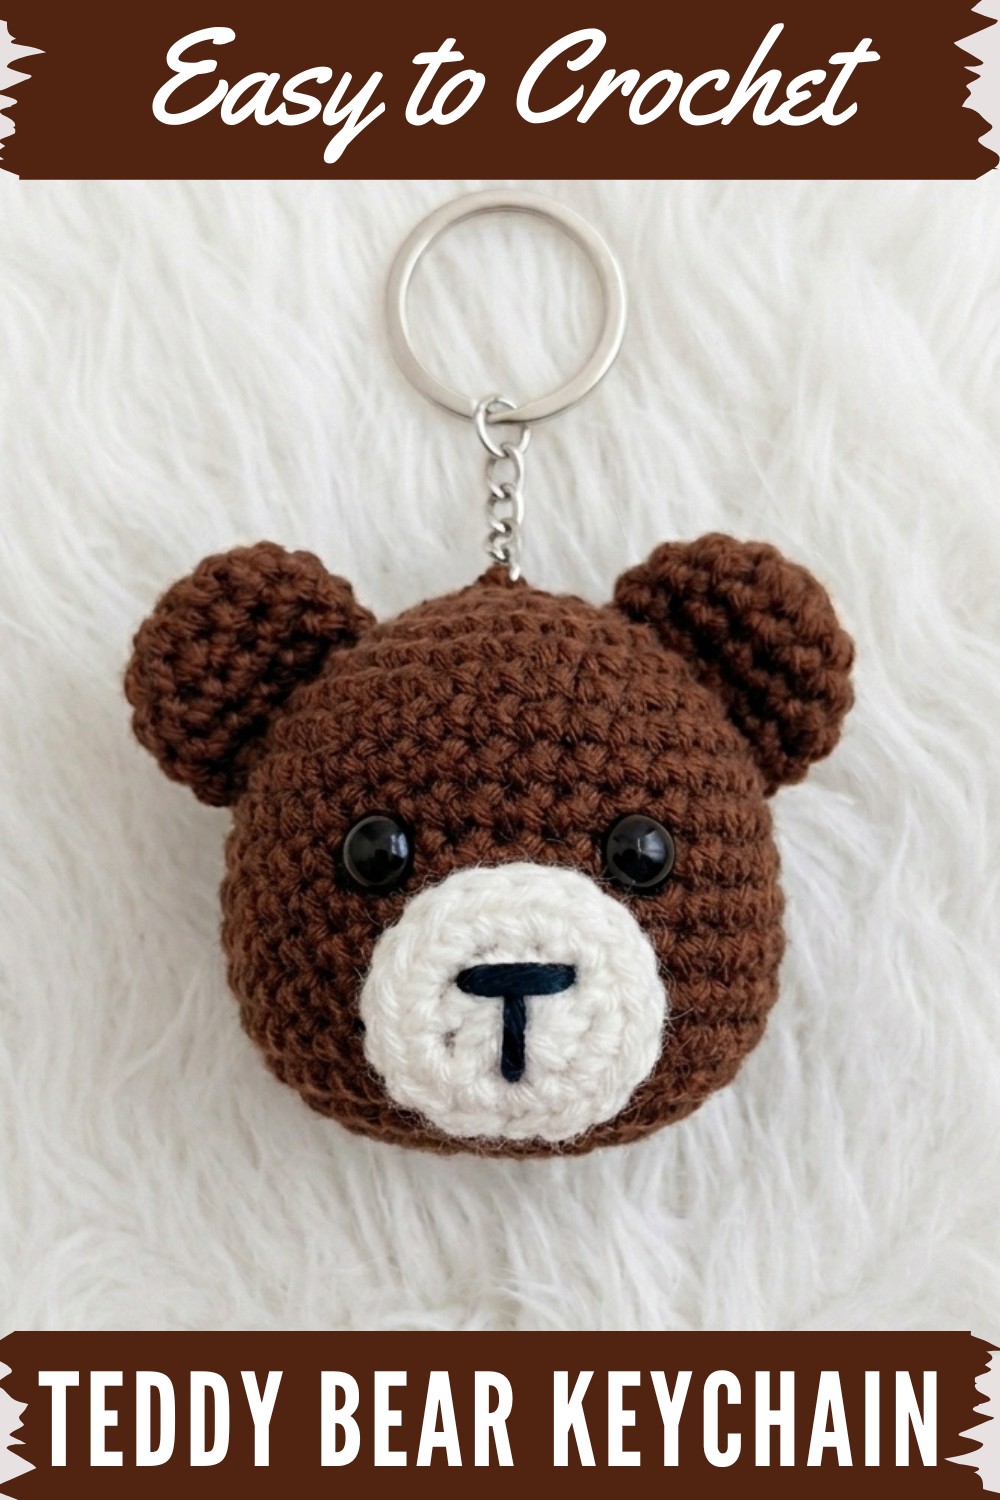
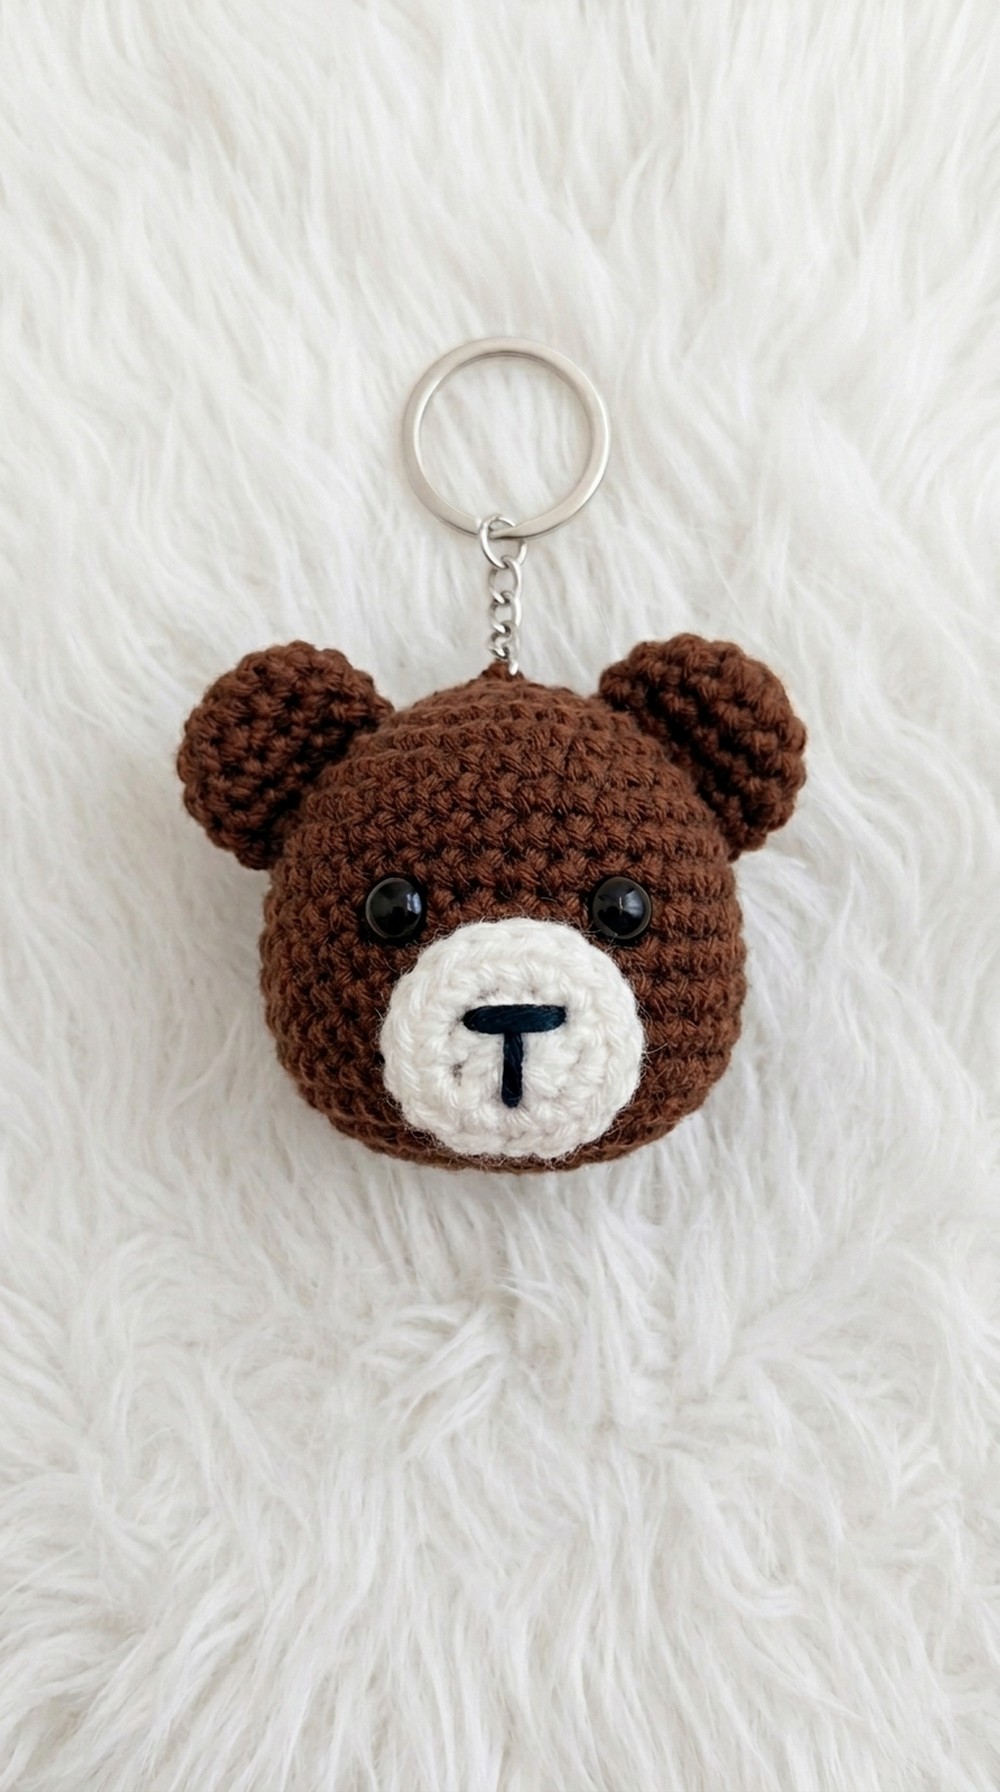
Crochet Teddy Bear Keychain – Free Step By Step Guide
The texture of a crochet teddy bear keychain is what makes it stand out. The stitches give the bear a soft and squishy feel, even though it’s tiny and sturdy enough to handle daily use. Some designs add little touches like a bow tie, a heart, or even a mini scarf, making the bear even more unique and fun.
The compact shape is super handy, too. These keychains aren’t too big, so they can dangle from your keys, backpack, or purse without being in the way. I especially like attaching one to my bag—it’s always fun to get compliments from friends or curious questions from people who notice the handmade detail.
These adorable keychains make perfect little gifts, party favors, or stocking stuffers. Plus, since there are free patterns online, it’s easy for anyone to try making one, even if you’re just starting out with crochet. In the end, crocheting a teddy bear keychain is a simple, joyful project that adds a touch of homemade happiness to everyday life.
Adorable Bear Keychain Crochet Pattern
Create a delightful little bear head that’s perfect for keychains or bag charms, using just a small amount of yarn and simple crochet stitches. Each essential section is explained with traditional pattern steps. Follow the structure below for a clear, enjoyable crochet experience—ideal for gifting or adding whimsy to your daily accessories!
Preparation Checklist
- Know how to crochet the basic stitches: magic ring, single crochet (sc), increases, decreases, slip stitches.
- Read through the pattern and gather your preferred yarn colors in advance.
- Prepare your work area to avoid misplacing the tiny components.
Design Brief
- This keychain is constructed in several rounds working in the round (amigurumi style).
- The face, ears, and muzzle are made separately and then assembled.
- Eyes can be safety eyes, embroidered, or glued in place.
- The project is quick and uses only scraps of yarn.
Pattern Development Approach
- Began with the central bear head using increasing rounds of single crochet.
- Formed bear ears by crocheting small, flat circles.
- Created the snout (muzzle) with another small round piece.
- Assembled all pieces together and embroidered or glued details.
- Added a keychain ring for finishing.
Skill Rating
Easy/Beginner Level:
Only basic crochet techniques required; simple shaping and minimal sewing.
Finished Dimensions
- Bear head diameter: Approximately 4–5 cm (1.5–2 inches)
- Adjust size with different yarn weights or hook sizes
Materials List
- Chocolate yarn (main color)
- White yarn (muzzle and ear detail)
- Black embroidery floss or scrap yarn (nose and mouth)
- 2.5 mm crochet hook (or size to suit your yarn)
- Tapestry needle (for sewing and weaving ends)
- Scissors
- Fiberfill stuffing
- Keychain hardware (split ring)
- Safety eyes, fabric glue, or small black buttons for eyes (optional)
Sizing & Proportions
- The completed head should measure about 1.5–2 inches across.
- Ears fit neatly on top—ensure even placement for symmetry.
- Snout is small, just covering the lower face area.
Gauge & Texture
- Gauge is not critical for amigurumi projects.
- Stitches should be tight enough so stuffing does not show through fabric.
Stitch Reference
| Abbrev. | Explanation |
|---|---|
| mr | Magic Ring |
| sc | Single Crochet |
| inc | Increase (2 sc in one st) |
| dec | Decrease (sc2tog) |
| sl st | Slip Stitch |
| ch | Chain |
Special Techniques
- Invisible Decrease: Insert hook into front loops of next two stitches, yarn over, pull through both loops, yarn over, pull through remaining loops. This helps shape the rounded head.
- Magic Ring: Used for starting parts without a hole in the center.
Step-By-Step Instructions
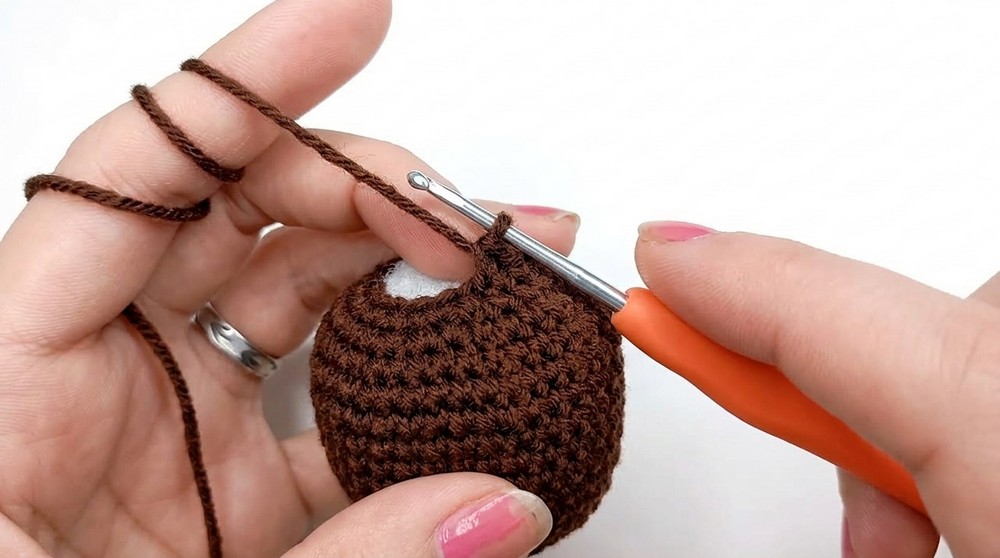
1. Head Construction
Pattern:
- Create a magic ring, 6 sc into ring (6)
- Inc in each st (12)
- (sc, inc) around (18)
- (sc, sc, inc) around (24)
- sc in each st (24)
- (sc in next 3 sts, inc) around (30)
- sc in each st (30)
- (sc in next 2 sts, inc, sc in next 2 sts) around (36)
9–12. sc in each st (36) for 4 rounds - (sc in next 5 sts, inc) around (42)
- sc in each st (42)
- (sc in next 5 sts, dec) around (36)
- (sc, dec, sc) around (27)
- (sc, dec) around (18)
— Stuff the head with fiberfill now, shaping firmly - dec around (9); finish with a long tail
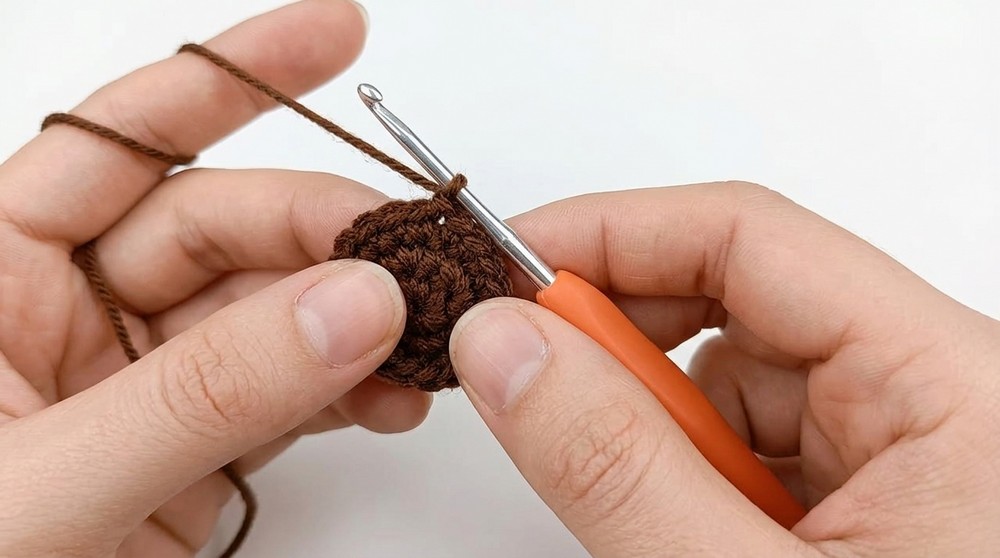
With elastic instructions:
Start in a circle, add more stitches each time to widen, then crochet several rounds at that top width to create the “cheeky” bear shape. Begin decreasing to close off the bottom, stopping partway to firmly stuff with fiberfill. Complete with a final decrease and use a yarn needle to close off any small hole.
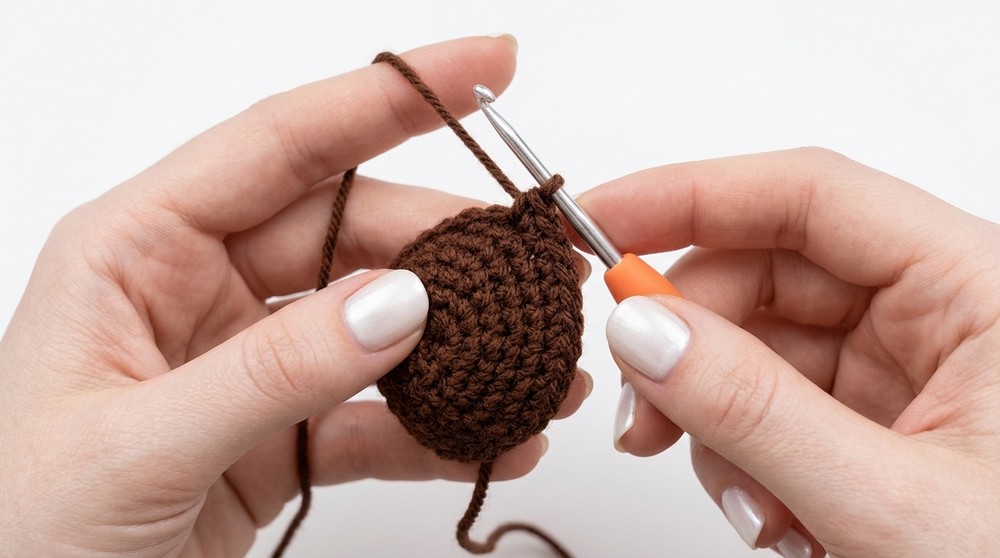
2. Bear Ear (Make 2)
Pattern:
- mr, 6 sc into ring
- Inc in each st (12)
3–4. sc in each st (12) for 2 rounds
— Finish off, leave tail for sewing
Explanation:
Make a magic ring, widen with an increase, then do a couple of rounds with no increases for a slightly domed, yet soft ear. Use the long tail to sew the ears to the top sides of the bear’s head.
3. Muzzle/Snout
Pattern:
- mr, 8 sc into ring
- Inc in each st (16)
— Finish off with long tail
Explanatory Note:
This small flat oval will become your bear’s snout. Use white yarn for a classic look or match the head color for a subtler style.
4. Facial Features
- Sew on the snout to the front middle of the head, between rounds 9 and 12.
- With embroidery thread (black), stitch a small triangle or oval for the nose and a line for the mouth at the bottom center of the snout.
- Attach safety eyes or sew/glue black beads/buttons above the snout, spacing evenly.
- Attach the ears to the head along the upper sides, evenly spaced.
- Weave in and secure all ends inside the head for a neat finish.
Step Insight:
Arrange the ears and snout symmetrically. Place the nose and mouth in the center of the muzzle. You can glue or sew eyes between the 9th and 10th rounds, leaving a few stitches gap between.
5. Final Assembly
- Firmly attach your keychain ring to the top center of the head.
- Make sure all pieces are securely fastened, especially for children’s gifts.
- Use fabric glue or a hot glue gun to secure eyes/nose if not sewn.
Making It Complete:
Loop the keychain through the top; reinforce with extra stitches if needed. Double-check that all features are tight and secure, especially for a keyring that may be bounced around!
Troubleshooting & Solutions
Potential Issue:
If your head looks uneven or the face is off-center:
Solution:
Double-count your stitches in each round, evenly place facial features, and adjust stuffing before the final closure. If the opening is too large to close, add an extra decrease round before threading shut.
Creative Outcomes with These Stitches
- Tiny animal amigurumi for bag charms or desk mascots
- Baby mobiles and rattles
- Decorative pins
- Keychains of various animal faces (bear, cat, bunny)
- Holiday ornaments
For anyone struggling with pattern reading:
Focus on creating a simple ball shape for the head—widen, even out, decrease and stuff, then assemble the add-ons simply by sewing or gluing in place. Each piece is a mini round or oval, joined up for a friendly finish. Enjoy making this cute bear in your favorite shade as a personalized accessory or a charming gift.