
Start your next project with this crochet tote bag pattern that’s perfect for carrying essentials stylish for any look and easy for beginners to follow.
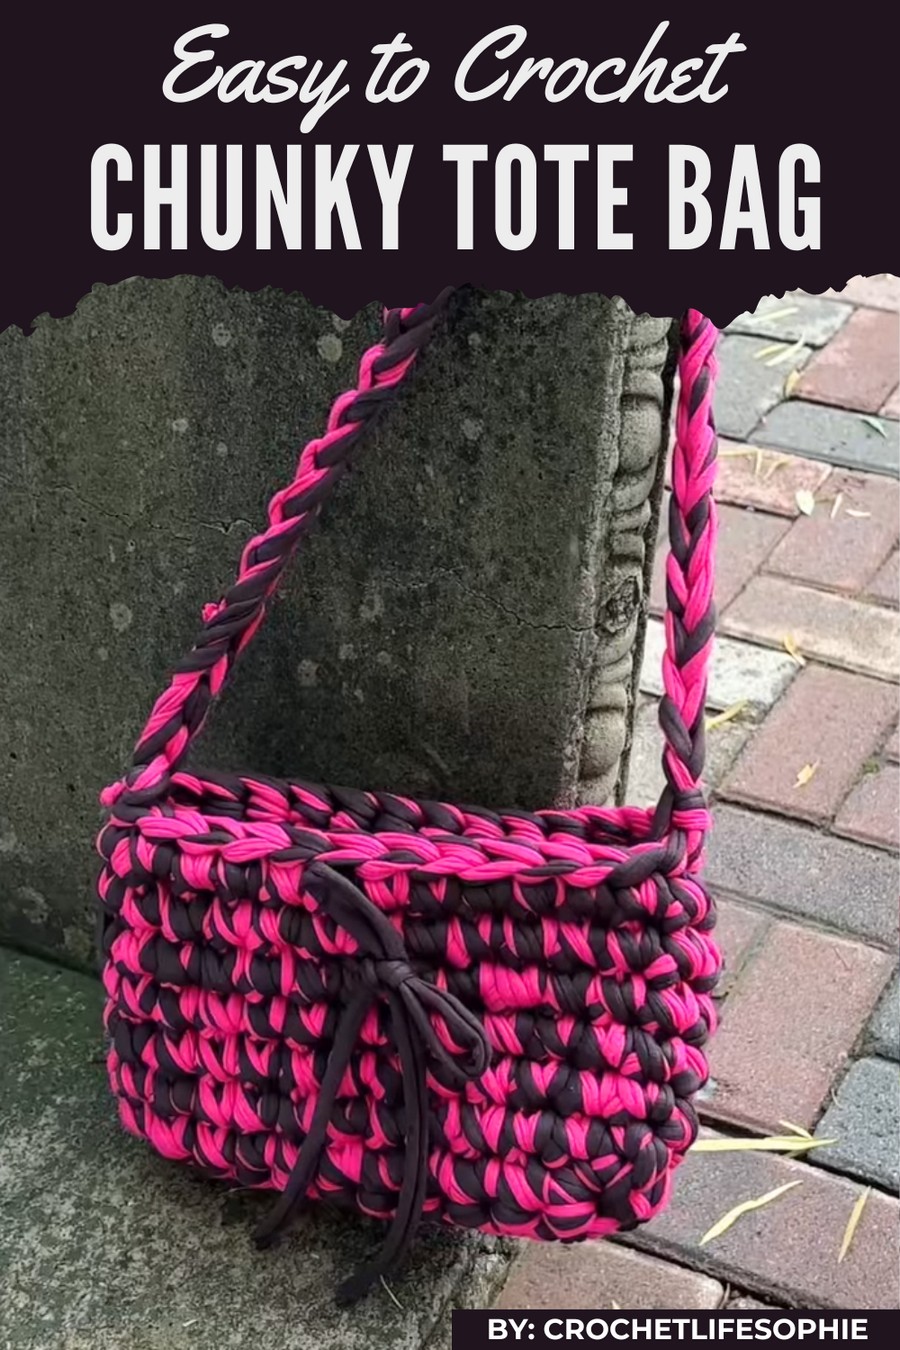
Beautifully practical and stylish, this crochet tote bag pattern opens up endless possibilities for creating a unique accessory that’s perfect for everyday use. With its intricate yet easy-to-follow design, this handmade bag stands out as both functional and aesthetically pleasing, ideal for carrying groceries, books, or your daily essentials.
Adorable Crochet Tote Bag Pattern for Handmade Magic
The soft and durable texture paired with the customizable size and colors makes it a versatile piece that complements any outfit or occasion. Its handmade charm adds a personal touch, making it a one-of-a-kind item that not only showcases creativity but also offers eco-friendly and reusable use in everyday life.
Supplies Needed
To ensure a successful crochet project, gather the following supplies:
- Crochet Hook: 15 mm hook (best for chunky yarn).
- T-Shirt Yarn:
- Recycled t-shirt yarn sized approximately 2–3.5 cm wide.
- Thin strands may require doubling or tripling the yarn for thickness.
- Use multiple strands simultaneously based on the yarn thickness.
- Tape Measure: For verifying yarn size and bag dimensions.
- Stitch Markers: To mark row beginnings when working in rounds.
- Scissors: For clean cuts and trimming ends.
- Needle (Optional): For weaving in ends neatly.
Step-by-Step Instructions
Foundation of the Bag Base:
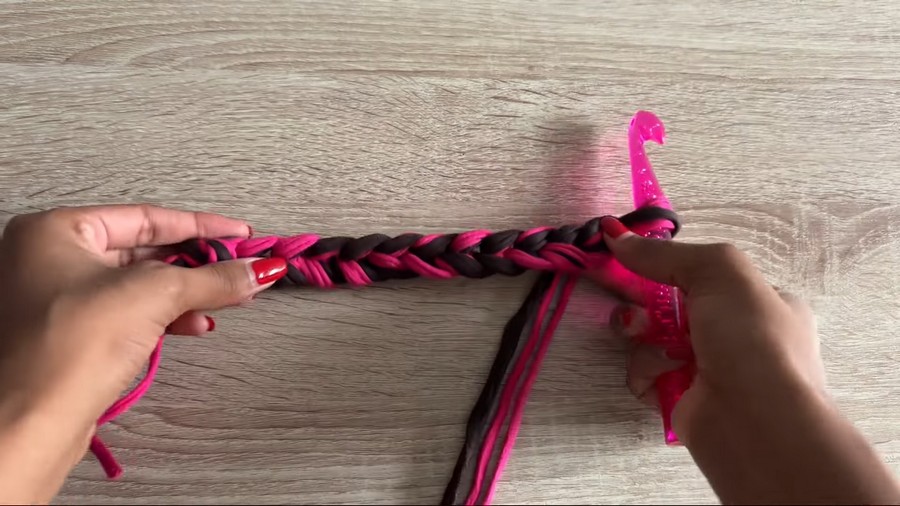
- Start with a Slip Knot: Create a slip knot using three strands of t-shirt yarn for chunky texture. Adjust the loop appropriately.
- Chain 12: Make sure your chains are securely tightened to prevent stretching when crocheting. The chain length will determine the width of your tote bag.
- First Row of Single Crochet:
- Skip the first chain.
- Crochet 1 single crochet into the second chain from the hook.
- Continue making single crochets into each chain until the end of the row.
- Turn and Repeat Rows:
- Chain 1 at the end of the row, turn your work, and crochet 1 single crochet into every stitch across the second row.
- Repeat this process for a total of 3 rows.
- Side Edges: Turn the base of the bag to work single crochets along the edges of the foundation base. Insert your hook into any stitch along the sides where necessary. Use scissors or a smaller crochet hook to make it easier to stretch stitches along the edges.
Building the Bag Body:
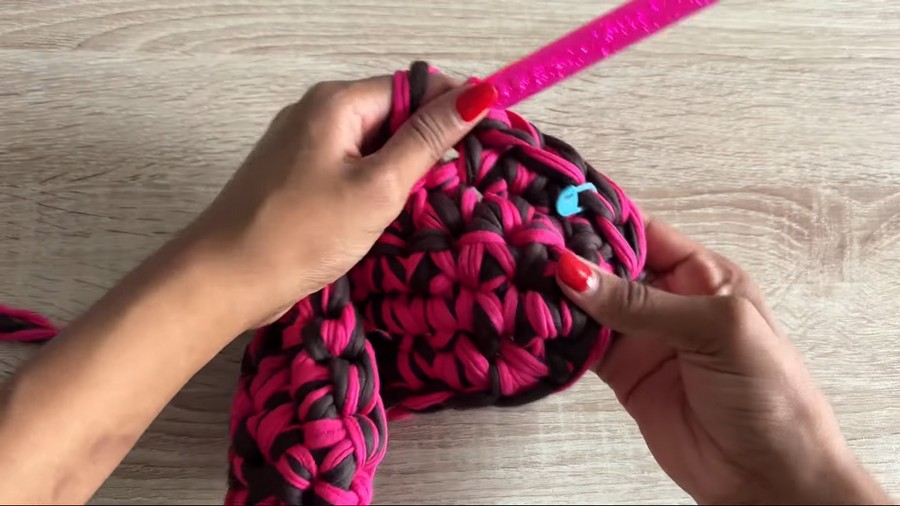
- Transition to Rounds:
- Once you’ve finished single crochets on the edge stitches, continue working single crochets along the longer base side.
- Insert a stitch marker at the beginning of the next row. This prevents confusion about where the row starts as you work in rounds.
- Work in Rounds:
- Crochet 1 single crochet into every stitch around the bag base. Avoid slip stitching at the end of each row; simply continue working in the round.
- When you reach the stitch marker, remove it, crochet the next stitch, and reinsert the marker to identify the new row.
- Increase Height: Continue working single crochets in rounds until the desired height is achieved. For the tutorial, 7 rows were used for a short tote bag. You can increase more rows for taller bags as desired.
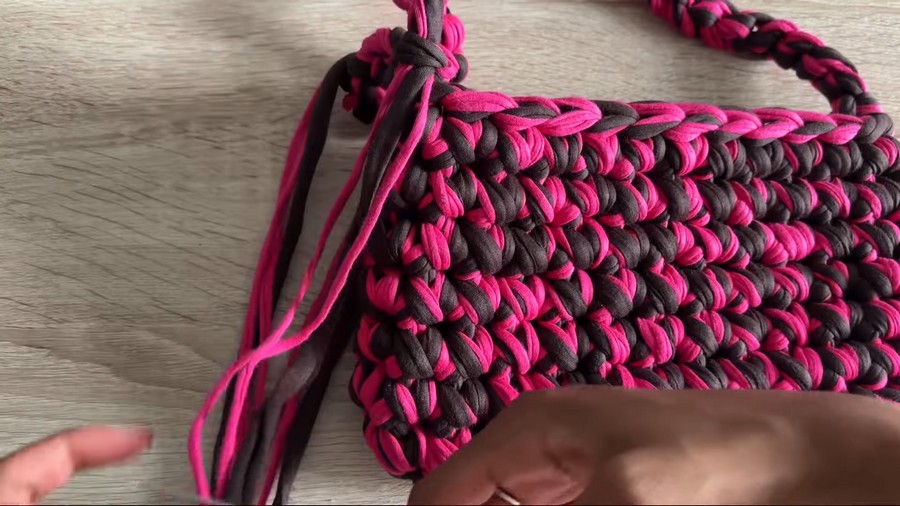
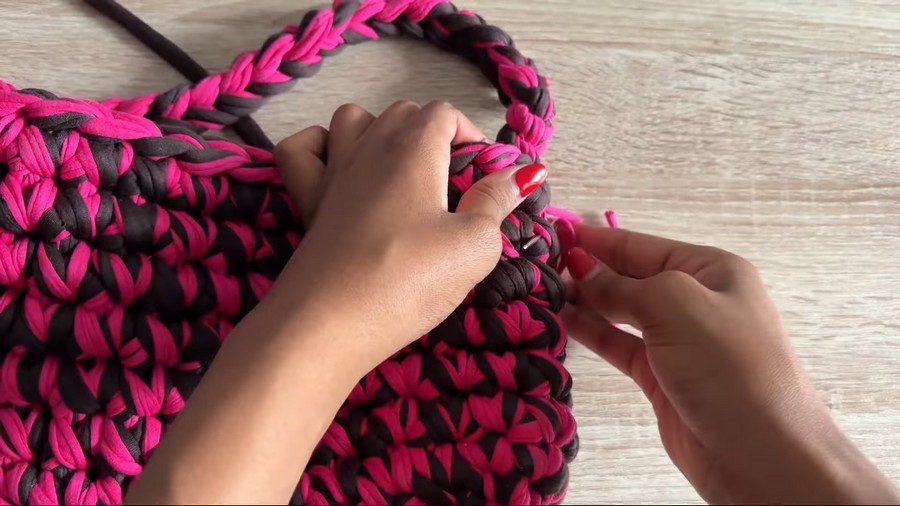
Creating the Strap:
- Add Chains:
- At the end of the last round, create a chain of 30 for the bag strap. Adjust the chain count to make your strap longer or shorter based on your preference.
- Leave the strap simple (only one row of chains). Note: A single row may make the strap stretchy, which can be handy for shoulder sizing.
- Attach Strap to the Other Side:
- Ensure the chain is not twisted. Attach the end of the chain to the opposite side of the bag with a slip stitch.
- Secure the Strap:
- Add 1 chain and tighten the strand to secure the attachment fully.
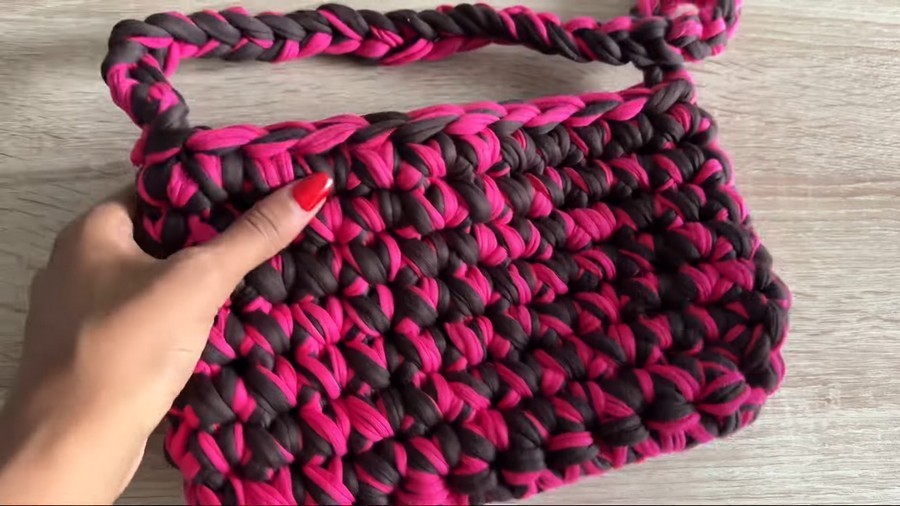
Finishing Touches:
- Weaving in Ends:
- If using multiple strands, weave each strand individually. Insert your needle wherever possible, working around stitches until satisfied with the neatness.
- Trim excess yarn after weaving in all ends.
- (Optional) Bow Decoration:
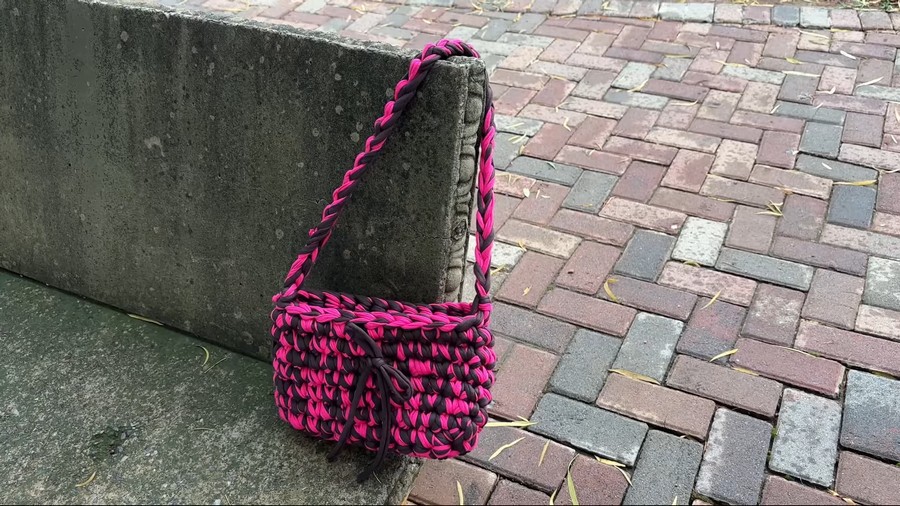
- Add a decorative bow to the bag’s base or strap using a contrasting yarn color. Secure it neatly with stitching or glue.
Tips for Success
- Using Recycled Fibers: T-shirt yarn comes in various widths due to its recycled nature. Measure carefully and combine strands if needed for desired thickness.
- Prevent Stretch Overuse: Avoid crocheting too loosely to ensure the bag maintains structure despite the natural stretch of t-shirt yarn.
- Customization: Use stitch markers to keep rows organized, adjust bag dimensions by increasing/decreasing chain lengths, or add unique decorations.
- Durability: Reinforce heavily used areas, like straps, with extra stitches or doubled yarn for long-term sturdiness.
Pattern Variations
- Color Customization:
- Use contrasting colors for base and strap (e.g., white and black or pastel shades for a softer finish).
- Mix strands of different colors to create a unique, blended effect.
- Size Adjustments:
- Increase the foundation chain count for wider bags. Example: Chain 15 for a medium tote.
- Add more rows when working in rounds to increase height. Example: Work up to 12 rows for a taller bag.
- Decorative Features:
- Attach appliqués (like crocheted flowers or hearts) to personalize the tote.
- Embroider simple designs or initials onto the bag's body.
Conclusion and Final Look
This chunky mini tote bag is stylish and functional, perfect for casual use or gifting. The chunky texture makes it comfortable to carry, while its customizable size allows for diverse usage (e.g., shoulder bag or handbag).
Whether you experiment with different colors, add decorations, or adjust the strap length, this design remains quick and beginner-friendly, making it an excellent crochet project for all.
Important Remarks
- Always check yarn stretchability and thickness to ensure the bag dimension matches your expectations.
- The bag is sturdy enough for everyday use but should avoid carrying overly heavy items to maintain its shape.
- Explore creativity by personalizing each bag with embellishments or adjustments tailored to your needs.



