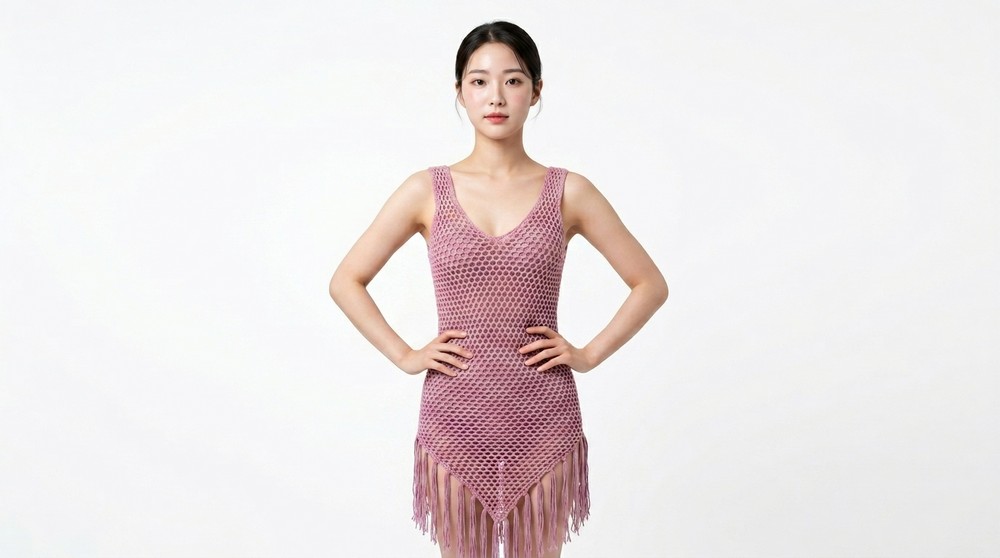
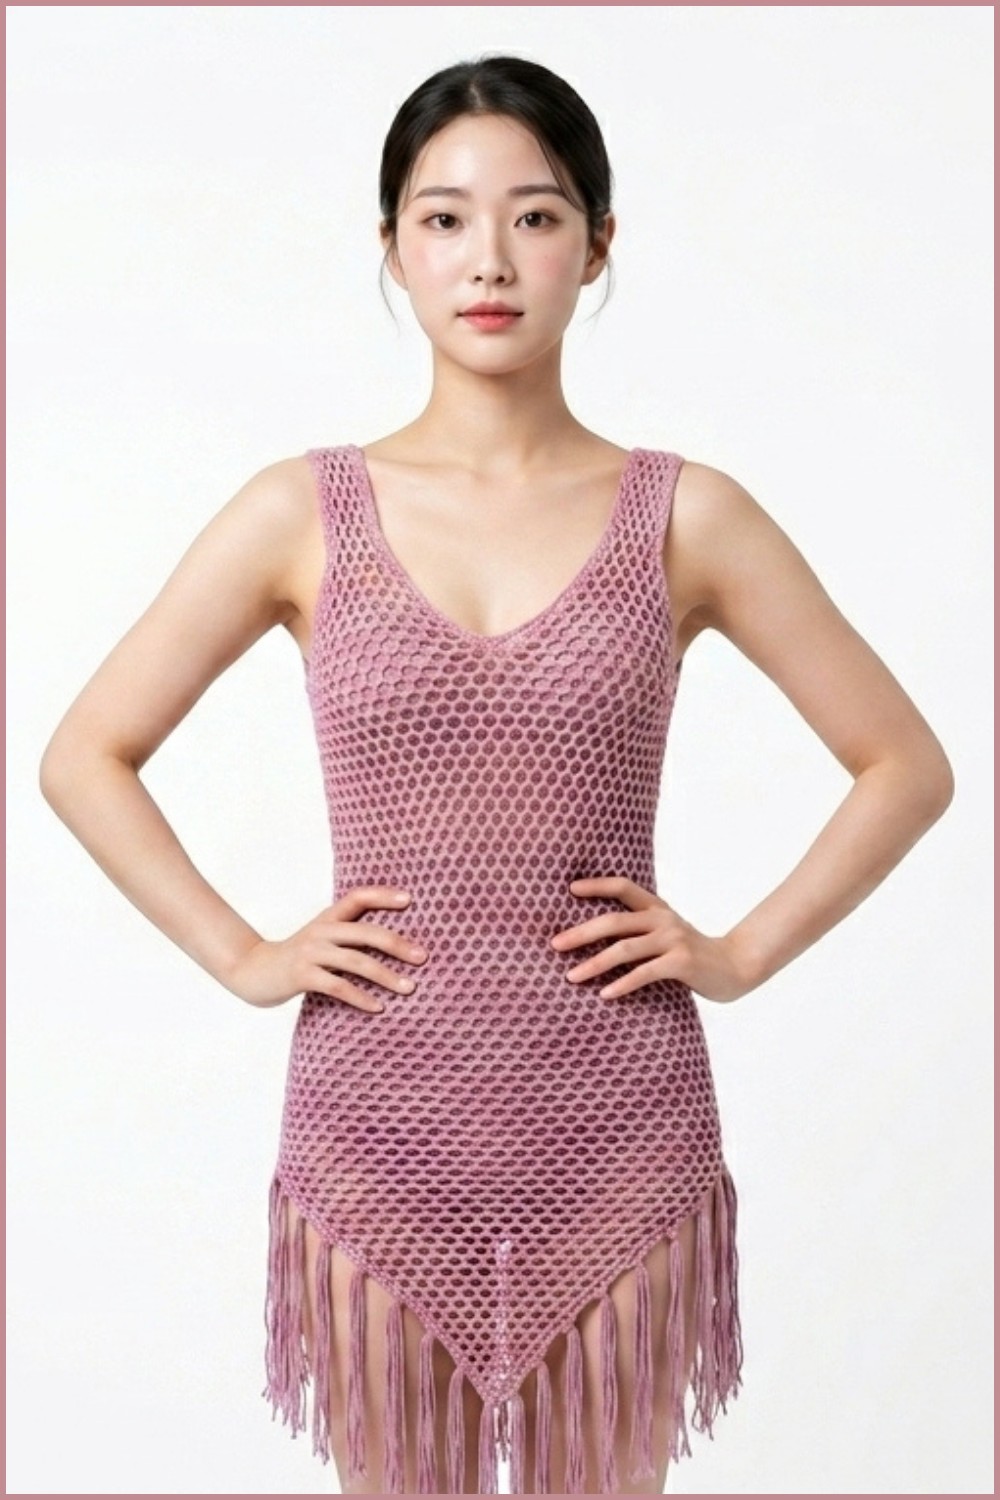
Start crocheting your own Free Crochet Mesh Dress Pattern featuring a gorgeous diamond design, easy-to-make decreases, and customizable fit for any size!
A stunning and versatile crochet creation, this mesh dress is perfect as a stylish cover-up for days at the beach or pool. Using a Free Crochet Mesh Dress Pattern, this design features a beautiful diamond-shaped mesh structure that is both elegant and breathable, making it a lightweight and comfortable addition to your wardrobe. The dress can be customized to fit your measurements, ensuring a perfect fit from the waist to the hips, while subtle shaping techniques like decreases and increases help create a flattering silhouette.
Easy Free Crochet Mesh Dress Pattern for Handmade Style
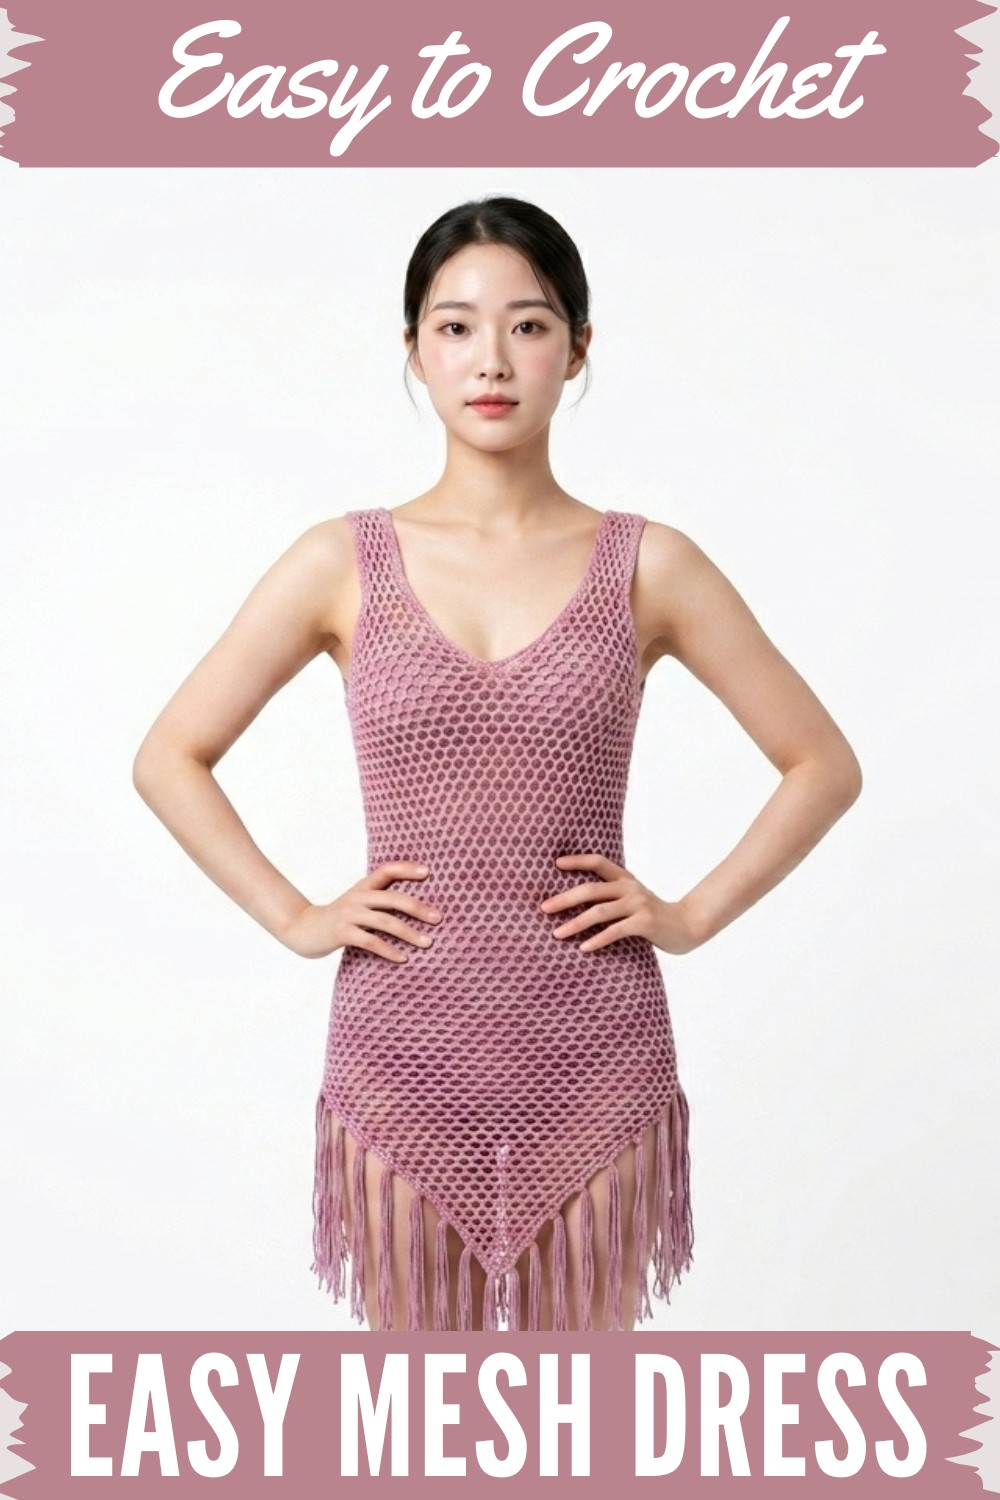
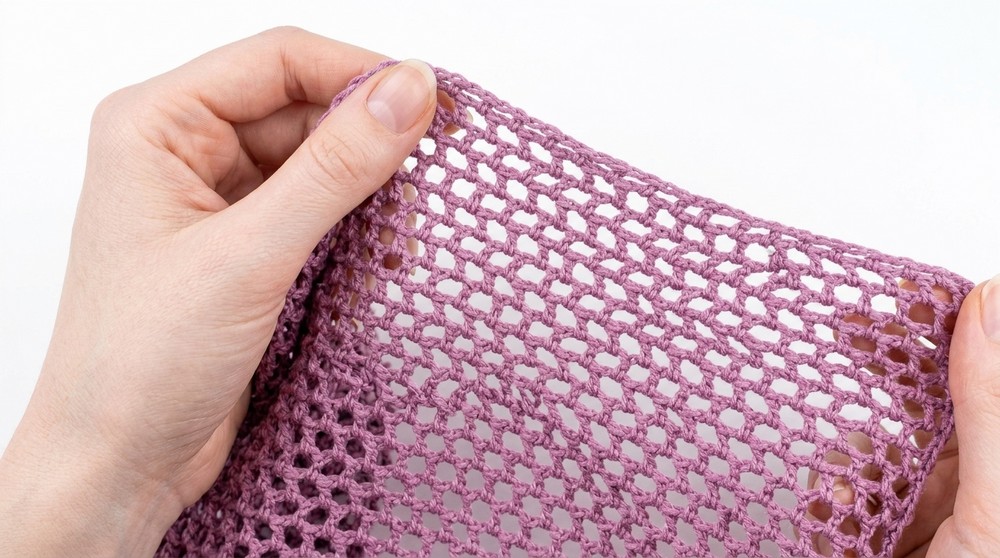
The vibrant acrylic yarn and simple repeating mesh design make it a project that is both visually appealing and easy to work on, even for beginners. The pattern involves chaining, double crochets, and increases to achieve the flowing and airy look, with finishing touches including single crochets around the edges and optional fringes for added flair.
Whether you wear this mesh dress over a bikini or as a casual summer outfit, it offers both function and beauty. The lightweight texture ensures comfort in warm weather, while its elegant appearance makes it a versatile garment for various occasions. With patience and precise stitching, this free crochet pattern transforms into a handmade masterpiece that’s sure to turn heads.
Crochet Mesh Dress or Bikini Cover – Detailed Pattern
Materials
- Yarn:
- Acrylic yarn (weight #3 – DK or light worsted).
- The sample used acrylic Coral Tree yarn.
- Hook:
- 0.5 mm hook (or adjust based on yarn thickness and gauge for appropriate results).
- Notions:
- Scissors
- Stitch markers
Skill Level
Intermediate – Requires familiarity with foundational crochet stitches and handling increases/decreases.
Key Abbreviations (US Terminology)
- ch = Chain
- dc = Double Crochet
- hdc = Half Double Crochet
- sl st = Slip Stitch
- rep = Repeat
- sp = Space
Special Techniques
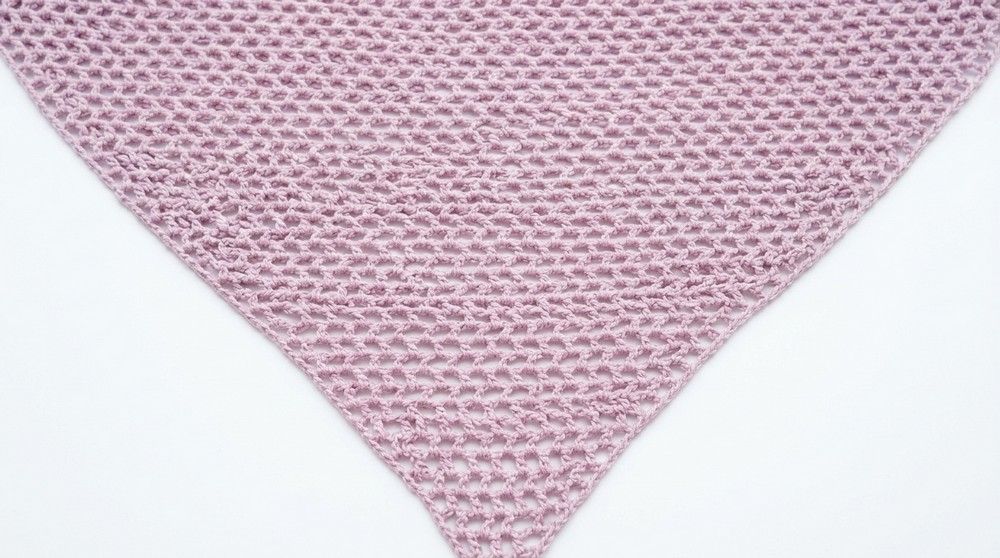
- Diamond Mesh Pattern:
- Created by alternating chains and double crochet stitches to form open diamond-like shapes.
- Increasing and Decreasing:
- Increases are placed at the edges of the mesh, while decreases are made by skipping mesh spaces.
- Fringe Attachment:
- Add strands of yarn for decorative fringe along the hem.
Pattern Instructions
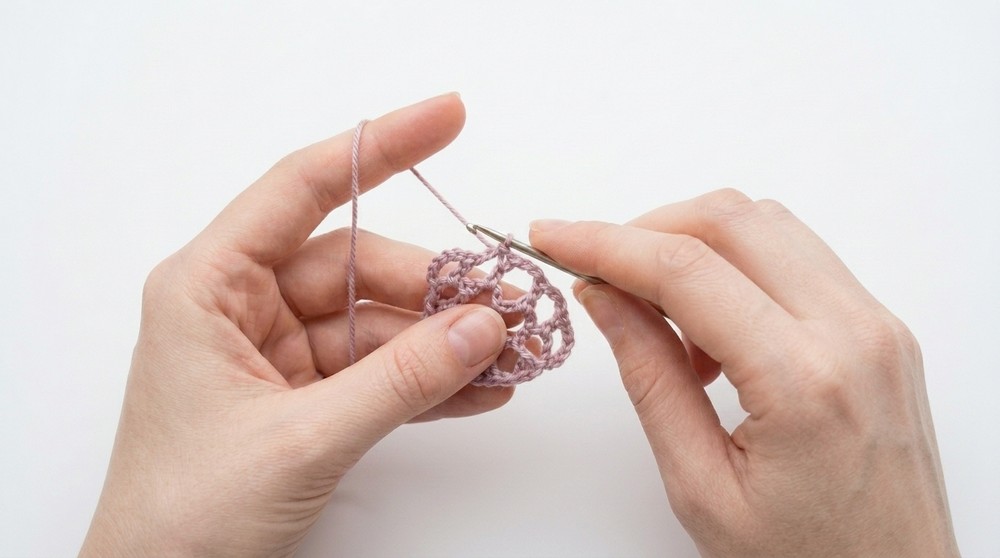
Step 1: Starting the Mesh Base
- Begin with a slip knot on your hook.
- Chain 6 (ch 6) to form a loop.
- Join the chain to the first chain with a sl st, creating a ring.
- Chain 3 (ch 3) (counts as first double crochet).
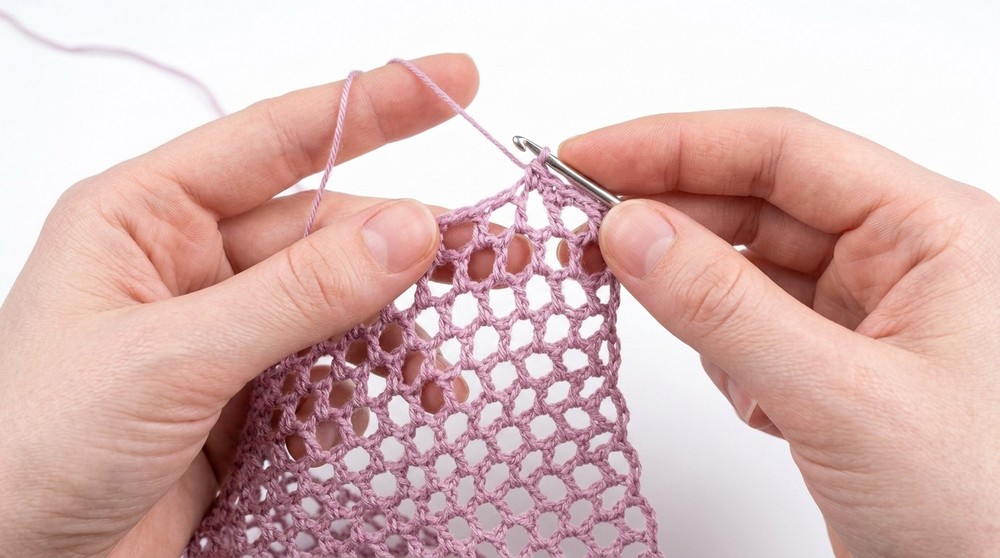
Step 2: Establishing the Mesh Pattern
- Chain 6 (ch 6) to form the base of the mesh.
- Work 1 double crochet (dc) into the ring.
- Chain 6 (ch 6) again, then work 1 dc into the same ring.
- The first row has a loop-like structure with 2 mesh spaces.
Step 3: Adding Rows with Increases
- Turn your work at the end of each row.
- Chain 6 (ch 6) and place 1 dc at the last mesh space from the previous row.
- Chain 3 (ch 3): Skip 2 stitches and work 1 dc at the third stitch.
- Continue working ch 3, skip 2 sts, 1 dc until you reach the last stitch.
- At the edge, add an increase:
- Work ch 6 and place 1 dc at the corner to form an additional mesh space.
- At the edge, add an increase:
- Repeat the process for subsequent rows, with increases at the edges to widen the mesh.
- Continue this until the panel reaches half of your hip measurement (approximately 19 inches in the sample).
Step 4: Working Without Increases
- Once the panel reaches the desired width (half your hip measurement), stop increasing at the edges.
- Continue working the same mesh pattern without increases until you reach the waist area.
- For the sample, the panel was extended by 8 rows without increases before moving to decreases.
Step 5: Decreasing Rows
- To start decreasing:
- Chain 6 (ch 6) then skip the first mesh space.
- Place 1 dc at the next mesh space, marking the decrease.
- Work the mesh pattern (ch 3, dc) across the row until the end.
- At the end of the row:
- Turn the work, chain 6, then skip the first mesh to begin the next decrease.
- Repeat this process for 3–5 rows of decreases to shape the dress at the waist.
Step 6: Continuing Without Increases or Decreases
- After finishing decreases, continue working the mesh pattern without increases or decreases.
- Repeat rows until the panel reaches the desired length for the dress.
- For the sample, 23 total rows were worked from the start.
Step 7: Creating and Joining Panels
- Front and Back Panels:
- Repeat the above process to create the second panel (front or back).
- Mark for Seaming:
- Fold each panel in half and place a stitch marker along the side seams, leaving the top triangular part open for armholes.
- Seaming:
- Use single crochet (sc) stitches to join the panels along the edges, leaving openings for the arms and neck.
Step 8: Adding Borders
- Work half double crochets (hdc):
- Add 1–2 rows of hdc around the arm, neck, and dress edges for added stability and a clean finish.
- Carry yarn tails as you crochet (to minimize sewing ends later).
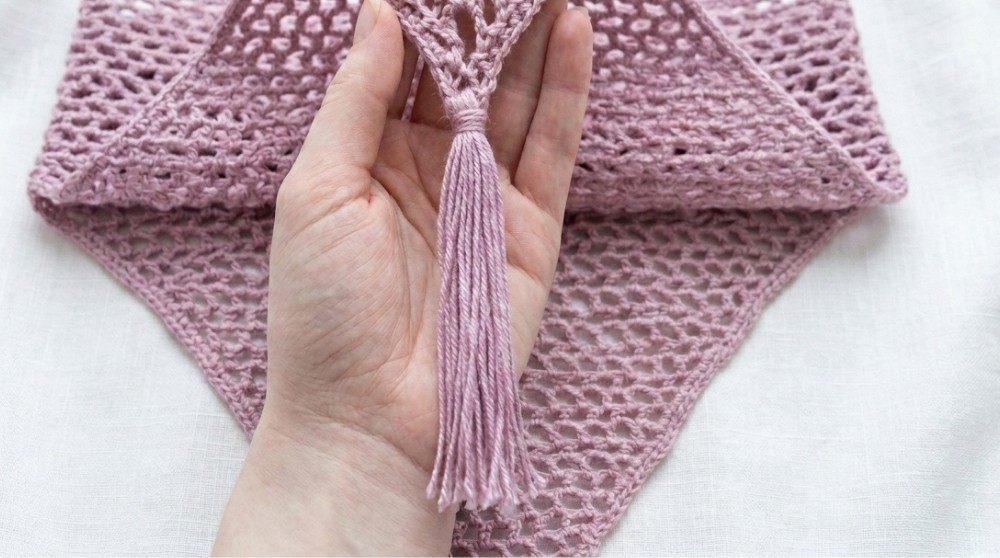
Step 9: Attaching Fringe (Optional)
- Cut yarn strands to your desired fringe length.
- Hold 6 strands together:
- Fold them in half and pull through via the hem edge.
- Secure with a simple knot.
- Repeat to evenly space fringe along the hem.
Finishing Steps
- Weave in all loose ends with a yarn needle.
- Block the garment using steam or water spray to ensure even tension and shape.
Final Words
Your mesh dress or bikini cover is now complete! This lightweight and breathable piece is perfect for beach days or casual summer outfits. The openwork mesh and fringe hem give it a boho vibe that can be styled in various ways.
Tips to Maintain the Pattern
- Check Your Stitch Count: Ensure mesh spaces align symmetrically.
- Customize Length/Width: Adjust the number of rows for shorter or longer garments.
- Fringe Suggestions: Experiment with multiple colors or longer lengths for a bold look.
- Acrylic Yarn Care: Wash gently and avoid high heat when drying to preserve shape.