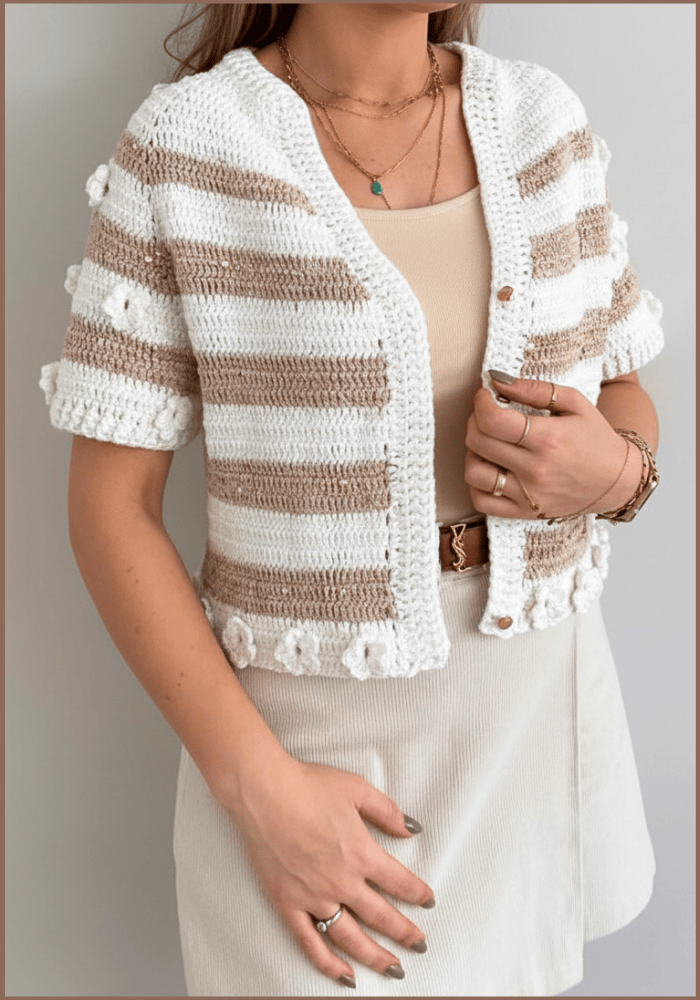
Create your own stylish crochet short sleeve cardigan with an easy-to-follow pattern that adds a touch of charm to any outfit and lets you shine all day long.
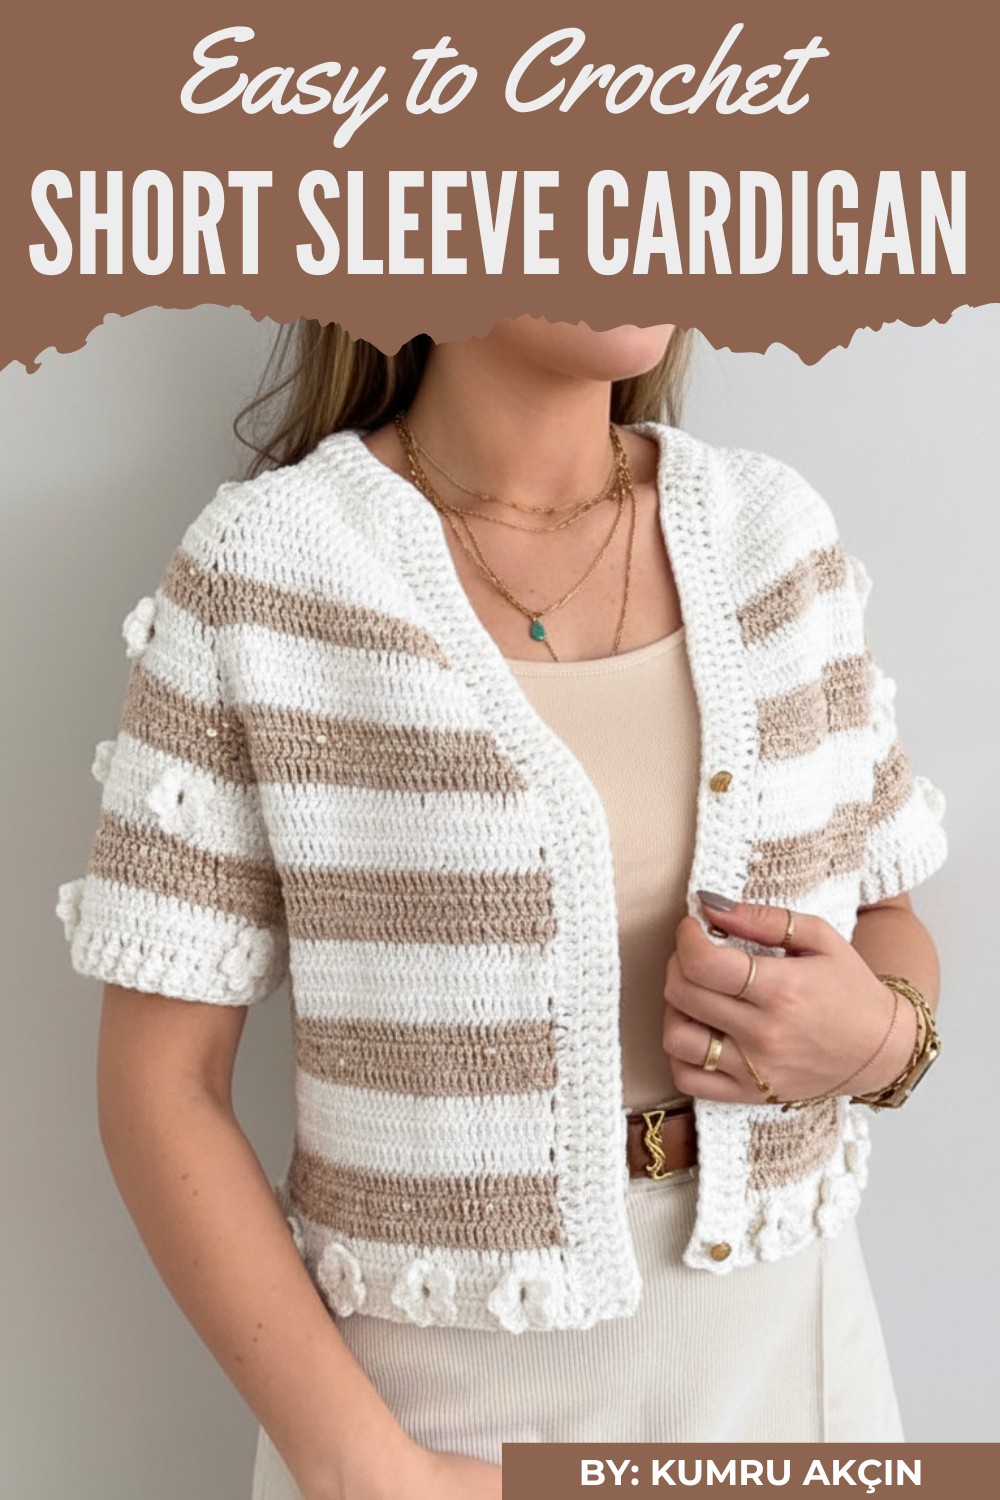
A lightweight and stylish cardigan is perfect for every season. A crochet short sleeve cardigan pattern offers a simple and beautiful way to make a cozy and elegant piece of clothing. These cardigans are great for layering, whether you’re dressing up for a special event or keeping it casual when running errands. Their soft texture and breathable design make them comfortable to wear all day long.
Unique Crochet Short Sleeve Cardigan Pattern That Stand Out
You can customize it with different stitches, colors, and yarn types to suit your style. Short sleeve cardigans are great for warmer days while still adding a touch of charm to your outfit.
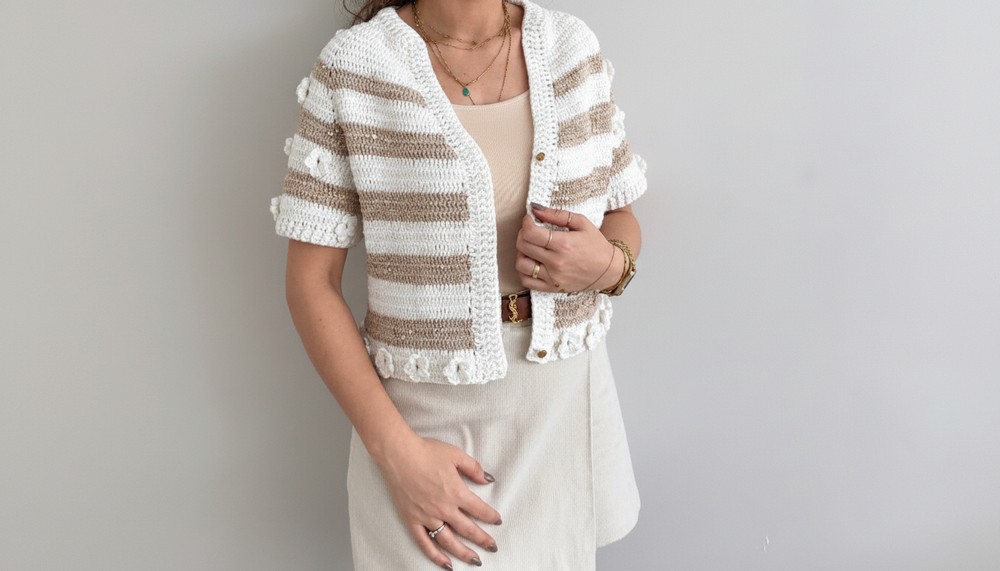
This handmade piece is unique because it mixes functionality with fashion, allowing you to design each cardigan to look one-of-a-kind. Using a crochet cardigan tutorial, you can easily create these gorgeous garments in no time, perfect for gifting or personal wear!
Materials Needed
- Yarn:
- Primary Yarn: Sensi Shine Series – Sequined, lightweight yarn (100 grams, 310 meters).
- Contrast Yarn: Milk brown or white yarn for alternating flower and cardigan sections.
- Hook Size:
- 3 mm crochet hook for loose hand tension.
- Adjustable: 3.5 mm or 4 mm if your crochet is tighter.
- Additional Supplies:
- Stitch Markers (approximately 6–8).
- Measuring tape.
- Scissors.
- Tapestry needle for weaving in tails.
Skill Level
Intermediate – Requires knowledge of double crochet (dc), increases, slip stitches (sl st), working around stitch markers, and creating flower motifs.
Key Abbreviations (US Terminology):
- ch = chain stitch
- sl st = slip stitch
- dc = double crochet
- yo = yarn over
- st(s) = stitch(es)
- sc = single crochet
- bl = back loop
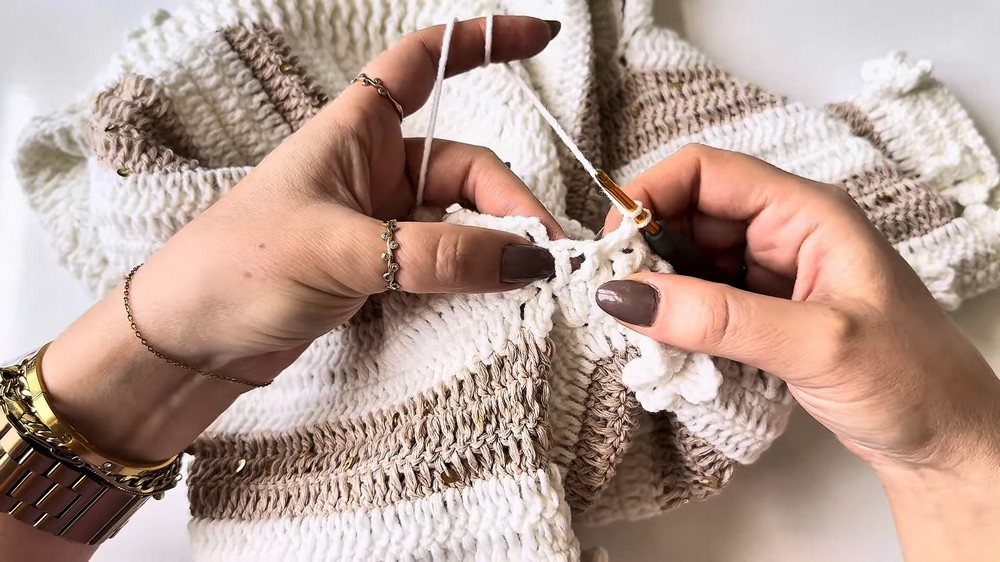
Pattern Instructions
Step 1: Foundation Chain and Setup
Chain 80: Begin with a starting knot on the crochet hook and chain 80 stitches. Adjust this number based on body size (see Pattern Variations for details).
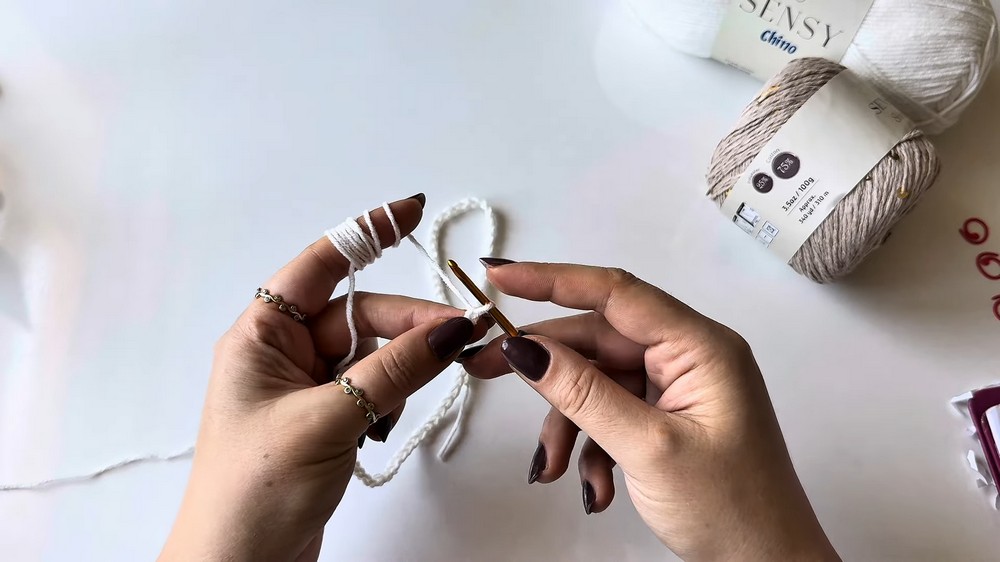
Add Turning Chains: After the 80 foundation chains, add 2 extra chains to accommodate the turning height required for dc stitches.
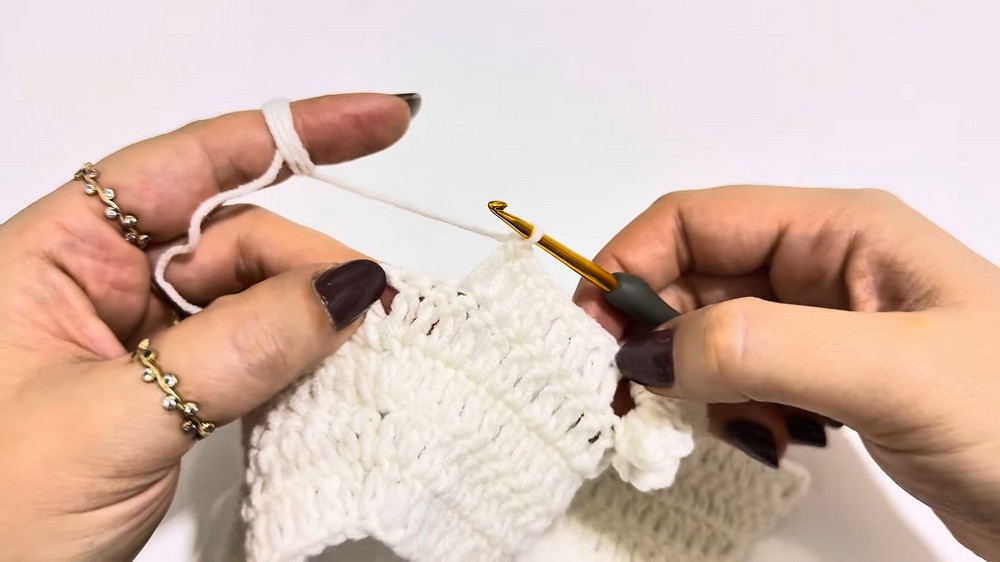
Step 2: Establishing the Base with Double Crochet (Row 1)
- Insert Hook Through Back Loops:
- Wrap yarn around the hook (yo). Working with the back loops of each chain ensures durability.
- Skip the first 3 chains and insert the hook into the 4th back loop. Pull up a loop, yarn over, and pull through 2 loops, then yarn over again to complete the double crochet (dc) stitch.
- Work Across All Chains:
- Continue one dc stitch per chain across all 80 stitches, completing the first row.
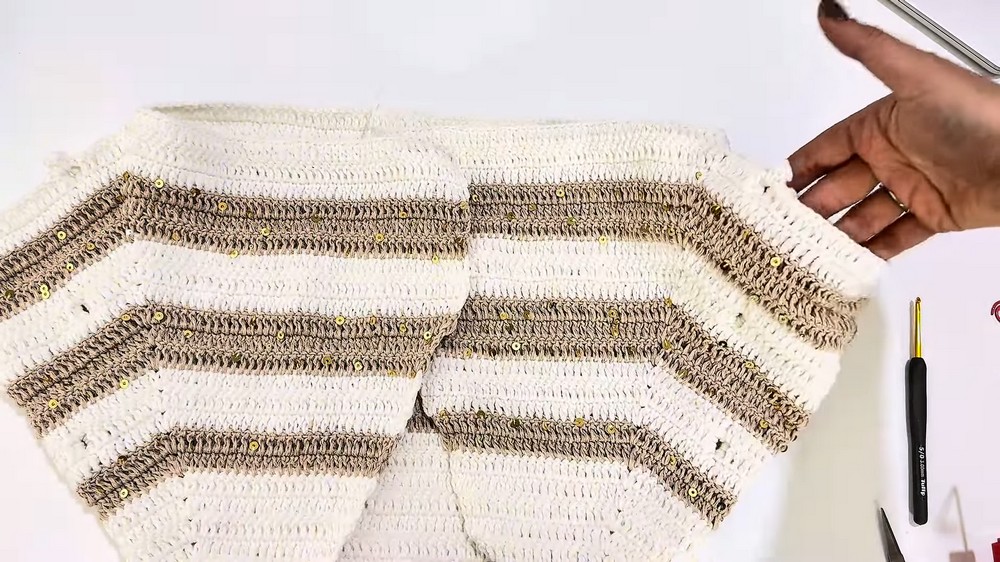
Step 3: Starting the Sections and Increases
Divide the sections of the cardigan as follows (total = 80 chains):
- Right Front Body: 10 chains.
- Left Front Body: 10 chains.
- Right Sleeve: 14 chains.
- Left Sleeve: 14 chains.
- Back Body: 28 chains.
Increase Points:
Locate 4 increase points based on stitch markers, placed as follows:
- After the Right Front (10 sts): Insert 1 dc, chain 1, followed by a second dc in the same chain space for the increase.
- Between the Sleeves and Back: Each increase consists of one dc, one chain, followed by another dc.
- Ensure you attach stitch markers at each increase chain space for reference.
Step 4: Working Row 2 and Subsequent Rows
- Chain 3: Start with 3 chains to turn to the next row.
- Add 1 dc on each railing (dc stitch from the previous row).
- At increase points: Insert one dc, chain 1, and another dc into the chain space marked from Row 1. Place stitch markers for reference.
- Continue crocheting dc stitches for designated sections:
- Front Bodies: 10 stitches each.
- Sleeves: 14 stitches each.
- Back Body: 28 stitches.
V-Neck Outline:
To create the V-shape neckline, increase 1 dc at the row beginning and row end progressively for the front pieces.
Step 5: Adding Flower Motifs
Flower motifs begin from Row 5–6 and repeat every 6th row. Flowers are only applied on sleeve sections.
Flower Motif Steps:
- Locate the Center of the Sleeve: Divide sleeve stitches equally and identify the central stitches (e.g., stitches 11 and 12). Attach markers here for flower placement.
- Work the flower motif as follows:
- Insert 2 dc into the first marked stitch.
- Chain 2, insert hook into the same space, and complete sl st to form the petal.
- Repeat this process for 5 petals in the marked central space.
Progress Rows:
Continue dc stitches on all other railing stitches while maintaining increases at the designated increase points.
Step 6: Joining the Pieces
Once the required body length is achieved:
- Fold and Seam Underarm Sections:
- Use slip stitches to join the underarm areas securely.
- Ensure alignment by folding the cardigan in half to match increase points symmetrically.
Step 7: Edging and Elastic Band Design
- Work Edging Along All Borders:
- Crochet 3 dc stitches per edge railing for smooth border alignment.
- Add Tire Rows: Alternate between front post double crochet and back post double crochet for a ribbed elastic band effect.
Customization Ideas
- Colors: Alternate between contrast colors (e.g., milk brown and white) for a striped or floral accent finish.
- Sizing Variations: Add extra chains in increments of 20 if resizing for larger bodies (e.g., size 44).
Tips for Success
- Use stitch markers consistently to keep track of increase points and flower placement.
- To avoid distortion, focus on maintaining even tension.
- Block your work after completion for better shaping and alignment.
Conclusion and Final Look
The finished cardigan is stylish, detailed, and highly customizable. Its sequined yarn adds elegance while the flower placement creates unique charm. Stretch-block the finished piece for perfection before wear.