
Style your look with this Free crochet Bandana Scarf Pattern, making cozy, trendy scarves that bring charm, warmth, and a unique handmade touch to any outfit.
Looking for a stylish accessory that’s both functional and elegant? A crochet bandana scarf pattern offers the perfect blend of fashion and creativity, adding a handmade touch to any outfit. Whether worn as a trendy headscarf, a lightweight neck wrap, or a chic layering piece, this versatile design enhances your style for every season.
Modern Crochet Bandana Scarf Pattern For Fashionable Looks
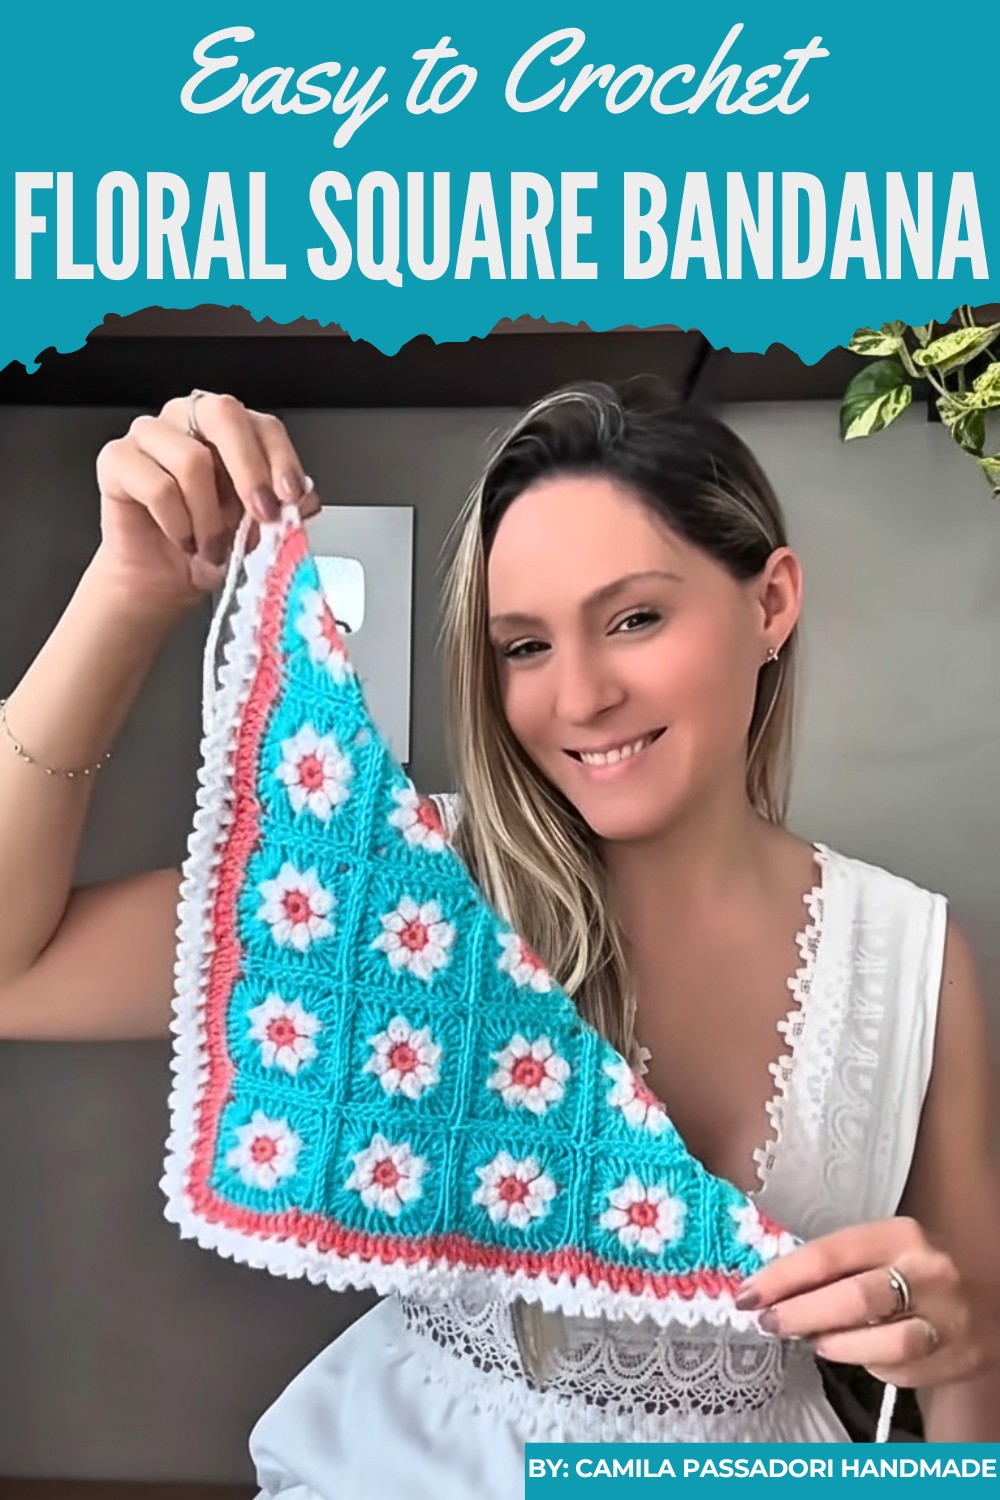
Crochet a Floral Square Bandana
Create a fashionable, delicate floral square bandana using the classic granny square technique with a beautiful flower motif at the center. This project involves crocheting full and half floral squares, joining them to form a triangle, and finishing with a decorative border and tie straps. The finished bandana measures approximately 45 cm wide by 23 cm high.
Uses
-
Wear this finished piece as a stylish Bandana or Head Scarf.
-
Scale up the project by adding more squares to create a Shawl or Scarf.
Materials
-
Yarn: Cisne Natural Algodão (100% Cotton, Tex 465). The project is economical, using about 56 grams total.
-
Color 1 (Center): Salmon Pink.
-
Color 2 (Petals/Straps): White.
-
Color 3 (Square/Joining): Blue.
-
-
Crochet Hooks:
-
Main Hook: 3.5 mm.
-
Finishing Hook: 2.0 mm (or smaller for weaving).
-
-
Notions: Scissors, Tapestry needle, and Fast-drying craft glue (like Pegamil/Pega 1000) for securing ends.
Special Features
-
Floral Motif: Each square features a centered flower that uses a 3-DC closed cluster (also called a Puff or Petal stitch) for high texture and visual interest.
-
Seamless Finish: A special closing technique at the end of each round ensures the motif looks clean and perfect on both the front and back sides.
-
Invisible Joining: Join squares using a Slip Stitch into the inner loops only. This leaves a neat, raised chain detail on the front, providing a charming contrast.
-
Effective Blocking: Use a specialized post-project blocking mixture to soften the cotton, improve the fabric's drape, and ensure all squares align perfectly.
Level of Difficulty
This project is Intermediate. It requires you to know basic stitches (SC, DC), master the Magic Ring, execute the specialized 3-DC closed cluster/Puff stitch, manage multiple color changes, and join squares with precision.
Tutor's Suggestions
-
Seamless Joining: When you fasten off a color, use the smaller hook to join the last stitch to the second stitch of the round (not the turning chain). This creates a seamless, proportional loop.
-
Secure Ends: Always hide yarn ends within stitches of the same color for a cleaner finish. After knotting and weaving, apply a small dot of fast-drying glue where the tail is hidden, then trim and tuck the remaining end to prevent unraveling.
-
Monitor Tension: Keep the Magic Ring hole slightly open instead of fully closing it; this creates a deliberate, decorative center.
-
Block for Drape: Prepare a blocking mix (1 part fabric softener, 1 part water, 1 part alcohol). Spray the mix and gently stretch the piece on a flat surface to align the squares and soften the cotton for a better drape. Use steam only to help the process; do not press the iron directly onto the cotton.
Step-by-Step Details
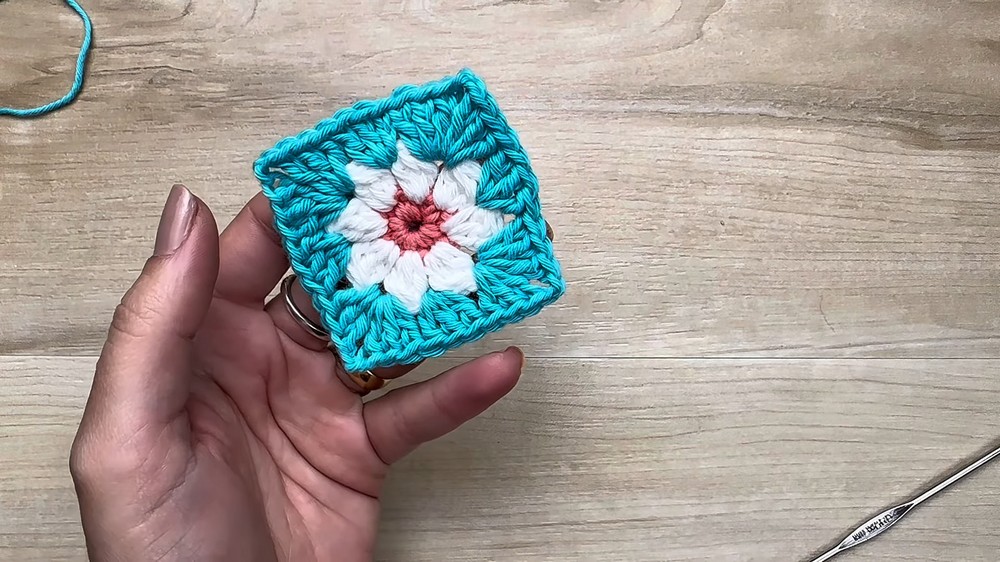
1. Crochet the Full Floral Square
You must crochet 10 full squares for this project.
Round 1 (Center - Salmon Pink)
-
Start: Create a Magic Ring.
-
Base: Work 8 Single Crochet (SC) stitches into the ring.
-
Finish: Cut the yarn and pull the tail through. Use your finishing hook to join the end to the second SC stitch, and weave in the tails.
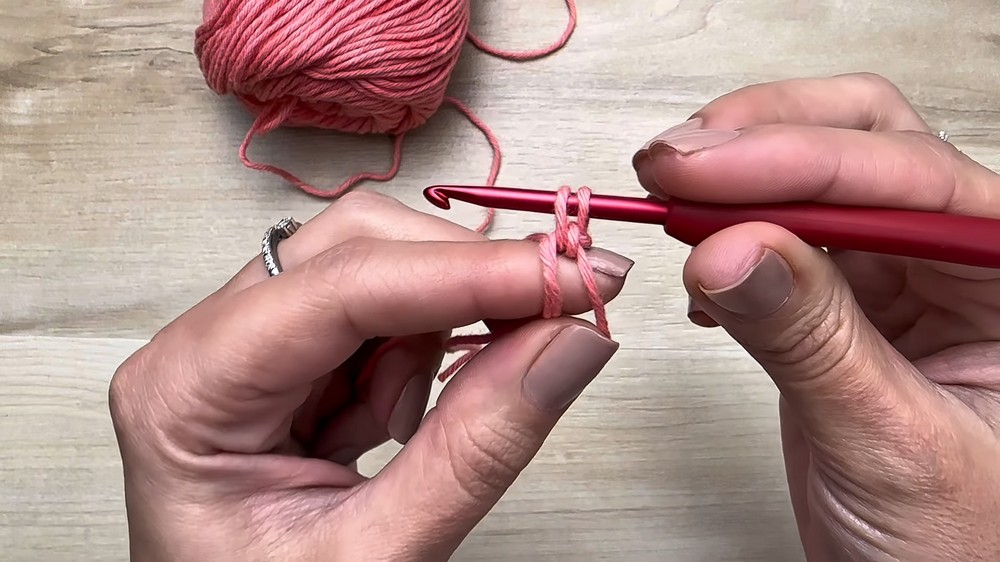
Round 2 (Petals - White)
-
Start: Attach the white yarn to any SC stitch from Round 1. Chain 2.
-
First Cluster: Work 2 incomplete Double Crochet (DC) stitches into the same stitch. Yarn over and pull through all 3 loops to close the cluster.
-
Separate: Chain 1.
-
Repeat: Work a 3-DC closed cluster into the next SC stitch. Chain 1. Repeat this sequence until you have 8 petals total.
-
Finish: Cut the yarn and use the seamless joining technique.
Round 3 (Square - Blue)
-
Start: Attach the blue yarn into any Chain-1 space between the petals. Chain 2 (counts as 1 DC). Work 2 DC into the same space (first 3-DC block).
-
Corner: In the next Chain-1 space, work (3 DC, Chain 2, 3 DC).
-
Side: In the next Chain-1 space, work 3 DC.
-
Repeat: Alternate 3 DC in the side spaces and (3 DC, Chain 2, 3 DC) in the corner spaces. You will form 4 corner groups.
-
Finish: Slip Stitch (Sl St) into the top of the beginning Chain 2, cut the yarn, and secure.
2. Crochet the Half Floral Square (Triangle)
You must crochet 5 half squares for this project, forming the top edge of the bandana.
Row 1 (Center - Salmon Pink)
-
Start: Create a Magic Ring.
-
Base: Work 4 SC stitches into the ring.
-
Finish: Close the ring, cut the yarn, and secure the ends.
Row 2 (Petals - White)
-
Start: Attach white yarn to the first SC stitch. Work a 3-DC closed cluster.
-
Separate: Chain 1.
-
Repeat: Work a 3-DC closed cluster, Chain 1 into the remaining 3 SC stitches. You will have 4 petals total.
-
Finish: Cut the yarn and secure the ends, pulling the last chain tight to close the row.
Row 3 (Triangle - Blue)
-
Start: Attach the blue yarn to the side of the last petal on the left. Chain 2. Work 2 DC into the same spot.
-
Corner: In the center Chain-1 space, work (3 DC, Chain 2, 3 DC).
-
Side: Work 3 DC into the next Chain-1 space.
-
Last Side: Work 3 DC into the side of the first petal on the right.
-
Finish: Chain 1 to lock the last stitch. Cut yarn and secure.
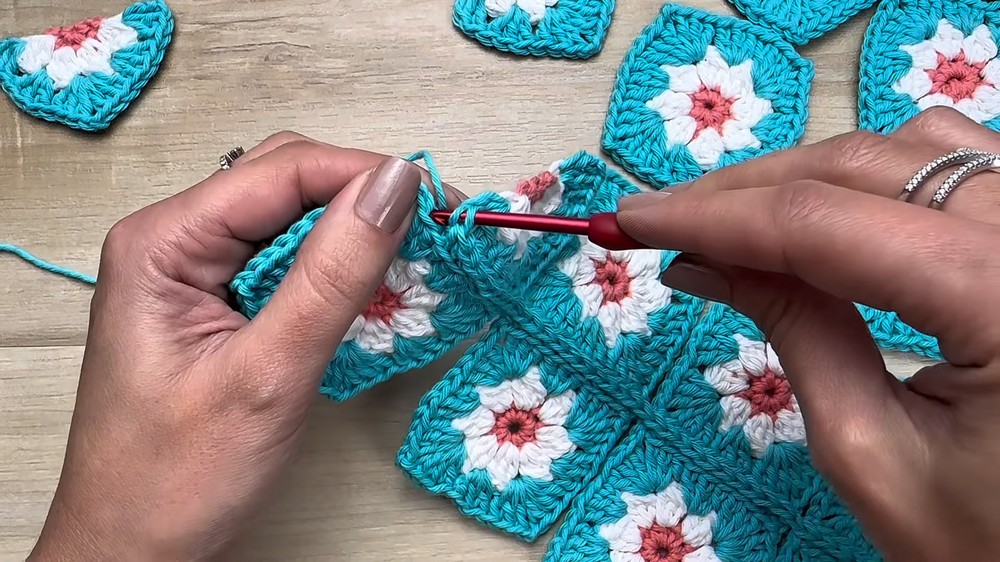
3. Join the Squares
-
Layout: Arrange your 10 full squares and 5 half squares in a triangular configuration (1, 2, 3, 4, 5 half squares on the longest edge).
-
Join: Use the blue yarn and the Slip Stitch (Sl St) method.
-
Technique: Place two squares right-sides facing up. Insert your hook through the inner loop (the one closest to the center) of the top V-stitch on both squares.
-
Process: Sl St across all corresponding stitches and chains until you reach the corner. When four squares meet, work a Sl St to join all four corner points. Join all vertical seams first, then join all horizontal seams.
4. Create the Border
Border 1 (DC Row - Pink)
-
Start: Attach the pink yarn to the last chain space on the bottom right corner. Chain 2 (counts as 1 DC).
-
Row: Work 1 DC into every stitch along the bottom edge, including the side and corner stitches.
-
Corner: At the two bottom corners of the triangle, work (1 DC, Chain 2, 1 DC) into the Chain-2 corner space.
-
Finish: Sl St into the beginning Chain 2. Cut yarn and secure.
Border 2 (Shell Base - White)
-
Start: Attach white yarn to the first DC stitch in the corner space.
-
Pattern: Chain 2. Skip 1 DC stitch. Work 1 SC into the next DC stitch. Repeat the sequence (Ch 2, skip 1, SC) across the entire bottom edge.
-
Corner: Work (SC, Chain 2, SC) into the corner Chain-2 space.
Border 3 (Picot Edge - White)
-
Start: Sl St into the first Ch-2 arch. Chain 3. Work 1 SC into the same arch.
-
Pattern: Work (SC, Chain 3, SC) into every Ch-2 arch around the bottom edge until the last arch.
-
Finish: Close the round with a Sl St and secure the yarn end.
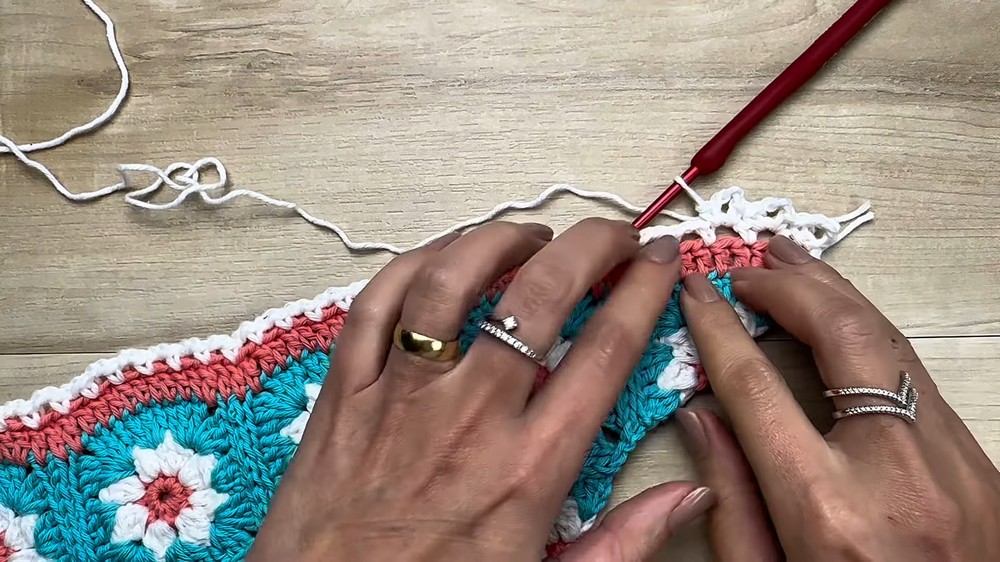
5. Add the Tie Straps
-
Start: Attach white yarn to the corner loop at the top left of the bandana.
-
Chain: Work a long chain of approximately 40 chains (or to your desired length).
-
Finish: Cut the yarn and pull the end through the last loop to secure the chain. Repeat the process for the top right corner.
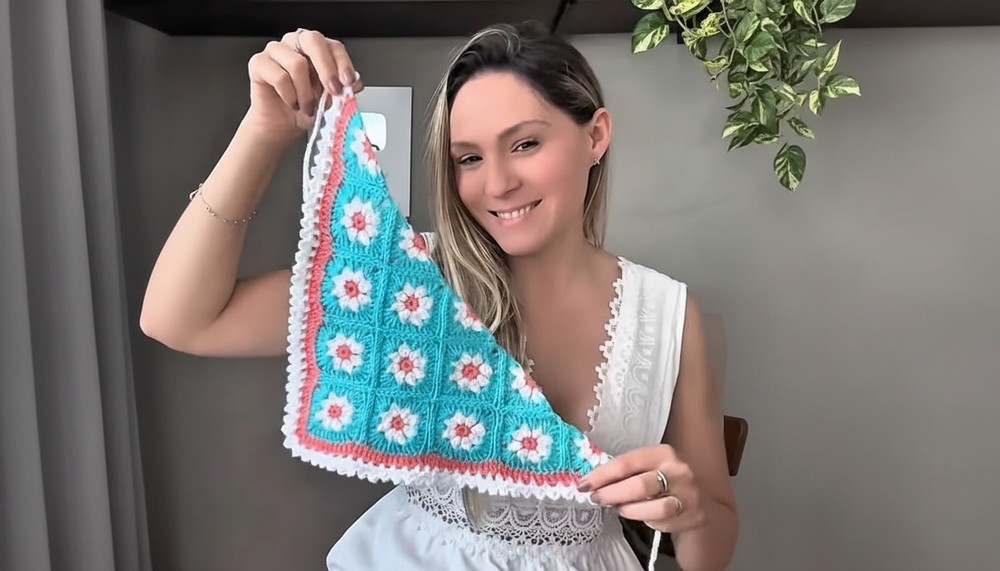
This pattern provides the opportunity to explore your creativity through various yarns, color palettes, and stitch techniques. It’s an excellent choice for beginners learning basic crochet methods, while also offering enough complexity to intrigue experienced crocheters. The beauty of a crochet bandana scarf pattern lies in its adaptability, create one with bright, playful hues or opt for subtle, neutral tones to match your everyday outfits.
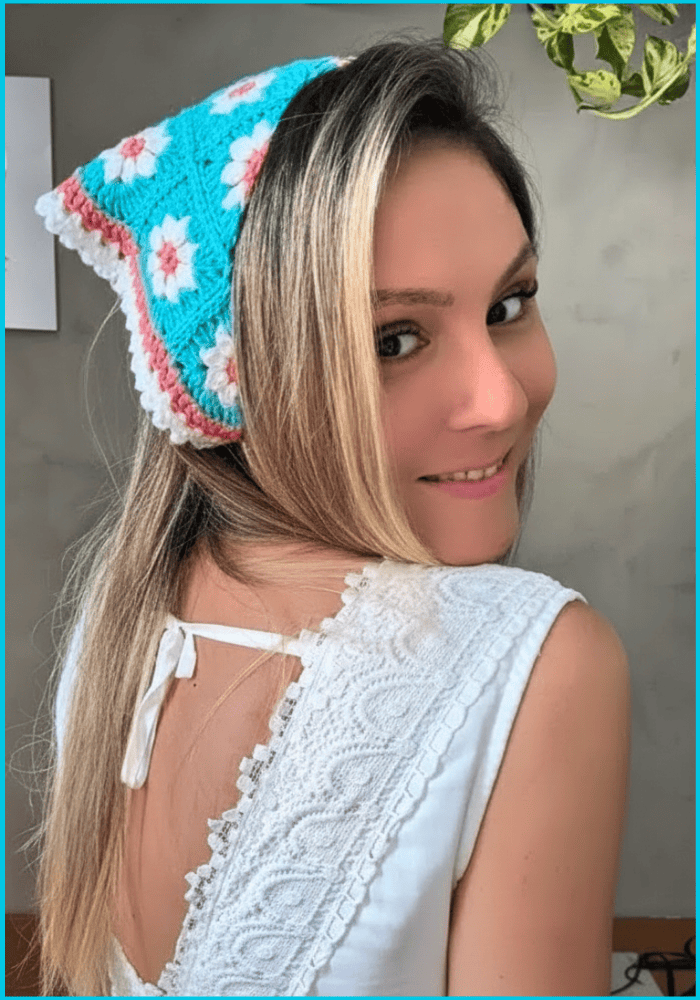
Beyond its aesthetic appeal, the scarf is practical as well as sentimental. It can be gifted to loved ones as a thoughtful gesture or made for yourself as an expression of your creativity. This timeless accessory not only enhances your fashion collection but also celebrates the artistry of handmade work, making it a truly valuable addition.
Conclusion
You have successfully crocheted a beautiful, multi-colored floral square bandana. The combination of the petal motif, decorative joining, and picot border results in a stunning piece that is soft, flexible, and ready to wear.
Tip
Practice Uniform Tension: When pulling up the loops for the 3-DC closed cluster/Popcorn stitch, make sure they are all the same height. Even tension ensures that the cluster puffs out uniformly, maximizing the beautiful texture on the front of the square.



