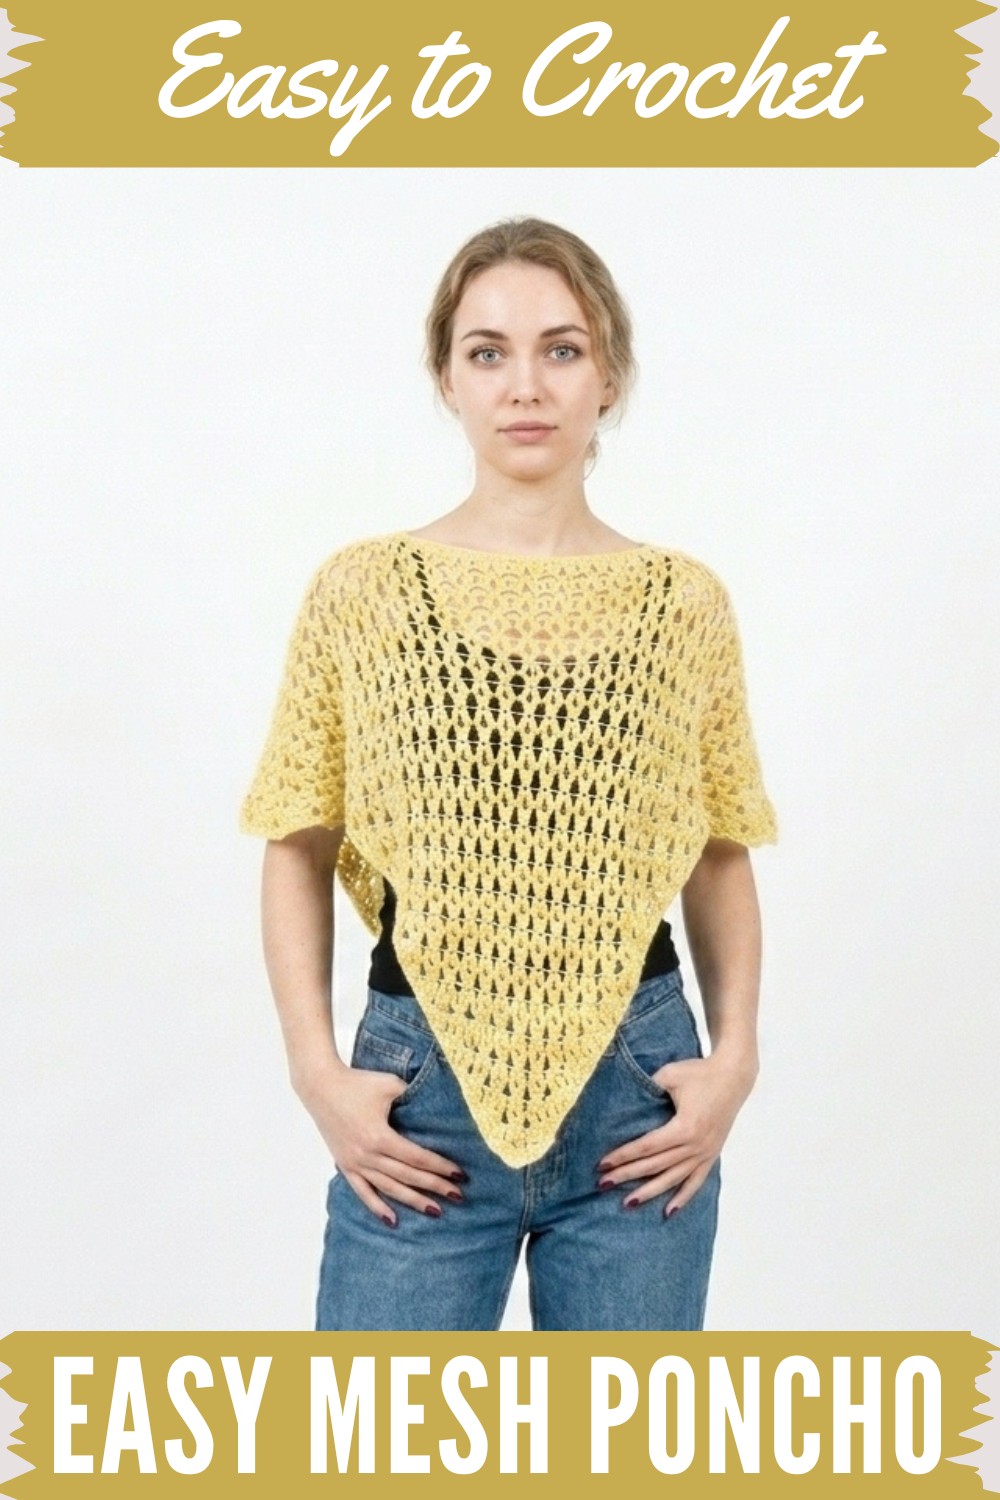
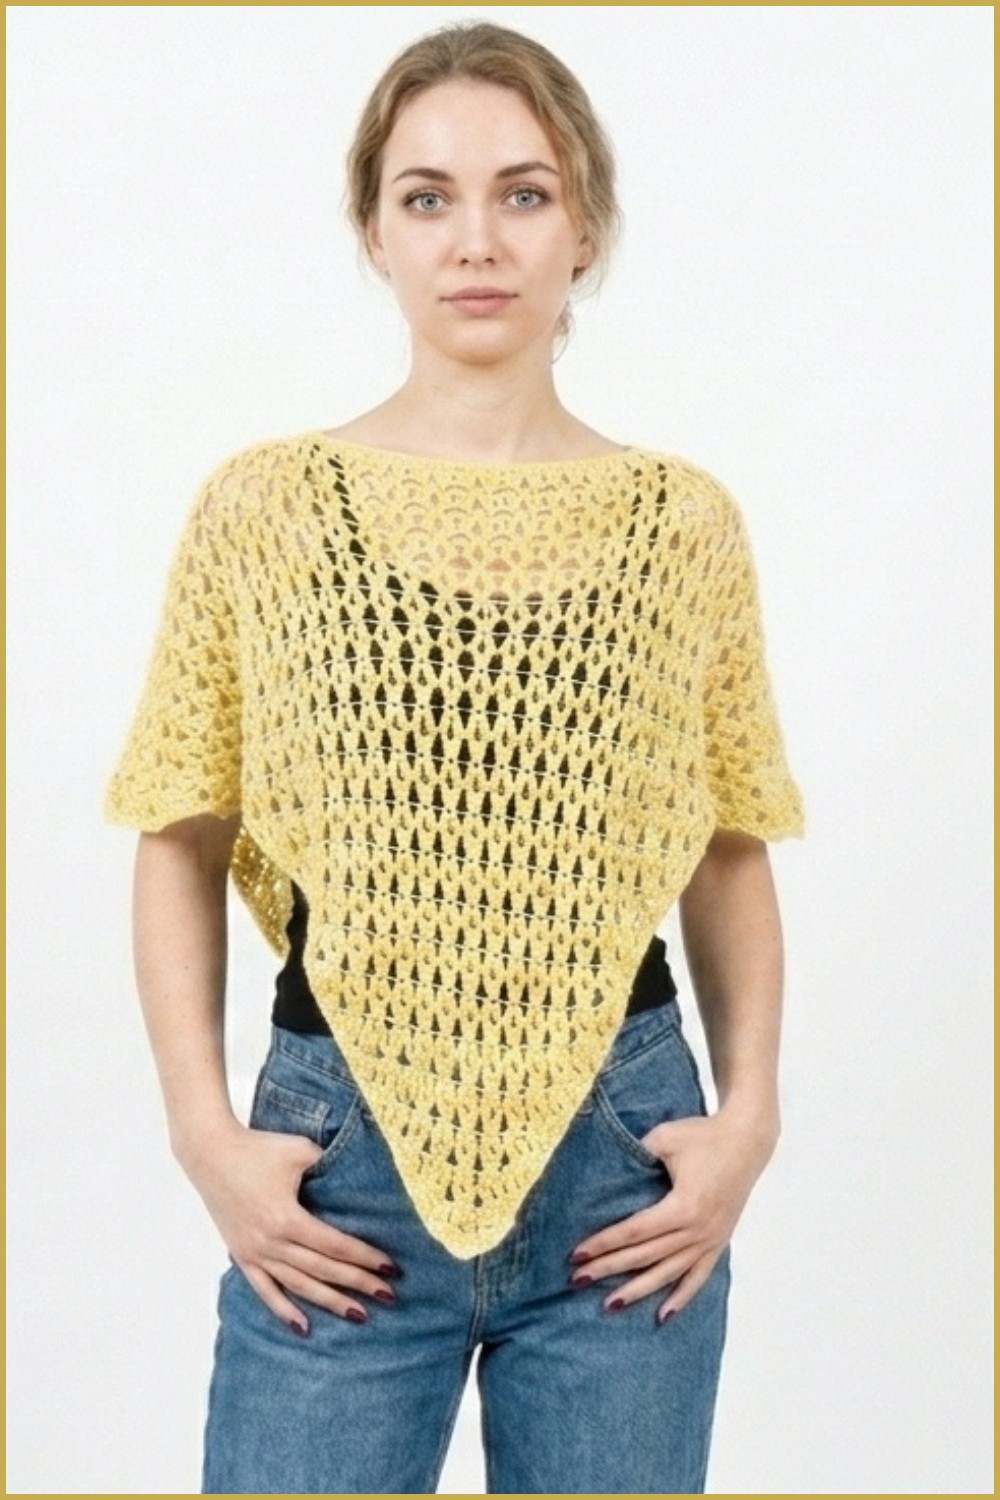
Find a simple and stylish free crochet poncho pattern that is easy to make, cozy to wear, and perfect for adding a special touch to any outfit or season.
Wrapping yourself in something soft, cozy, and stylish, perfect for any season. A poncho is more than just clothing—it’s both practical and beautiful. Made using gentle crochet stitches, it has a flowing and elegant design that fits comfortably over your shoulders. Its lightweight feel makes it easy to wear, while the soft texture adds a sense of warmth and care.
Unique Free Crochet Poncho Pattern for a Classic Look
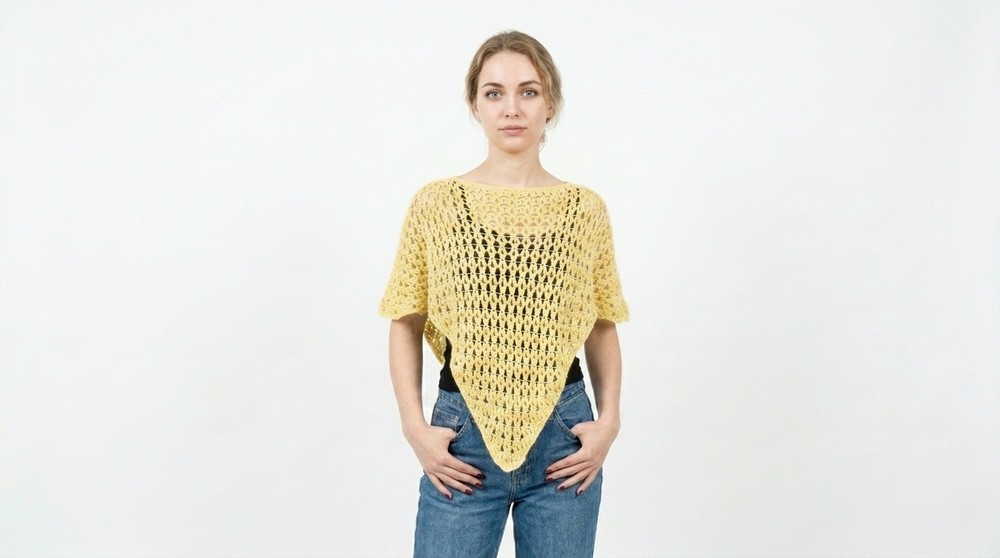
The poncho’s appearance is truly unique, with its graceful drape and handcrocheted look that makes it stand out. It can be worn as an extra layer during cooler weather or as a stylish outfit for casual outings. With a variety of colors and simple yet charming designs, it’s easy to pair with anything in your wardrobe.
The detailed stitching gives it a timeless look, and its versatility makes it suited for both comfort and style. Whether you need something cozy or something trendy, the poncho is a perfect choice that blends fashion and function into one beautiful piece.
Crochet Poncho Pattern
Finished Size
- Approximate measurements for one triangle panel:
- Width across the top (base of triangle): 42 stitches (~depends on gauge and yarn size).
- Height of the panel: Adjustable based on the number of rows; in the video, 42-43 rows were completed for one panel.
- Poncho Size: Depends on assembled panel sizes and head opening. The example used 16 joined rows for the neck opening.
Materials Needed
- Yarn:
- Cotton Bamboo Light Yarn (~3 skeins per panel). Suggested yarn weight: DK (Category #3).
- Sample used purchased yarn on sale, but substitute as needed (ensure similar fiber content for desired drape).
- Hook:
- 3.5 mm crochet hook (adjust hook size depending on gauge).
- Optional Blocking Tools:
- Pins and a blocking mat.
- Water or steam for wet blocking.
- Scissors and Yarn Needle:
- For weaving in ends and sewing panels.
Gauge
- 4 Double Crochet stitches grouped together x 2 jasmine puff rows = approximately 5 cm x 5 cm.
- Adjust hook size if the width or height does not match to ensure proper dimensions.
Special Techniques
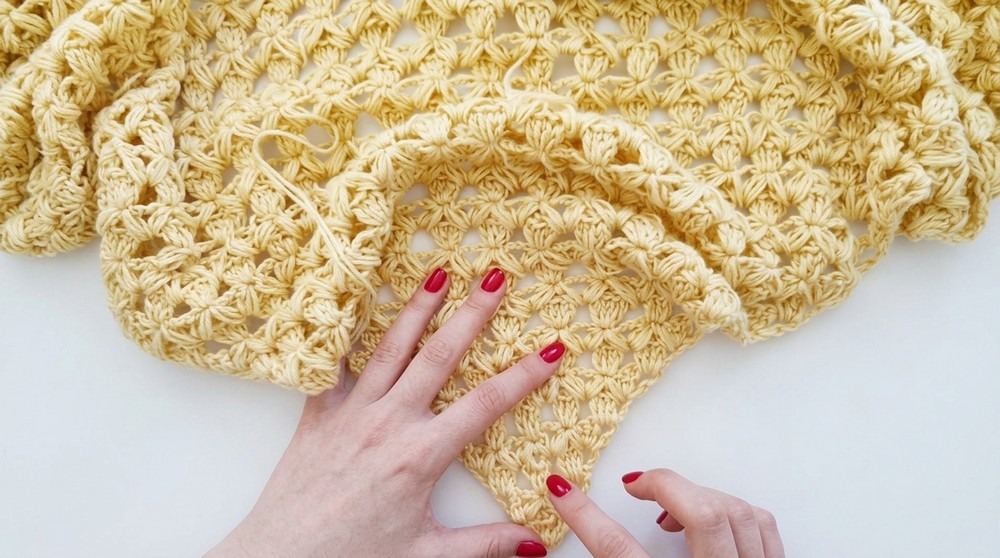
- Puff Stitch (Modified Jasmine Stitch):
- Pull up loops three times into the same space to create texture; explained below.
- Foundation Triangle Construction:
- Each panel begins at the base tip and grows row by row into a triangle.
- Seaming Panels with Single Crochet:
- Use double strands for added durability during assembly.
- Wet Blocking:
- After completion, block the poncho for uniformity, shape, and a polished look.
Instructions
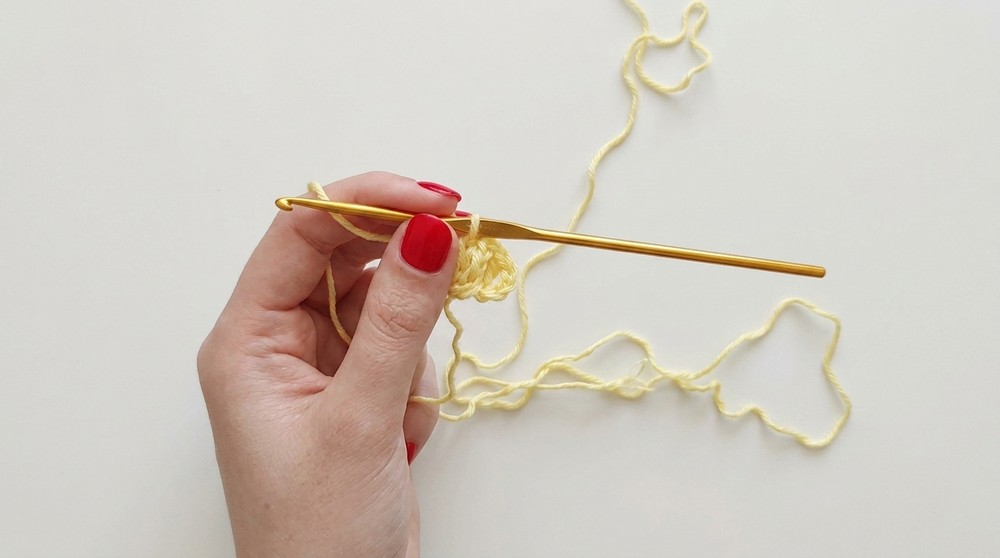
Step 1: Starting the Foundation Triangle for One Panel
- Foundation Chain: Chain 4 stitches.
- Chain 1 additional stitch for turning.
- First Row (Base Row):
- In the last chain of the foundation chain: Work 4 double crochet (DC) stitches into the same space.
- Chain 1.
- Work 1 triple treble crochet (TRTR) in the same space as the 4 DC stitches: Yarn over twice, insert hook, pull up, and remove loops 3 times in pairs.
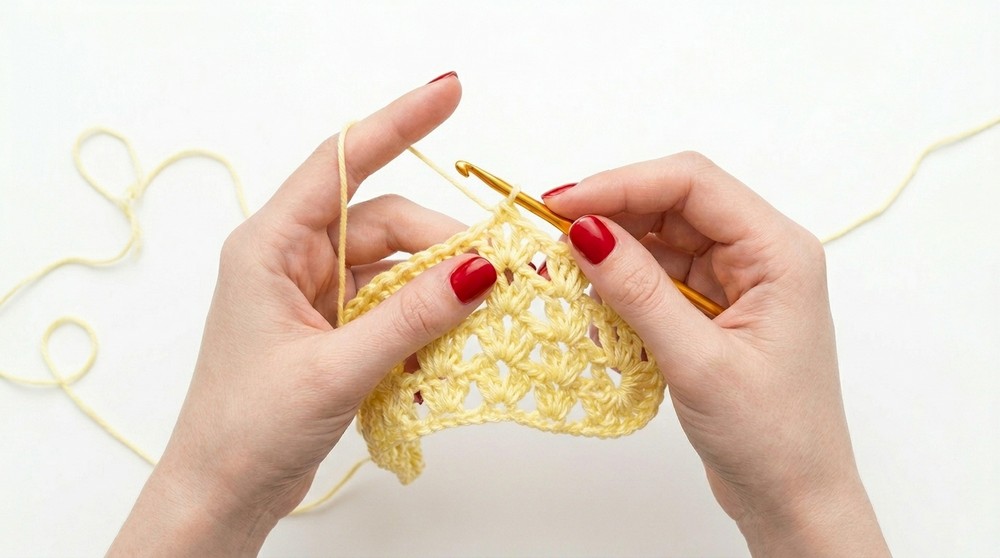
- Second Row (Puff Row):
- Chain 4, turn.
- Into the space between the previous row’s 4 DC stitches, work 2 DC stitches.
- Begin the puff stitch:
- Yarn over, insert the hook into the space, and pull up a loop.
- Repeat this three times, so you have 6 loops on your hook.
- Perform the same puff stitch into the adjacent space. Total: 12 loops on the hook.
- Yarn over and pull through all loops. Chain 1.
- Repeat Rows:
- Puff Rows Alternate with Double Crochet Rows:
- Puff Row: Chain 4, work puffs with spacing (4 chains between each puff).
- DC Row: Chain 4, work 4 DC stitches into every top puff space.
- Puff Rows Alternate with Double Crochet Rows:
- Continue Building Triangle Shape:
- Repeat alternating rows until the panel reaches the desired dimensions (in the video, 42-43 rows were completed).
Step 2: Creating the Second Panel
- Repeat Step 1 to create an identical triangle-shaped panel.
- Ensure the same number of rows and stitch count for both panels.

Step 3: Assembling the Poncho Panels
- Align Panels: Place the two triangle panels together with the straight edges aligned. Ensure the points of the triangles face downward.
- Join Panels with Single Crochet:
- Use double strands of yarn for added strength.
- Work single crochet (SC) stitches along the edges of the panels, ensuring both are evenly aligned.
- Leave 16 rows (from the top edge) unjoined to create the head opening.
- Neck Finishing:
- Work 1–2 rounds of single crochet stitches around the neck opening for a clean finish.
Step 4: Wet Blocking
- Block the Poncho:
- Lay the poncho flat on a blocking mat, pin the panels in place, and spray lightly with water or use steam.
- Allow to dry completely for even tension and alignment.
Tips for Customization
- Sizing Adjustments:
- For a larger poncho, add rows to each triangle or use larger panels.
- For smaller sizes, reduce the number of rows per panel.
- Color Variations:
- Alternate colors for each puff stitch row to create a colorful striped pattern.
- Use ombre or gradient yarn for a seamless flow of colors.
- Add Fringe or Tassels:
- Attach fringe or tassels to the bottom hem for a boho-inspired look.
- Neckline Customization:
- Add a drawstring cord or ties at the neck opening for adjustable wear.
Conclusion
This poncho combines elegance and texture with its alternating puff and double crochet rows. The triangular construction and customizable features allow for a versatile fit that can suit any size or style. With proper blocking and finishing, the poncho takes on a professional and polished appearance, perfect for everyday wear or gifting.
Important Remarks
- Final Look: The puff stitches create stunning texture reminiscent of jasmine blooms, while the neat edgework and head opening ensure comfort and ease of wear.
- Easy Repetition: The pattern consists of two alternating rows, making it perfect for beginners to memorize and master.
- Durable Assembly: The double-stranded single crochet seams ensure long-lasting use without compromising the drape of the panels.