Free crochet tank top pattern with easy instructions for creating lightweight, trendy, and breathable handmade summer top is Perfect for all skill levels.
This pattern is a simple and stylish project that teaches you how to make your own crochet tank top, step by step. This Free Crochet Tank Top Pattern uses basic stitches and a mesh design, which creates an open, airy fabric—perfect for warm weather. The tank top is made by crocheting two panels (a front and a back) and then sewing them together at the sides and shoulders.
Lightweight Crochet Tank Top Pattern for Women
The finished tank top has a relaxed, straight shape with roomy armholes and a classic neckline. The pattern is easy to follow, even if you are a beginner, because the stitches are simple and repeat in the same way for each row. You can also make the tank top in different sizes, just by adding or removing some stitches or rows.
To make the tank top, you will need some lightweight yarn and a crochet hook. You can choose any color you like to match your style. The airy mesh texture makes the tank top comfortable to wear over a camisole, with shorts, or as a cover-up for the beach or pool. If you like layering, you can also wear it over a long-sleeve shirt in cooler weather.
This Free Crochet Tank Top Pattern is a great project if you want to practice your crochet skills, or if you’re looking for a practical, handmade piece to add to your wardrobe. Overall, it’s a fun, easy, and useful summer project for all levels of crocheters.
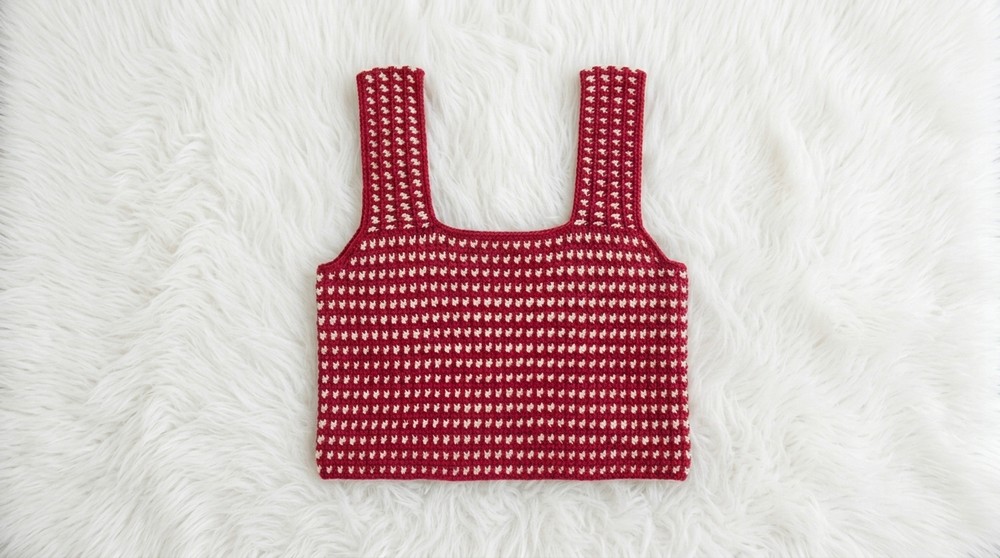
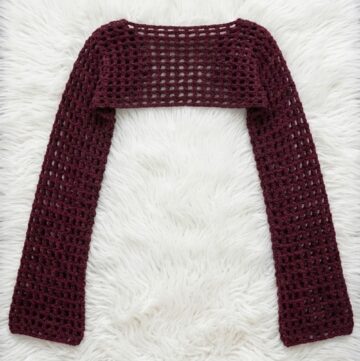
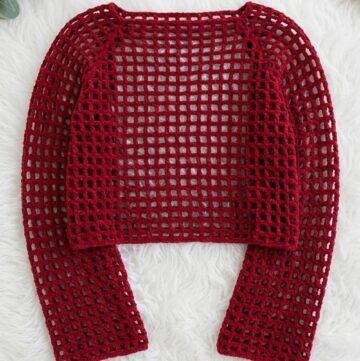
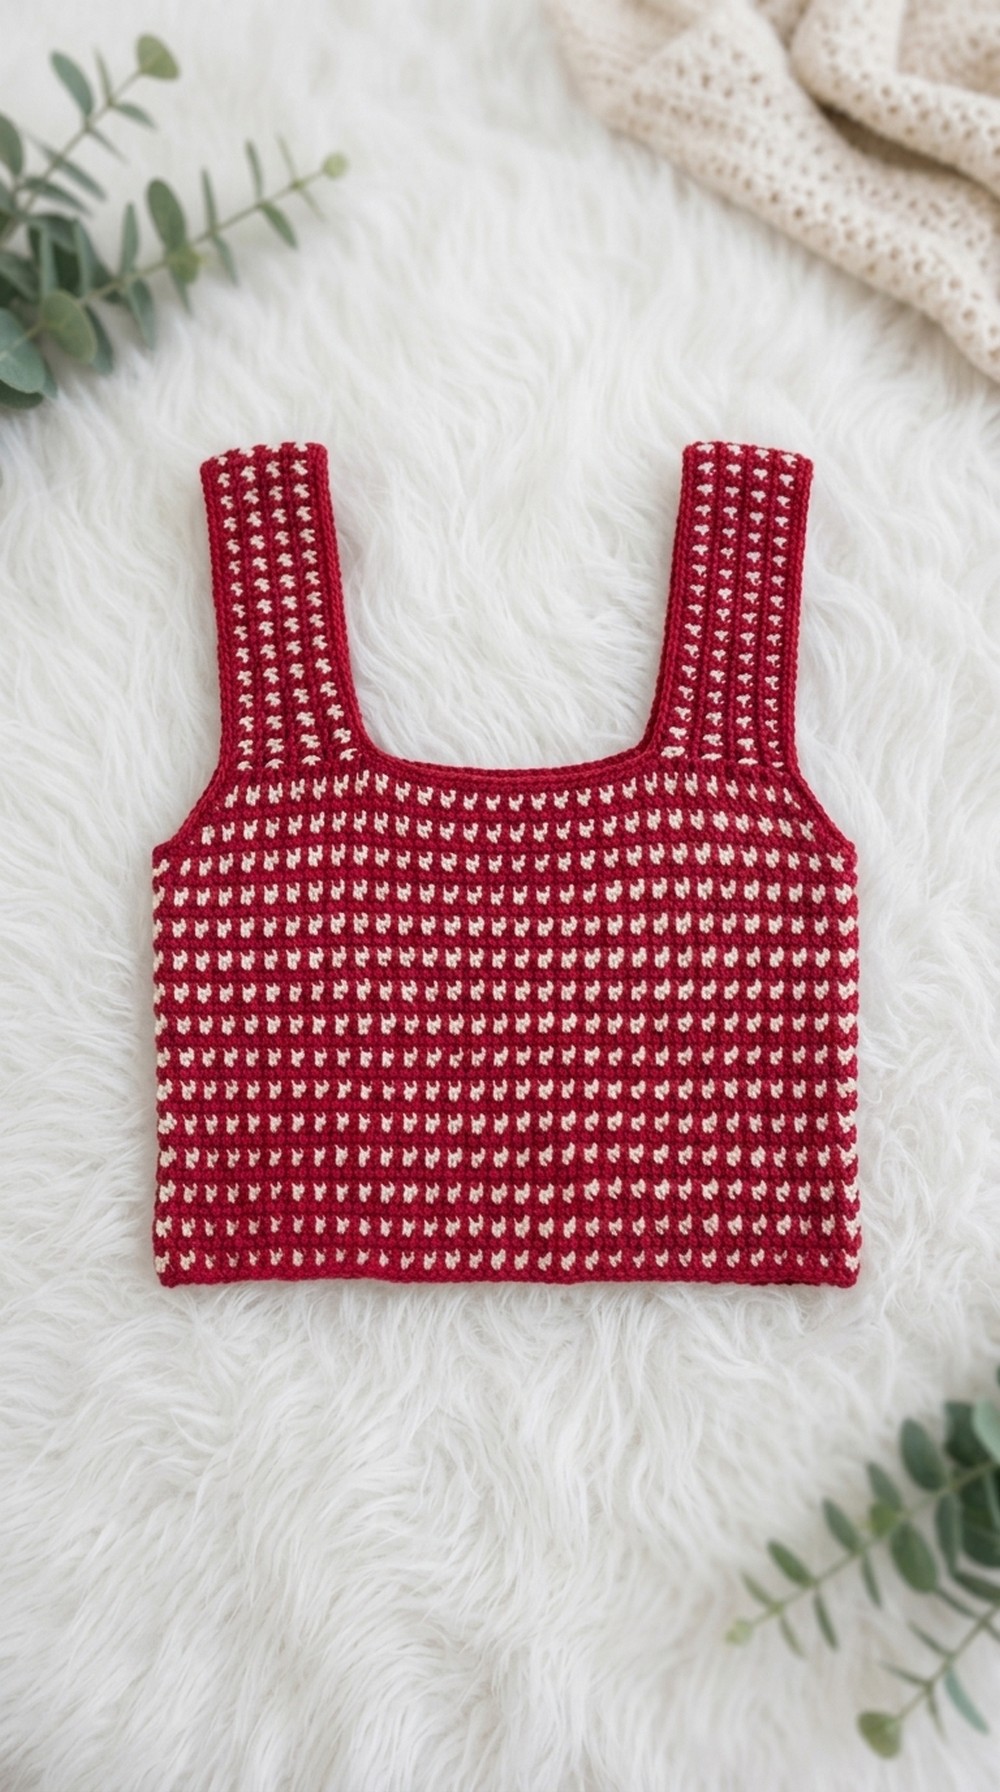
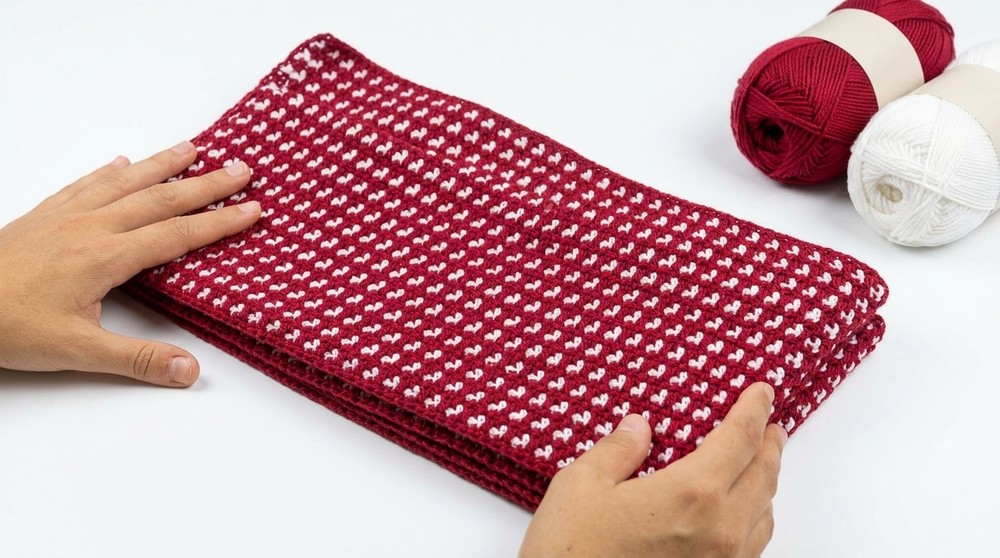
Striped Crochet Top Pattern With Lace Motif
This step-by-step pattern for a practical, modern crochet top using pink tones and a lace motif. This design is a versatile wardrobe piece: easy rectangles, simple colorwork, and seams for a comfortable fit. The pattern is inspired by Twister Sole yarn and is perfect for intermediate beginners who want to learn color changes, simple lace motifs, and garment assembly. If you are new to reading patterns, don’t worry—plain-language explanations follow every section.
Skill Level & Terminology
Skill Level: Confident Beginner
Terminology: US Crochet Terms
You’ll make chain stitches, single crochets, double crochets, and slip stitches. Color changes and sewn seams are explained step-by-step, suitable for makers with basic crochet experience.
Materials & Tools
- Twister Sole yarn or similar (cotton-acrylic blend, sample uses pink tones: white & red)
- Crochet hook: 3.5 mm (or size to obtain gauge)
- Scissors
- Tapestry needle (for finishing and sewing)
- Measuring tape
Gauge
- Motif sample: Chain number must be odd.
- Sample swatch: Ch 9 + 1 for foundation, worked in single crochet and motif to determine final chain count for your size.
- Check your rectangle width against desired measurements — adjust hook or chain count as needed.
Abbreviations List
| Abbreviation | Meaning |
|---|---|
| ch | chain |
| sc | single crochet |
| dc | double crochet |
| sl st | slip stitch |
| rep | repeat |
| st(s) | stitch(es) |
Special Stitch Instructions
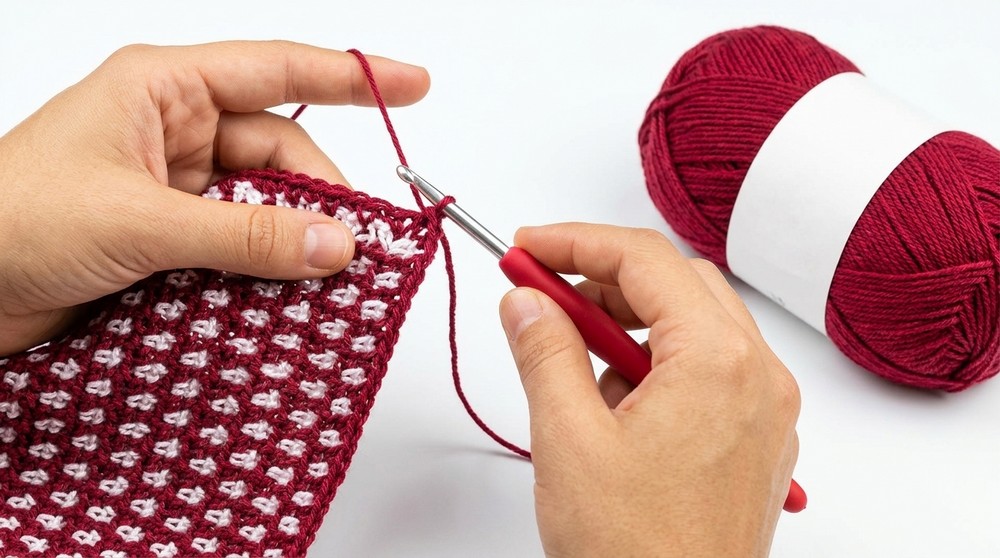
- Color Change: Leave last sc unfinished, pick up new color, finish stitch, and continue.
- Motif St (Lace Motif): Ch 1, skip next st, sc in following st — repeat across for lace section.
- Inset DC: For textured row, dc worked down into chain space from previous motif row.
Finished Size
- Customizable for S, M, L, XL, XXL, and 3XL.
- Rectangles:
- Two larger for front and back (width = bust, height = garment length)
- Two smaller for sleeves (length = arm circumference, width = sleeve length)
- Sample Front/Back Rectangle: Ch 83, 62 rows.
- Sample Sleeve Rectangle: Ch 77, 18 rows.
Pattern Overview
The top is constructed from four rectangles. You start with a foundation chain, then alternate colorwork and motif stitches according to the sample, working up to your desired length. Rectangles are sewn together for a classic boatneck, then finished with slip stitch edging for polish.
Stitches used: Chain, single crochet, double crochet, slip stitch, motif stitch, color changes.
The Pattern Itself
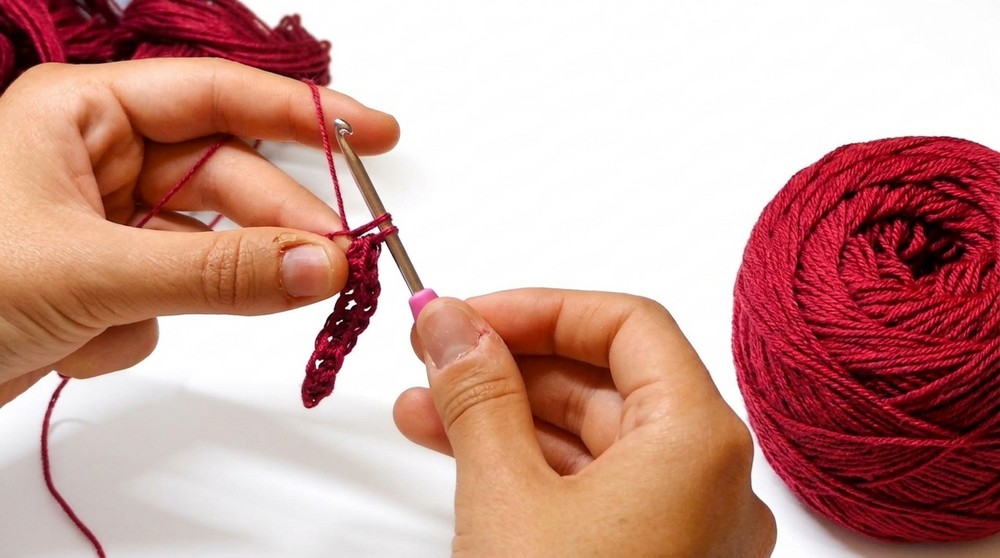
1. Sample Motif — Swatch and Chain Calculation
Before starting, practice with a motif sample:
- Ch 9 (odd number for swatch)
- Ch 1, turn. Sc in 2nd ch from hook and across (9 sc).
- Leave last sc unfinished; change color before closing.
TIP
For beginners: Always count stitches and change color at the end of each repeat for neat stripes.
2. Motif Rows (Lace Stripe Section, White)
- With new color (white), ch 1, turn.
- Sc in 2nd st from hook and across.
- Motif row: Ch 1, skip next st, sc in the next; rep to end.
- At end, add ch 1, turn, and sc in 2nd st from hook.
- On motif rows, always start in the second st for neat edges.
TIP
After every color change, tighten carry threads gently so stripes look crisp.
3. Main Lace Stripe Pattern (Work Full Rectangle)
- Repeat:
- 2 rows in white (motif as above)
- 2 rows in red (plain sc rows and textured row with dc)
- For the textured row:
- After sc in second st, dc into chain space from previous motif row, sc into next sc; repeat.
- Alternate motif and plain sc rows, changing color every two rows.
- Continue until rectangle measures desired length (consult size chart for S-3XL).
TIP
Work in sets of four rows: two motif (white), two sc & dc/texture (red). Count stitches every row — foundation count should match side-to-side for seam alignment.
4. Rectangle Construction
- For Front/Back: Ch 83 (for sample); work 62 rows, alternating stripe motif.
- For Sleeves: Ch 77 (for sample); work 18 rows.
Non-pattern readers: Make two big rectangles and two smaller rectangles, always changing colors every two rows.
5. Assembly & Seaming
- Arrange rectangles as follows:
- Place front and back rectangles side-by-side.
- Place sleeve rectangles above where shoulders will be.
- Sew side seams: Use a tapestry needle and yarn matching the stripe color at each seam for nearly invisible joins.
- Sew sleeves: Center sleeves evenly at shoulder seam, leaving room for neck opening (boatneck style).
- Use mattress stitch, whipstitch, or your favorite crochet seam.
- Tighten ends after sewing, then weave in all stray color threads.
TIP
Align stripe colors at seams for a professional finish. Hide tails inside seams for fewer ends to weave.
6. Edge Finishing — Slip Stitch Edging
- (Optional but recommended) With darker pink, join yarn at neck, sleeve, and hem edges.
- Work sl st (slip stitch) evenly around neck, sleeves, and bottom hem for a polished border.
- Adjust tension: Keep slip stitch loose enough to avoid puckering but snug for structure.
TIP
For beginners: Work slowly on slip stitch rows for a straight, neat finish.
Conclusion
Your striped crochet top is finished! Through this pattern, you learned the steps to build colorwork rectangles, swap colors smoothly, make lace and textured motif stripes, and assemble a wearable garment. With basic rectangles, the construction is simple; adjust for longer or shorter sleeves and body as you wish.
The slip stitch edging adds a professional touch and prevents the edges from stretching or curling.
This pattern builds fundamental crochet garment skills; experiment with width, length, color shifts, or motif placement for infinite customization. If you’re unsure about stitch counts or color changes, follow the plain-language summaries after each step and measure as you go. The result is a modern, comfortable, and stylish top—perfect for spring and summer wear.
Pattern Process at a Glance
- Motif Sample: Practice motif rows and color changes; measure for desired width.
- Build Rectangles: Crochet two front/back rectangles, two sleeve rectangles with alternating 2-row stripes.
- Assembly: Sew side seams and sleeves; mattress stitch, whipstitch, or slip stitch for neat finish.
- Edging: sl st borders around neck, sleeves, and hem for polish.
- Finish: Weave in ends, block if desired—wear your contemporary striped crochet top!