Create a stylish crochet mesh top for girls with this easy pattern that's for trendy, lightweight, and breathable outfits effortlessly.
If you’re looking for a fast and easy crochet project, this pattern is just what you need! The Free Crochet Mesh Top Pattern naturally comes together in no time, making it perfect for anyone who wants a quick, satisfying finish. The design uses only simple stitches like chains and double crochets, so there’s no need to worry about learning anything complex. Even beginners can jump right in.
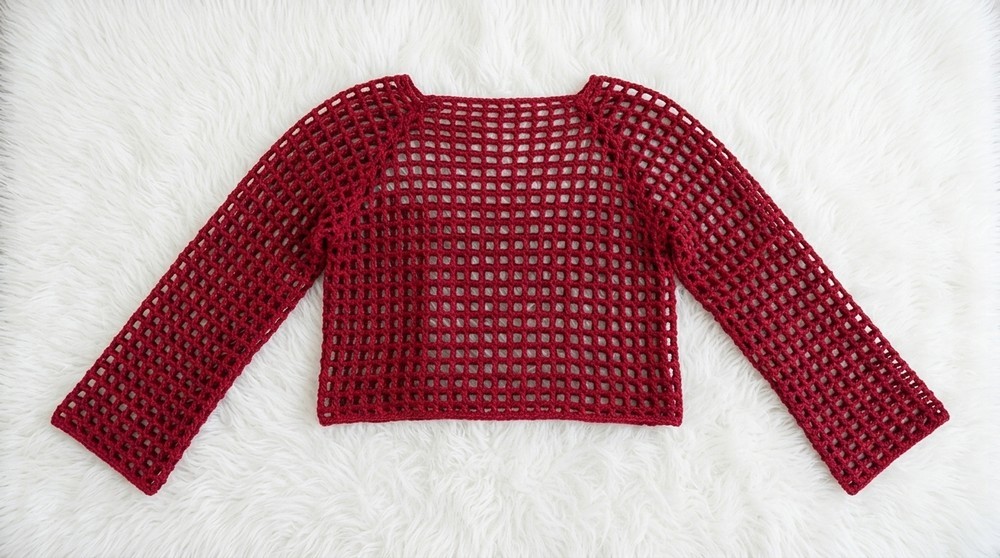
Beautiful Crochet Mesh Top Free Pattern
One of the best things about this mesh top is how quickly you see progress. The open mesh design means you’ll finish rows in no time, and before you know it, the shape of the top appears right in your hands. You start with a simple foundation chain and crochet in rounds, which makes the process smooth and straightforward.
The shape is loose and comfy, with short sleeves and a relaxed fit that doesn’t require a lot of shaping or counting. Because the pattern is so forgiving, you can easily adjust it for your size or style preferences without any fuss. Using cotton yarn keeps things soft and cool, just right for warm weather.
This top is great for layering over a tank, a summer dress, or even your swimwear. It’s stylish enough for a day out and casual enough for lounging at home. If you need a quick win or a last-minute gift, this crochet mesh top pattern will have you finishing up in just a few evenings. It’s the kind of project that proves beautiful crochet doesn’t have to take forever.
Pattern Process & Summary for Quick Guidance
- Start:
- Make a chain divisible by 16; join into a circle.
- Work one round of sc.
- Divide:
- Use markers to separate chain into 4 (front, back, sleeves).
- Mesh Pattern:
- Ch 3, skip 3, tr in 4th st for mesh cells.
- Make increases at each marker (two mesh cells in same st).
- Repeat for several rounds, matching arm and body width.
- Body:
- Remove sleeve markers, join sleeves, work mesh cells in the round for body.
- Finish with single crochet round if desired.
- Sleeves:
- Attach yarn at sleeve, work mesh cells to match the length, finish with sc if wanted.
Stitches Used:
- Ch, sc, tr (triple crochet), sl st, mesh increases.
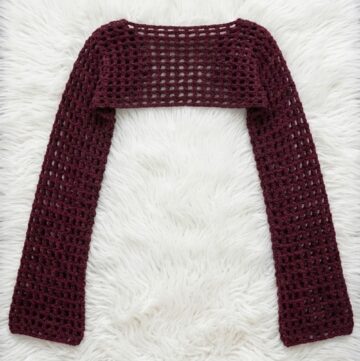
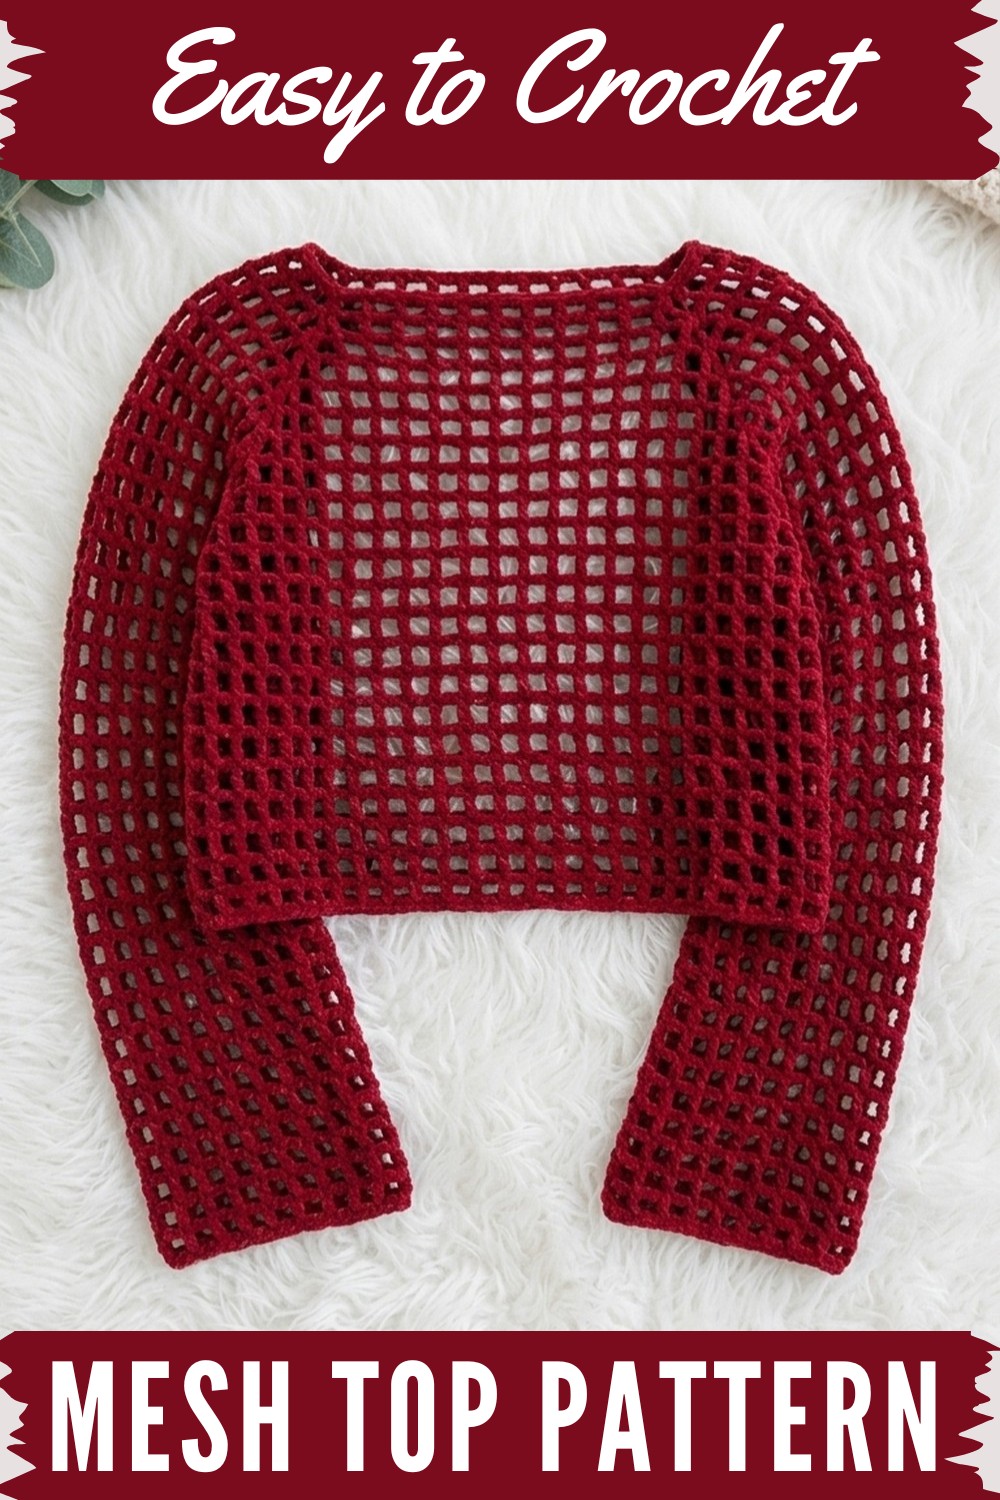
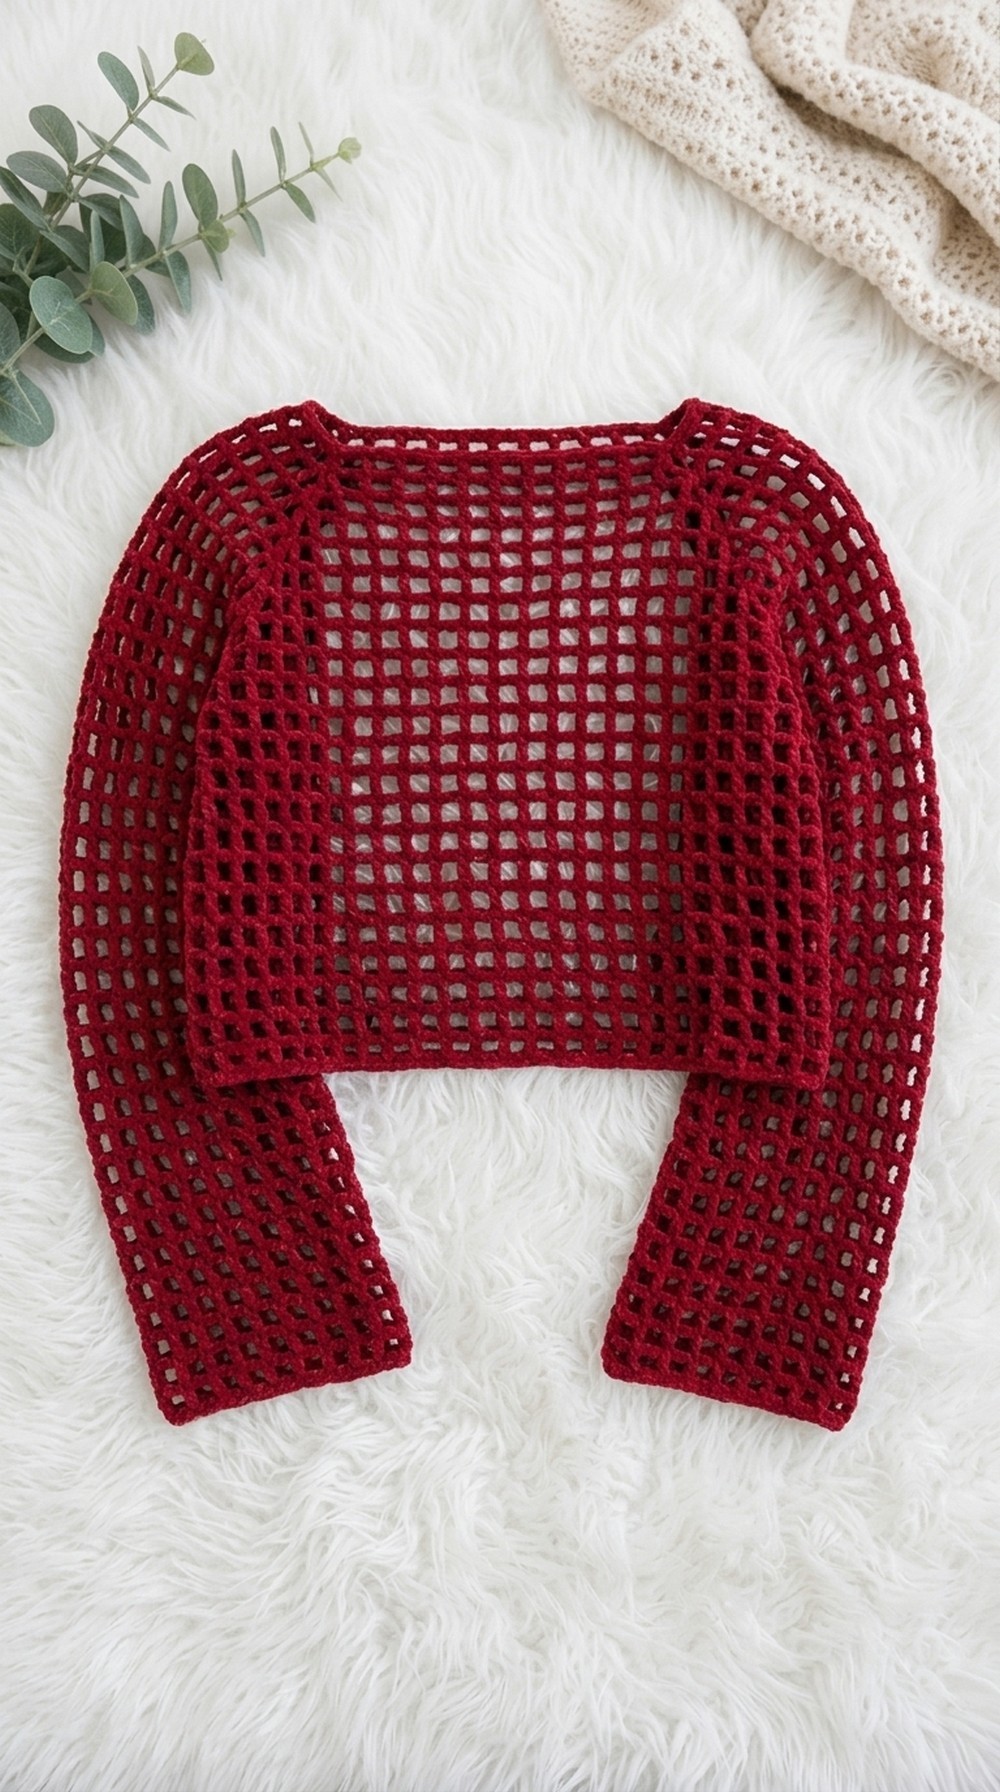
Mesh Raglan Crochet Top – Step-By-Step Pattern
Create a modern mesh raglan top with this detailed, beginner-friendly crochet pattern! If you love wearable crochet and easy construction, this airy pullover is a perfect project. The pattern forms sleeves, front, and back in a single piece, using mesh “cells” and raglan increases. All sections are divided for clarity, and practical tips are provided throughout.
If you struggle with pattern reading, don’t worry—after each part, you’ll find simple instructions and reminders to help you along.
Skill Level & Terminology
Skill Level: Confident Beginner
Terminology: US Crochet Terms
All instructions use standard US terminology, focusing on triples, chains, and increases. If you know how to join rounds, make chains, single crochets, and simple mesh, you can master this top!
Materials & Tools
- 100% Cotton Yarn (2 mm weight recommended)
- Crochet Hook: 3 mm
- Four Stitch Markers
- Tape Measure (optional)
- Scissors
Gauge
Mesh cells are approximately 4 stitches x 4 rows = 1 mesh cell
Check that your foundation chain fits easily over your head—chain should NOT be tight.
Abbreviations List
| Abbreviation | Meaning |
|---|---|
| ch | chain |
| sc | single crochet |
| sl st | slip stitch |
| tr | triple (treble) crochet |
| st(s) | stitch(es) |
| rep | repeat |
Special Stitch Instructions
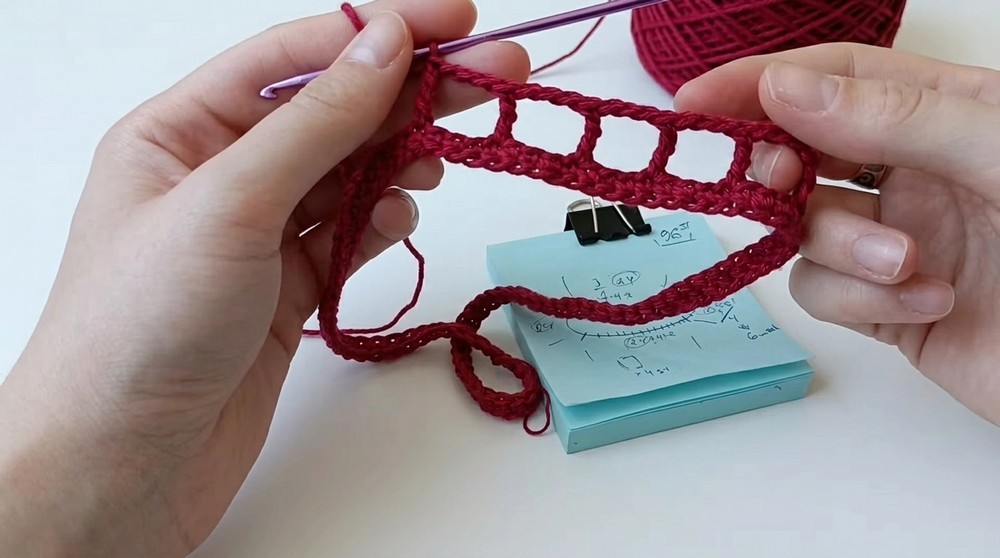
- Triple Crochet (tr): Yarn over twice, insert hook, yarn over, pull up loop, yarn over, pull through two loops (three times).
- Mesh Cell: Ch 3, skip 3 sts, tr in 4th st. Forms one mesh cell.
- Increase: Ch 3, tr in same st, ch 3, tr in same st again (work two mesh cells in one stitch).
- Invisible Join: Used in last rounds to give a seamless finish—see Finishing section.
Finished Size
Sample:
- Foundation chain: 96 ch = approx. 24 sts per section (front, back, two sleeves).
- Customizable for all sizes; adjust chain in multiples of 16 for raglan increases.
How to Start & Pattern Overview
This raglan top begins with a foundation chain joined in a circle. It’s divided into sleeves, front, and back sections, each separated by increases. As you work mesh cells and increases, the garment takes shape in the round.
Main stitches used: chain, tr, single crochet, slip stitch, mesh increases.
At the start, plan to organize your sections and count carefully—this makes shaping the raglan sleeves easy! Midway, you’ll mark corners for sleeves and at the end, finish the body and sleeves individually.
The Pattern Itself
1. Foundation & Single Crochet Round
- Make a slip knot and ch 96 (or any amount divisible by 16).
- Join into a circle: Check chain isn’t twisted, insert hook in first ch, yarn over, pull through to join.
- Optional: Adjust for bust size by adding 4, 8, etc. stitches to front section (all sections remain divisible by 4).
If you're not comfortable reading patterns:
Make a chain that fits loosely over your head, and double-check it's not twisted before joining the ends.
- Single crochet round:
- Ch 1, sc in each chain around for added strength (work in back bump for neater edge if you wish).
- Place a marker on the second sc for easier round counting.
- Count to ensure you have the same stitch number as the chain.
Tip: After making your foundation chain, work a full circle of single crochets to reinforce the base. Place markers where needed for clarity.
2. Mesh Raglan Yoke – Setup Round
- Divide sc round into 4 sections (sleeves, front, back) using stitch markers.
- For sample: 24 sts per section.
If you don’t understand pattern language: Divide your stitches evenly into four and place markers to show each corner.
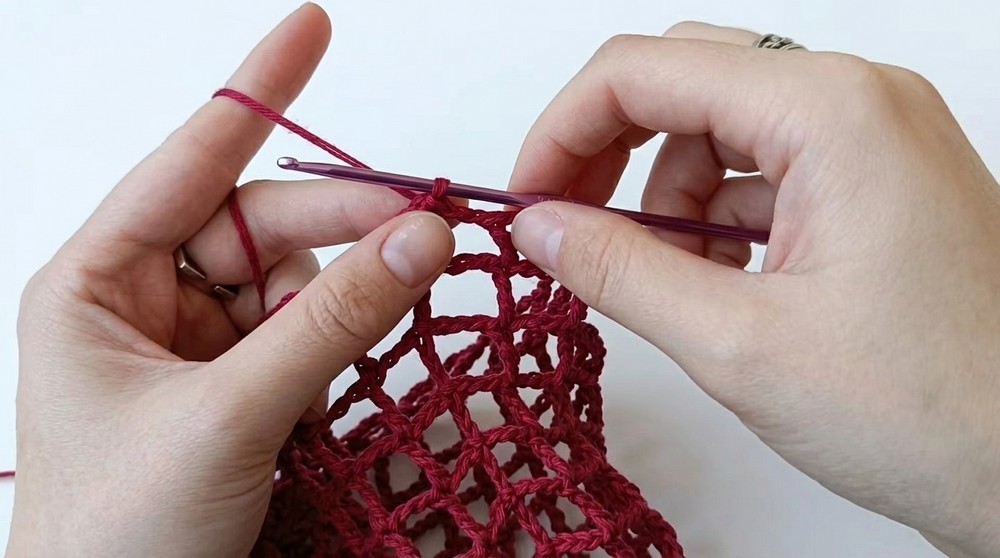
3. Mesh Pattern & Increase Rounds
Round 1: Mesh
- Mesh cell:
- Yarn over twice, skip 3 sts, tr in 4th st.
- Ch 3.
- Repeat this process until 6 mesh cells formed (24 sts per section ÷ 4 = 6 mesh cells).
- At end of section, make an increase:
- Ch 3, tr into same st, ch 3, tr into same st again.
- Repeat mesh cells and increases for all four sections.
For beginners:
Work tr and ch 3 combos in groups of six, then make an increase at each corner. Use markers to remember each increase placement.
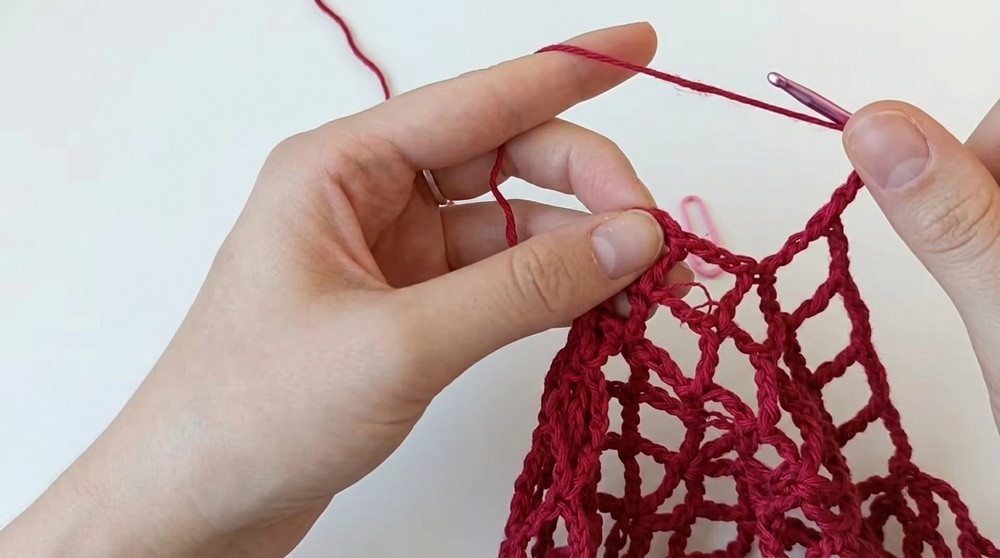
Following Rounds: Mesh with Increases
- At beginning of each round, ch 6 (acts as tr and ch 3).
- Mesh cells:
- Tr in column (top of tr from previous round), ch 3, repeat until you reach corner/increase marker.
- At corner/increase:
- Ch 3, tr in same space, ch 3, tr in same space.
- Continue making mesh cells and increases until sleeve sections are wide enough to comfortably fit your arm (try on as you go).
Continue working mesh rows and increases at corners. Each round, the yoke will expand, forming sleeves and body. Place new markers at corners each round for easy tracking.
Joining & Shaping the Body
- Once sleeve and body sections are wide enough, place markers at sleeve/body corners.
- Remove sleeve markers and join sleeve stitches together with a tr so sleeves stay open and round isn't twisted.
- Continue mesh cells to next marker, join sleeve the same way.
- Complete body round.
If the process is confusing, just keep crocheting mesh and increases until you can clearly identify sleeves and body. Join sleeves with tr to keep body seamless.
4. Body – Mesh Pattern
- Continue mesh pattern in the round (no increases now) working tr in top of columns and ch 3 between mesh cells.
- Work until desired body length achieved.
After joining sleeves, crochet mesh pattern evenly around body until it’s as long as you want for your top.
5. Optional Body Finishing Round
- For a polished edge, make one round of single crochet as follows:
- Ch 1, sc in each stitch (or mesh space) around.
- Fasten off using invisible join technique (see Special Instructions).
Not sure about patterns? Simply crochet single crochets all around the last round for a neat finish.
6. Sleeves
- Attach yarn at sleeve corner using slip knot.
- Ch 6, then work mesh cells (ch 3, tr) in a continuous round.
- Work until desired sleeve length reached.
- Optionally, finish with one round of single crochet. Fasten off and weave in ends.
To make sleeves, join yarn at the corner and repeat mesh or single crochet rounds until you’re happy with the length. Make sure both sleeves have equal rows.
Assembly & Finishing
- Weave in ends for body and sleeves using yarn needle.
- Secure invisible joins for a smooth look.
- Gently block your top for a professional finish.
- Try on! Sleeves and body should drape easily thanks to the mesh construction.
After all crocheting is done, sew in yarn ends firmly and block if desired. This ensures your top fits beautifully and looks clean.
Conclusion
Congratulations! You’ve created a mesh raglan top with seamless sleeves and body in one piece. This method produces a lightweight, airy garment that’s perfect for layering or warm weather. You learned mesh cell construction, raglan increases, and joining techniques. Adjust size and length easily using your foundation chain and rounds—making this pattern versatile for all bodies.