Crochet a soft and stylish butterfly top that is simple to follow, perfect for sunny days, and a beautiful choice for any casual or special occasion.
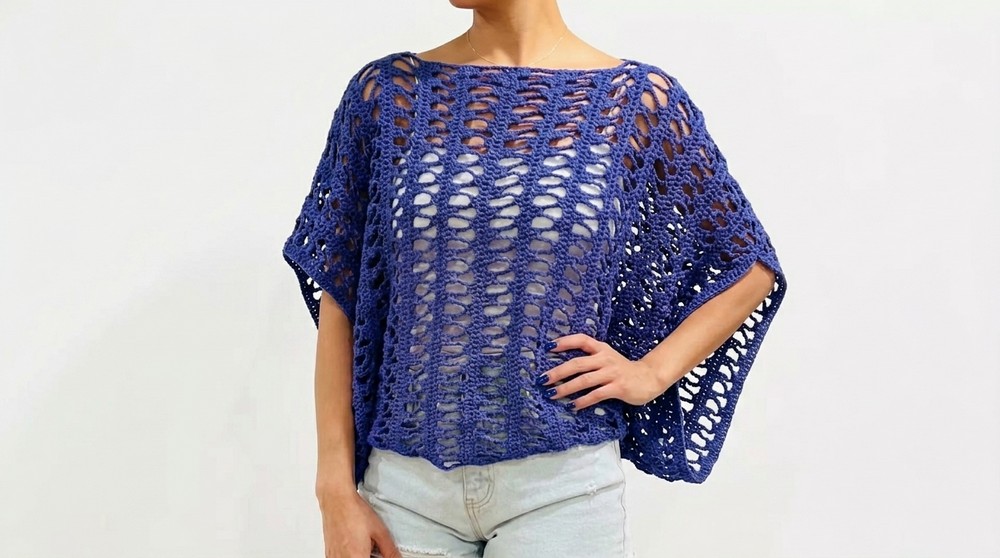
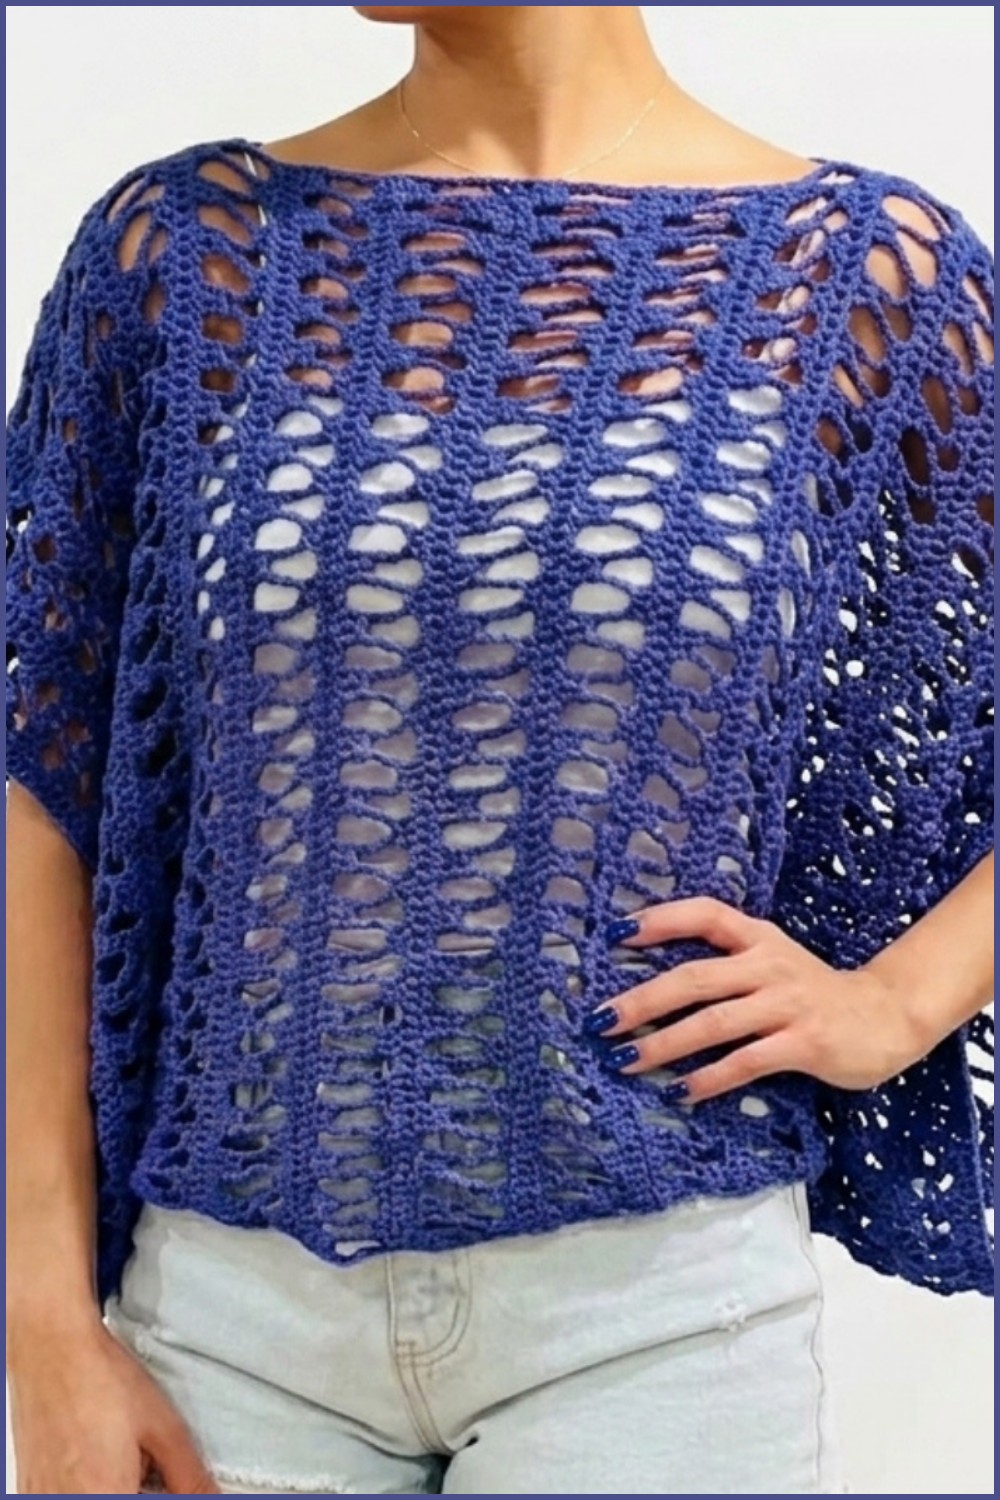
A beautiful top shaped like a butterfly can be a stylish and eye-catching piece of clothing for anyone who loves unique outfits. It has a light and airy design that feels comfortable to wear, especially on warm days. The soft yarn gives it a smooth texture, and the detailed stitching makes it look delicate and artistic. The shape of the wings adds a flowy and graceful appearance, making it stand out from ordinary tops.
Free Crochet Butterfly Top Pattern for Summer Outfits
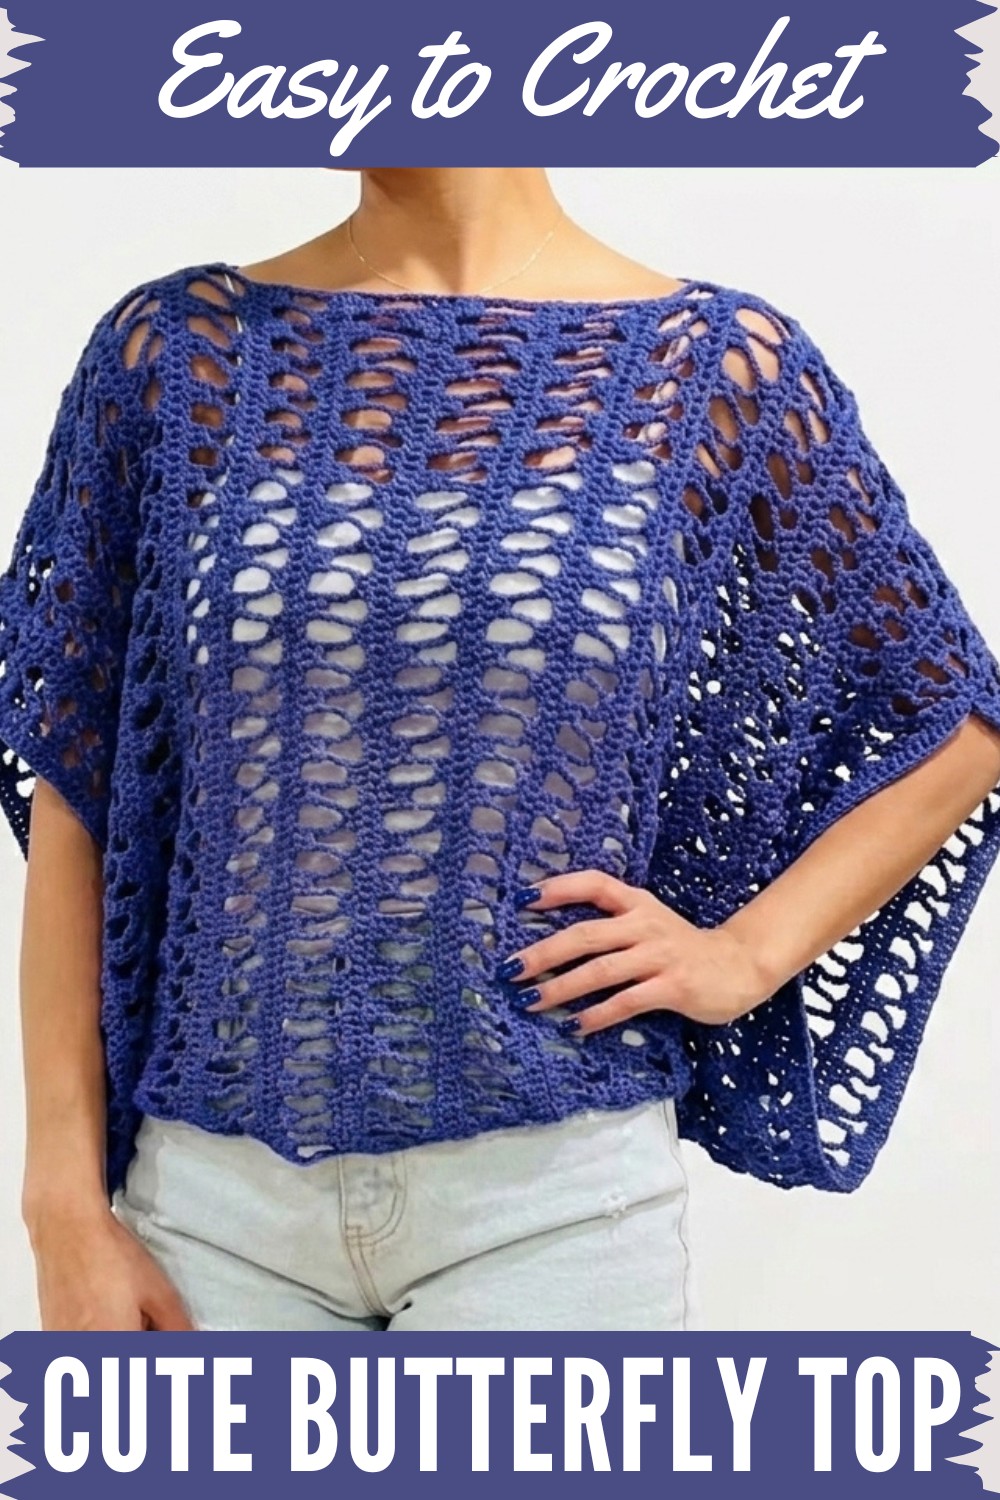
This type of top is perfect for casual outings, beach days, or even as a statement piece for festive gatherings. It can also be a thoughtful handmade gift for someone special. The pattern is simple to follow and can be made in your favorite colors, so it works for all ages and styles. With its easy-to-wear design, it pairs well with jeans, skirts, or shorts, making it a versatile addition to any wardrobe.
Crochet Baggy or Loose Blouse Pattern
Materials Required
- Thread: 100% mercerized cotton. The recommended hook size for this thread is 4 mm, but this pattern uses a 3 mm crochet hook.
- 3 mm Crochet Hook
- Wool Needle: For weaving in seams.
- Scissors
- Measuring Tape
- Stitch Markers: To mark necklines, shoulder openings, hip width, and additional sections during assembly.
Gauge
- 16 stitches (in double crochet) = 4 inches (10 cm)
- 1 row of the stitch pattern = approximately 2.5 inches high (6.35 cm)
Gauge is necessary for ensuring size consistency. Always measure your fabric and adjust hook size if needed.
Finished Size (Small)
- Blouse Length: 52 cm (adjustable from shoulder to hip by measuring yourself for a customized fit)
- Blouse Width: 80 cm (knit vertically)
- Hip Opening: 46 cm
- Neck Opening: 28 cm
For larger or smaller sizes, adjust the measurements as follows:
- Blouse Length: Measure from the shoulder to hip.
- Blouse Width: Measure the width of your hip and follow gauge recommendations to match.
- Consult the sizing chart below for variations:
- Small: Width = 80 cm, Length = 52 cm
- Medium: Width = 90 cm, Length = 57 cm
- Large: Width = 100 cm, Length = 65 cm
- Extra Large: Width = 110 cm, Length = 70 cm
Step-by-Step Instructions
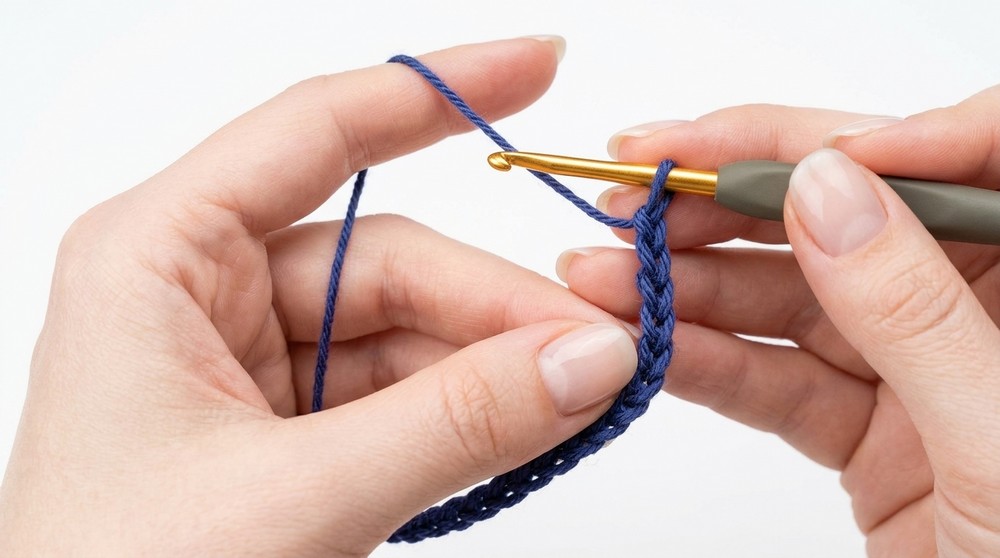
Step 1: Start With the Chains
- Make a slip knot to begin.
- Crochet a base chain in multiples of 10 + 2.
- Small size: Chain 92 stitches (resulting in approximately 52 cm height).
- Leave enough slack to ensure the chain does not curl.
Step 2: Row 1 (Double Crochet Base)
- Skip the first 3 chains (counted as your first double crochet).
- Double crochet into the 4th chain from the hook.
- Continue placing 1 double crochet into each subsequent chain stitch until the end of the row.At the end of Row 1:
- Total height = 52 cm
- Stitch count = 90 double crochets
Step 3: Row 2 (Openwork Setup - Groups of 3 DC Separated by Chains)
- Chain 3 (counts as the first double crochet) and turn your work.
- Make a double crochet into the first stitch.
- Make another double crochet into the adjacent stitch, forming a group of 3 double crochets at the start.
- Chain 10, skip the next stitch, and crochet 3 double crochets into consecutive stitches.
- Repeat the sequence of "3 double crochets + chain 10" across the row, leaving 1 stitch unworked between groups of 3 double crochets.
- End the row with 4 double crochets (to mirror the start of this row).
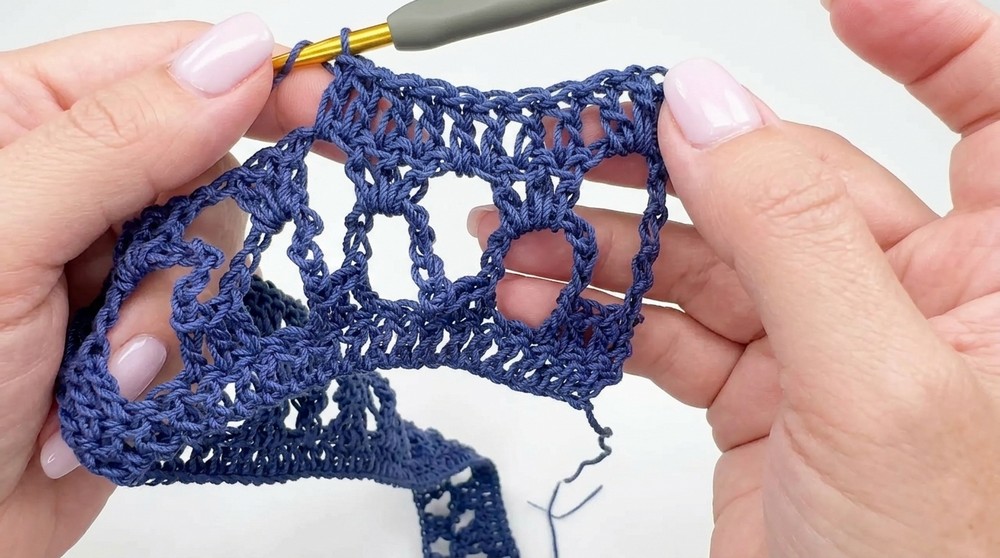
Step 4: Row 3 (Groups of 3 DC in Arches)
- Chain 8 (this will create the bridge for arches) and turn the work.
- Crochet 3 double crochets into the arch of 10 chains from the previous row.
- Separate the groups of double crochets with 1 chain.
- Repeat the sequence of "3 double crochets + 1 chain" into the arches until the end of the row.
- At the end, crochet a long stitch to close by wrapping the yarn 4 times around the hook and working through the closing chain.
Step 5: Repeat Rows
Repeat the sequence of:
- Row 1 (Double Crochet Base),
- Row 2 (Groups of 3 DC with Chains), and
- Row 3 (Groups of 3 DC in Arches).
Work until the fabric reaches a width of 80 cm. You will need approximately 17 rows of this repeating pattern for the small size.
Step 6: Preparing the Pieces
- Iron both pieces with a cloth covering them to stretch and open the stitches. This step is important to ensure the stitch falls and fabric dimensions are accurate.
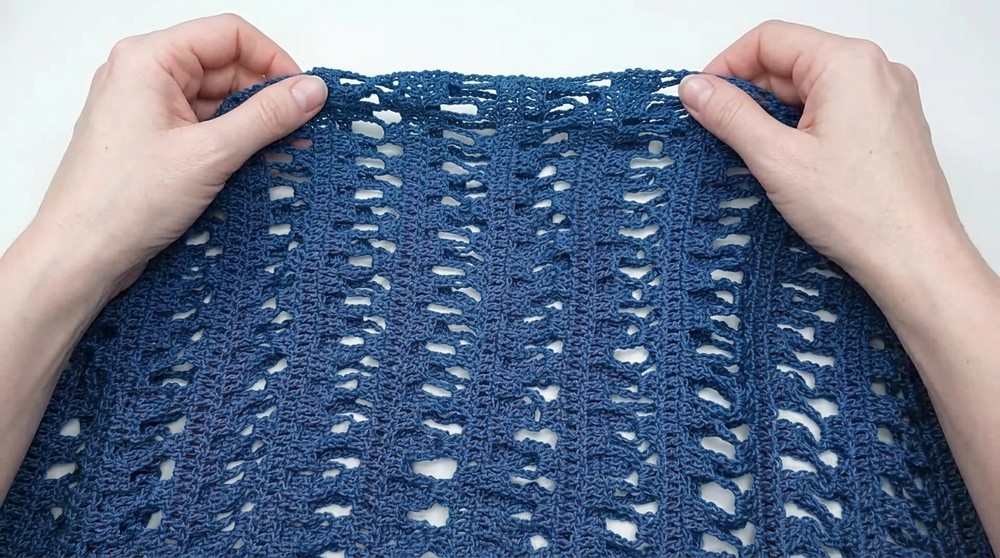
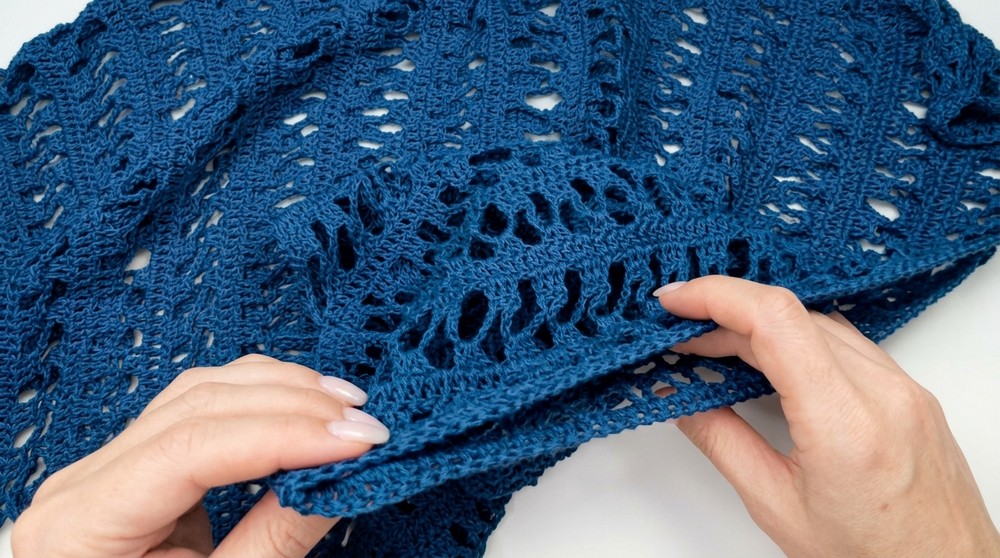
Step 7: Assembly
- Position the rectangles: Place one on top of the other with the wrong sides facing outward.
- Shoulder Closing:
- Pin the shoulders leaving a 28 cm opening for the neckline.
- Using a wool needle or your crochet hook, slip stitch the shoulder seams stitch by stitch. Ensure the double crochets align perfectly to maintain a clean finish.
- Side Seams:
- Pin the sides, leaving a 46 cm opening for the hips.
- Slip stitch the seams similarly to the shoulders, ensuring careful alignment.
- Neckline and Sleeves:
- Leave the sleeve openings completely wide for a breezy look.
- Do not turn the neckline. Let the edges fall naturally for a modern, relaxed finish.
Customization Ideas
- Fabric Variations: Use different fibers for seasonal wear, such as bamboo yarn for summer or wool for winter.
- Edge Detailing: Add single crochet or picot borders around the neckline and sleeve openings for a refined appearance.
- Length Adjustments: Increase the row count for a longer blouse or adjust the width for a loose or fitted style.
Tips
- Gauge is Key: Measure your swatches to ensure you meet the stated gauge before beginning.
- Patience With Alignment: Slip stitching shoulders and sides requires matching stitches meticulously.
- Blocking: Always block your fabric for a professional finish.
- Keep Count: Use stitch markers to separate sections and avoid losing count.
Conclusion
This crocheted baggy blouse is a timeless addition to your wardrobe, showcasing a delicate stitch pattern, maximum comfort, and breathable design. Whether paired casually or styled elegantly, this blouse is sure to become a versatile favorite.
Final Look
The finished blouse has:
- Open sleeves for an airy vibe.
- Perfectly matching stitch patterns at the seams.
- A light and modern feel, thanks to the mercerized cotton and openwork pattern.