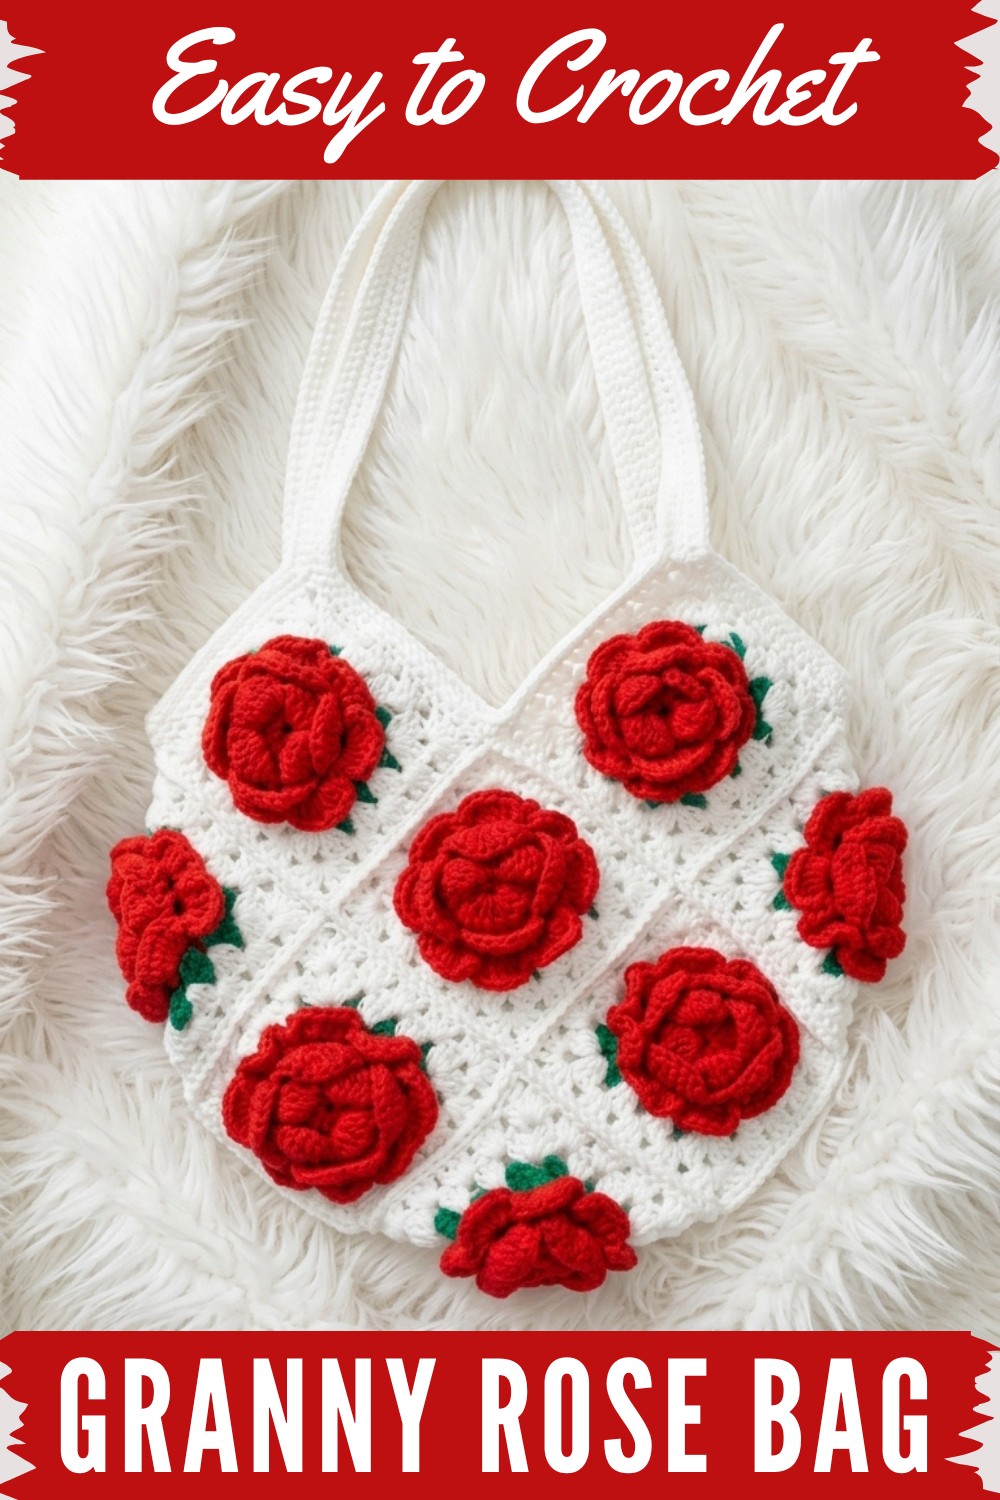
Shape 13 vibrant granny squares into a beautiful and functional rose-patterned bag, guided by detailed step-by-step instructions for a timeless accessory.
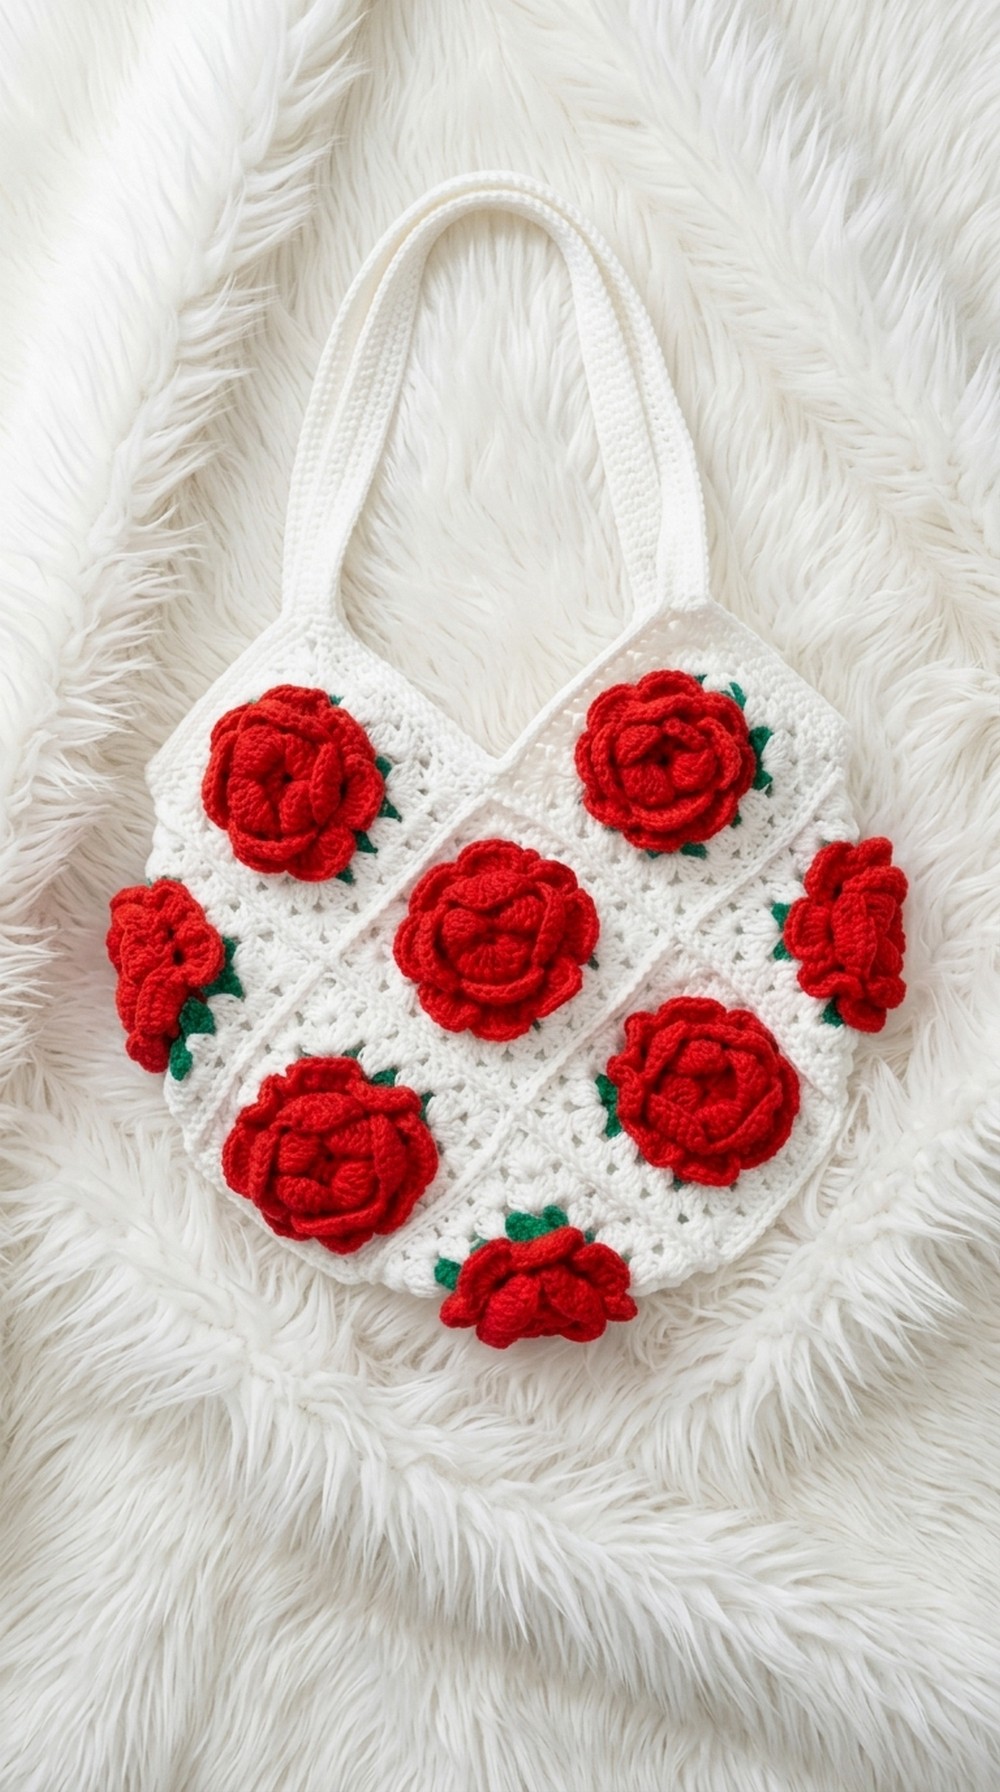
Not every crochet bag makes you smile every time you see it, but the Free Crochet Granny Rose Bag Pattern definitely does. This cute bag is simply beautiful and is bursting with charm. The eye-catching rose motifs make it look like you’re carrying a little garden with you wherever you go. Each rose is made right into a granny square, and you get to choose your favorite color combinations—soft and sweet pastels or bold, vibrant shades. It’s such a joyful project to make because those little roses seem to bloom right in your hands!
Free Step-by-Step Crochet Granny Rose Bag Pattern for All Levels
The texture is another lovely feature. The raised petals of the granny roses give the bag a playful, 3D feel that’s so much fun to touch. The rest of the bag is built with strong, sturdy crochet stitches, so it holds its shape well and can carry all your essentials without any trouble. Whether you’re using it as a daily purse, a market bag, or a pretty tote for your craft projects, it’s guaranteed to draw compliments.
Shape-wise, the Granny Rose Bag is usually roomy enough for everyday needs, but not so big that it gets heavy or bulky. Many patterns even let you adjust the size, and the sturdy straps make it comfortable to wear over your shoulder or carry in your hand.
he Crochet Granny Rose Bag looks cheerful, creative, and totally unique. It’s a perfect way to show off your crochet skills and personality at the same time. This bag isn’t just useful—it’s a little piece of art you can carry around, and best of all, the pattern is free! It’s definitely a project that will make you proud every time you use it.
Crochet Granny Rose Bag Free Pattern
Pre-Project Reminders
- Brush up on granny square and rose motif basics.
- Gather all colors and tools before beginning.
- Ahead of time, prep by making all the rose motifs for a consistent look.
- Read through the instructions completely before starting.
Important Project Insights
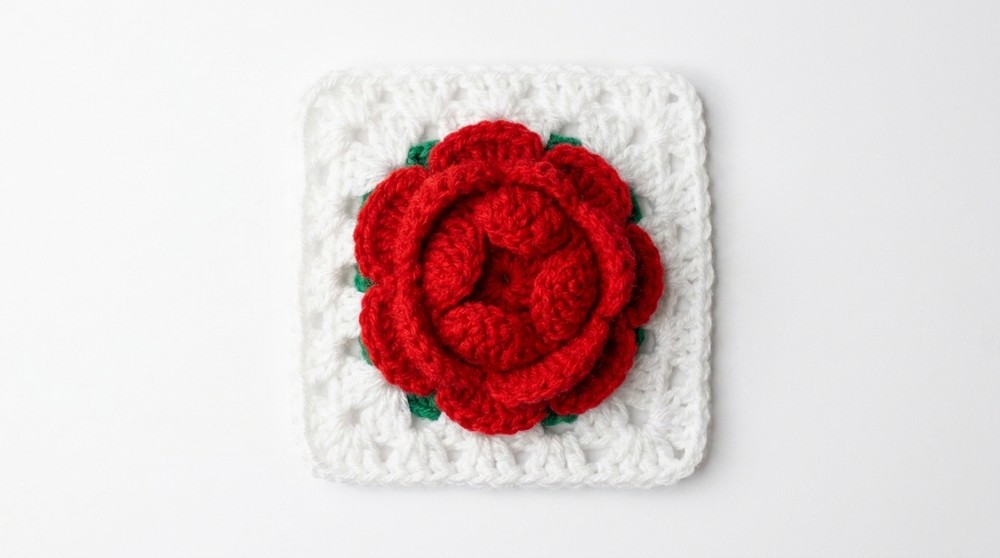
- Each granny square starts with a raised rose motif. The granny square is built around this central flower.
- Transparent join and continuous color changes are key in this project.
- Precise stitch placement (including corners) is critical for neatness.
- Handles are made with chains and then reinforced with rounds of single crochet.
Pattern Creation Summary
- Crocheted dimensional roses in advance.
- Circular floral motif becomes the foundation for each granny square.
- Added granny rows square-by-square using traditional granny square construction.
- Joined squares into the body of a bag according to a diagram.
- Finished with simple, sturdy handles and border rows.
Crochet Difficulty
Intermediate:
You should be confident with basic stitches (double crochet, single crochet, chain), joining motifs, and changing colors.
Finished Bag Dimensions
- Each square: approx. 4.5" (11.5 cm)
- Bag: approx. 12" x 12" (30 x 30 cm), not including handles—adjust with square count
- Handles: 100 chains (customizable length), plus 2 rounds of single crochet for comfort
Materials Needed
- Medium-weight (worsted) acrylic yarn or cotton (Rose, background, leaf/green, accent/handle)
- Crochet hook: 4.0 mm (US G-6) or size to obtain gauge
- Stitch markers
- Yarn needle (for joining and weaving in ends)
- Scissors
Measurements
- Each completed granny square is about 4.5" across.
- Bag size when assembled is roughly 12" across and tall.
- Adjust the number of squares or their size to alter finished dimensions.
Gauge
- Post-blocking: 1 granny square should measure approx. 4.5" x 4.5".
- Granny squares should be flat and slightly firm.
Stitch Abbreviations
| Abbreviation | Meaning |
|---|---|
| ch | Chain |
| sc | Single crochet |
| dc | Double crochet |
| sl st | Slip stitch |
| sp | Space |
| st(s) | Stitch(es) |
| tog | Together (decrease) |
Special Techniques Used
- 3dc Cluster Corner: (3 dc, ch 2, 3 dc) in same sp
- Raised Rose Center: Refer to your preferred dimensional rose motif pattern.
- Invisible Join for Seamless Squares
- Reinforced Handle: Multiple rounds of sc worked into long chains
Step-by-Step Pattern
Part 1: Make Raised Rose Motifs
Make 13 motifs for the full bag.
Part 2: Granny Square Foundation
Starting the Granny Square around the Rose Back:
- Join Yarn: With green/background color, attach yarn in any chain space at the rose’s back.
- Ch 2, make 3 dc into same space.
- Ch 2, 3 dc in same space (first corner formed).
- In next ch space, 3 dc in same space.
- In next space (corner): 3 dc, ch 2, 3 dc.
- Repeat steps around, alternating (3 dc) in regular spaces and (3 dc, ch 2, 3 dc) in corners, until all 8 spaces are used.
- Slip stitch to top of first dc. Fasten off or proceed with next color.

Beginner summary:
Attach new yarn to a chain space on the back of your rose. In some spaces you’ll make 3 double crochets, in others (the corners) you’ll do 3 dc, chain 2, and another 3 dc in the same spot. Alternate until you’re around the square.
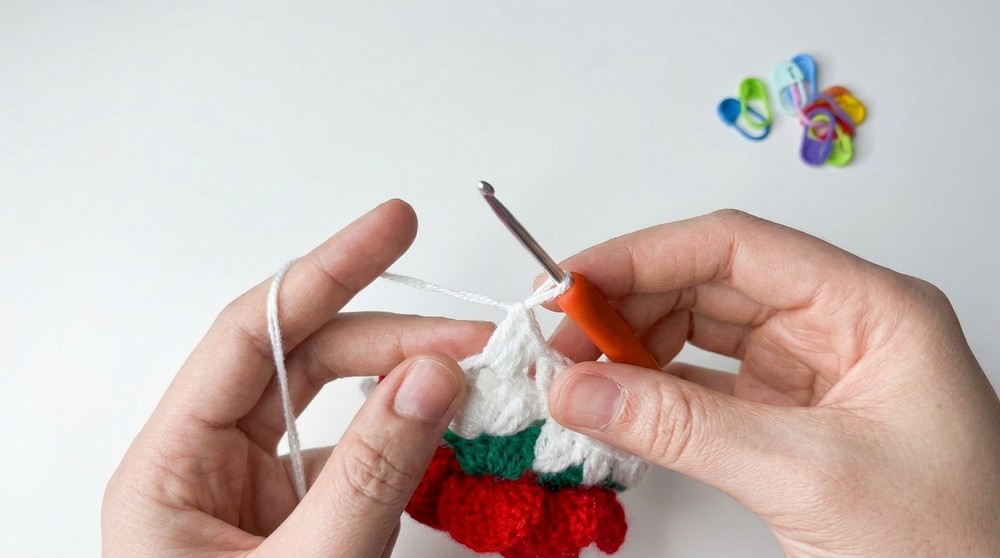
Part 3: Making the Border Rounds
Add two rounds—first in white and then repeat in main color, increasing at corners only.
- Join new (contrast or white) yarn in any corner ch-2 sp.
- Ch 2, in same sp, 3 dc, ch 2, 3 dc (for corners).
- In every side sp: 3 dc.
- At corners: Always (3 dc, ch 2, 3 dc).
- Continue for 2 rounds total, joining with slip stitch, and changing colors as desired.
- Make 13 squares in total.
Plain instruction:
Always put 3 dc, ch 2, 3 dc into corners, and just 3 dc into spaces along the sides. Continue this easy pattern for two more rounds. Make thirteen total squares!
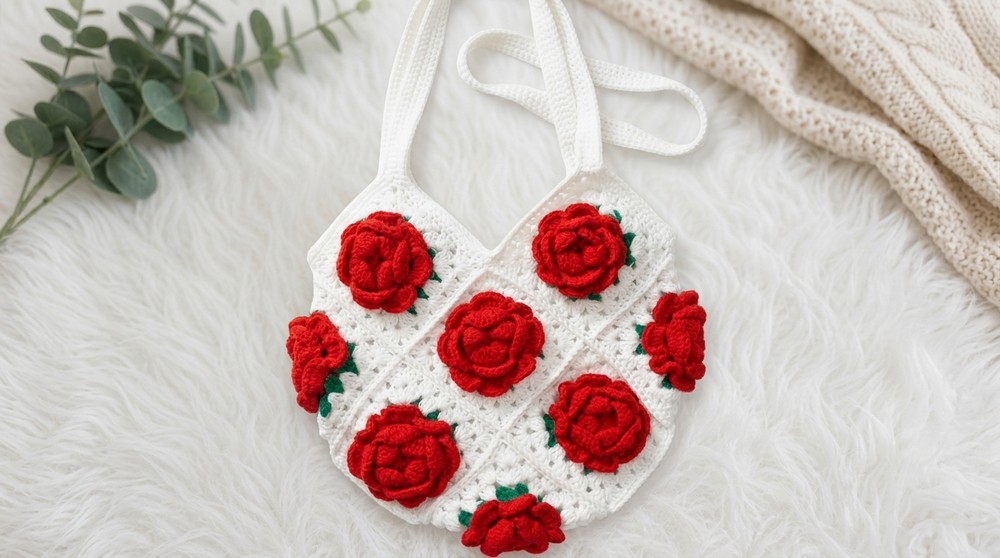
Part 4: Join the Granny Squares
- Arrange granny squares as follows: 1 (top), 3 (row 2), 4 (row 3), 3 (row 4), 2 (row 5); 13 squares total.
- With right sides up, use slip stitch or whip stitch to join squares:
- Match up stitches on adjoining squares and work a crochet join through both loops.
- Add the “extra” (13th) square in the central space as described.
Beginner summary:
Lay your squares out in this shape: the first row has 1, the next 3, then 4, then 3, then 2. Join all touching edges with slip stitch, holding the right sides facing up.
Part 5: Seam Sides and Shape
- When all squares are joined flat, fold your work to bring matching rows together into a folded bag shape.
- Seam matching “two” sections of squares to each other to form bag sides and base.
- Weave in all loose ends firmly.
- Turn bag right-side out.
Layman’s terms:
Fold the piece as shown in the assembly, lining up the groups of squares. Sew the sides together gently. Be careful not to twist.
Part 6: Handles and Border
- With main color, join at top corner of bag side.
- Round 1: Ch 1, sc evenly along the upper edge. At corner, chain your desired handle length (e.g., 100 ch), attach at opposite top corner with sc.
- Continue sc evenly across to start; join with sl st.
- Round 2 & 3: Sc around the top edge and handles (work into each stitch and chain). Join rounds as you go.
- Finish off, weave in all ends.
Plain-language:
With your chosen color, single crochet along the top of the bag. When you reach a corner, make 100 chains for a handle, attach to the opposite corner. Crochet single crochets around the handle on the next two rounds to make it sturdy. Do the same for the other side.
Final Assembly Instructions
- Weave in all loose yarn tails.
- Optionally block the finished bag for evenness and polish.
- Stretch and arrange handles while wet-blocking for perfect symmetry.
- Before using, double-check all seams for strength.
Troubleshooting & Solutions
Problem: Bag looks misshapen or squares don’t meet at corners.
Solution: Lay all squares flat before assembly; count stitches precisely on every round to keep edges even. Steam block for crisp shaping if needed.
Practical Projects Using These Stitches
- Floral granny square blankets, throws, or pillows
- Totes, pouches, or market bags
- Table runners or wall hangings
- Garment panels (vests, shrugs)
- Phone cases or Coasters
Note for Learners:
If you dislike reading patterns, just remember: join rose backs with traditional granny rows, assemble per diagram, then add sturdy single crochet handles. Take it one square at a time.