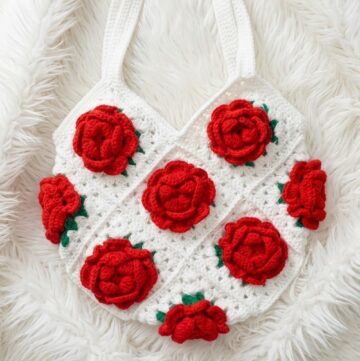
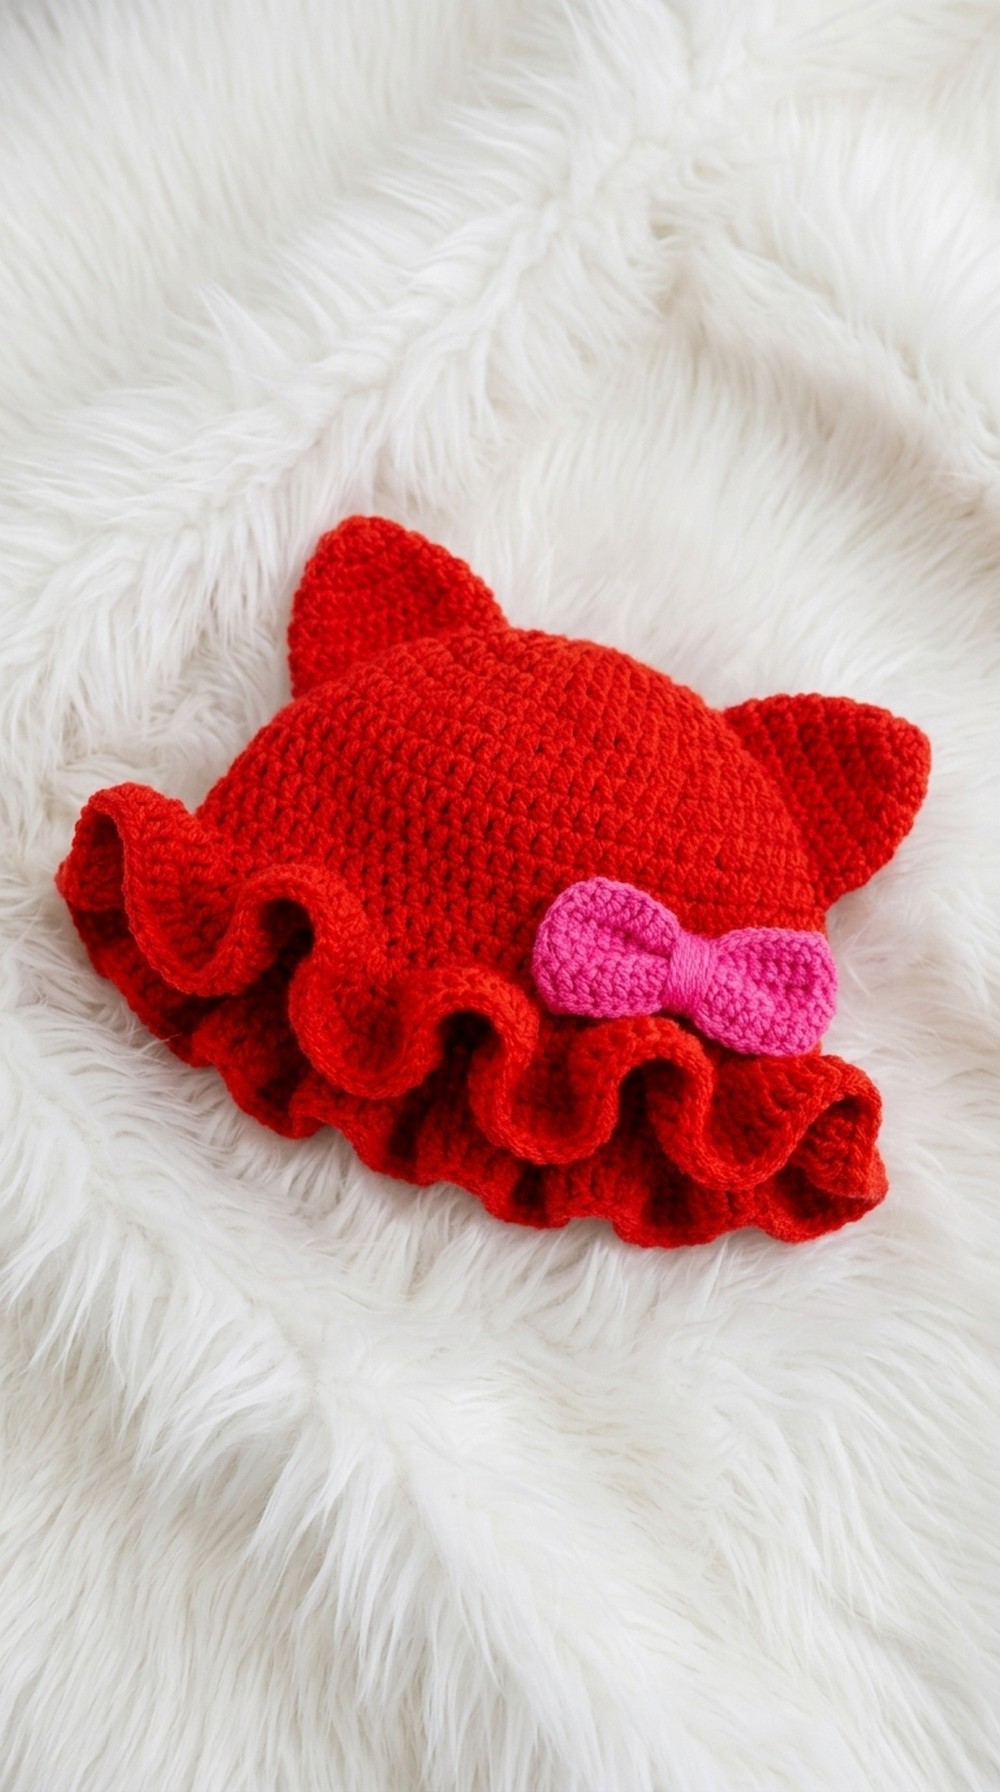
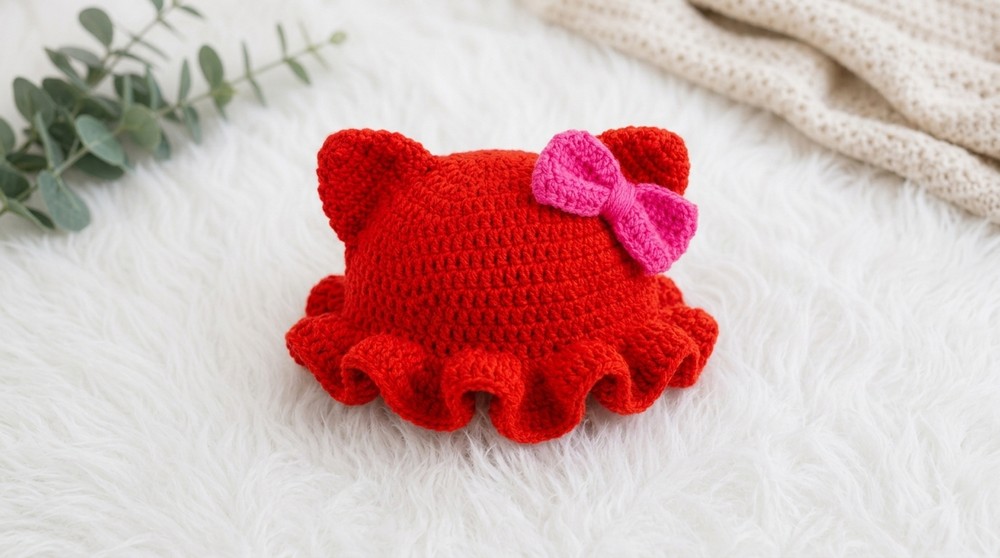
Create an adorable and cozy accessory with this free crochet cat ears beanie pattern and ruffle bow, perfect for all skill levels and a fun custom gift idea.
One of the best things about a Free Crochet Cat Ears Beanie Pattern is how easy it is to make it truly your own. You can choose any color yarn, like classic black, soft pastels, or even stripes, to match your personality. Many people love to add special extras such as sparkles, or a cute embroidered nose and whiskers for a little extra cat-inspired fun.
One customization I absolutely adore is adding a ruffle bow to the beanie. You can crochet a sweet, frilly bow in a contrasting color and attach it just under one ear for an extra playful touch. The ruffle bow brings a bit of whimsy and makes your creation even more unique. Kids especially love this detail, and it adds a charming splash of texture and color.
Fun Crochet Cat Ears Beanie With Ruffle Bow For Everyone
Of course, the most attractive feature of this pattern is the adorable cat ears that sit right on top of the hat. The ears are pointed and usually stand up nicely, making the beanie instantly fun and playful. It is hard not to smile when you see someone wearing it. Whether you crochet the ears in the same color as the hat or pick a different shade, they always become the highlight of the design.
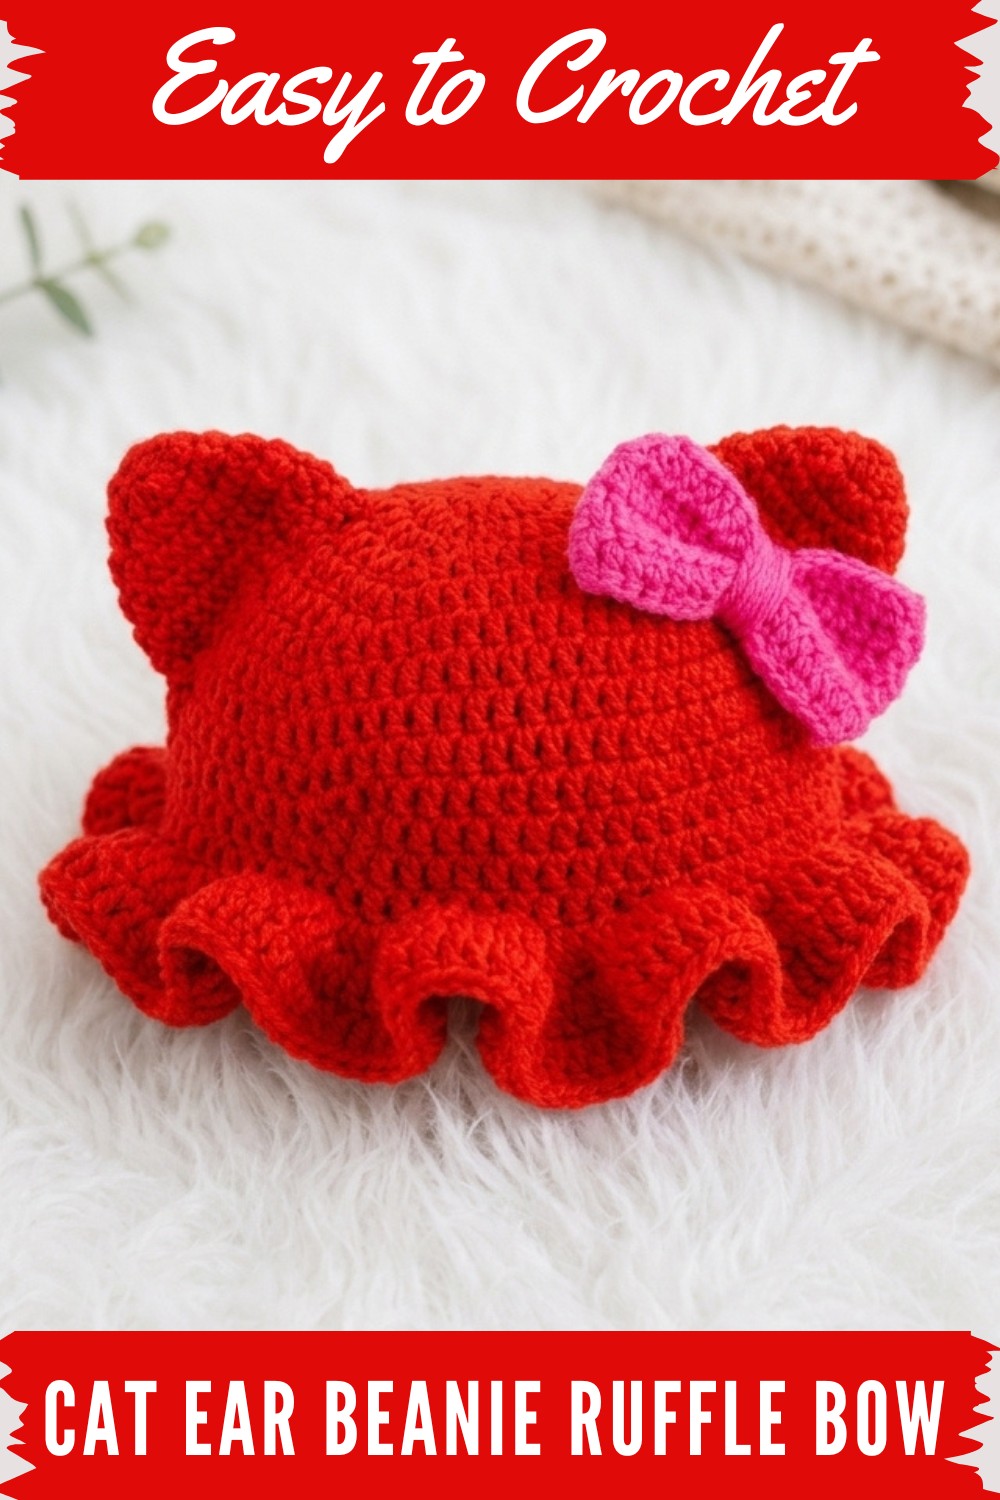
The texture of the beanie is soft, squishy, and stretchy, making it perfect for keeping your head cozy in cooler weather. Depending on your pattern, you might use simple crochet stitches for a smooth look, or even add some ribbing for an extra touch of style. The beanie fits snugly but remains comfortable, and those cute little ears keep their shape, even when you tuck it into your bag.
As for shape, this beanie has a classic rounded crown with two cat ears on top and, if you like, a sweet ruffle bow on the side. It looks wonderful on kids, teens, and adults, and works for everyone, from cat lovers to cosplay fans.
Crochet Cat Beanie with Ruffle and Bow | Step-by-Step Pattern
This approachable pattern guides you through creating a playful cat-inspired beanie, complete with lively ruffles and a chunky bow.
Preparation Checklist
- Pick out two yarn shades: one for the beanie, one for the bow.
- Use about 40g of each color.
- You’ll need both 4 mm and 5 mm crochet hooks.
- Get your tape measure and scissors ready.
- Set aside a length of elastic and glue gun/needle (to affix the bow).
- Know how to do chain stitch, double crochet (dc), treble crochet (tr), single crochet (sc), and slip stitch (sl st).
Project Insights
- The base of the beanie is started as a long chain and then shaped into a round.
- Ruffles are added with a bigger hook for extra volume.
- Three yarn strands are held together to make the bow sturdier.
- This design fits a 24" head, but is easily resized.
Pattern Design Process
- Measured for a comfy fit, then crocheted a foundation chain.
- The beanie is formed in rounds using double crochet stitches.
- The brim is gathered with elastic for a snug finish.
- Swapped to a larger hook and added lively ruffles at the edge.
- Created a statement bow with thick strands and attached it.
Skill Level
Beginner-Friendly (Just basic stitches and straightforward shaping.)
Finished Size
- Designed for average adult (fits about 22–24" head circumference).
- Easily adjustable for kids or adults by measuring and adding/removing chains.
Materials Needed
- 40g each of two worsted yarn colors
- 4 mm and 5 mm crochet hooks
- Elastic (optional, for a fitted brim)
- Tapestry needle, scissors, measuring tape
- Glue gun or needle for attaching bow
Measurements / Sizing
- Foundation chain should measure close to 12" (half the head size).
- Beanie’s height: approximately 9–10" for most adults.
Gauge & Stitch Pattern
- 9 dc = 2" (5 cm)
- 5 rows = 2" (5 cm)
- Make a small swatch and change hook up or down for best results.
Stitch Abbreviations
| Abbreviation | Meaning |
|---|---|
| ch | Chain |
| dc | Double Crochet |
| tr | Treble (Triple) Crochet |
| sc | Single Crochet |
| sl st | Slip Stitch |
| st(s) | Stitch(es) |
| rep | Repeat |
Special Stitches
- Treble Crochet (tr): Yarn over twice, insert hook into stitch, yarn over, pull through; yarn over, pull through two loops, repeat twice more until one loop remains.
- Ruffle Increase: Multiple trebles in the same stitch for a flared effect.
The Pattern!
1. Brim and Foundation
Pattern Instructions:
- With the 4 mm hook and your main color, ch 47 (or as many as needed to reach 12").
- Check your measurement; adjust chain count if needed.
- Row 1: Dc into the second ch from the hook and work dc all the way down (46 dc).
- At the end, place 3 dc in the last chain to curve the row.
- Pivot your work; continue placing dc into each unused loop on the other side of your foundation chain.
- Connect the edges into a loop with a slip stitch.
- Ch 2; get ready to work in the round.
Simple Instructions:
First, make a chain that stretches from center front to center back of your head. Crochet double crochets down one side, then three double crochets in the final stitch to help you turn around. Continue up the other side, turn your project into a circle and join the two ends together—this forms your starting round.
2. Working the Beanie Body
Pattern Instructions:
- Continue working in rounds: ch 2, place one dc in each stitch.
- Slip stitch to close each round, ch 2 to begin the next.
- Make a total of 15 rounds (add or subtract rounds to change depth).
Further Explanation:
At this stage, just keep building up the hat by making double crochets all the way around, joining each round and starting again. Do this until you’ve made enough rounds to fit your head comfortably.
3. Elastic Brim
Pattern Instructions:
- Hold an elastic band along the inside edge of the open brim.
- Use the 4 mm hook to single crochet over the elastic and the edge at the same time, gently pulling elastic for tension as you go.
- Close the circle, snip and weave in ends.
Easy Steps:
Attach the elastic to the base edge by creating single crochets around both the elastic and hat. Stretch the elastic as you stitch to fit your comfort level, joining at the end.
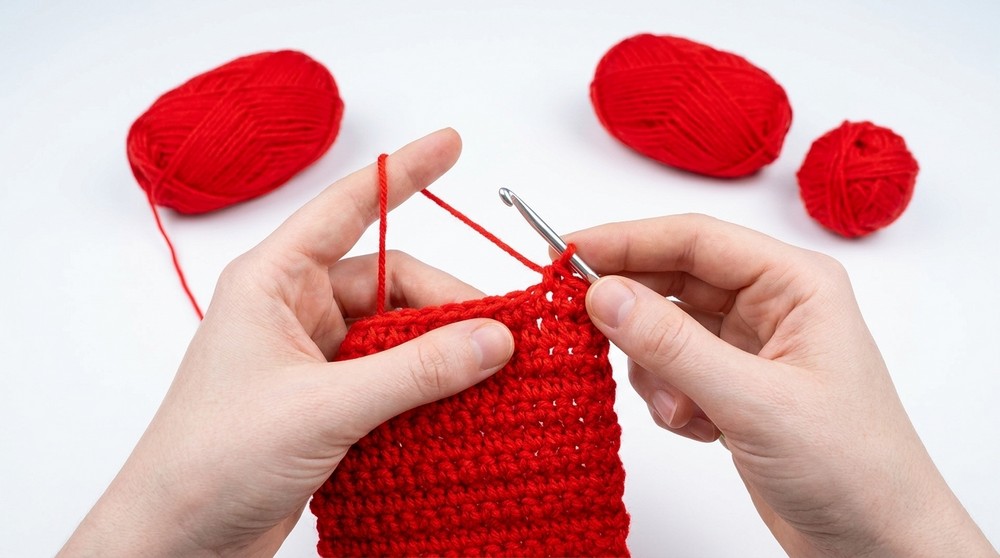
4. Ruffle Edge
Pattern Instructions:
Switch to your 5 mm hook.
- Round 1: Work 3 tr in each stitch around the brim for a full ruffle.
- Join with a slip stitch. Ch 3.
- Round 2: (2 tr in one stitch, 1 tr in next); repeat this sequence all the way around.
- Join with slip stitch. Ch 2.
- Round 3: Place one dc in each stitch around (no extra stitches). Finish with a slip stitch and fasten off.

Accessible Guidance:
Swap to the larger hook, and crochet three trebles per stitch for your first ruffle layer. Next, alternate two trebles in one, one treble in the next for the second layer. Finish by placing one double crochet in each stitch all the way around to shape the ruffles.
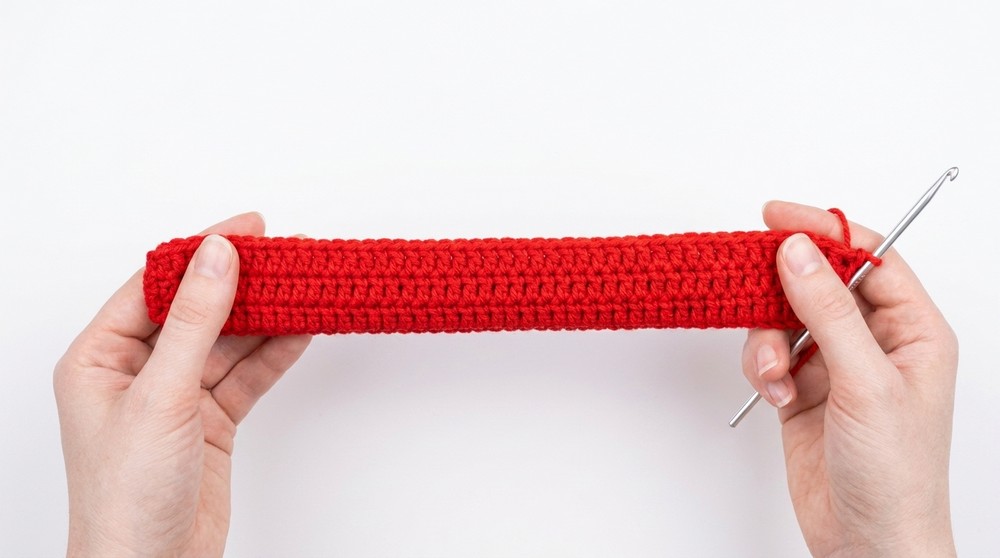
5. Constructing the Bow
Pattern Instructions:
- Using three strands of yarn, ch 20 (4 mm hook).
- Row 1: Dc in second ch and across (19 dc).
- Rows 2–10 (or to your desired width): Ch 2, turn; dc across.
- Fold rectangle in half and slip stitch the short ends for a closed loop.
- With a single strand, ch 50, wrap this cord tightly around the center and tie securely.
- Stitch or glue the bow onto the beanie.
Further Explanation:
To make a bold bow, crochet a thick rectangle by holding three yarn strands together. Sew or crochet the ends to form a ring, wrap a long chain tightly around the middle to pinch it, and attach this finished bow to your hat wherever you wish.
Assembly & Finishing
- Hide and trim yarn tails using a tapestry needle.
- Adjust the ruffle and bow by hand for an even look.
- Secure the bow at your favorite spot using thread or a glue gun.
- Tweak the elastic for ideal comfort and stretch.
- Block the hat gently if desired to shape.
Solution of problem
If the brim feels too tight or loose:
Just adjust the tension of the elastic as you attach it, or try a different chain count for your starting round if necessary. A different hook size can also help with sizing.
Creative Applications
- Playful children’s or adult hats with animal or novelty details
- Ruffled edge bonnets in any color theme
- Bows as separate embellishments for hats, scarves, or hairbands
- Decorative collars or cuffs using this ruffle technique
Remember: For each section, refer to the simplified breakdown if the formal pattern feels overwhelming. With these friendly instructions, you’ll master this cheerful beanie with its full ruffle and strong bow in no time!