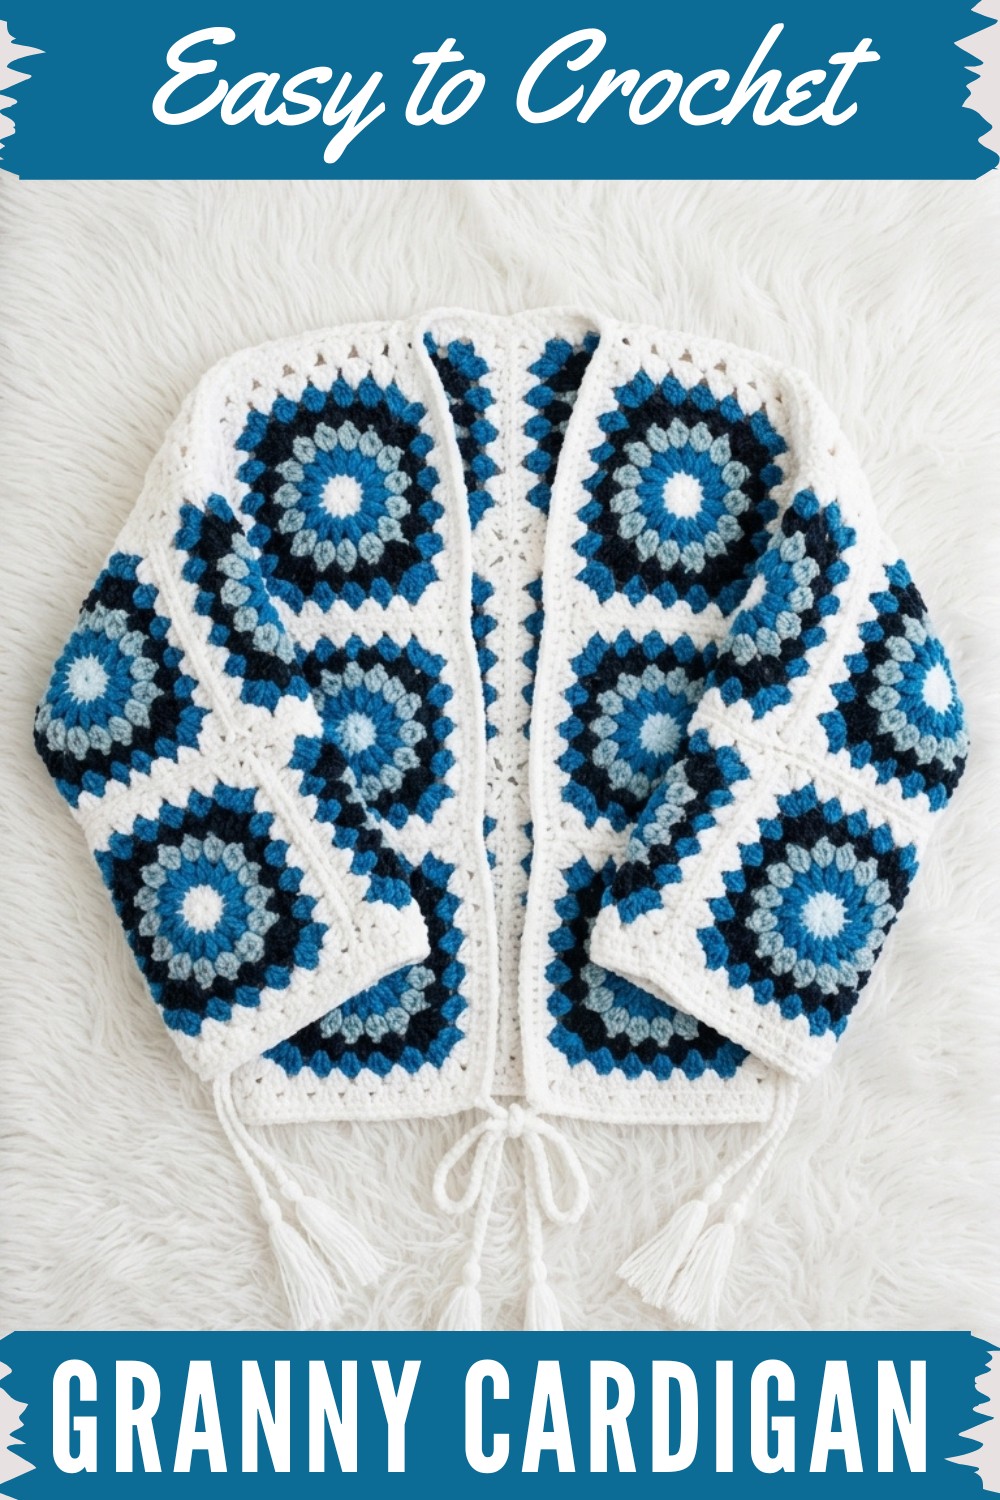
Make a cozy and stylish cardigan with this free crochet granny cardigan pattern, perfect for adding a handmade, fun, and timeless piece to your wardrobe.
You can’t help but notice the charm of a granny cardigan, especially when you use a Free Crochet Granny Cardigan Pattern. This classic piece is full of personality and color, thanks to the beloved granny square design. Each square is like a mini masterpiece, and joining them together creates a cozy cardigan that’s perfect for layering.
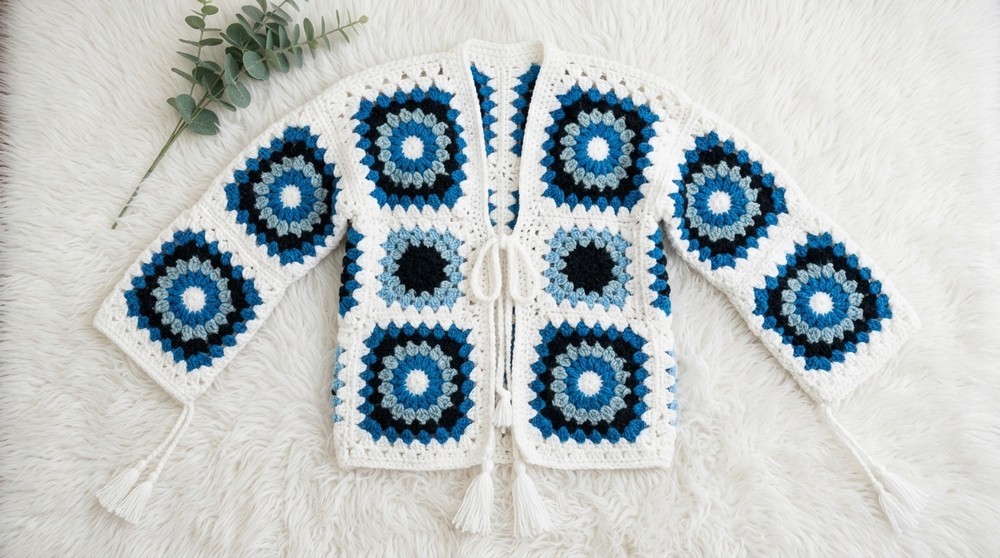
What I love most about making a granny cardigan is the way you can play with colors and patterns. Whether you choose soft pastels, bright hues, or a mix of both, each cardigan turns out totally unique. The patchwork effect adds a cheerful, vintage vibe that feels both homemade and stylish. Sometimes I add a border in a contrasting color, which really makes the design pop.
Free Granny Cardigan Crochet Pattern - Step By Step
The texture is another highlight. Granny squares are thick and warm, giving the cardigan a delightful, cushy feel. The open stitches make it breathable, so it’s comfortable to wear all year round. It keeps you warm enough for cool evenings, yet isn’t too heavy for mild days. The handmade texture of this granny square cardigan is always eye-catching and inviting.
Shape-wise, granny cardigans usually have a relaxed fit. The roomy sleeves and comfy body make them easy to throw over anything—jeans, dresses, or even pajamas! Sometimes I add buttons or leave it open for a laid-back style. No matter how you finish it, this cardigan looks lovely on all sizes and shapes.
The granny cardigan is a fun, practical project for anyone who loves crochet. It gets lots of compliments, and every stitch reminds you of the joy of making something truly special.

Granny Square Cardigan – Step-By-Step Crochet Pattern
Create a beautiful granny square cardigan with bold, textured stitches and easy-to-follow directions.
Preparation Checklist
- Choose three colors of six-ply yarn for an effective colorwork pattern.
- Gather a 5 mm crochet hook, scissors, and a tapestry needle.
- Plan your cardigan size by making three sizes of granny square patches.
- Prepare stitch markers if desired for easier joining.
- Block your patches before final assembly for a neat finish.
Pattern Notes
- Granny squares are worked from the center outward, each round in a different texture and color.
- Cardigan is constructed in modular fashion: patches are made separately and joined at the end.
- Patch sizes: Small (for sleeves), Medium (for front), Large (for back).
- Joining uses a special method: connecting front and back loops for a decorative seam.
- Sleeves and body are assembled after patchwork is complete.
Pattern Design Process
- Created granny squares using various stitches: double crochet, puff, incomplete dc, and hdc.
- Used color changes for texture and interest.
- Sized and counted patches for sleeves, back, and front.
- Finished with back loop single crochet edge for medium squares, back loop half-double crochet for largest squares, and left smallest edges raw.
- Connected patches using front loop/back loop single crochet seam.
Skill Level
Adventurous Beginner – Intermediate:
Basic familiarity with stitches and simple pattern increases helpful.
Finished Size
- Customizable: Example patch sizes lead to a relaxed, boxy fit for adult S/M/L.
- For a typical build: back panel measures approx. 20” x 20”, each front panel 10” x 20”, sleeves approx. 20” x 7”.
Materials
- 5 mm crochet hook
- Six ply yarn in three colors (approx. 600–800g total)
- Stitch markers (optional)
- Tapestry needle
- Scissors
Measurements / Sizing
Patch Sizing Guide:
- Small patch: 7 rounds, for sleeves (make 8 total)
- Medium patch: 8 rounds (with last round in sc), for front (make 4 total)
- Large patch: 8 rounds (with last round in hdc), for back (make 4 total)
Schematic:
[Not provided; arrange patches to match your measurements as you assemble.]
Gauge
- 16 dc x 8 rows = 4” x 4” (10 x 10 cm)
Check gauge for best fit and adjust hook size if necessary.
Stitch Abbreviations
| Abbreviation | Stitch Name |
|---|---|
| ch | Chain |
| dc | Double Crochet |
| hdc | Half Double Crochet |
| sc | Single Crochet |
| sl st | Slip Stitch |
| BLO | Back Loop Only |
| FL | Front Loop |
| BL | Back Loop |
| puff st | Puff Stitch |
| inc dc | Incomplete Double Crochet |
Special Stitches
- Puff Stitch:
(Yarn over, insert hook, yarn over, pull up a loop and loosen slightly) x 5 in same st, yarn over and pull through all loops. - Incomplete Double Crochet:
(Yarn over, insert hook, pull up loop, yarn over, pull through two) x n, leave last loop unworked, yarn over and pull through all loops. - BLO Single Crochet:
Insert hook in back loop only, work sc. - Joining seam:
Insert hook in FL of first patch and BL of second, sc to join.
The Pattern!
1. Granny Square Patch – Foundation Center (Round 1)
Pattern:
- Magic Ring.
- Ch 3 (counts as 1 dc).
- 15 dc into ring (Total: 16 dc).
- Join with sl st in 3rd ch of starting ch-3.
- Ch 1, cut yarn.
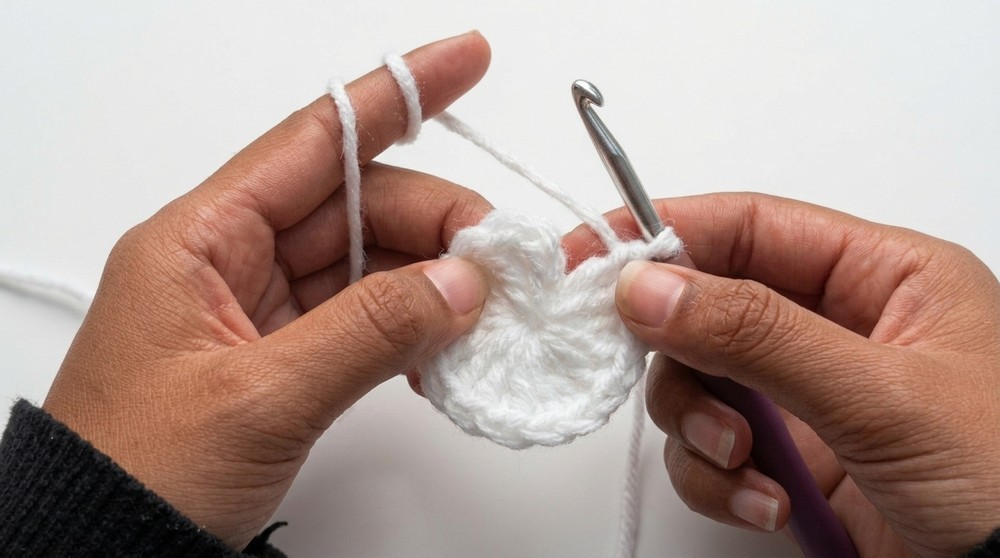
Begin with a magic ring (or chain 4, join into a loop if unfamiliar). Make 16 double crochet inside, then slip stitch to the start. Cut off your yarn – this is the patch center.
2. Puff Stitch Round (Round 2)
Pattern:
- Attach 2nd color to any dc loop.
- Ch 2.
- In the same st:
- (Yarn over, insert hook, yarn over, pull up a loop, loosen) x 5
- Yarn over, pull through all loops.
- Ch 2.
- Next st: repeat Puff Stitch, ch 2.
- Work 16 puff st with ch 2 between.
- Sl st to 2nd ch of starting ch-2.
- Ch 1, cut yarn.
Attach your second color and work a puff stitch in each stitch around, separated by chain 2. Repeat for 16 patches and fasten off your yarn.
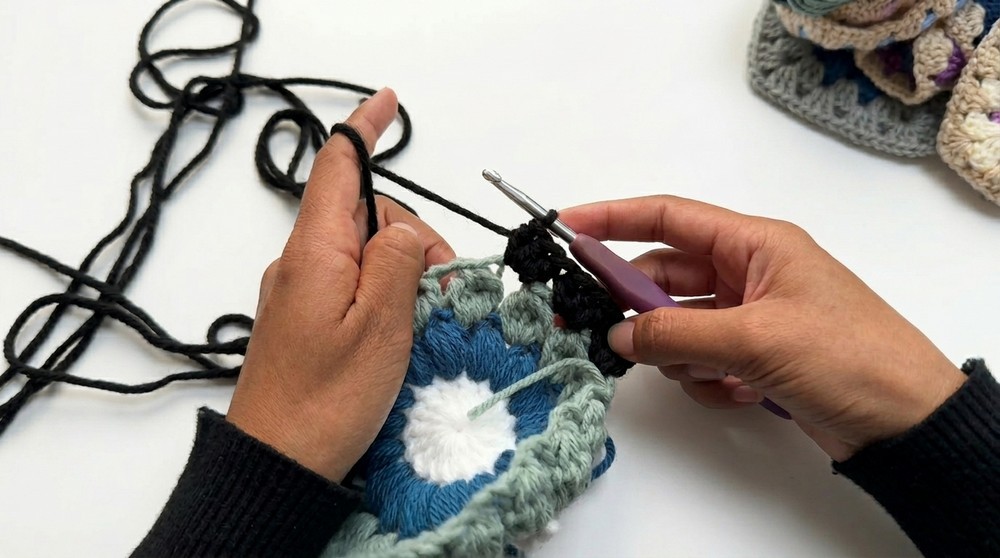
3. Incomplete Double Crochet Round (Round 3)
Pattern:
- Join 3rd color in any ch-2 gap.
- Ch 2 (counts as first inc dc).
- In same gap: Make 4 more incomplete double crochets (leave last loop each time).
- Yarn over, pull through all loops.
- Ch 3.
- Repeat in next ch-2 gap (5 inc dc, pull through all loops, ch 3).
- Continue for all gaps.
- Sl st to starting ch-2.
- Ch 1, cut yarn.
Work clusters of incomplete double crochet (start but don’t finish five dc, then pull together) in each chain-space around, with chain 3 between. Fasten off yarn.
4. Squaring Up (Round 4)
Pattern:
- Join in any gap, ch 3.
- Make 2 dc in same gap.
- Next 3 gaps: 3 hdc in each.
- 5th gap (corner): 3 dc, ch 2, 3 dc.
- Next 3 gaps: 3 hdc in each.
- 9th gap (corner): 3 dc, ch 2, 3 dc.
- Continue, forming corners every 4th gap for four corners.
- Sl st to starting ch-3, ch 1, cut yarn.
Corners are made by working three dc, chain 2, three dc. Between corners, fill each gap with three half double crochet. Four corners emerge, making your patch square.
5. Traditional Granny Rounds (Rounds 5, 6, 7)
Pattern:
- Join color in any corner, ch 3.
- 2 dc in same corner.
- Corner: 3 dc, ch 2, 3 dc in each corner.
- Sides:
- Skip required stitches, (under fourth dc for first side, skip two for remaining)
- 3 dc in space.
- At end, last corner: after 3 dc, add 3 dc, ch 2, sl st to ch-3, ch 1, cut yarn.
- Repeat for rounds 6 and 7, increasing patch size.
Keep growing the square: three double crochet blocks in spaces, with chain 2 at corners between sets. For sleeves, stop at round 7; for front, go up to round 8; for back, follow with round 8 and a hdc edging.
6. Edging Rounds
Medium Patches (Front):
- BLO sc: At side spaces, do single crochet in back loop only. At corners: sc, ch 2, sc in corner space.
- At end, join and fasten off.
Large Patches (Back):
- BLO hdc: At side spaces, half double crochet in back loop only. At corners: hdc, ch 2, hdc in corner space.
- At end, join and fasten off.
Sleeve Patches:
- No edging; stop after round 7.
Add single or half-double crochet edge to the front and back squares, working only in the back loops for texture. Corners get a special: single or half-double, chain 2, single or half-double for a pointed look.
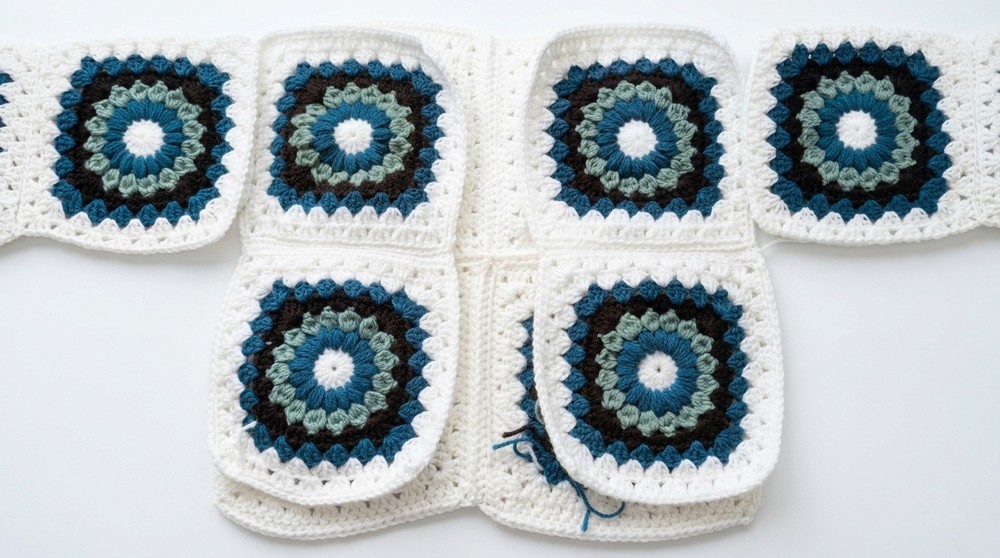
Assembly & Finishing
- Lay patches out to match cardigan schematic (back in center, fronts on sides, sleeves next).
- Place wrong side facing up for joining, right side facing down.
- Join edges: Insert hook in front loop of first patch, back loop of second patch; sc to connect.
- Work from corner, join side-to-side and top-to-bottom.
- For shoulders, join only half the patch for neck opening.
- Sew in ends.
- Block cardigan to soften, shape, and even out stitches.
Solution of Problem
Problem: Lining between connected patches is messy or uneven.
Solution:
Always connect using front loop of one patch and back loop of the next, starting at the corner. This results in a neat seam line visible from the right side, giving a tailored finish.
Creative Applications
- Classic granny square cardigans
- Cozy afghans and patchwork blankets
- Throw pillows and home decor
- Colorful bags or scarves
- Modular tops and vests
Note:
If you don’t understand the pattern format, work in rounds with your chosen color and stitch. After each part, check the visual shape – your center, puff round, incomplete dc round, then square up with dc and hdc, continue growing as needed. Always lay out your patches and join patiently for best results.
You now have a bold, colorful, and textured cardigan pattern suitable for customization and personal style. Enjoy crocheting, and let your creativity shine as you assemble and personalize your granny square cardigan!