Give your bag a creative makeover with DIY Backpack Decor idea, featuring fun, stylish, and easy ways to add a personal touch to your everyday look.
For inspiration and a helpful video tutorial, check out Flying Mio on YouTube through the provided link. I am very grateful for Mio.
Sometimes, a plain backpack needs only a few creative touches to become something truly special. Decorating your own bag is a fun way to show your personality, refresh an old backpack, and make your everyday style more interesting. The purpose is not only to make the bag look attractive but also to enjoy a simple creative activity that lets you design something in your own way.
Fun and Easy DIY Backpack Decor Projects With Tutorial
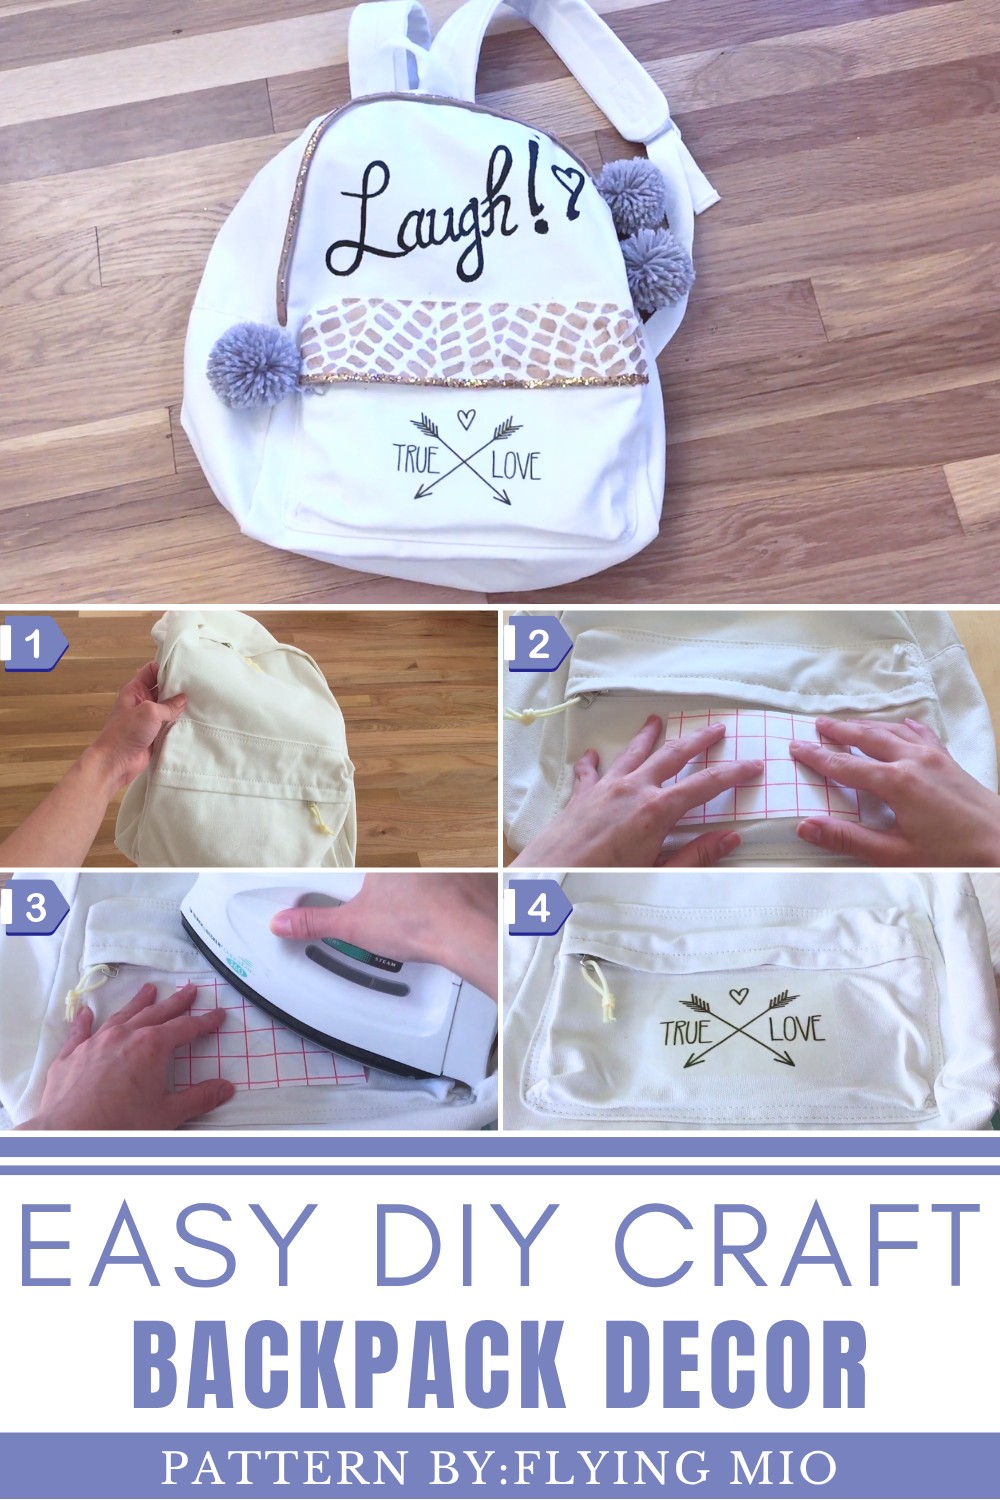
DIY Backpack Decor offers many easy possibilities for adding a personal touch. You can use cute patches, colorful pins, ribbons, keychains, beads, fabric pieces, charms, or handmade decorations. For a cheerful look, mix bright colors and playful designs. If you prefer a clean style, choose two or three matching shades and keep the decorations simple. Pastel colors can create a soft appearance, while bold patterns can make your backpack eye-catching.
These ideas can be used for school bags, travel backpacks, casual bags, or even an old backpack that needs a fresh look. You can also change the decorations for different seasons, events, hobbies, or moods.
The benefits go beyond appearance. It can help you explore creativity, reuse an old bag, save money, and enjoy a satisfying DIY project. Most importantly, your backpack becomes a reflection of you—colorful, creative, and completely your own!
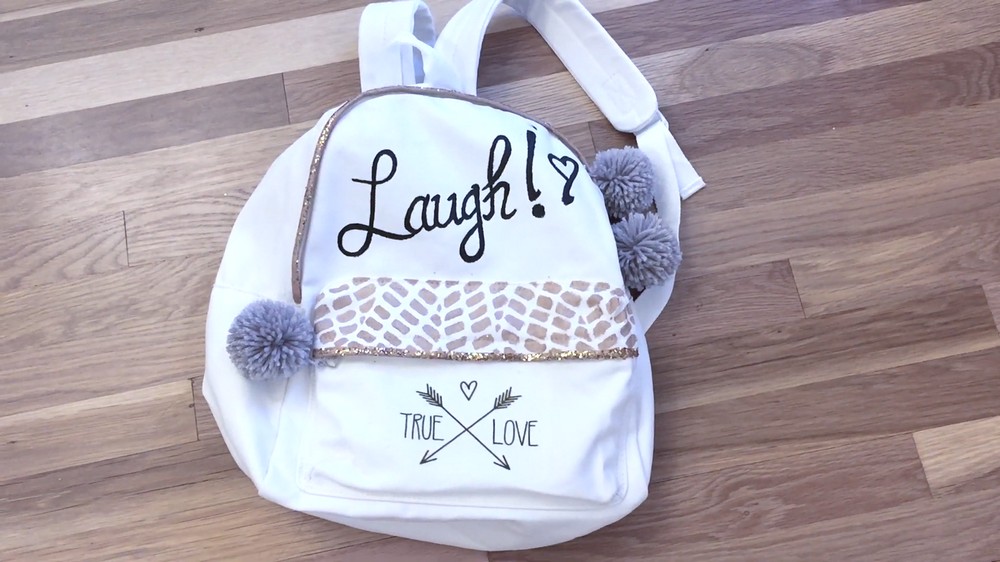
DIY Backpack Decoration Tutorial: Turning Your Backpack in 5 Easy Steps!
Hello, crafty friend! Let’s make an adorable and trendy backpack for the upcoming school year. Follow these simple steps and get ready to show off your unique creation!
Materials You'll Need:
- A plain backpack (white is recommended for this project, but choose any color you like!)
- Printable transfer sheets (white fabric T-shirt transfer sheets work great)
- Access to the internet (for downloading images)
- Scissors
- An iron (for transferring the design)
- Yarn (any color of your choice)
- Paint (metallic or glittery)
- Scotch tape
- Paintbrush
- Glitter
- Pen/marker for writing words or initials (black paint suggested)
Phase 1: Choosing Your Canvas
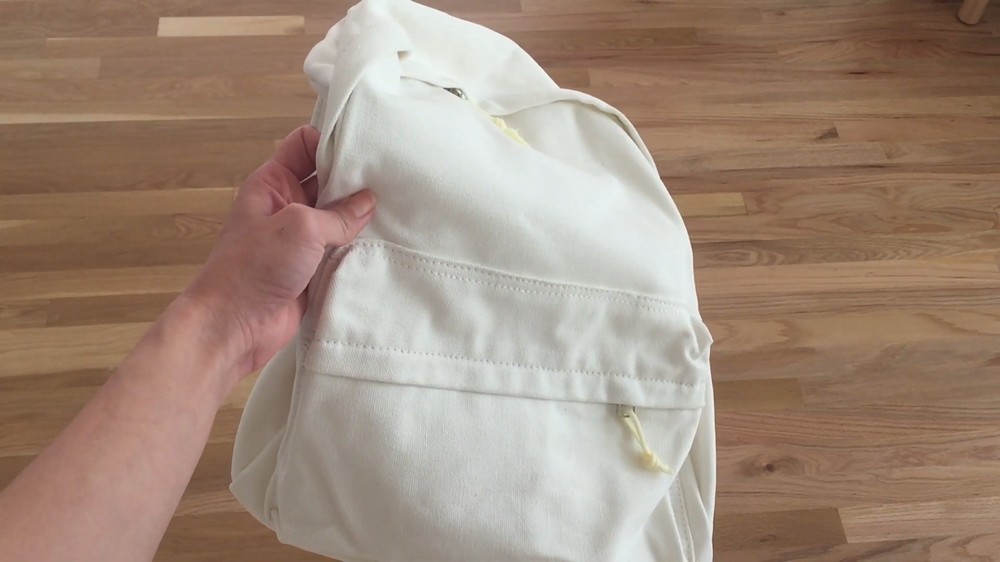
- Start with a clean, plain backpack. A white one works best because colors will show more vibrantly.
- Make sure there’s no dust or dirt on the surface.
Phase 2: Adding a Custom Design Using a Transfer Sheet
- Search for an image. Go online to a royalty-free image any site with free graphics. Search for a design that excites you (e.g., flowers, arrows). Download it in JPEG or PNG format.
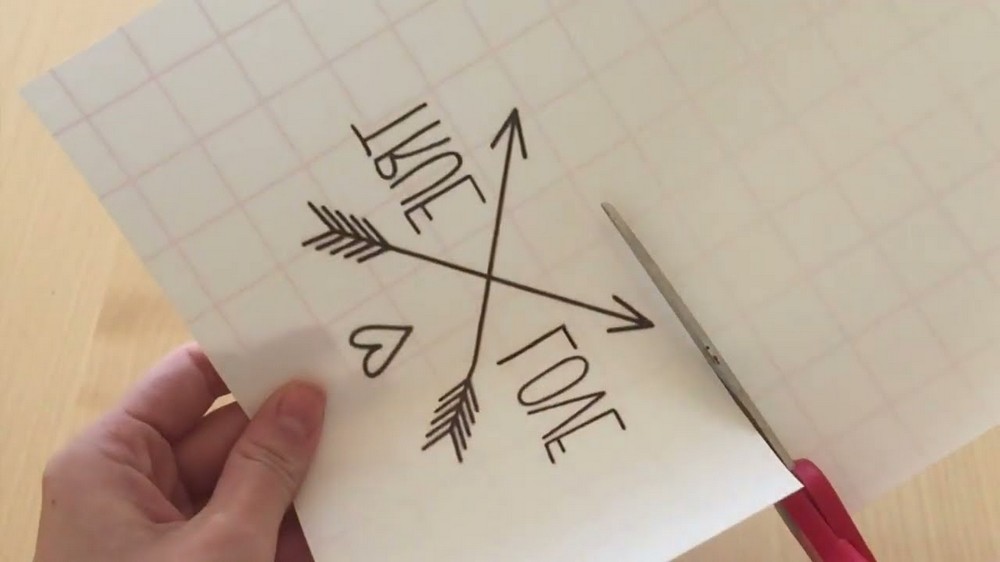
- Resize the image. Use Microsoft Word or any editing software to enlarge or adjust the dimensions of your image. If you're using a white transfer sheet, invert the image (flip it horizontally).
- Print the design. Print it on your transfer sheet. Make sure to print on the plain, bright-white side and NOT the checkered side.
- Cut out your design. Use scissors to carefully cut the edges of your design. Don’t worry if it’s not perfect since white transfer areas turn invisible on a white background.
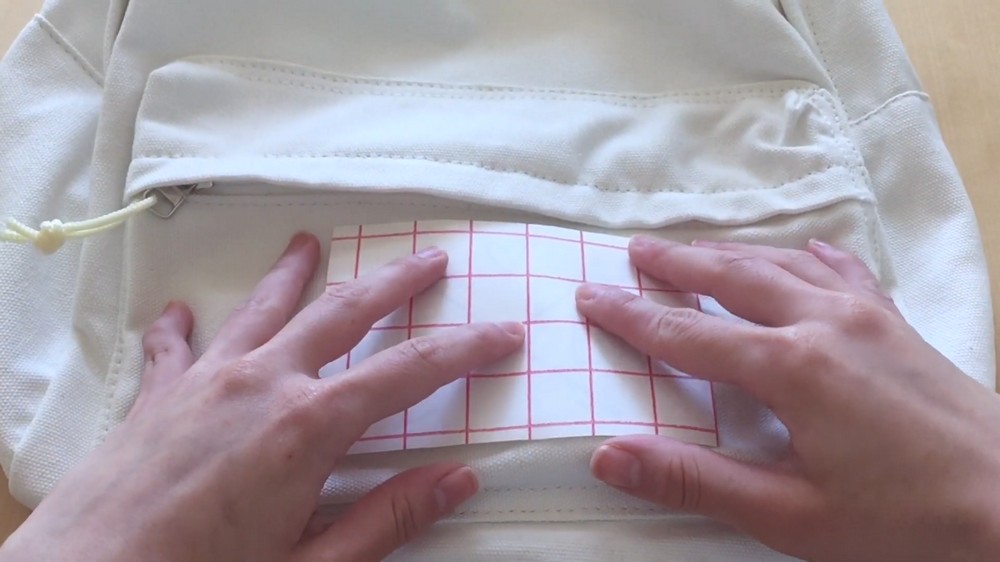
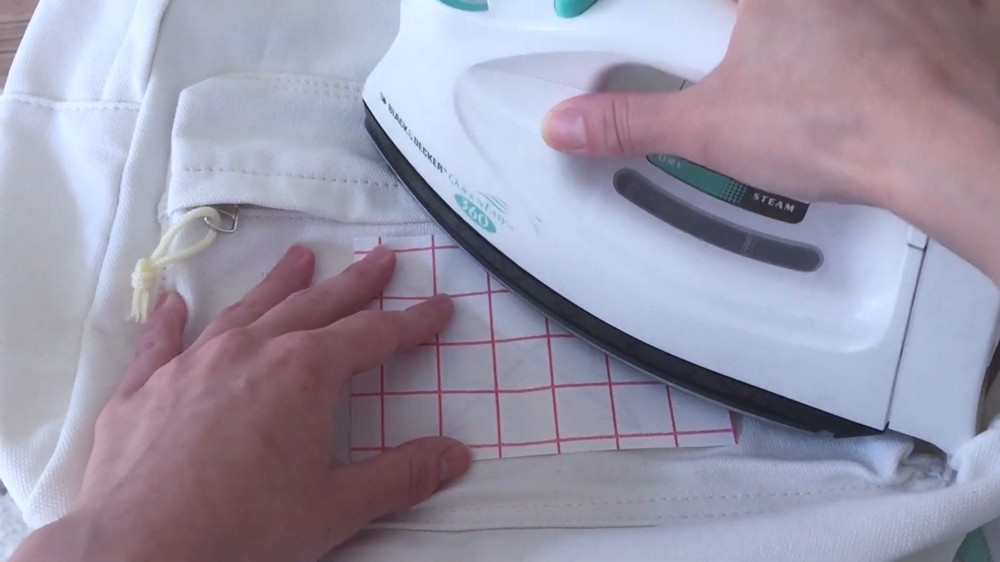
- Transfer the design.
- Place the transfer sheet design-side down on the backpack.
- Iron it onto the surface, following the instructions provided with your transfer sheet pack.
- Allow it to cool completely.
- Peel off the backing. Once cooled, gently peel the paper backing off, and your design will appear beautifully on the backpack.
Phase 3: Create Pom-Poms for Zippers
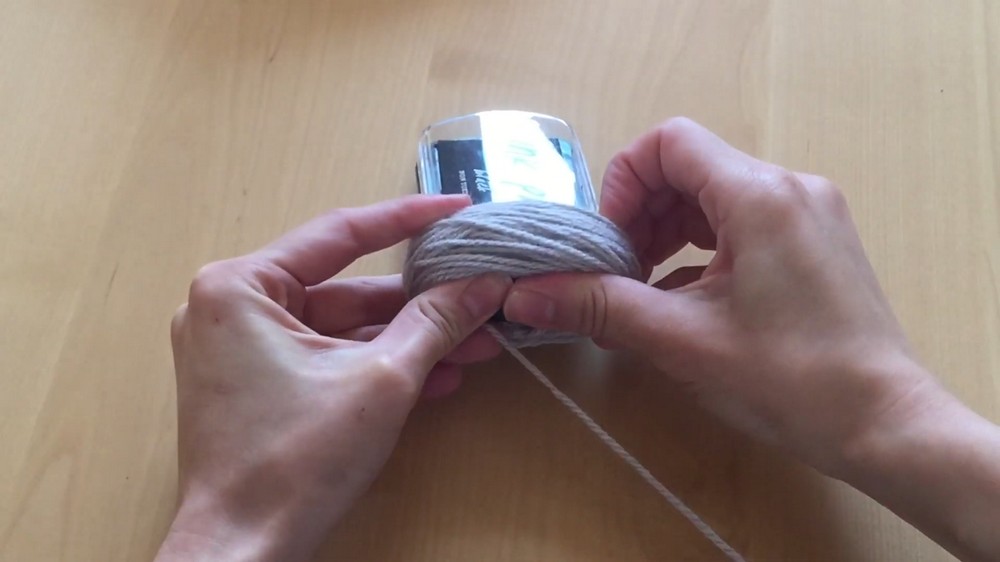
- Take a household object like an ink pad (or something thick and sturdy for wrapping yarn).
- Wrap yarn around the object roughly 100 times (or more for fluffier pom-poms).
- Carefully slide the yarn bundle off the object while keeping its shape intact.
- Take a piece of yarn and tie it tightly in the center of the loops you created. This is the knot that holds your pom-pom together, so make sure it’s really snug.
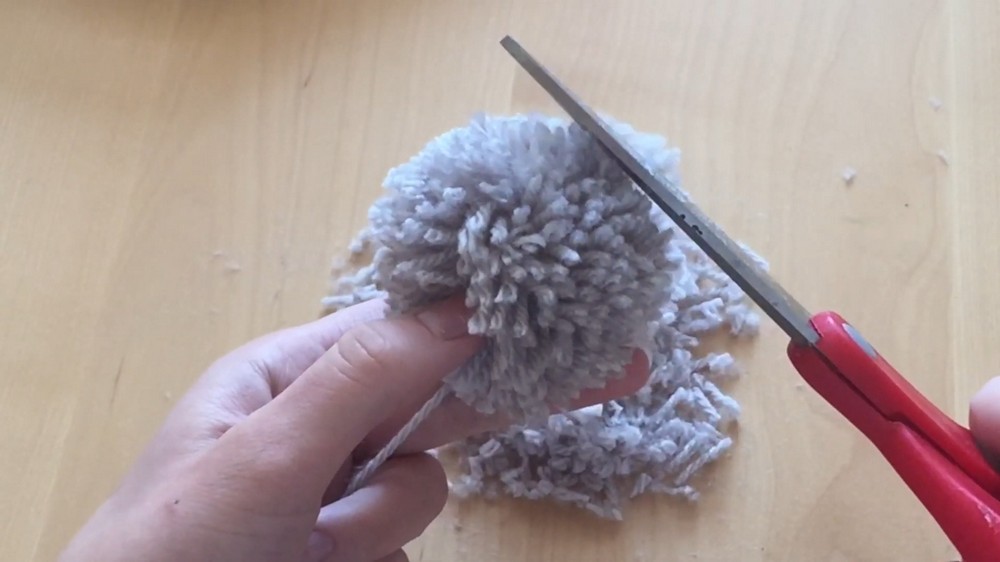
- Use scissors to cut open all the loops at both ends of the bundle.
- Trim the edges of the yarn until your pom-pom looks round, fluffy, and even.
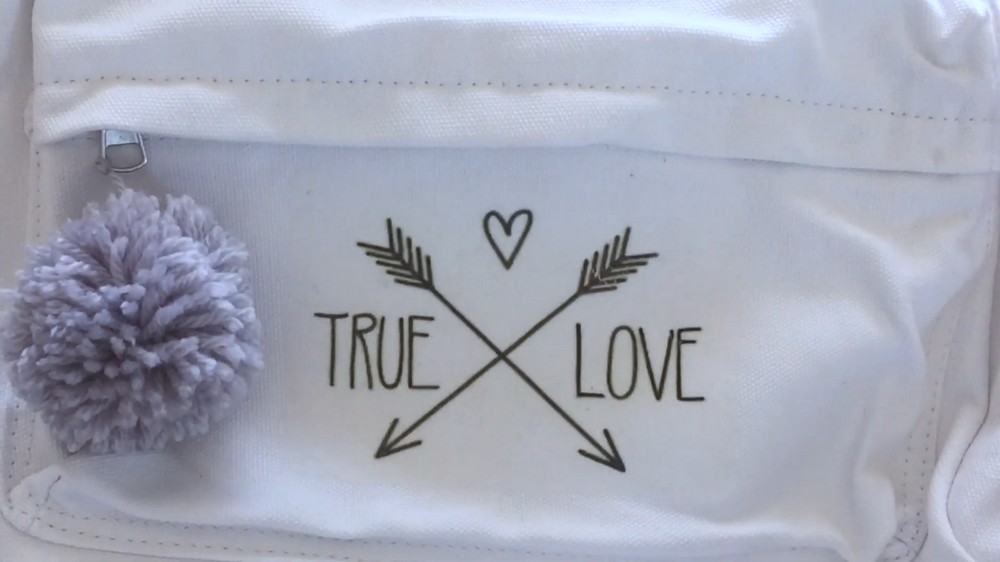
- Repeat the process for multiple pom-poms if your backpack has more than one zipper. Attach each pom-pom to the zipper pulls for a cute and playful touch.
Phase 4: Add a Glittery Touch
- Tape the edges of your backpack with Scotch tape to create clean lines or sections you want to decorate.
- Choose a metallic paint (gold, silver, or any color you like).
- Use a paintbrush to gently apply the paint to the taped area.
- Add a thin, even coat for smooth results.
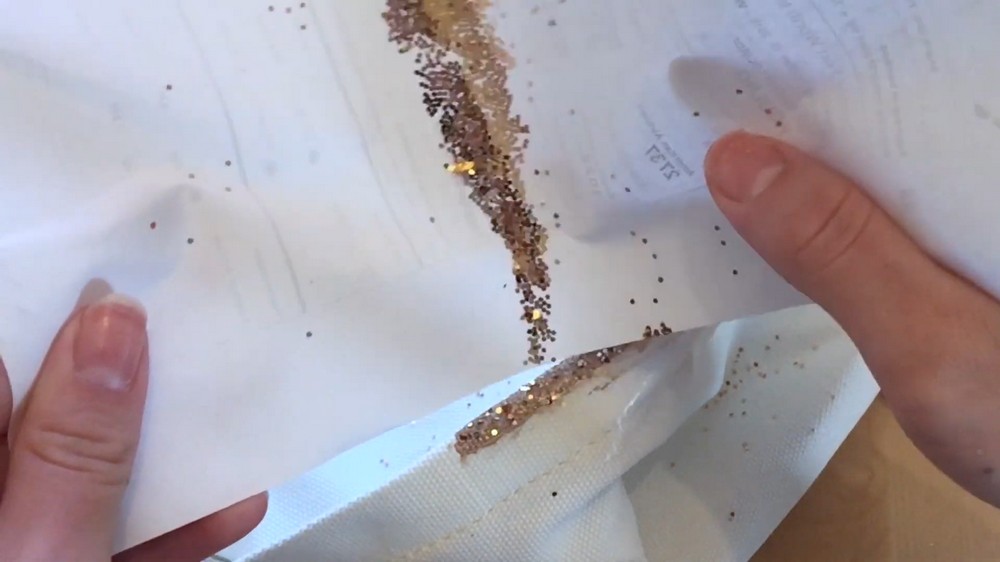
- Quickly sprinkle glitter (rose gold or any fun color) onto the wet paint.
- Catch any excess glitter with a piece of paper underneath to avoid a mess.
- Once the paint dries, carefully remove the tape to reveal a sharp, clean line of glittery goodness.
Phase 5: Personalize with Words or Quotes
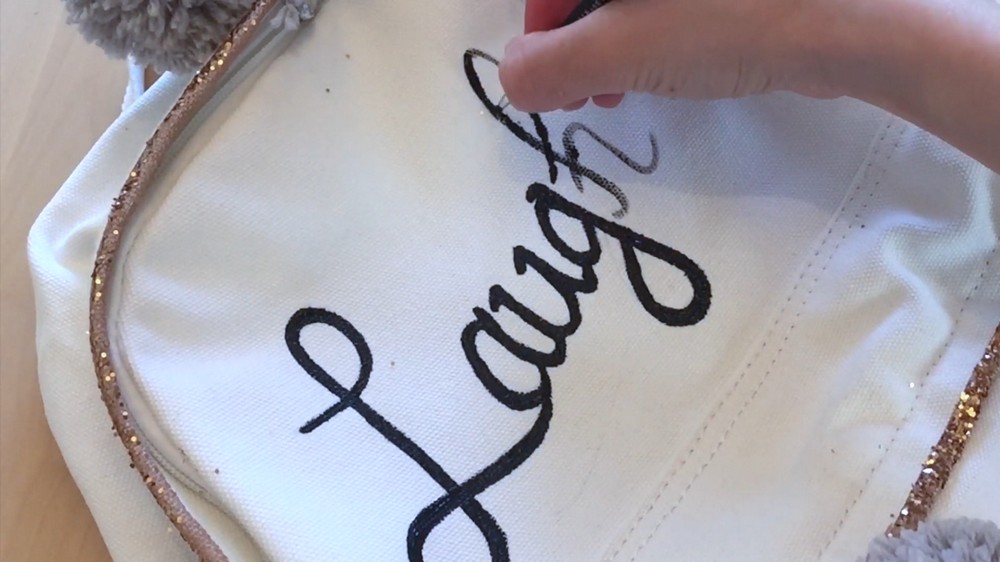
- Use a pen, paint, or marker to write your favorite word, name, or quote on your backpack.
- Keep it bold and simple—words like "Laugh," "Dream," or "Love" look chic and minimalistic.
- You can pair the text design near your painted or glittered sections for a coordinated look.
Final Touch
- Take a moment to look over your backpack and make small adjustments (e.g., trim pom-poms, spot-clean smudges, etc.).
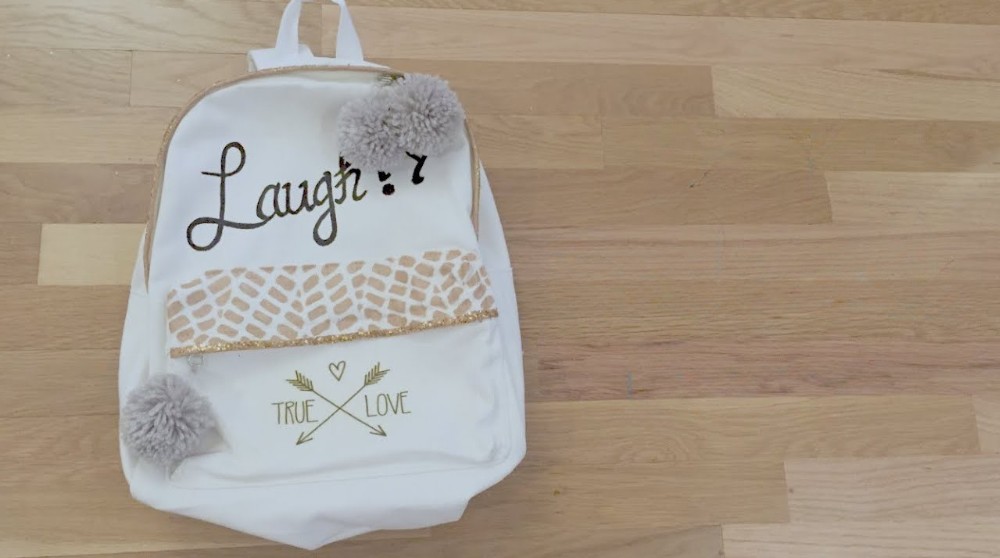
- You now have a one-of-a-kind backpack that’s ready to shine and show off your personality!
Quick Recap of Phases:
- Prepare the backpack. Clean it thoroughly.
- Create a custom design. Use a printed transfer sheet for unique graphics.
- Add pom-poms. Decorate the zippers with fluffy yarn pom-poms.
- Paint with glitter. Add metallic paint or sparkles for a trendy pop.
- Write something meaningful. Personalize your backpack with text.
Reminder
- Let all paint and decorations dry fully before using.
- Have fun and don’t stress—it’s all about making something that YOU love!