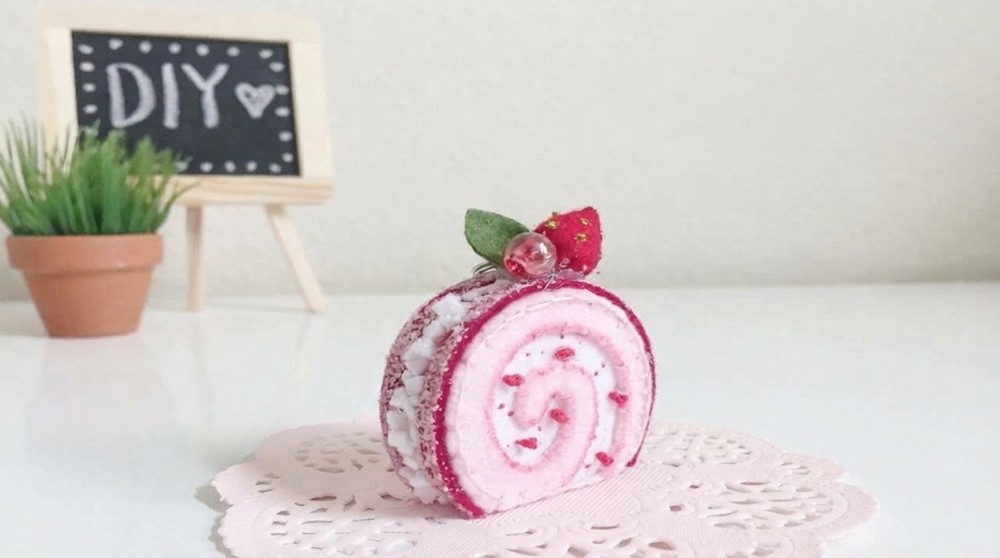
Add a sweet handmade touch to your space with this DIY Strawberry Cake Roll Plush, a cute felt craft idea for keychains, charms, gifts, and decor.
Tiny crafts can bring a sweet touch to everyday life, and this adorable project is a perfect example. Inspired by Flying Mio, the DIY Strawberry Cake Roll Plush combines soft felt, simple sewing, and cute dessert-inspired details to create a charming handmade piece. You can make it as a relaxing craft, a creative beginner project, a personalized gift, or a playful accessory. Its purpose is not only to look adorable but also to turn simple materials into something useful and decorative.
DIY Strawberry Cake Roll Plush: Make Your Own Mini Treat
The plush can be styled with strawberries, sprinkles, glitter, beads, and colorful felt details for a unique bakery-inspired appearance. Add a ribbon to use it as a phone charm, keychain, backpack charm, or bag accessory, or display it on a desk or shelf.
This project can improve sewing skills, patience, creativity, and attention to detail. Best of all, it lets you create a tiny dessert that never melts, gets eaten, or loses its charm
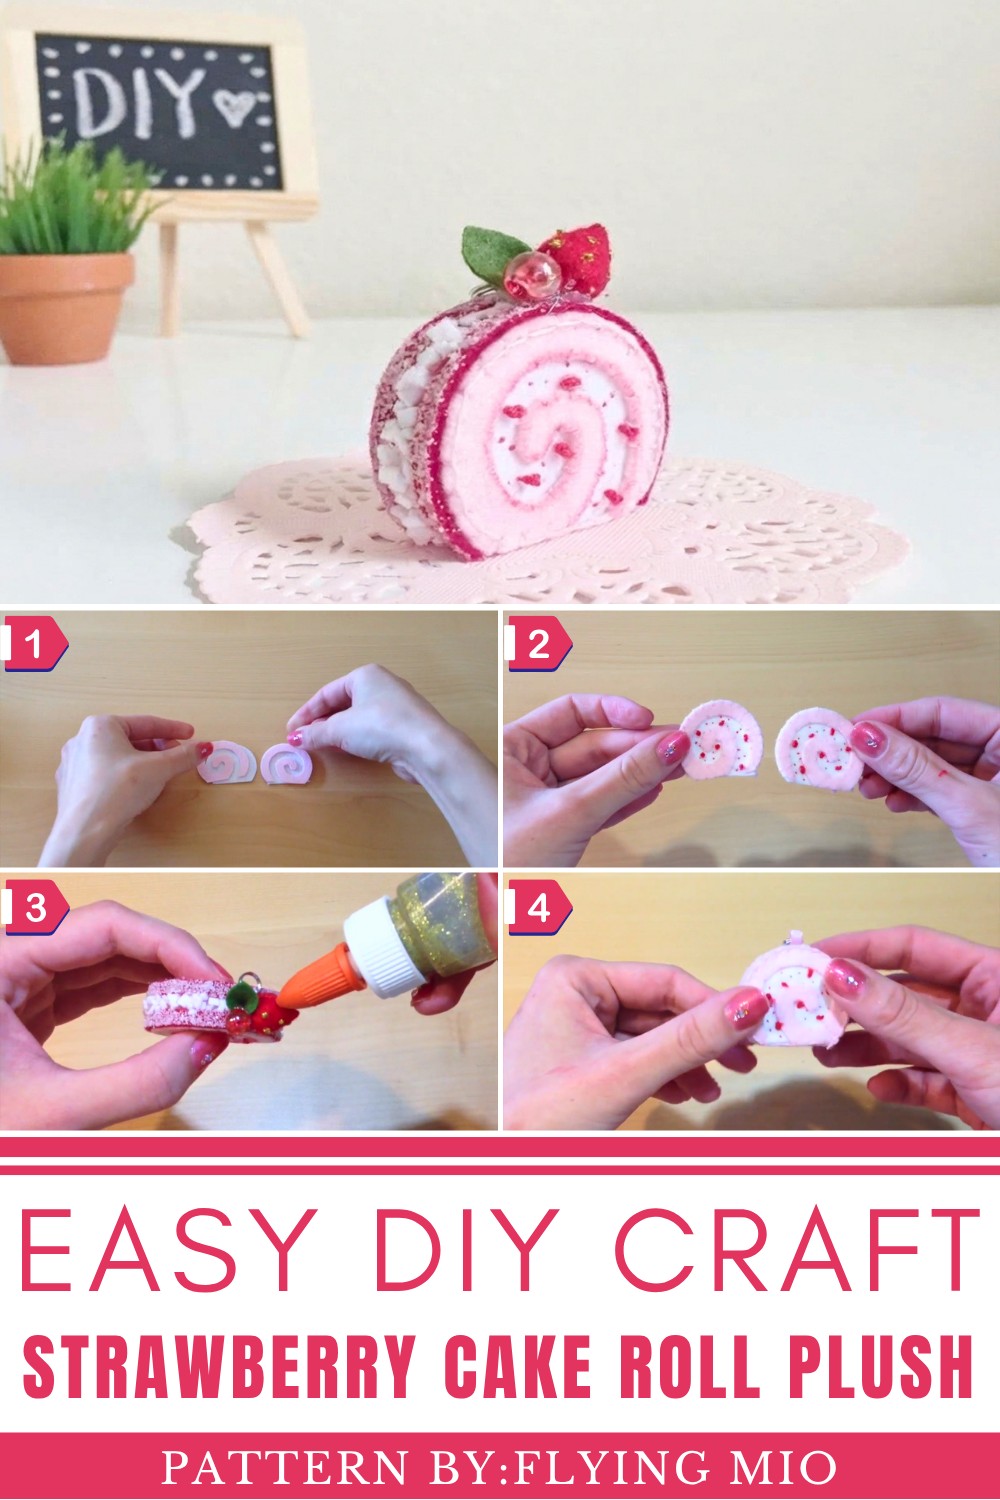
Strawberry Cake Roll Plushy
A cute, miniature strawberry cake-roll plushy that can be used as a phone accessory, keychain, or decorative item.
1. Materials
Materials Included in the Kit
- Pre-cut felt pieces:
- White felt for the cream
- Pink/red felt for the cake roll
- Felt strip for the cake-roll sides
- Small felt rectangle for the bottom
- Semicircle of felt for the strawberry
- White felt for sprinkles
- Small leaf-shaped felt piece
- Stuffing/fiberfill
- Sewing thread
- Sewing needle
- Cardboard inserts
- Small beads
- Ribbon/strap for attaching the plushy
- Small packet of decorative sand
Additional Materials
- Dark red sewing thread
- Clear nail polish
- Red pen
- Hot glue
- Gold glitter or glitter glue
2. Tools
- Sewing needle
- Scissors
- Hot glue gun
- Red pen
- Small container or surface for the decorative sand
- Optional: tweezers for handling tiny pieces
3. Preparing the Materials
Step 1: Open and Sort the Kit
Open the kit and separate all of the pieces.
You should have:
- Felt pieces
- Stuffing
- Cardboard pieces
- Thread
- Needle
- Beads
- Ribbon
- Decorative sand
Lay everything out so that the individual pieces are easy to identify.
Step 2: Remove the Pre-Cut Felt Pieces
The felt pieces are already cut into the required shapes.
Carefully pop each piece out of the felt sheet. If necessary, use scissors to cut around the pieces.
Keep the pieces organized according to their purpose.
4. Making the Cake Roll
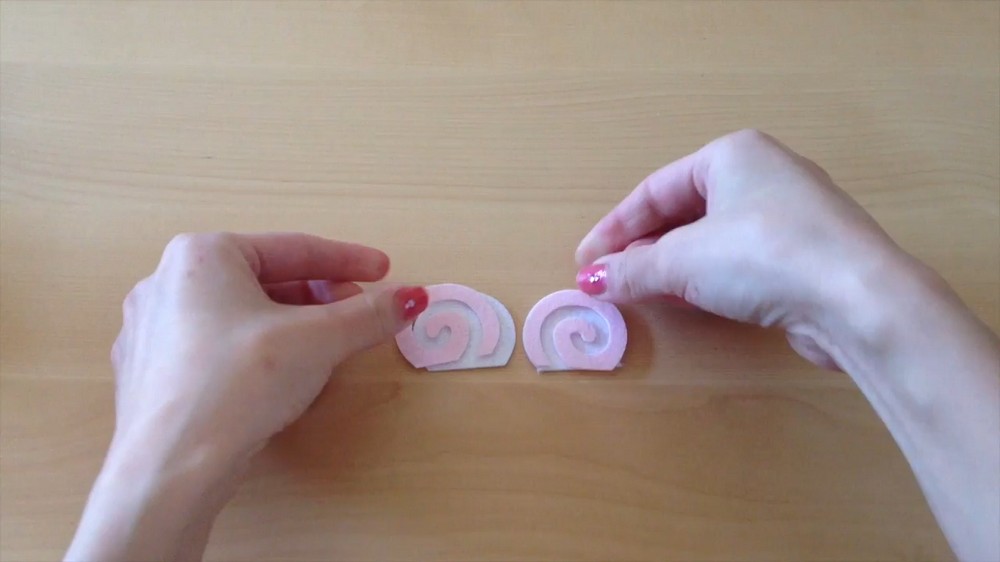
Step 3: Assemble the Cream and Swirl
Take the white felt piece representing the cream and place the swirl-shaped piece on top.
Position the swirl in the center so that it resembles the spiral inside a strawberry cake roll.
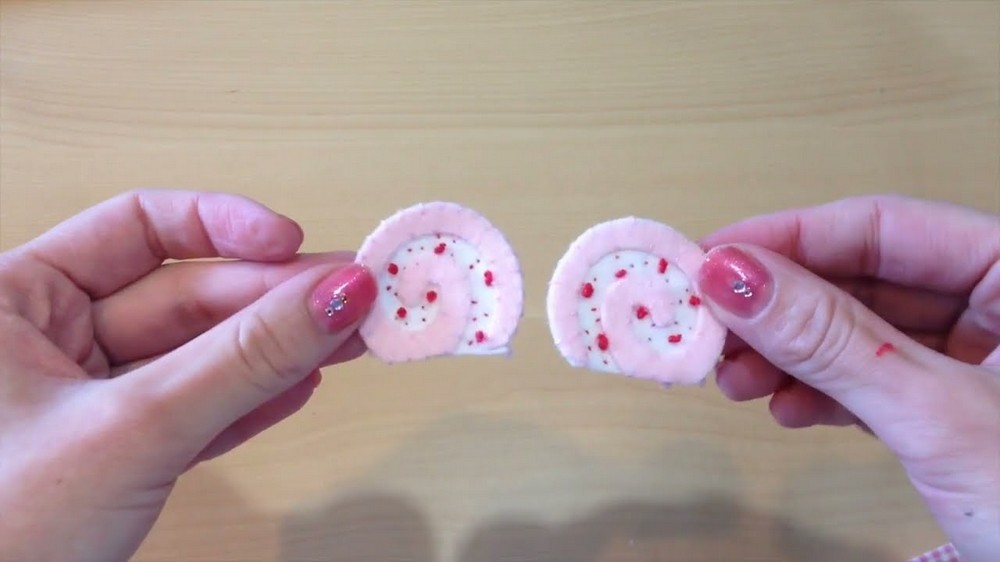
Step 4: Sew the Two Pieces Together
Thread the needle using the sewing thread provided in the kit.
Sew the swirl to the white felt using simple regular stitches.
No special sewing technique is required.
Important Sewing Tip
Try to make the stitches:
- Small
- Evenly spaced
- Approximately the same size
Consistent stitches will make the finished plushy look cleaner and more professionally made.
The piece is very small, so hand sewing is recommended rather than using a sewing machine.
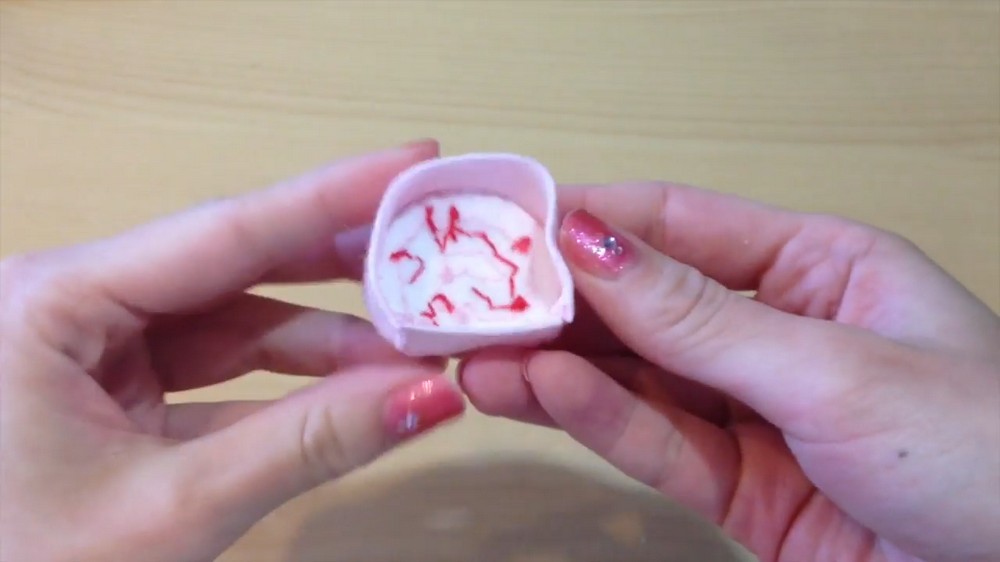
Alternative: You can use hot glue instead of sewing these pieces together if preferred.
5. Adding Strawberry Pieces to the Cream
Step 5: Make the Red Strawberry Dots
Take the darker red sewing thread.
Tie a small knot at the end of the thread.
Make small knots/dots across the white cream portion of the cake roll.
These red knots represent small pieces of strawberry mixed throughout the cream.
Placement
Distribute the dots:
- Evenly across the cream
- At different locations
- With some variation in size
The back of the felt does not need to look neat because it will eventually be hidden inside the plushy.
6. Creating the Three-Dimensional Cake Roll
Step 6: Attach the Long Felt Strip
Take the long felt strip included in the kit.
This strip will form the sides and circumference of the cake roll, turning the flat felt design into a three-dimensional plushy.
Place the strip around the outside edge of one of the cake-roll pieces.
Sew the strip around the circumference.
Step 7: Use a Blanket Stitch
For the edge pieces, use a blanket stitch for a cleaner decorative finish.
Instead of simply passing the needle through the felt, pass the needle through the loop at the edge of the stitch.
Continue stitching around the entire circumference.
If there is excess felt remaining when you reach the end, carefully trim it away with scissors.
7. Adding the Bottom
Step 8: Attach the Bottom Felt Piece
Your kit should contain a small rectangular piece of felt.
This piece forms the bottom of the cake roll.
Position it at the bottom of the roll and sew it into place.
Make sure the edges are properly aligned and securely attached.
8. Adding the Cardboard Support
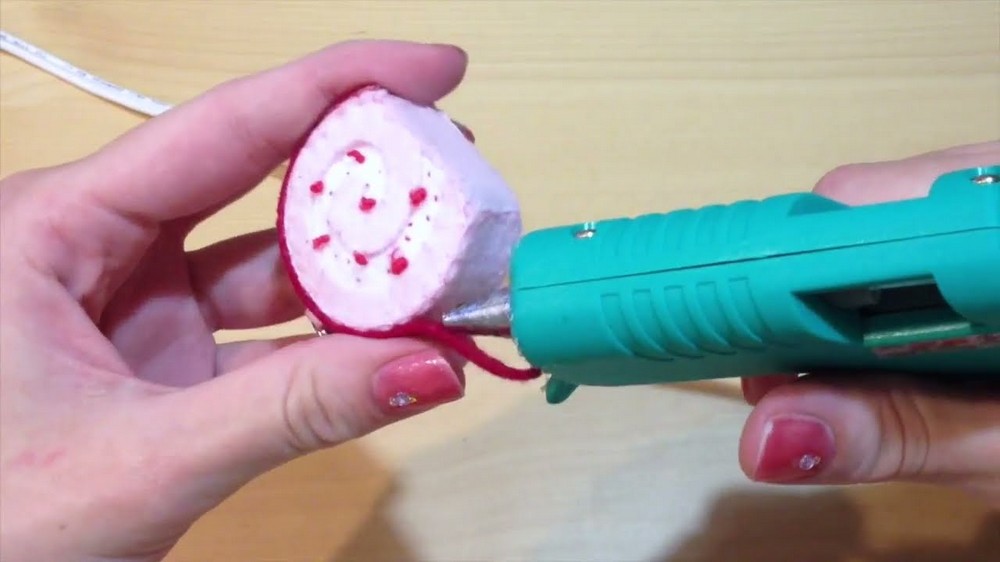
Step 9: Insert the First Cardboard Piece
Once the felt structure has been sewn together, insert the cardboard piece supplied with the kit into the center.
The cardboard helps the cake roll maintain its shape.
Step 10: Add the Bottom Cardboard Support
Place the flat rectangular cardboard piece inside the bottom portion of the cake roll.
This provides additional support and prevents the plushy from collapsing.
9. Stuffing the Cake Roll
Step 11: Add the Stuffing
Take the stuffing included in the kit.
Place it inside the cake roll.
Add enough stuffing to give the plushy a rounded, soft appearance, but do not overfill it.
The stuffing should fill the empty spaces around the cardboard while allowing the cake roll to retain its shape.
10. Closing the Cake Roll
Step 12: Place the Final Cardboard Piece
Take the remaining cardboard piece and place it across the top of the stuffed cake roll.
Press it down gently so that the stuffing is compressed and the structure is easier to close.
Step 13: Sew on the Final Felt Piece
Take the remaining cake-roll felt piece and place it over the opening.
Sew it securely around the edge.
Important
This is one of the most difficult sewing stages because the cardboard is underneath the felt.
Work slowly and carefully so that:
- The stitches remain even
- The felt stays in position
- The stuffing remains inside
- The cardboard does not interfere with the needle
Once this piece is attached, the basic cake-roll shape is complete.
11. Adding the Phone/Keychain Strap
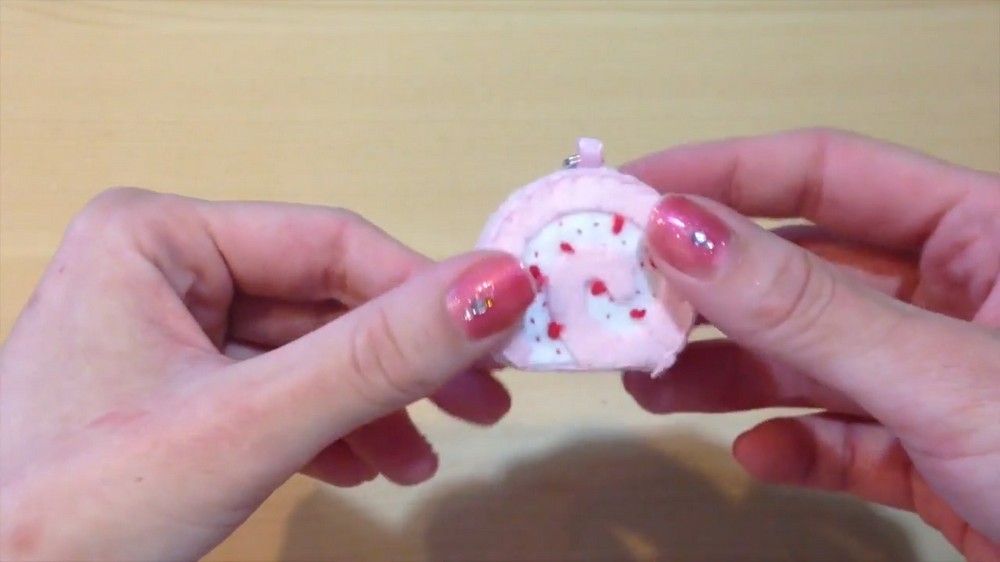
Step 14: Attach the Ribbon
If you want to use the cake roll as a phone accessory or keychain, take the small ribbon included in the kit.
Position it at the top of the cake roll.
Sew the ribbon securely into place.
The ribbon provides a loop for attaching the plushy to a phone, keychain, bag, or similar item.
If you are making the cake roll purely as a decoration, you can leave the ribbon off.
12. Making the White Sprinkles
Step 15: Prepare the White Felt
Take the white felt provided for the decorations.
Cut it into long, narrow strips.
Then hold the strips horizontally and cut across them into very small pieces.
These tiny pieces will become the white sprinkles.
Try to keep the pieces relatively small and similar in size.
13. Adding the Red Cake-Roll Stripes
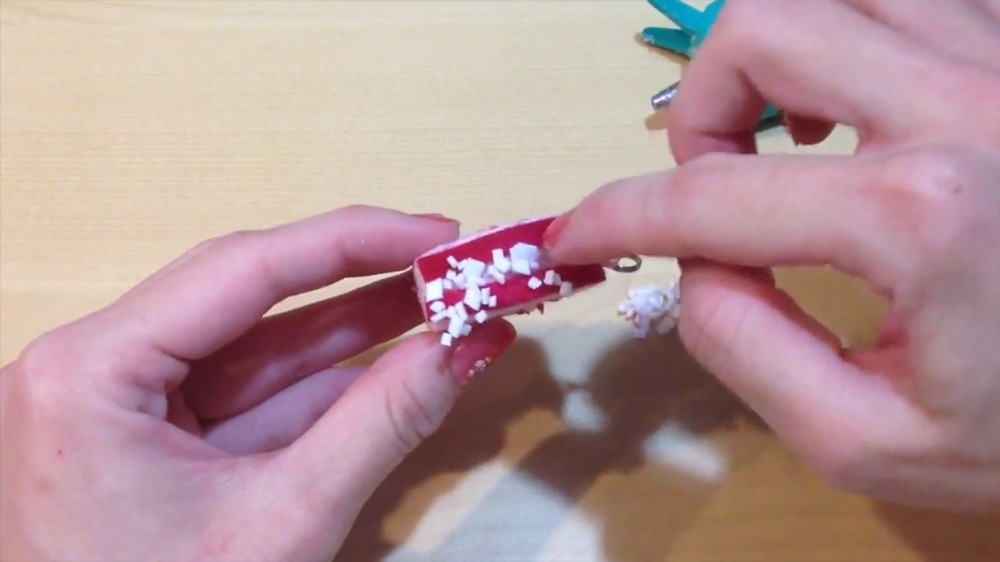
Step 16: Attach the Red Strips
The kit should include two red felt strips.
These strips are used to decorate and outline the cake roll.
Position them close to the outer edges of the cake roll.
The original method uses hot glue because it is easier and produces a clean result.
Apply small amounts of hot glue and carefully attach the red strips.
Alternative: You can sew the strips into place instead.
Make sure the strips remain close to the edge and leave the central area open for the sprinkles.
14. Adding the Sprinkles
Step 17: Glue on the White Sprinkles
Apply small amounts of glue to the exposed central area.
Place the tiny white felt pieces over the glue.
Continue adding the sprinkles until the desired area is covered.
Allow the glue to cool and set.
Carefully remove any excess felt or stray pieces around the edges.
At this point, the cake roll should have its basic decorative appearance.
15. Making the Tiny Strawberry
Step 18: Fold the Strawberry Felt
Take the semicircular red felt piece provided for the strawberry.
Fold it in half.
Align the edges.
Step 19: Sew the Strawberry
Sew the two edges together.
Because the strawberry is extremely small, use small, careful stitches.
Step 20: Add a Small Amount of Stuffing
Take a very small pinch of stuffing.
Place it inside the tiny strawberry.
Do not use too much stuffing because the strawberry needs to remain miniature.
Step 21: Shape the Strawberry
Gather or scrunch the corners of the felt together.
Pull them toward the center to create a small, rounded strawberry shape.
Secure the gathered portion with thread.
16. Adding the Decorative Sand
Step 22: Apply Clear Nail Polish
Take the clear nail polish.
Apply a thin layer to the red decorative portions of the cake roll where you want the sand to stick.
Do not saturate the felt.
Step 23: Add the Sand
While the nail polish is still wet, roll or press the decorated portion into the small packet of sand.
The sand will stick to the nail polish and create a textured decorative surface.
Shake off any excess sand.
Allow the cake roll to dry for several minutes.
17. Adding Red Outlining
Step 24: Outline the Pink Cake Section
Take a red pen.
Carefully trace around the pink/red cake section to make the design resemble the picture on the kit.
A red pen is useful because it gives you good control over the small details.
Work slowly to avoid marking the white cream area.
18. Making the Top Decoration
Step 25: Assemble the Strawberry Topping
Take:
- The miniature strawberry
- The small bead
- The leaf-shaped felt piece
Arrange them together to create the cake topping.
Step 26: Glue the Topping Together
Use the hot glue gun to attach the strawberry, bead, and leaf.
Allow the glue to set.
Step 27: Attach the Topping to the Cake
Apply a small amount of hot glue to the top of the cake roll.
Place the assembled strawberry decoration on top.
Hold it in position until the glue has cooled and the decoration is secure.
19. Adding Strawberry Seeds
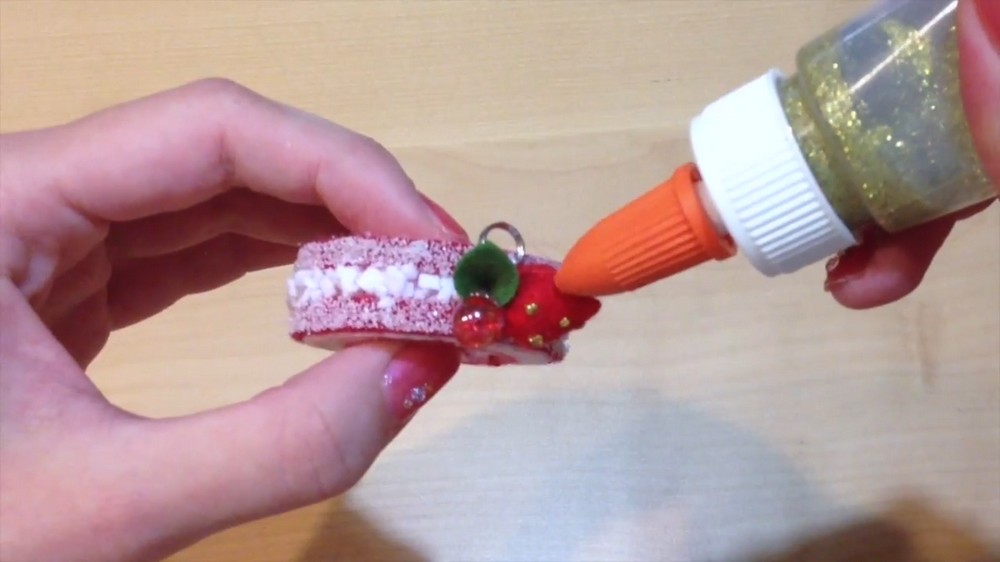
Step 28: Add Gold Decorative Details
For an extra decorative effect, add tiny gold dots to the strawberry.
These dots imitate strawberry seeds.
The kit may contain tiny beads for this purpose, but if the beads are difficult to sew because the needle/thread is too large, glitter glue can be used instead.
Apply tiny dots of gold glitter glue to the strawberry.
Allow them to dry completely.
20. Final Finishing
Step 29: Inspect the Plushy
Check the entire cake roll.
Make sure:
- All felt pieces are securely attached.
- The seams are closed.
- The stuffing is contained.
- The cardboard is hidden.
- The ribbon is firmly attached if being used.
- The red strips are secure.
- The sprinkles are glued down.
- The strawberry topping is firmly attached.
- The decorative sand is dry.
- The glitter/glitter glue has dried.
Step 30: Clean Up
Trim any:
- Loose threads
- Excess felt
- Stray glue strings
- Loose decorative pieces
Make any final adjustments to the shape.
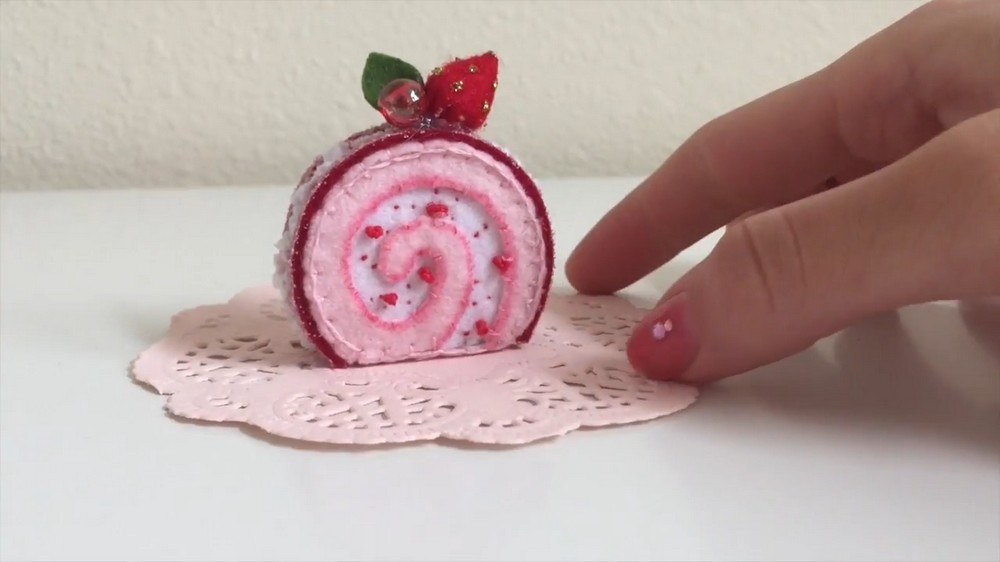
21. Finished Features
The completed strawberry cake-roll plushy features:
- A miniature three-dimensional cake-roll shape
- White cream with a spiral design
- Red strawberry pieces scattered through the cream
- Decorative red outer stripes
- Tiny white felt sprinkles
- A miniature strawberry topping
- A leaf and bead decoration
- Textured decorative sand
- Optional gold glitter "seeds"
- Optional ribbon for use as a phone charm or keychain
22. Final Uses
Once completely dry and secure, the finished plushy can be used as:
- A phone accessory
- A keychain
- A bag charm
- A desk decoration
- A small room/apartment decoration
- A handmade miniature gift