Follow a detailed guide to make a charming lazy egg plushie using needle felting techniques, perfect for adding a playful touch to your collection.
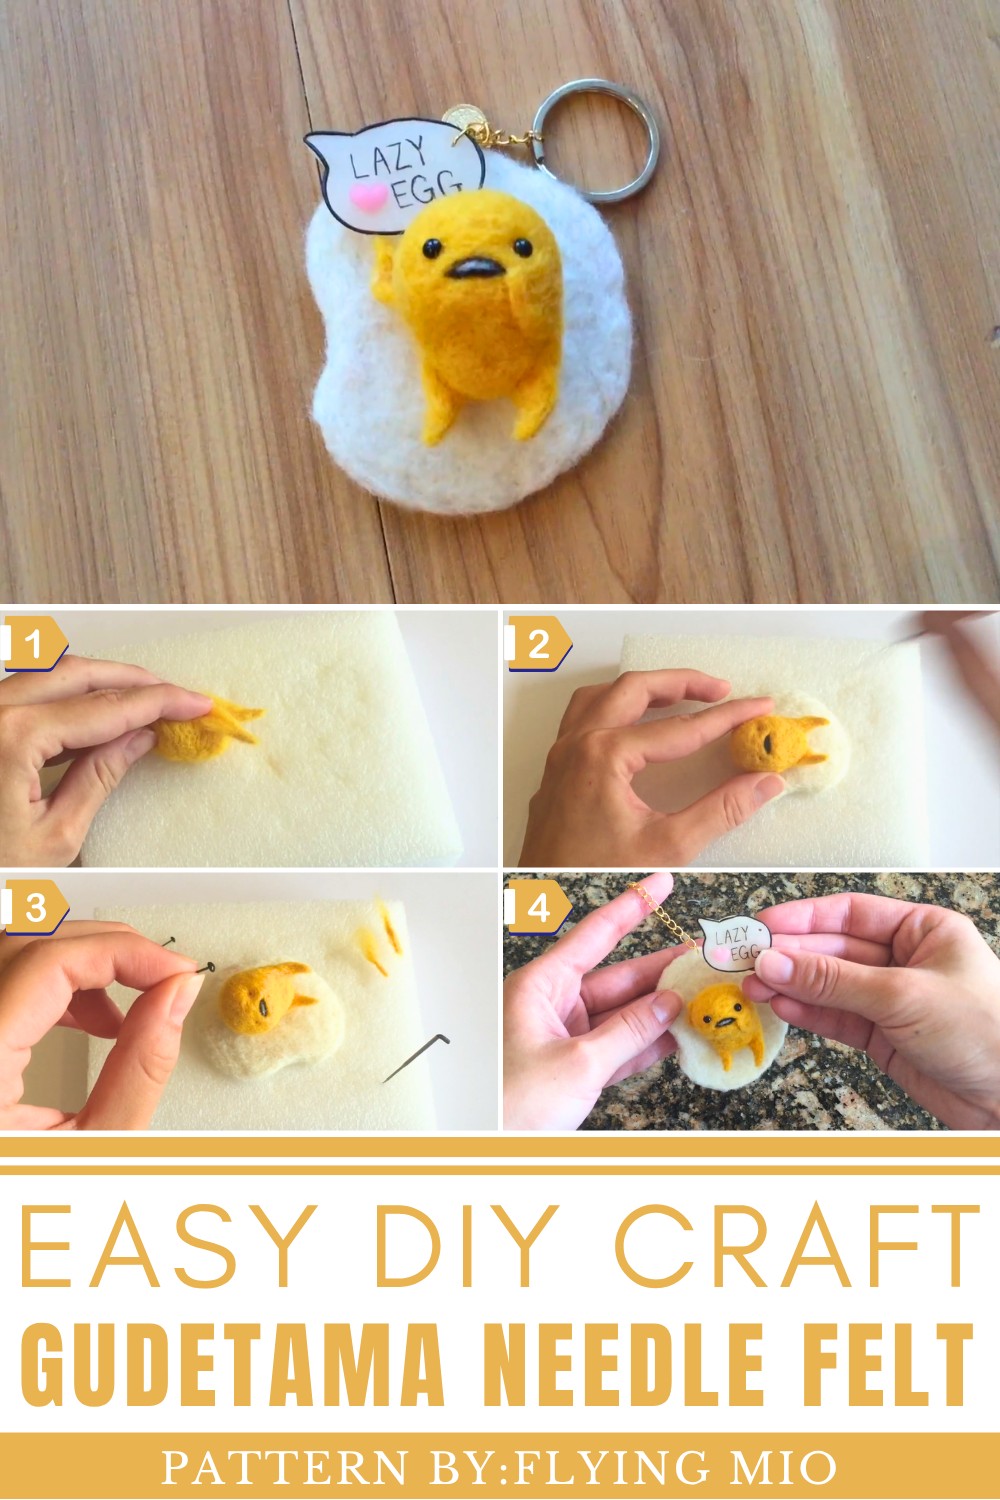
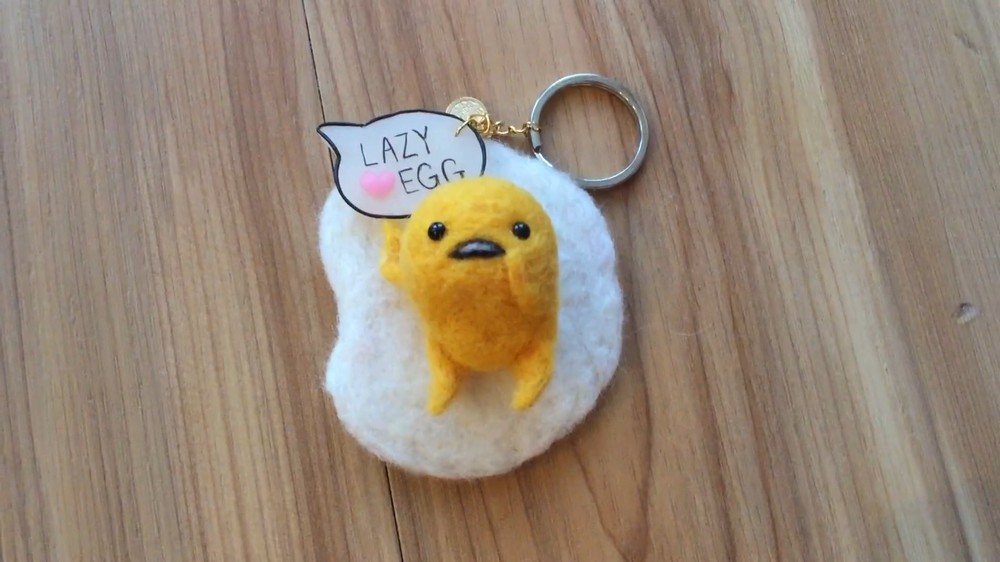
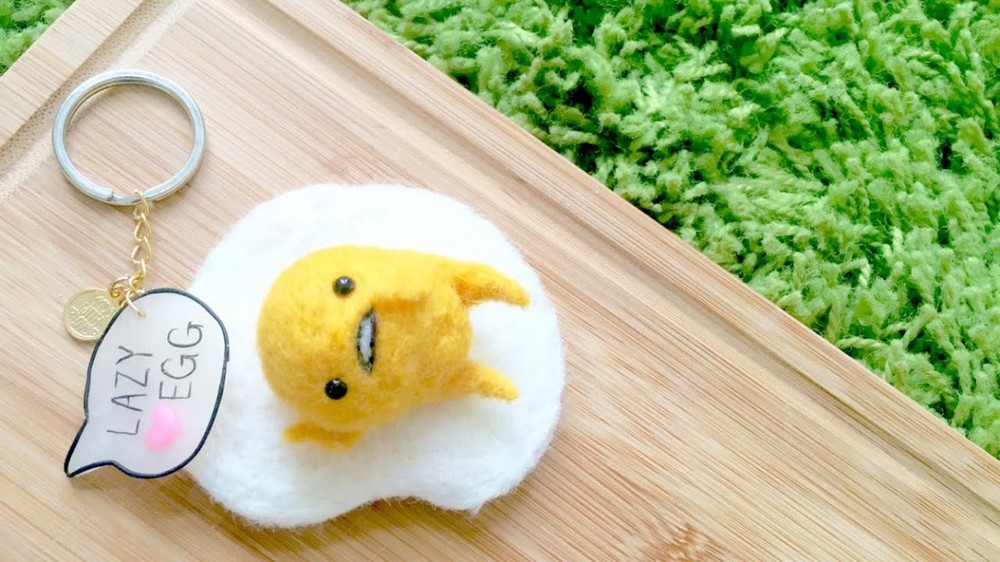
Bringing the quirky personality of Sanrio’s lazy egg to life, this irresistibly cute Lazy Egg plushie is the perfect blend of humor and charm. The finished design captures lazy egg signature lethargic expression, complete with a sleepy face, tiny limbs, and a yolk-colored body that looks ready for a nap atop a cozy white egg base. With its playful pose and comical "lazy egg" vibe, this DIY Lazy Egg Plushie Needle Felt creation is ideal for quirky home decor, gifts, or even as a cheerful keychain accessory. It's a simple yet clever design that appeals to fans of adorable, relatable characters and handcrafted projects.
Make Your Own Needle Felt Lazy Egg Plushie with Simple Steps
Flying Mio is known for bringing whimsical ideas to life through her creative DIY tutorials. Her YouTube channel Flying Mio showcases an array of charming designs, encouraging viewers to express their imagination and craft skills.
Importance of the DIY Lazy Egg Plushie
The DIY Lazy Egg Plushie Needle Felt design holds a special significance for fans of crafting and playful, character-inspired creations. Beyond its adorably quirky appearance, this plushie allows individuals to engage with the art of needle felting—a relaxing and rewarding craft that encourages creativity and mindfulness. Making this Lazy Egg helps crafters embrace the joy of creating something unique while offering an opportunity to explore their artistic skills.
The finished plushie itself is more than just a cute decoration. Featuring the hilarious and relatable character of Gudetama, the Lazy Egg plushie brings a sense of humor and lightheartedness to any space, reminding us all to slow down and enjoy the little things in life. Its compact form makes it perfect for gifting, personal crafts, or as an uplifting statement piece to brighten up your home or workspace.
Moreover, designs like this showcase how even small, handmade creations can evoke emotional connections. The Lazy Egg plushie embodies whimsy, comfort, and the beauty of imperfection, highlighting the significance of self-expression through crafting. Whether you're a seasoned artisan or a beginner exploring needle felting, this project can inspire a sense of accomplishment and joy.
How to Make a Lazy Egg Plushie – Step-by-Step Beginner’s Guide
If you love the idea of crafting a fun and lovable character, this tutorial is perfect for you. Today, we’ll create Lazy Egg, Sanrio’s incredibly adorable and hilariously lazy egg yolk. You may feel inspired to turn Lazy Egg into a keychain or simply make it as a cute decoration. With needle felting techniques and a bit of patience, you’ll have your very own Lazy Egg relaxing on a bed of egg white.
Materials You'll Need
- Felting needle (a specialty needle available at craft stores)
- Foam board or house sponge (to keep felting safe and controlled)
- Felting wool in white (for the egg white base)
- Felting wool in yellow (for Lazy Egg yolk body, arms, and legs)
- Felting wool in black (to create Lazy Egg eyes and expression)
- Felting wool in white (for mouth detail)
- Animal eyes (tiny 2 mm) or create your own (optional)
- Hot glue gun (optional for assembly)
- Polymer clay (if you plan to create any accessory like a sign)
Step 1: Making the Egg White Base
- Begin by taking a handful of white felting wool and flattening it into an oval shape on your foam board. Aim for an organic, imperfect oval—this will be Lazy Egg “egg white.”
- Use your felting needle to poke the wool repeatedly, shaping it into a flat oval. Gradually press down and mold the wool until it’s roughly 0.5 centimeters thick.
Step 2: Creating Lazy Egg Yolk Body
- Take the yellow felting wool and roll it into a small oval ball by hand to give it an organic yolk-like shape.
- Place the wool on your foam board and work with the felting needle to further shape it. Poke the wool repeatedly to compress it, creating a smooth, dense texture. Avoid making it too perfect—in true lazy egg fashion, Lazy Egg is wonderfully imperfect.
Step 3: Adding Lazy Egg Limbs
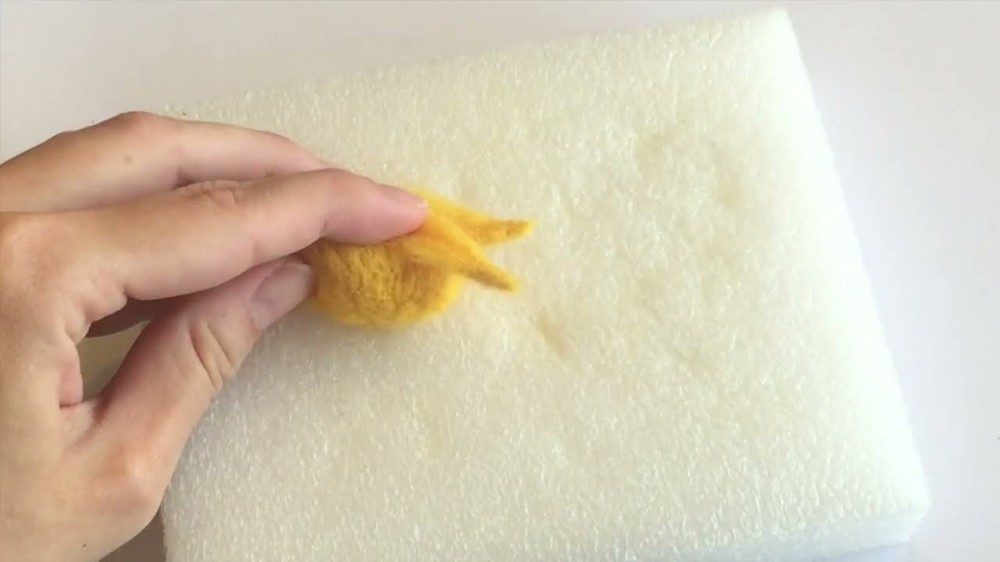
- To make the legs, take small amounts of yellow wool and roll them into thin, long cylinder shapes. Carefully needle felt these shapes into smooth, tiny legs.
- Once your legs are ready, position them on the yolk where you want them to be and use the felting needle to connect them to the body. Needle felting attaches the legs by interlocking fibers, eliminating the need for glue.
- Repeat this step for the arms, which can be more curved or angled depending on the position you desire for Lazy Egg . Play with positioning—arms can point toward the mouth or lounge out lazily.
Step 4: Shaping Lazy Egg Face
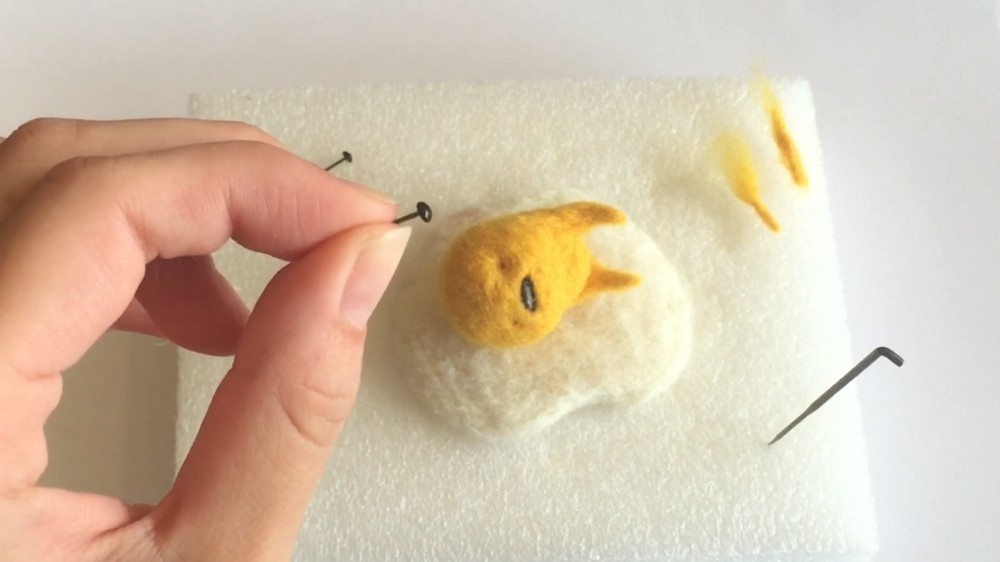
- Position the yolk on top of the white base so you can get a sense of where you want the face to be. Use your felting needle to lightly mark two tiny holes for the eyes.
- Take small pieces of black wool and gently needle felt them into place, forming Lazy Egg sleepy, lazy eyes.
- For the mouth, needle felt a thin strip of black wool into a frowning shape below the eyes.
- Add a tiny piece of white wool to the center of the black mouth to give it extra detail. Be careful to keep the black visible around the edges.
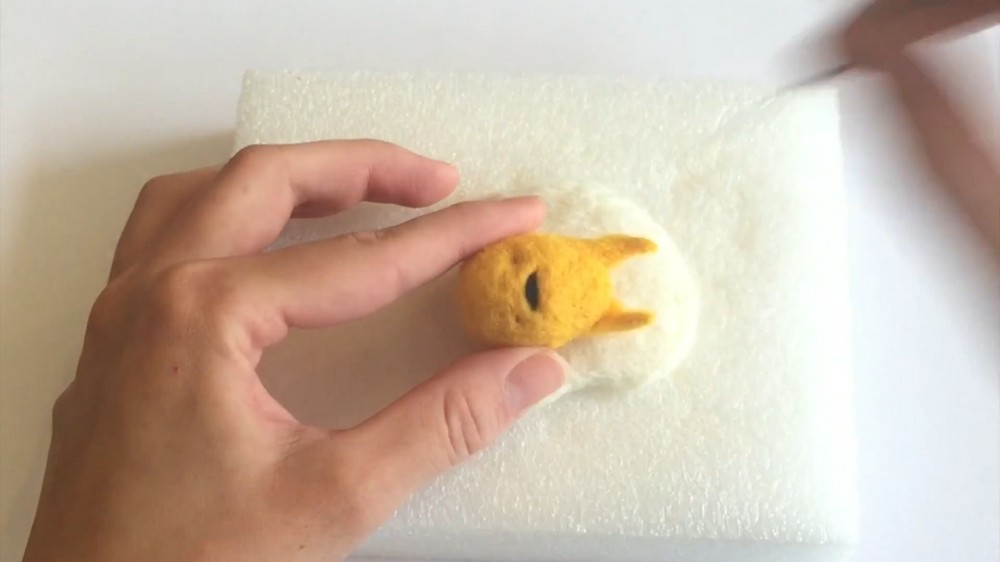
Step 5: Finishing Lazy Egg Features
- Insert tiny plastic animal eyes where you previously marked the holes on the face. If you prefer a handmade look, create flat black circles from black wool or polymer clay and attach them instead. Adjust the placement until Lazy Egg face looks perfectly lazy.
- Position and attach Lazy Egg arms and legs. For more dimension, curve the arms slightly before attaching them—for example, one arm could lazily reach toward Lazy Egg mouth or rest beside him on the egg white.
Step 6: Joining Lazy Egg and the Egg White
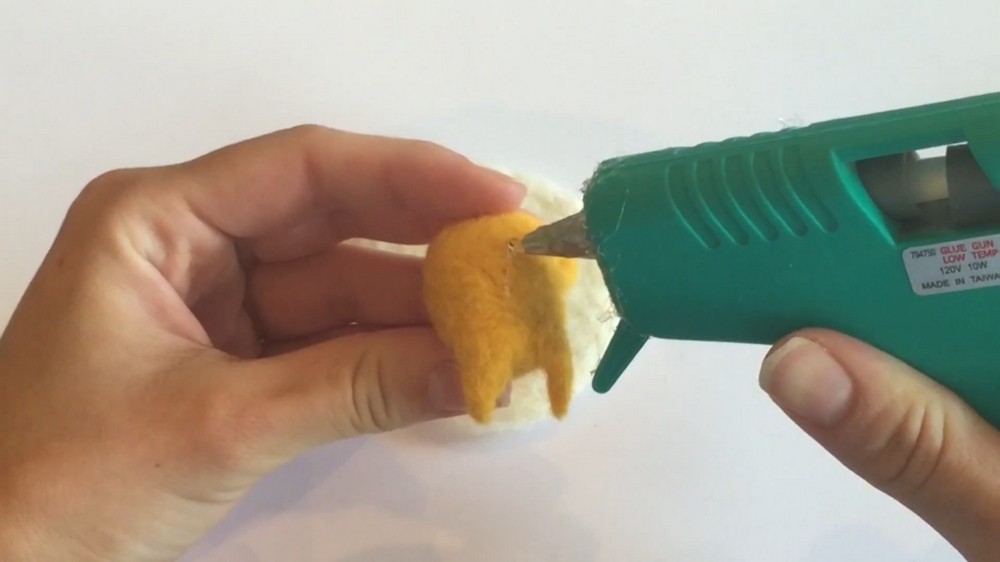
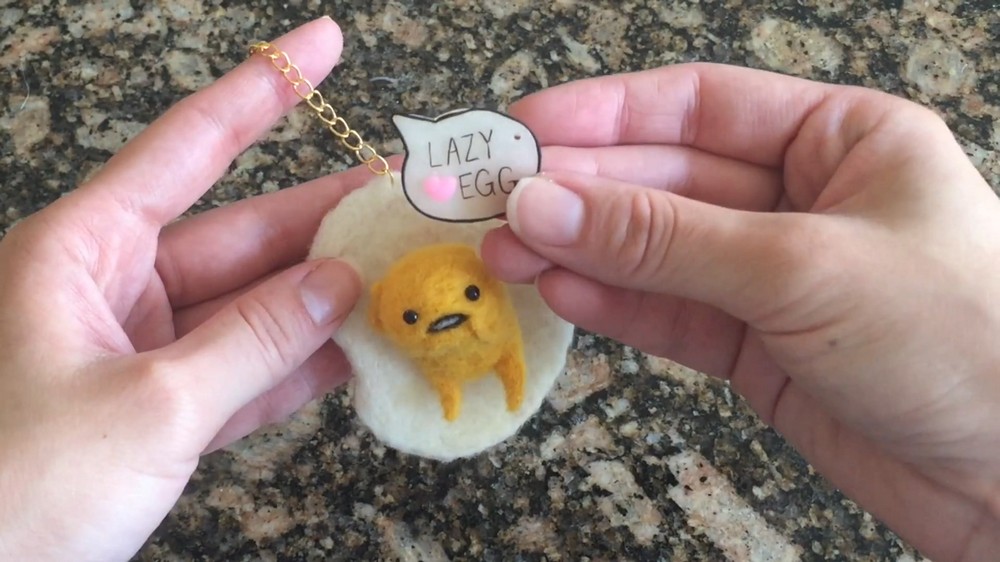
- Lay Lazy Egg yolk body on top of the felted egg white. If you’re confident with positioning and want to keep the shapes intact, use a hot glue gun to attach them together.
- Alternatively, you can needle felt the yolk and egg white together, but note that this may slightly alter the shape of your pieces as the fibers fuse.
Step 7: Adding Accessories (Optional)
- If you want to turn Lazy Egg into a keychain, you can make a tiny sign or charm out of polymer clay.
- Roll out your clay into a thin, flat rectangle and use a toothpick or sculpting tool to inscribe your desired text. Bake the clay according to package instructions and let it cool. Attach the charm to Lazy Egg with glue or by adding a jump ring.
Step 8: Final Touches
Take a moment to examine your Lazy Egg plushie. Adjust any details or felt loose fibers if necessary to refine your character. Lazy Egg beauty lies in his quirky imperfections, so have fun with the design. You’ve just created a whimsical little companion that’s perfect for lazy Mondays and beyond.