Master the art of making adorable polymer clay charms inspired by dango mochi snack that's perfect for accessories or unique handmade gifts.
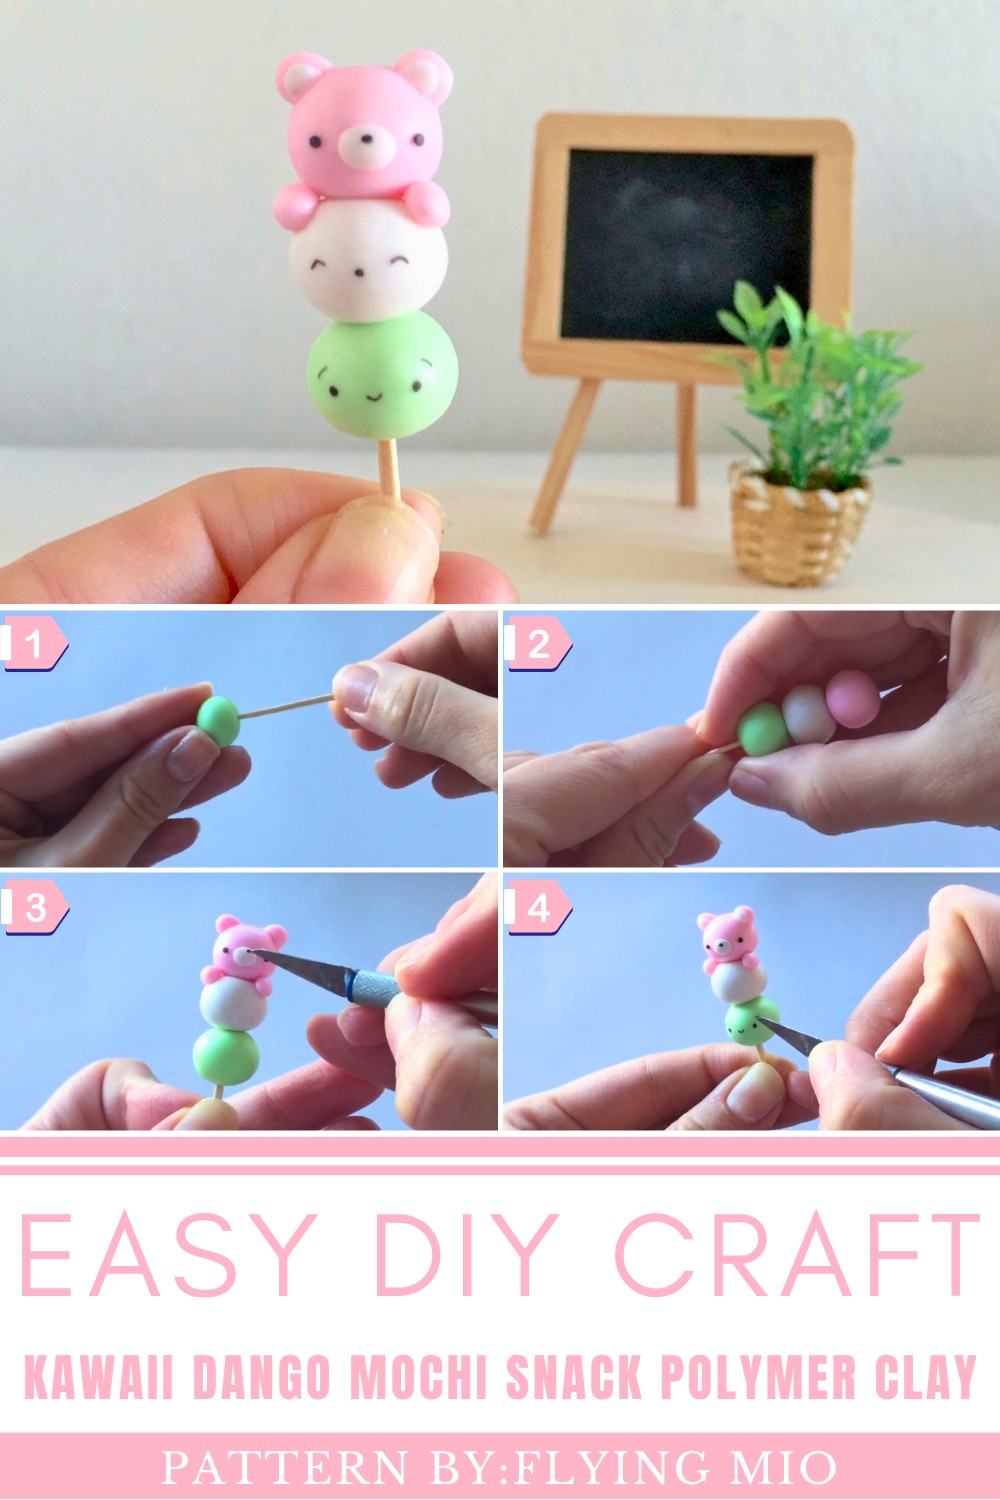
Bursting with charm and personality, this miniature design brings the magic of Japanese treats to life. The DIY Dango Mochi Snack Polymer Clay creation features three stacked mochi balls in soft pastel tones, green, white, and pink, each with its own playful expression. The top mochi, shaped like a teddy bear, adds an irresistible layer of whimsy, while the delicate facial details and carefully crafted poses make this piece truly eye-catching. Perfect for display, gifting, or adding a cheerful touch to your space, this adorable creation effortlessly combines cuteness with timeless design.
Turn Polymer Clay Into Cute Dango Mochi Snacks – Easy DIY Guide
For Designer!
Flying Mio, renowned for her captivating polymer clay artistry, shares tutorials and creative inspiration on her channel. Discover more of her delightful work by visiting Flying Mio’s channel.
Features of the DIY Dango Mochi Snack Polymer Clay Design
1. Adorable Trio of Mochi Balls
The design showcases three stacked mochi balls in classic pastel hues—soft green, white, and pink—immediately capturing the cheerful aesthetic of traditional Japanese dango snacks.
2. Playful Expressions
Each mochi is adorned with charming, hand-crafted faces that radiate personality, ranging from serene to cheerful, making the design visually engaging and uniquely appealing.
3. Teddy Bear Topper
The pink mochi is shaped like a cute teddy bear, complete with tiny ears, a hugging pose, and intricate details that add an extra dose of whimsy to the miniature.
4. Versatile Purpose
This creation is perfect as a decorative piece, a thoughtful handmade gift, or even a fun collectible for fans of polymer clay art or Japanese-inspired designs.
5. Compact and Aesthetic Design
Its small size and harmonious color palette make this miniature ideal for brightening up any space, whether placed on a desk, shelf, or display case.
6. Handcrafted Charm
Every detail of this DIY Dango Mochi Snack Polymer Clay piece reflects careful craftsmanship, bringing warmth and uniqueness to the finished product.
7. Inspired by Japanese Dango
The design reimagines the beloved dango snack as an artistic collectible, adding cultural depth and creativity to its appeal.
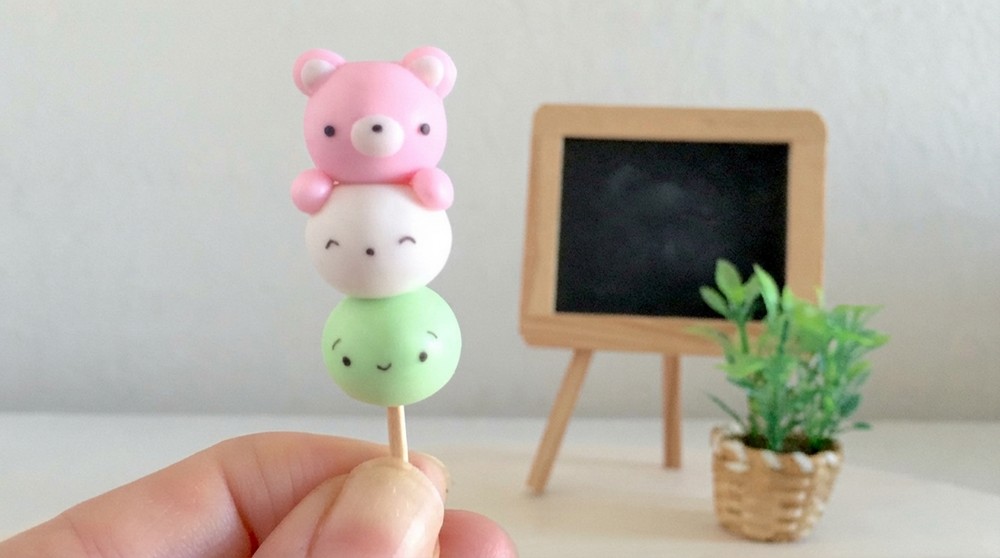
DIY Kawaii Dango Mochi Snack Polymer Clay
Step-by-step guide for creating your cute polymer clay Dango craft from scratch. I've broken it into simple steps to make sure beginners can follow along effortlessly. Let’s get started!
DIY Polymer Clay Dango Craft Tutorial
What is Dango?
Dango is a traditional Japanese treat typically made of chewy rice balls skewered on a stick. In this craft, we are recreating the dango using polymer clay and adding adorable faces, including a teddy bear for extra cuteness!
Materials Needed
Before you begin, gather these materials:
- Polymer Clay: Pink, white, and green (or other colors if you prefer).
- Toothpick or craft stick: For assembling the dango.
- Craft tools: Optional tools like a clay roller, small knife, or dotting tool.
- Micro beads or black clay: For creating tiny facial details.
- Smooth surface: A clean area to work.
- Oven or baking tool: To harden the polymer clay (per package instructions).
Step-by-Step Instructions
Step 1: Rolling the Mochi Balls
- Prepare your clay: Take small portions of pink, white, and green polymer clay.
- Roll into balls: Gently roll each color into a small ball (about the size of a marble). Tip: Slightly flatten the balls into oval shapes; they will look cuter and more realistic!
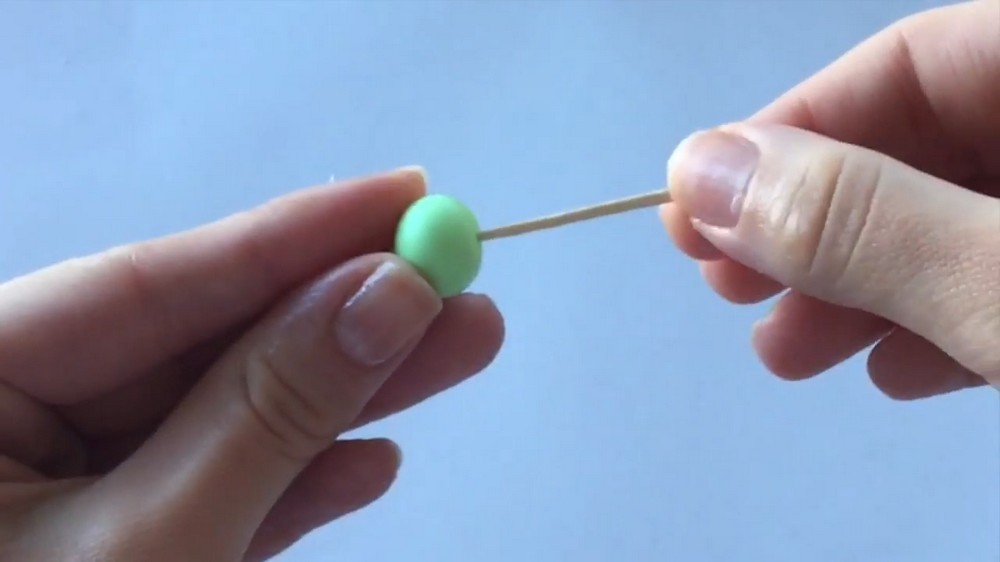
Step 2: Assemble the Dango
- Take your toothpick: Start with the green clay ball. Carefully slide the toothpick through the center of the green ball.
- Add the white ball next: Push the white ball onto the toothpick, stacking it above the green one.
- Top it with pink: Place the pink ball as the top layer.
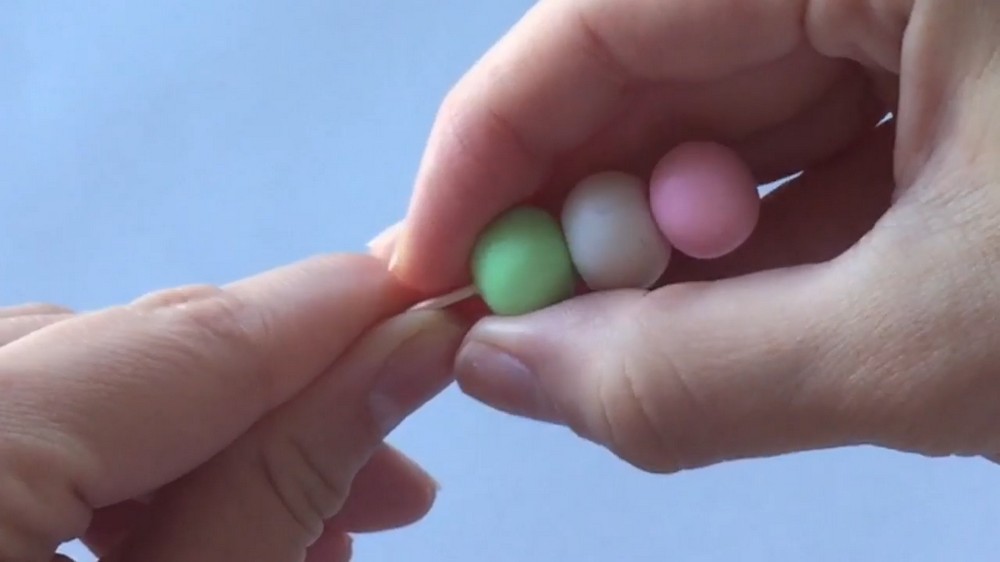
Your basic dango shape is now complete!
Step 3: Adding the Teddy Bear Details
- Create the bear ears:
- Roll two tiny semicircles from the pink clay.
- Attach them on top of the pink ball to look like ears. Smooth gently so they blend well.
- Make bear arms: Roll two small pink pieces and shape them into little arms. Attach them under the head and onto the white ball so it looks like the bear is hugging the dango.
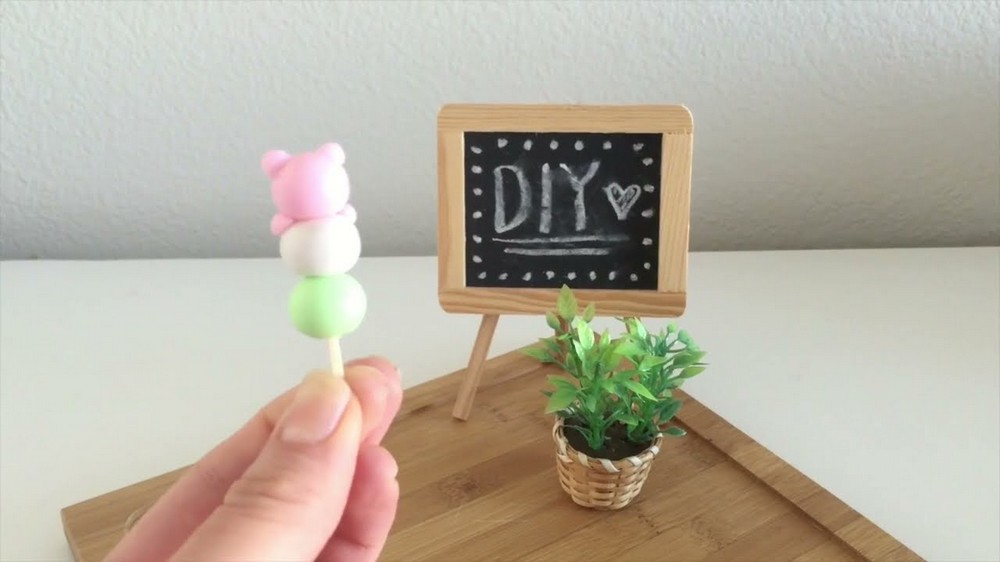
Step 4: Sculpting Faces
This part is where the dango becomes extra adorable! Let’s focus on the faces:
- Bear Face:
- Roll a tiny white ball and flatten it into a circle for the bear’s face. Attach it to the front middle of the head.
- Roll out two tiny black dots for eyes and a third one for the nose. Place them carefully on the white face circle.
- For inner ears, add even smaller flattened white clay (optional).
- Green Mochi Face:
- Roll two tiny black dots for eyes.
- For the smile, roll out a thin piece of black clay into a snake shape. Curve it slightly and place it between the eyes to form a happy smile.
- Optional: Add tiny black eyebrows for extra personality!
- White Mochi Face:
- Use black clay to create smiling, closed eyes (small curved lines). You can also make sleeping eyes by shaping thin lines like a happy arc.
- For the mouth, roll out a small black dot and place it in the center. You could also make a little “O” or even a tongue.
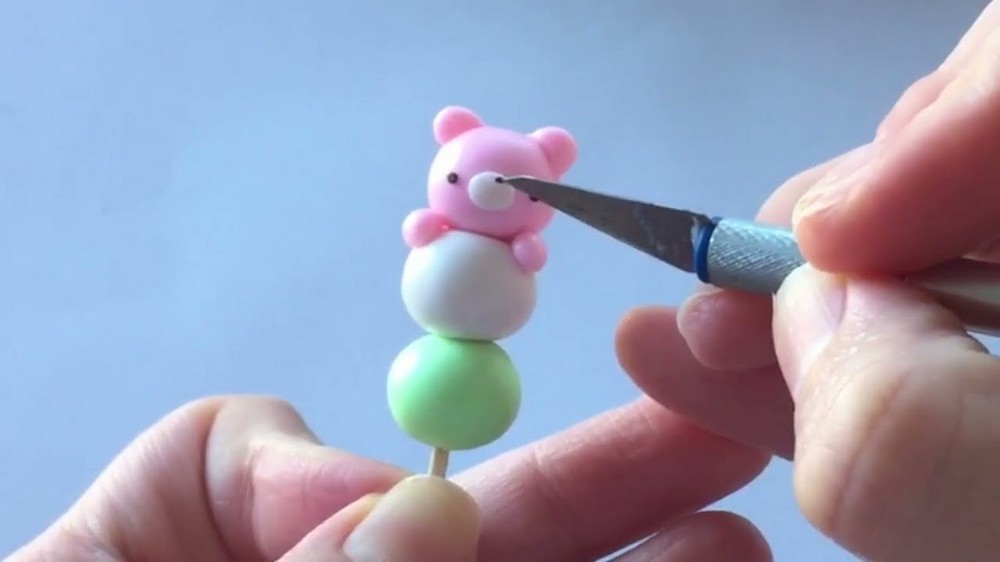
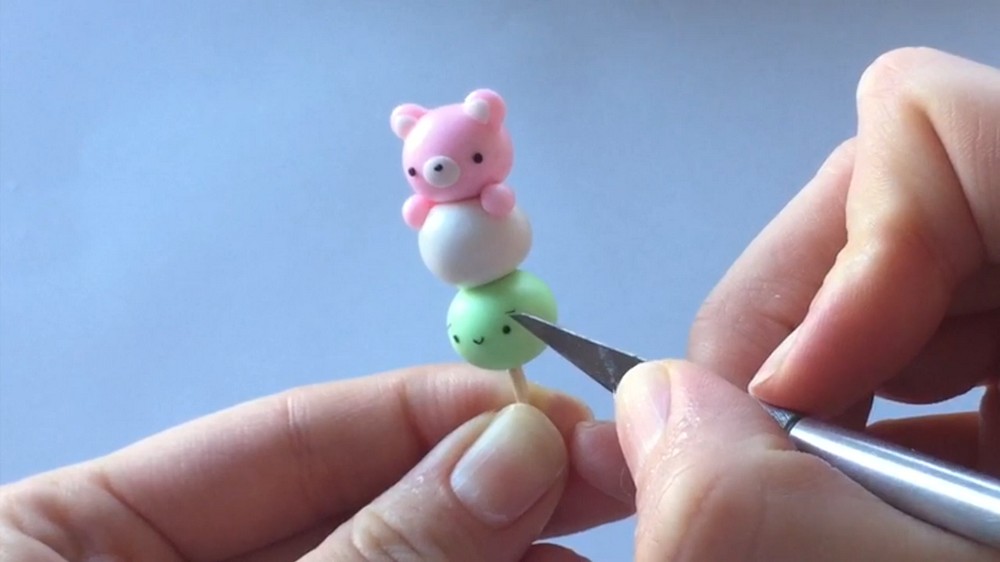
Tip for delicate details: If creating tiny facial features feels tricky, use micro beads instead of rolling black clay for eyes, or use a very thin toothpick to carve details.
Step 5: Final Touches
- After attaching all the pieces, make sure you smooth out any rough areas and press lightly to secure all parts together.
- Optional: If you want your dango extra shiny, you can glaze the clay after baking.
Step 6: Harden the Clay
- Follow your polymer clay package instructions for baking. Usually, it requires about 250°F-275°F for 15-30 minutes.
- Place your dango skewers on a baking tray lined with parchment paper.
- Watch them closely to make sure they don’t burn!
Step 7: Admire and Decorate
- Once cooled, you can proudly display your new dango creation or turn them into keychains, magnets, or even cute jewelry!
Tips for Beginners
- Work slowly when creating the facial features—precision is key.
- Always handle polymer clay with clean hands to avoid dirt sticking to the clay.
- If your clay starts feeling sticky, pop it in the fridge for 5 minutes to firm it up.
- Keep experimenting with different expressions or even animal designs for your dango!