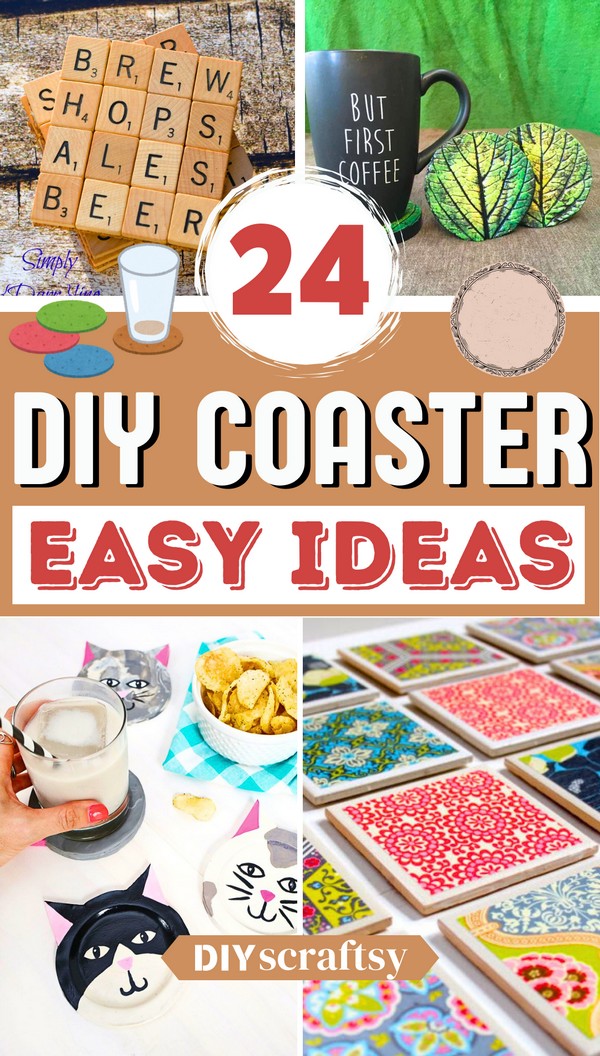
Do you love to make things on your own? Then, here is a nice collection of DIY coaster Ideas with which you can decorate your home and make it look more beautiful. These coasters are easy to make, so if you have some free time, you can try making them. If you want a unique pattern in your coaster, you can add wallpaper to the bottom side of it or use any other material of your choice. The shape and size of this coaster can be based on your wish. You can decorate them with beads of different shapes and colors and make a beautiful design on the top. As you look into your big box of coasters, get creative and give your home some personality by making some DIY coasters!
DIY Coasters Ideas For Mugs And Cups
Uses Of DIY Coasters Ideas
Fun DIY coaster ideas are a great way to add a little personality to your home decor. Whether you're looking for a fun craft project or a way to use up some of your favorite fabrics, there are so many great options for DIY coasters. Here are a few of my favorites:
- Sew Coasters: This is the perfect project if you love sewing and crafting! These DIY coasters are made from old t-shirts cut into squares and then sewn together with contrasting thread. You can even make them into poufs if you want!
- Cloth Napkin Coasters: If you're looking for something simpler than sewing, these cloth napkin coasters might be right up your alley. They're made with only two materials: cotton fabric and iron-on interfacing. No sewing is required!
- Chalkboard Coasters: Chalkboard paint is one of my favorite crafting products because it's so easy to use — apply it with a brush and wipe off any excess when dry! These chalkboard coasters are perfect for marking drink orders or setting out place settings at a party or event.\
DIY Scrabble Tile Coasters

Add a fun, personalized touch to your home decor with these unique, custom-made DIY Scrabble Tile Coasters. Crafted using Scrabble tiles, these coasters not only protect your surfaces but add a playful element to your home decor. Many 4-letter drink-related words can be used to describe various drinks, making them ideal for placing under your favorite beverages.
Begin by arranging the tiles into 4-letter words related to beverages or drinking. Once you have a layout you're happy with, apply glue to each tile and place it onto the base. Use the edge of the base as a guide to align your tiles. After the glue has dried, use a knife to cut the excess base around the tiles. For additional durability, you could choose to apply a sealant to the top of the tiles, but this step is optional. Enjoy your new DIY Scrabble tile coaster!
Materials:
- Scrabble tiles
- Cork backing
- E6000 glue
- X-ACTO knife
- Mod Podge (optional for sealing the top)
- Heavy items
DIY Cowhide Coasters

Bring a rustic touch to your home with these DIY Mini Cowhide Coasters. It uses scrap white leather or vinyl and seems like a miniature version of a full-sized cowhide, making your coffee table or dining table the focal point of any gathering. It is also a great gift for a cowboy or farmholder!
Begin by tracing the cowhide templates onto the back of the desired material. Following the outline, carefully cut out each mini cowhide using a pair of sharp scissors. To highlight details and spots, use black and brown permanent markers. Search for cowhide rugs online for inspiration on patterns. Start your design by outlining the spots and blotches, fill them in using a small circular motion, allow it to dry, and apply a second coat if necessary. Enjoy your DIY mini cowhide coasters!
Materials:
- Scrap white leather or vinyl
- Mini Cowhide Templates
- Black and brown permanent markers
- Scissors
DIY Scented Hot Pad

Increase your home's look and feel with DIY-scented hot pads. These multi-purpose tools are rice-filled coasters with soothing essential oils. When you put a hot drink on the pad, it warms the rice and makes the oil's scent stronger, creating a calm atmosphere in your house. They're also good for picnics and serve as a mild fragrance spreader..
Start by infusing the rice with essential oils. Leave this to rest overnight in a sealed bag. Create a 5x12-inch strip from the chosen fabric and neatly sew quarter-inch hems on the short ends. Fold this strip over itself, with the hemmed edges overlaid to form a 5x5 inch square. Sew the sides using a quarter-inch allowance, leaving sufficient space to reverse it later. For the inner pouch, build a muslin bag of 5x10 inches and leave a small opening to pour in the scented rice. Seal the muslin bag post-filling. Finally, slide the sealed muslin bag into your fabric envelope. Your DIY-scented hot pad is all set.
Materials:
- 1 cup rice
- Essential oil (of your choice)
- Ziploc bag
- 5″ X 12″ Fancy fabric (for the outside of the coaster)
- 5″ X 10″ Muslin
- Sewing machine
DIY Pallet Wood Coasters

So much more than just a coaster, these beautiful wooden coasters are perfect for any outdoor patio, cafe, or restaurant. They are handcrafted from all-natural wood and food-safe lacquer, making them sturdy and durable. These DIY Pallet Wood Coasters make excellent gifts, mainly if you use the recipient's favorite color.
First, cut dowels into 4" chunks. For each coaster. You need specific quantities of the square dowel and rectangular dowels all in 4" lengths. The square pieces form the base, and the rectangular pieces form the top. Space them evenly to produce a 4" x 4" coaster. Use a small dab of wood glue so it doesn't squeeze out. Once a pallet is stable, set it aside, lay a weight on top, and let it dry overnight. Optionally, you can stain each coaster for an aged look after gluing.
Materials:
- Three (3) ½ x ½ x 36-inch square dowels
- Two (2) ½ x ¼ x 36-inch rectangular dowels
- Franklin International 5003 Titebond-2 Premium Wood Glue, 8-ounce
- A wood saw
Wooden Coasters DIY

Delight your guests with these handmade wood coasters. They are rustic and sturdy, making them perfect for placing glasses or cups on. Each coaster is shaped by one-of-a-kind natural wood, so each coaster is different. Perfect for bars and kitchens, these handmade wooden coasters are one of a kind!
Take a thick tree branch and cut it into coaster-sized slices. Drill dowel holes into each slice for alignment. Then, attach a dowel to the bottom slice, creating a foundation. Stack the remaining slices in an orderly on the dowel. Trim the top of the dowel to be flush with the topmost slice. Optionally, you may sand the coaster surfaces and apply a protective finish. Finally, stack the completed coasters for serving or storage.
Materials:
- A tree limb
- Hand saw
- Chop saw
- A dowel
- Forstner drill bits
- Glue
- Flush cutting saw
- Danish Oil for finishing
- Heavy items or clamps for pressure during gluing
DIY QR Coasters

Establish a tech-inspired environment at your gatherings with these clever DIY QR Coasters. They not only offer a spot for guests to place their beverages but also facilitate swift and automatic login to your home Wi-Fi. If you have a bar or a shop, these DIY coasters provide you with an opportunity to promote your store or blog via this QR code.
You start by generating a QR code, which you import into Tinkercad and adjust to the correct size. Create a base for contrast and then test the QR code with a scanner app for functionality. You could enhance the design by making an image cutout for built-in redundancy. Proceed to 3D print the coaster, possibly switching filaments for a seamless look. For a touch of class, add extras like wooden bases and firmly fix the printed QR codes on them. This makes a perfect addition to any event.
Materials:
- SVG file of a QR code
- 3D Printer filament
- Plywood
- Danish Oil (or an alternate finish)
- E6000 adhesive
DIY Abacus Coaster

Use this DIY coaster to keep yourself entertained and hydrated! With the abacus feature, you can add up how many cups of water you've had today or calculate your cell phone bill at the end of the month. This DIY abacus coaster is easy to make. It's a great way to combine functional drinking and creative art.
Start by sticking the coaster pattern onto a piece of hardwood, then cut and trim it accordingly, including the tabs. Sand the coaster thoroughly for smooth edges. Mark and drill holes on those tabs for the dowel to fit in. Stain one bead for differentiation. Optional: sand tabs to mimic bead shape. Seal the coaster with a non-toxic finish, then assemble by inserting a dowel loaded with beads into drilled holes. Now it's ready for use!
Materials:
- (1x) piece of 5 ½" x 5 ½" x ⅜" hardwood
- (1x) 1/16" x 6" dowel
- (8x) 10mm round wooden beads
- Print out of coaster cut pattern pdf*
- Clear, non-toxic wood finish
- Brush for finish
- Double stick tape or non-permanent spray adhesive
- Either a darker wood stain or a colored paint**
- Sandpaper
- Disposable gloves
5-Minutes DIY Coasters

Are you a fan of the hexagon shape? Here's an easy-to-make coaster using the hexagonal design. This DIY project is suitable for beginners who want to give their house a fresh look, so get started now! The mini hexagon shape of these coasters makes them attractive and a great addition to your coffee table. The most beautiful part of this DIY coaster is that you can make it in less than 5 minutes if you are skilled enough!
Start by cleaning the little tiles that are attached to a woven grid. Then, cut the grid into desired coaster shapes. After you've cut the tiles, trim the woven grid along the edges of your coaster shape. Make sure to remove all loose ends to finish the coasters. That's it - a set of fresh coasters in no time at all.
Materials: The necessary supplies and recommendations can be found by clicking the following link:
DIY Concrete Coasters

Are you looking for a creative way to use concrete and make something useful? Why don't you start with these DIY concrete coasters? They're easy to make, requiring only a few basic materials. You can choose from various designs, create them yourself, or use this idea and turn it into a gift for your friends and family.
First, prepare a flat surface with wax paper and place a plastic cookie cutter on top, arranging a leaf for imprinting inside. Mix and pour the cement into the mold, filling it up evenly. Allow it to cure for about an hour until it hardens, then remove the coaster and peel off the leaf. Sand the edges and back of the coaster for smoothness. Paint the coasters using different shades, seal with acrylic sealer, and optionally add felt to the back. Enjoy your unique coasters!
Materials:
- Rapid Set Cement All
- Use a disposable cup, gloves, water, and a stir stick for mixing the cement.
- Plastic cookie cutter
- A leaf for imprinting
- Wax paper to protect the surface you are pouring concrete on.
- Coarse sandpaper
- Paint and acrylic sealer for decorating the coaster.
- Felt for the back of the coaster.
How To Make DIY Map Coasters

Your guests will love to see a little piece of the world on your tables. These DIY map coasters are an excellent addition to your home decor.It is also perfect to learn the map you want and also allow you to keep your beloved country map under your eyes. This project is so simple that anyone can make it anywhere with anything they already have lying around at home.
Choose the map section you want on each coaster, placing the coaster in the center of that area and tracing around it. Cut out your map sections accordingly. Apply a layer of adhesive to the back of each cut-out section; let it dry to avoid wrinkling. Once dry, adhere the map to the coaster. After this step, apply about three layers of sealant to the top of the coasters, allowing them to dry between each coat. Let the coasters cure for 48-72 hours before use.
Materials:
- Mod Podge
- Maps
- Tiles
- Self-adhesive felt
- Scissors
- Pencil
- Paintbrush
Tile Coasters DIY

These fun and easy tile coasters are a great way to use leftover tiles from your shower, tub, or backsplash. Showing vibrant color patterns and designs, they can add a vibrant touch to your simple table. The project is pretty and practical, an ideal gift you can make in bulk for family and friends.
Apply one coat of Mod Podge onto the tile. Place the paper in the center of the tile and allow it to dry. Brush another coat of Mod Podge on top of the paper. Allow it to dry for 15 minutes, and repeat this process 2-3 more times. After Mod Podge is dry, spray the tiles with clear acrylic sealer, following the manufacturer's instructions. Allow coasters to dry completely before gluing felt squares to the bottom center of the tiles.
Materials:
- 4 square tiles from your local hardware store (4.25″ x 4.25″)
- 4 pieces of scrapbook paper (3.75″ x 3.75″)
- 4 pieces of felt (3.75″ x 3.75″)
- Mod Podge
- Sponge brush
- Glue
- Clear acrylic sealer
Painted Clay Coasters DIY

Discover a nifty and fun project, crafting DIY Coasters that would add an artistic charm to your home! Highlighted on The Lovely Drawer, these coasters are an amalgamation of simplicity and elegance, created using white fimo polymer clay. You can go with this design or paint the design that matches your taste.
First, preheat the oven and prepare the clay by forming it into a ball and rolling it out into a disc. Use a cutter to create the desired shape, then bake the clay in the oven for the required time. Once cooled, paint your design on the coaster and bake it again or seal it with mod podge. For the iced tea, steep tea bags and sliced peaches in boiling water, then add honey. Refrigerate, remove teabags, and add cold water. Pour into glasses with ice and enjoy.
Materials:
- Rolling pin
- Cookie cutter
- White fimo / polymer clay
- A lined baking tray
- Blue porcelain/glass / tile paint
- Paintbrush
Clay Kitty Coaster DIY

This DIY project makes for all cat lovers a perfect gift for the person with everything! These clay kitty coasters are easy to make and very relaxing. This is an easy project, and if you make them as gifts, they'll be a big hit with your friends and family, even if they're not a cat person! It will look great in any home because it's simple yet stylish.
Kick off the process by preheating the oven and prepping the clay. Form it into a ball, then roll it flat into a disc. Next, use a cutter to carve your desired shape, then bake as advised. Once cooled, paint a design onto the coaster, then bake once more or seal with Mod Podge. For the iced tea, steep the tea bags and peach slices in boiling water, then mix in honey. Let it chill, discard the teabags, then add cold water. Fill glasses with ice and serve your tea.
Materials:
- Oven bake clay
- Kitty coaster template (right-click to download)
- X-acto and plastic clay knives
- Nonstick mat and rolling pin
- Acrylic paint
- Clay sealer
DIY Macramé Coaster
If you love macramé and crafts, this DIY Macramé Coaster craft is for you! This is an easy-to-follow pattern for creating your very own macramé coaster. Pair it with a delicious summer drink, or set it on the dinner table as an optional extra seat. Macramé is a twisty, knotty way to make extraordinary things, from giant blankets and home decor items to jewelry. But did you know that macramé can also be used to make beautiful coffee or tea coasters that are easy to assemble? They make a great gift idea or stocking stuffer, too!
DIY Knotted Coaster
How To Make Marble Coasters From Clay
This tutorial will teach you how to make your own marble coasters from clay. It is easy to follow; even a beginner can make these! Being made of clay and acrylic paint, they look just like natural marble and are a great addition to any table. This DIY project will show you how to make marble coasters from clay. This is a relatively easy project and can be done quickly. The finished coasters look like marble, but they are clay.
DIY Fall Leaf Coasters
Get ready for fall with these DIY Fall Leaf Coasters that are made using only two colors of yarn! It's a great project to work on while watching the leaves change outside. Each coaster can be customized to fit your décor and make a fun gift too! These DIY Fall Leaf Coasters are perfect for fall entertaining. Create a set of four-leaf silhouettes and use them as placemats or drink coasters on your next (or all!) future autumnal occasions! Fall is almost here, and the leaves are changing. Bring the beauty of the outdoors inside with these DIY Fall Leaf Coasters! It only takes a couple of supplies and minutes to make your own set of pretty Autumn coasters for your next get-together.
DIY Resin Coasters With Dried Flowers
This craft project is to make your resin coasters with dried flowers. You will need (in addition to the links below and later mentioned) oil paints, artist brushes, masking tape (optional), a glue/glue gun (optional), a mouse pad, a cardboard box, and something to seal surfaces like a paper towel. With the summer months of warm weather, there's no better way to cool down your patio than with these DIY Resin Coasters With Dried Flowers. Whip up a batch of coasters and use them on the deck this summer. The best part about coasters is that they do double duty as both decor and practical—never again will your drink leave watermarks!
You can also see: Crochet Flower Patterns
DIY Hexagon Concrete Coasters
This is the perfect project to experiment with concrete or to make a few of these beautiful-looking coasters as gifts. You'll love these easy DIY concrete coasters. Start with a mold and concrete, then smooth the tops and add colored concrete to create the hexagonal pattern. The finished pieces make beautiful accessories for your coffee table or kitchen counter. Even if you have no experience at all with concrete, we will show you step-by-step how to make these fantastic coasters that are so much more than just functional pieces.
DIY Coasters With Fabric
Are you looking for an excellent way to add some color to your home? In this DIY project, the creator made beautiful coasters using fabric. If you have gorgeous pieces of fabric in your home, you can use this guide and learn how to convert them into great-looking coasters. Fun and easy, this DIY project will instantly change your table's look. Fabric coasters are not just simple; they are also efficient. You can use these DIY Coasters with fabric to refresh your dining table elegantly and stylishly.
Epoxy Resin Wood Coasters DIY
Turn your favorite wood planks into beautiful coasters with this DIY Epoxy Resin Wood Coasters Kit! Follow the easy steps to transform your planks into fun, handmade coasters that are perfect for entertaining. DIY Epoxy Resin Wood Coasters are a simple, easy, and fun way to create a functional art piece. It contains everything you need to make these beautiful coasters and enhance your home decor simultaneously. The epoxy kit will provide hours of fun and a great conversation piece for your guests!