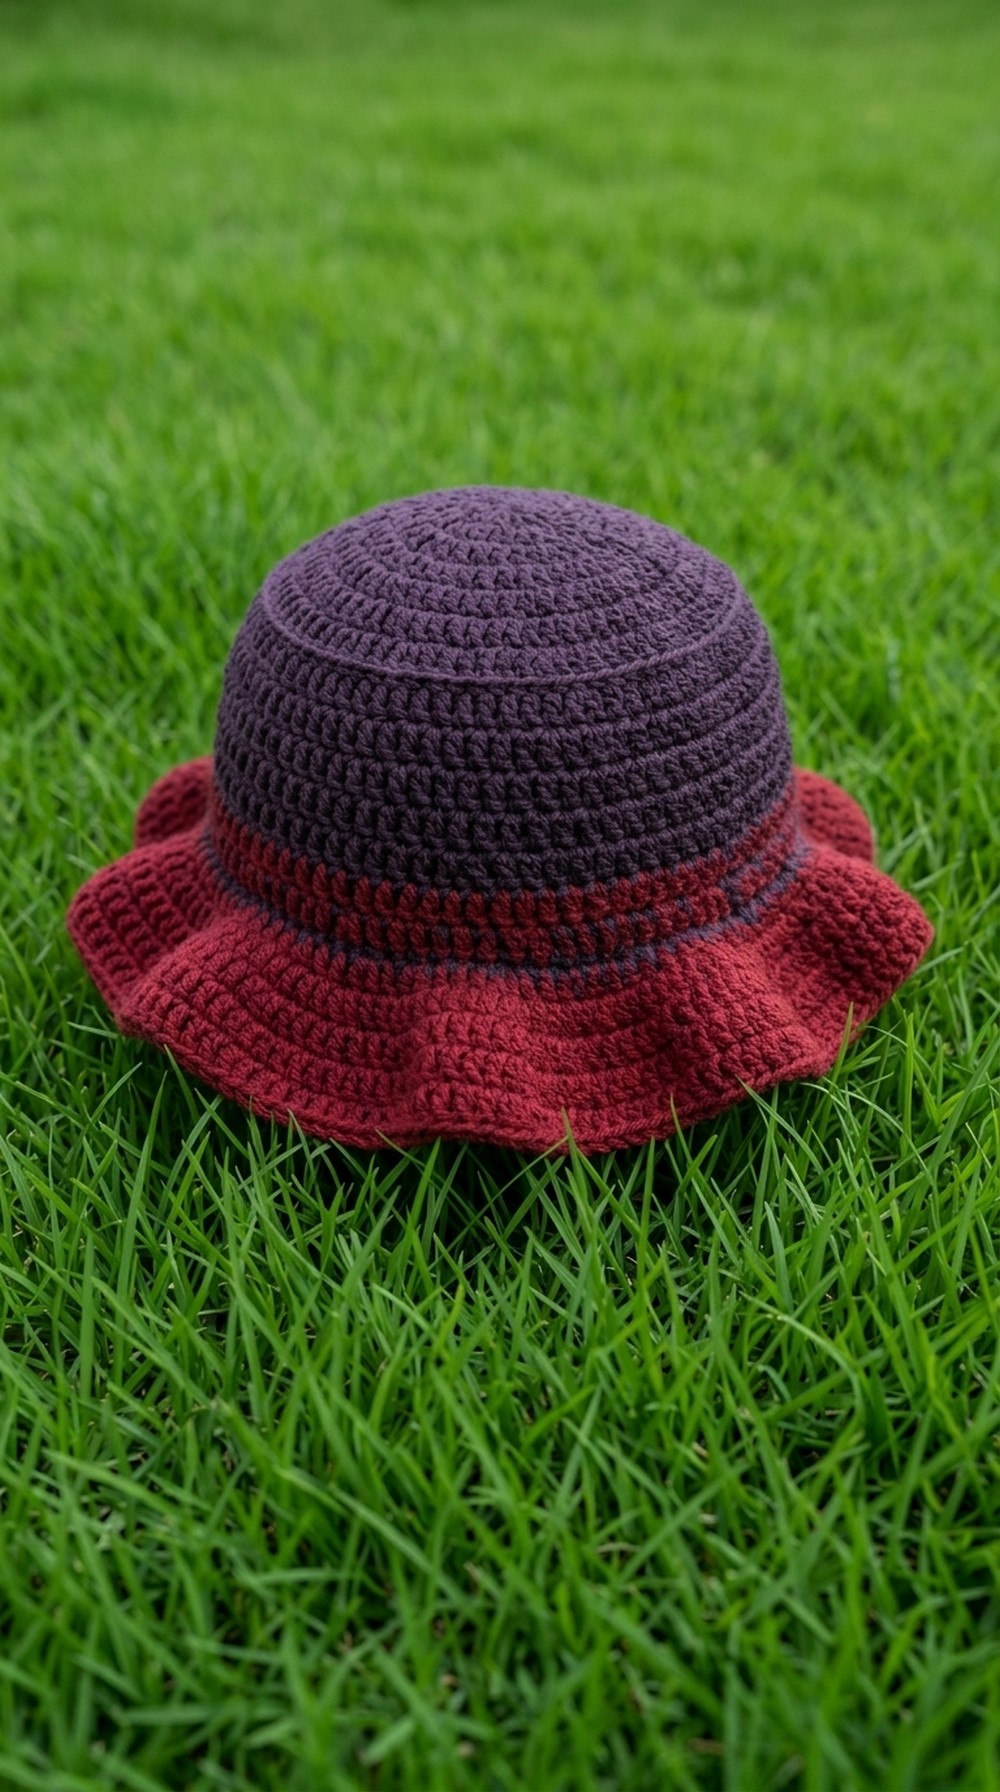
Make a trendy crochet bucket hat with this summer-ready pattern, perfect for adding a handmade touch to your warm-weather wardrobe.
Sometimes store-bought hats can feel plain and ordinary, but a crochet bucket hat adds personality and charm to your look. This timeless hat is lightweight, soft, and has a wide brim that shields your face from the sun. Its shape is both stylish and practical, making it a great choice for outdoor adventures or casual outfits. The flexibility of design allows for endless options—you can choose bright colors for a bold statement or soft tones for a subtle, elegant vibe.
Trendy Crochet Bucket Hat Pattern for a Perfect Summer Look
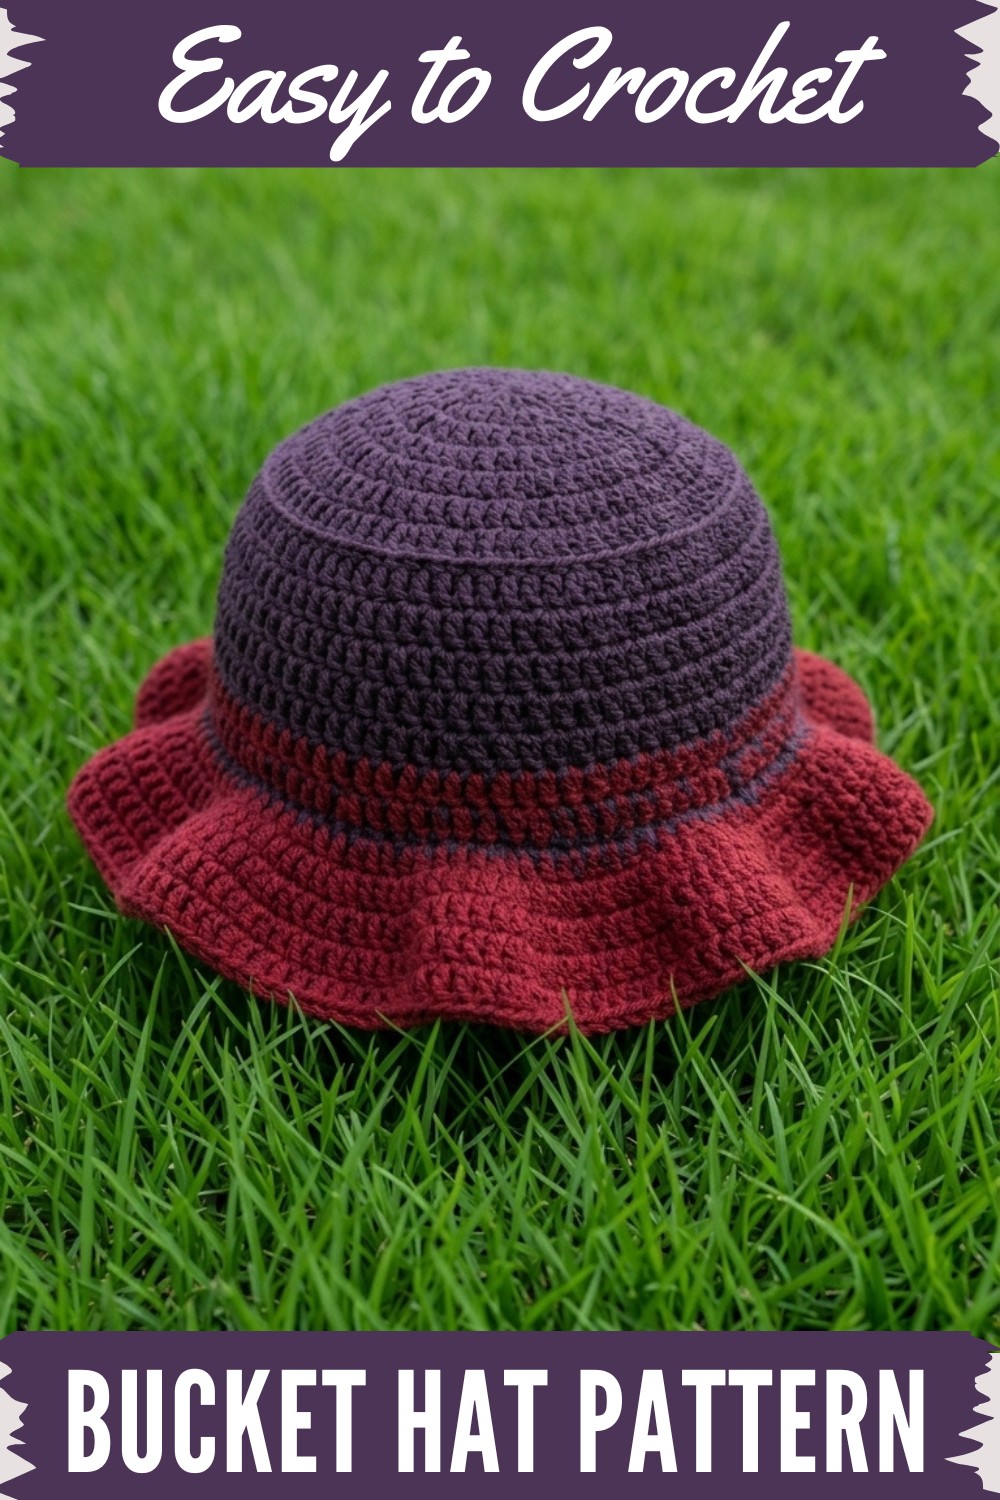
The process of building a bucket hat is simple yet fascinating. Starting from the crown, you work in rounds to shape it, gradually moving onto the wide brim that gives the hat its distinct silhouette. It’s easy to add your own twist with decorative details like flowers, beads, or stripes. This versatile accessory serves as a great addition to any wardrobe, offering both functionality and style. It’s also a thoughtful idea as a handmade gift for friends or family, spreading a sense of effort and care stitched into every little detail.
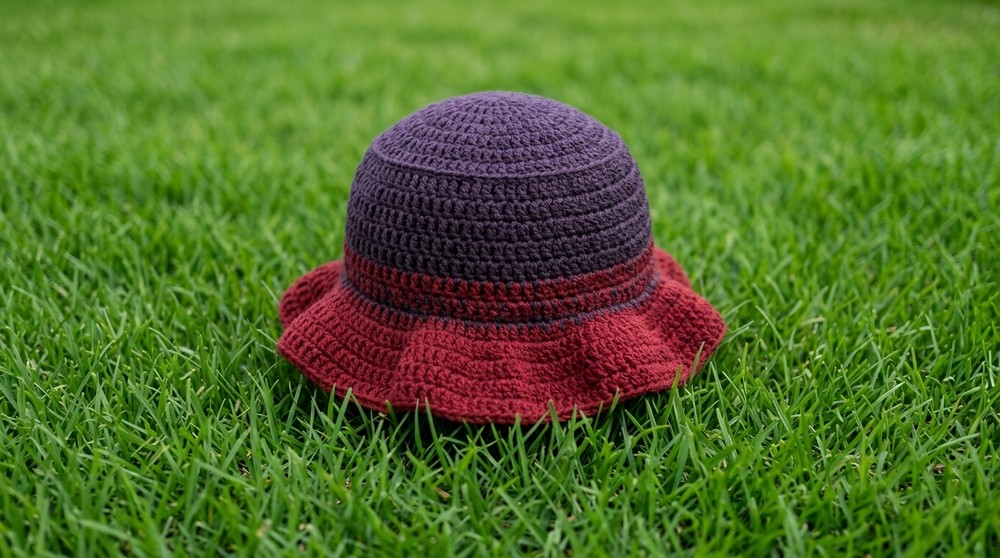
Classic Crochet Bucket Hat (Double-Strand)
Skill Level
Intermediate
(Basic experience with working in the round, increasing, and back/front loop stitches is recommended)
Materials
- Yarn: Soft cotton-acrylic blend (sample uses 50% acrylic, held double for structure).
- For beginners: use a single strand for ease of handling.
- Adult hat estimate: 100–150g total, DK or worsted weight.
- Crochet Hook: 3 mm (US D/3) or size needed for your yarn
- Scissors
- Tapestry needle (for weaving in ends)
- Stitch marker (optional, for marking round beginnings)
- Optional: Multiple colors for stripes/shading
Key Abbreviations (US Terms)
- ch: chain
- sl st: slip stitch
- sc: single crochet
- dc: double crochet
- inc: increase (2 dc in same st)
- BLO: back loop only
- FLO: front loop only
- st(s): stitch(es)
- rnd: round
Special Notes
- Pattern is worked in joined rounds, with increases evenly spaced.
- Chains at beginning of rounds do not count as dc unless otherwise noted.
- Hat is worked top down: crown, straight sides, then brim.
- Try the crown on as you go; stop increasing when you reach the desired diameter for your head size.
Pattern
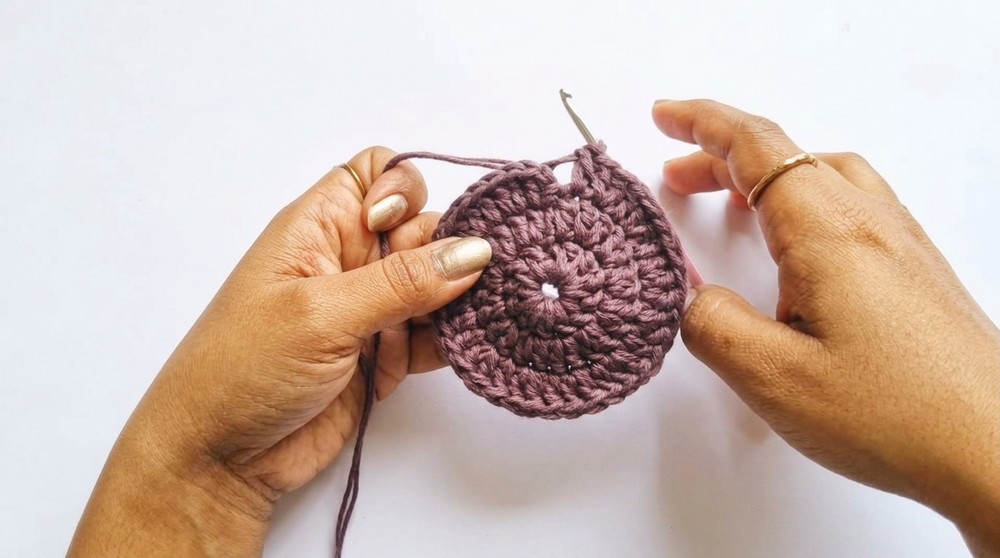
Top/Crown
With two strands held together (or single strand for a lighter hat):
Rnd 1:
Ch 6, join to form ring with sl st.
Alternative: Use a magic ring for a tighter center.
Rnd 2:
Ch 2 (does not count as dc), 12 dc into ring. Join with sl st to first dc. (12 sts)
Rnd 3:
Ch 2, 2 dc in each st around. Join with sl st. (24 sts)
Rnd 4:
Ch 2, [dc in next st, 2 dc in next st] repeat around. Join. (36 sts)
Rnd 5:
Ch 2, [dc in next 2 sts, 2 dc in next st] repeat around. Join. (48 sts)
Rnd 6:
Ch 2, [dc in next 3 sts, 2 dc in next st] repeat around. Join. (60 sts)
Rnd 7:
Ch 2, [dc in next 4 sts, 2 dc in next st] repeat around. Join. (72 sts)
Rnd 8:
Ch 2, [dc in next 5 sts, 2 dc in next st] repeat around. Join. (84 sts)
Continue increasing each round with one more dc between increases until the flat circle fits the crown of your head (generally 6.5"–7"/16.5–18cm diameter for an adult—may require one or more additional rounds).
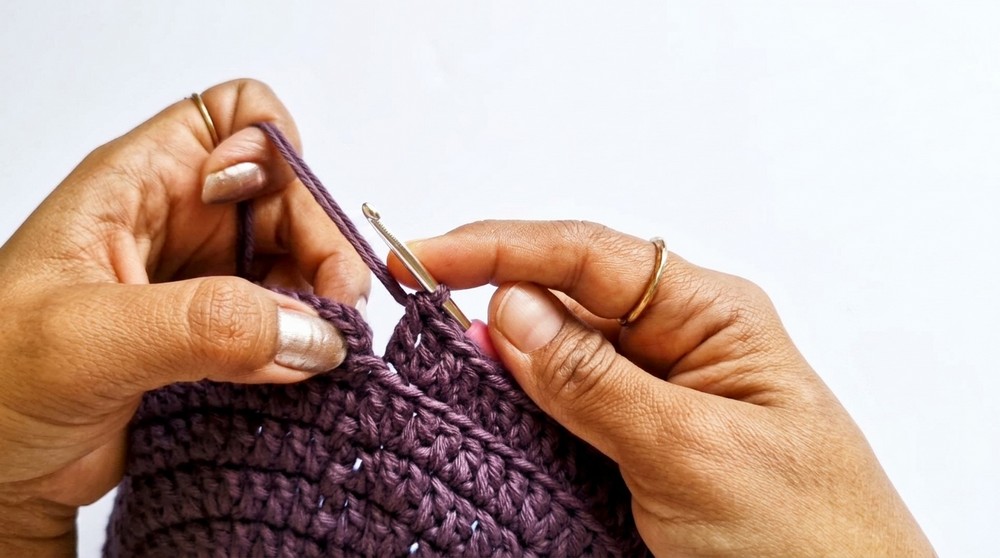
Sides of Hat
Rnd 9–15:
Ch 2, dc in each st around. Join with sl st.
Repeat for 6–7 rounds, or until the hat covers from the top of head to just above the ears (adjust row count for size).
Suggestion: Try on the hat after several rounds to adjust the depth as required.
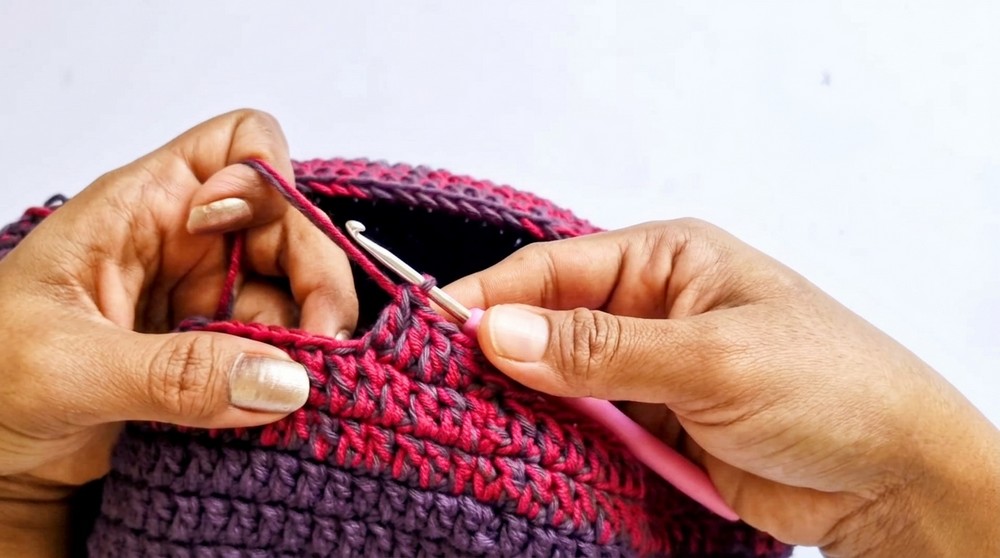
Brim
Start the brim using the BACK LOOP ONLY (BLO) for a crisp transition:
Rnd 16:
Ch 2, dc in BLO of each st around. Join with sl st.
Rnd 17:
Ch 2, [dc in next 5 sts, 2 dc in next st] repeat around. Join with sl st.
- If you desire a wider brim, continue as follows, each round increasing the number of dcs between increases by 1:
- Next rnd: 6 dc, inc
- Next rnd: 7 dc, inc
- etc.
For a wavy brim:
To exaggerate the wave, in the final 1–2 rounds, work:
- dc in FLO of each st around and increase more frequently—for example, [dc in next 4 sts, 2 dc in next st].
Finish off once you have the desired brim width and waviness.
Finishing
- Fasten off and weave in all ends with tapestry needle.
- Block hat lightly for shape if needed.
- Add a stripe or color change in any round for a custom look.
- Steam or gently iron brim for extra wave and structure.
Pattern Correction & Tips
- If the crown starts to ruffle, you have too many increases; work fewer in each round or check your stitch count.
- If the hat buckles or curls, you need more increases; redo last round or two with more frequent increases.
- For child/baby sizes: Stop increasing the crown earlier, and make fewer side and brim rounds.
- Try different hook sizes and yarn weights to create different hat sizes/textures.
- For a softer, more flexible hat, use one strand; for sturdier shape, use two.
Conclusion
This classic bucket hat is an ideal intermediate-level project for mastering increases, working in the round, and manipulating stitches with back/front loops for clean shaping. Its customizable size, optional brim style, and potential for creative color usage make it a versatile headwear pattern suitable for all ages.