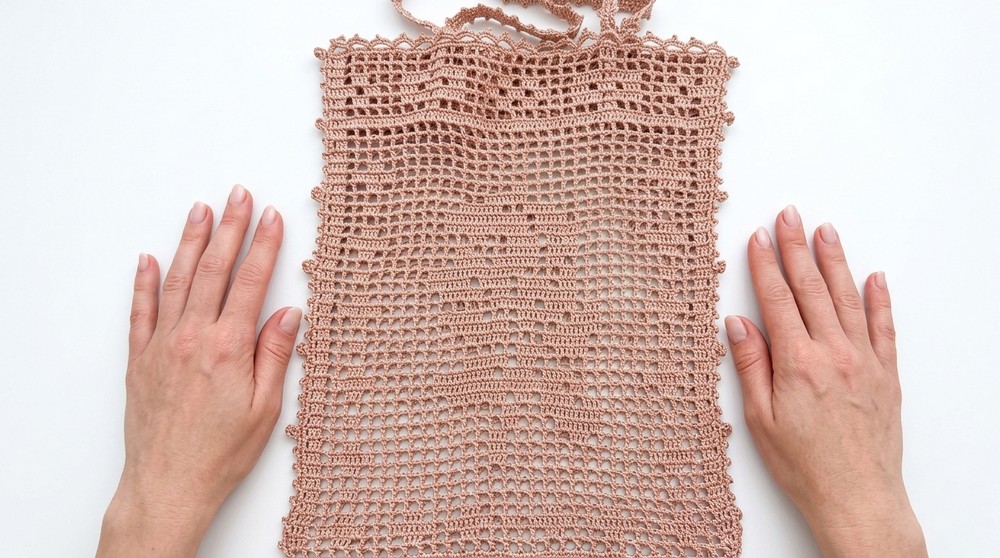
Carry your essentials in style with a free crochet cotton handbag that’s easy to stitch, lightweight, and perfect for adding a cheerful touch to any outfit.
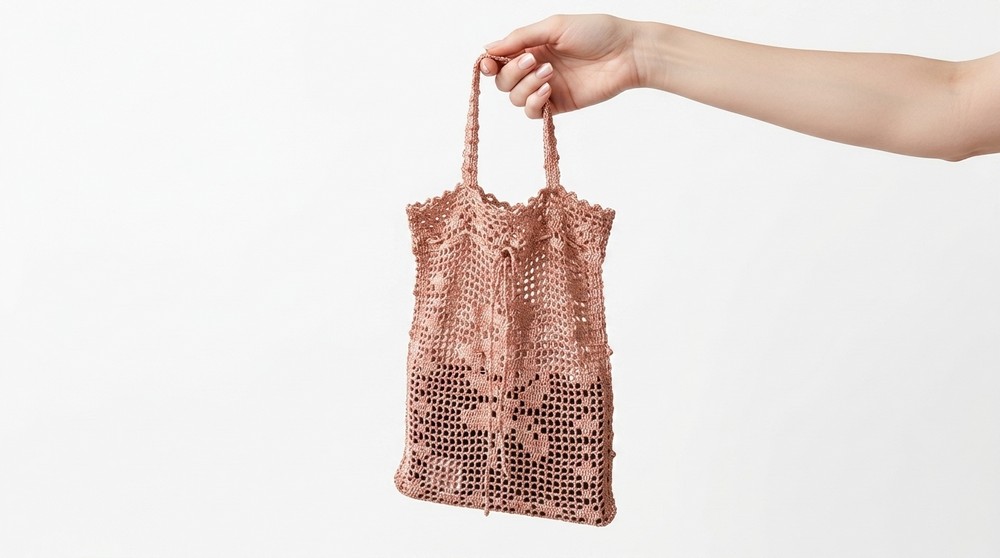
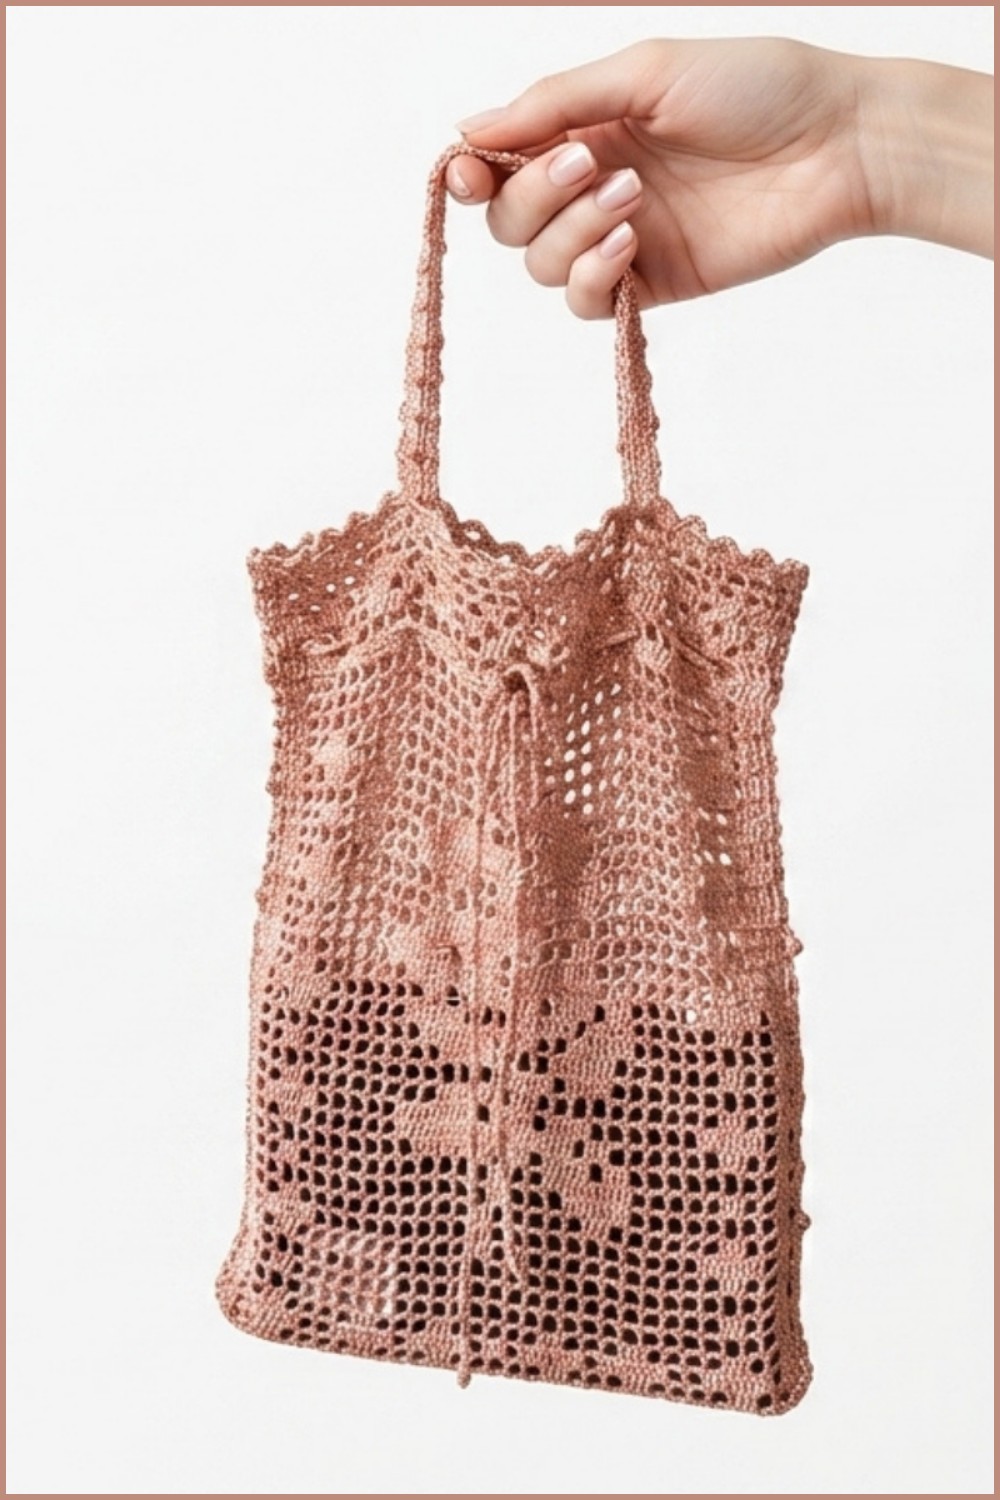
A beautiful handmade cotton bag can be the perfect accessory for anyone who loves a mix of style and practicality. This type of bag is lightweight yet strong, making it perfect for carrying everyday essentials like your wallet, phone, and small items. Its soft texture feels nice to the touch, while its neat crochet design makes it stand out in any crowd. These cotton handbags often come in lovely patterns and colors, giving you plenty of options to match with your outfits.
Free Crochet Cotton Handbag Pattern for Stylish Use
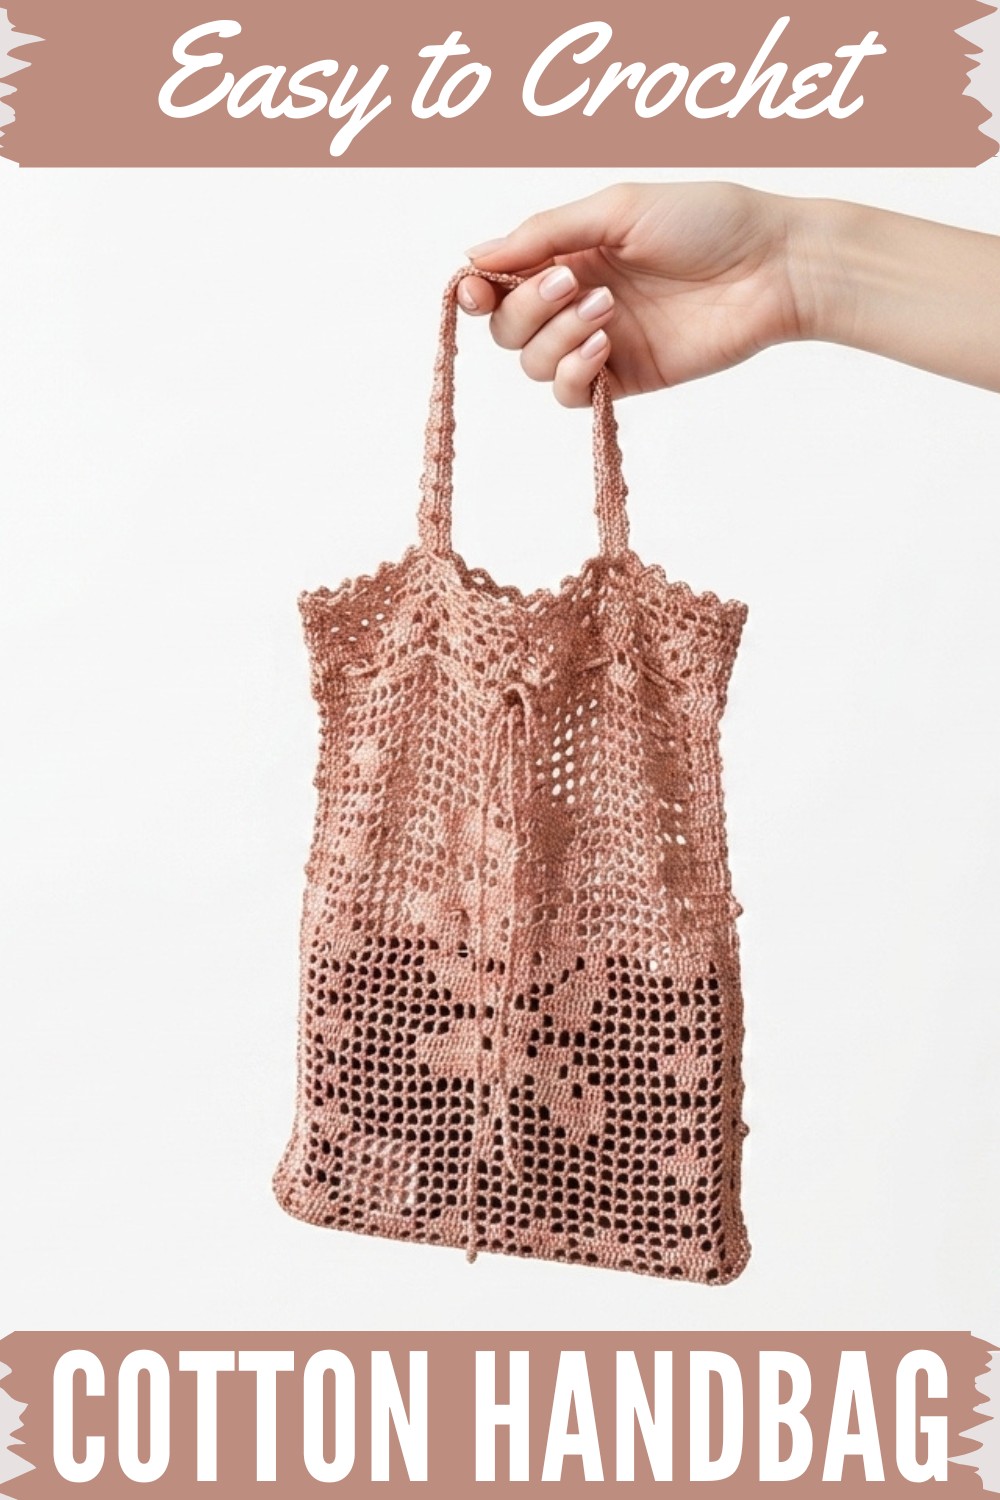
They are not just stylish but also reusable, which makes them eco-friendly and a great alternative to plastic bags. Whether you are heading to the market, a casual outing, or even the beach, this bag is both useful and fashionable. The unique crochet design gives it a classic and timeless appeal that never goes out of trend, making it an ideal choice for people of all ages.
Crochet Handbag Pattern
Materials List
Yarn:
- Crochet Thread (for a delicate finish) or Sport Weight/Fingering Weight Yarn for a larger, sturdier bag.
- Approx. 200–300 meters (thin crochet thread) or 400–500 meters (sport weight yarn).
- Cotton is recommended for durability and structure.
Hook:
- 1.6 mm crochet hook for a small, delicate version (as demonstrated).
- For larger bags, use:
- 2.0 mm–4.0 mm crochet hook, depending on your chosen yarn thickness.
Other Tools:
- Measuring Tape: To measure panel sizes and handle length.
- Scissors
- Yarn Needle: For sewing and weaving in ends.
- Clips or Pins: To hold panels together while working.
Suggested Skills
- Skill Level: Intermediate to Advanced.
- Familiarity with Filet Crochet, lace edging, and working from charts is recommended.
Key Abbreviations (US Terminology):
- ch: Chain
- sc: Single Crochet
- dc: Double Crochet
- sl st: Slip Stitch
- fpdc: Front Post Double Crochet
- bpdc: Back Post Double Crochet
- st(s): Stitch(es)
Special Notes
- Filet Crochet Basics:
- An open square consists of: dc, ch 2, dc in the third stitch.
- A filled square consists of: 4 dc.
- Use a grid diagram to follow the filet crochet chart.
- The chart PDF (referenced in the video) provides the rose motif design.
- Adjusting Size: Use thicker yarn and a larger hook size for a bigger bag. Adjust the number of chains proportionately.
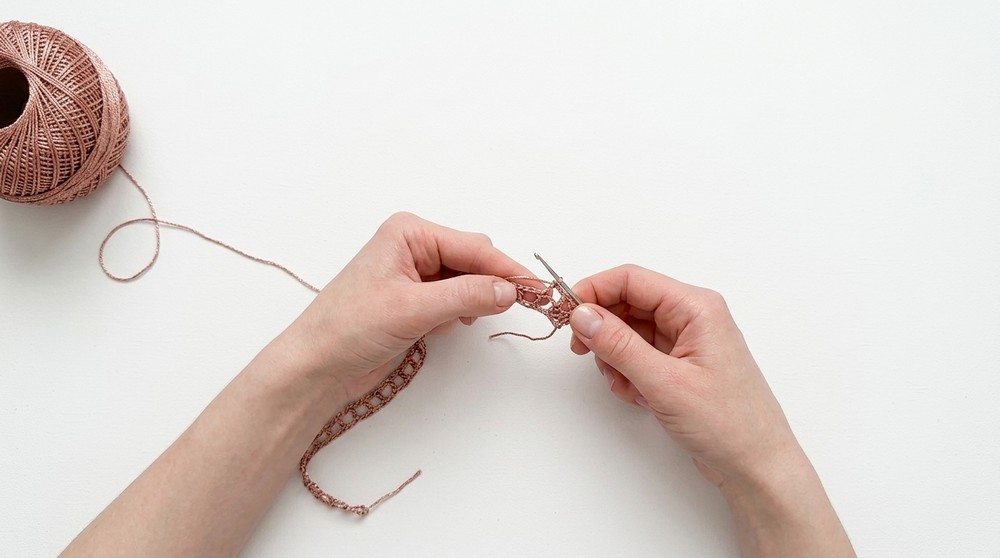
Step-by-Step Instructions
Step 1: Filet Crochet Panels
- Foundation Chain:
- Start with a slip knot.
- Chain 94 chains for the foundation row (based on the chart).
- Filet crochet requires multiple of 3 + 1 for the starting chain.
- Row 1 (Read from right to left on the chart):
- For the first filled square, ch 2, dc in the 4th chain from the hook.
- Make 3 more dc in the next 3 chains to complete a filled square.
- For the first open square, ch 2, skip two chains, dc into the third chain.
- Continue working the row according to the chart, alternating between filled and open squares as needed.
- End the row with a filled square: 3 dc in the last 3 chains.
- Row 2 (Read from left to right on the chart):
- Chain 2, turn.
- Work the chart in reverse order:
- For filled squares, make 2 dc into the chain space, then 1 dc into the top of the dc underneath.
- For open squares, ch 2, dc on top of the next dc from the previous row.
- Repeat this process for the entire row.
- Repeat Rows 1 and 2:
- Continue following the filet crochet chart row by row until the panel is complete. Ensure you create two identical panels for the bag.
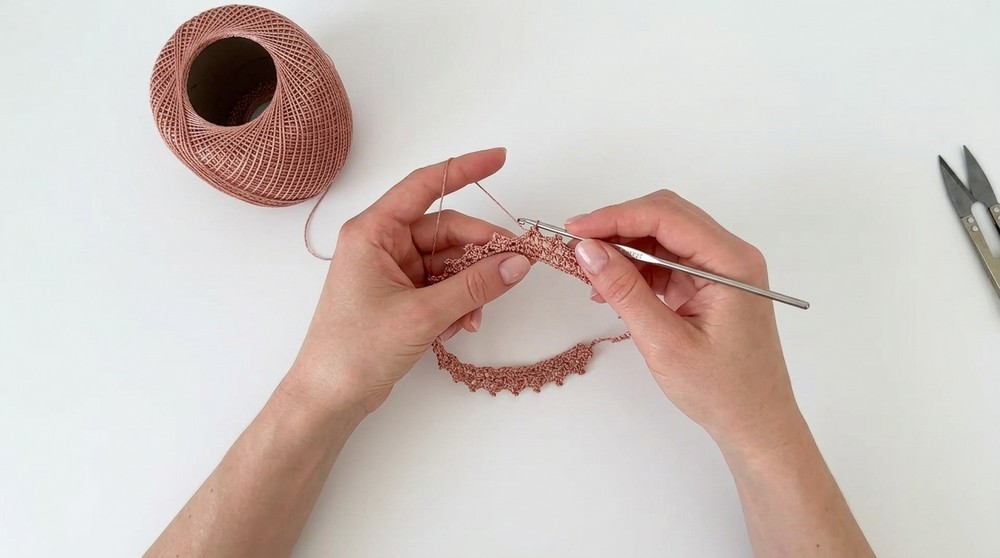
Step 2: Top Lace Edge
- Single Crochet Base (Row 1):
- Turn the completed panel; ch 1.
- Work 1 sc into each dc and 2 sc into each chain space across the top of the panel.
- Repeat for both panels.
- Lace Pattern (Row 2):
- Ch 5, turn.
- Skip 4 sts, sc into the 5th st. Repeat this pattern of ch 5, skip 4, sc to create loops.
- At the end of the row, adjust spacing by skipping fewer stitches if necessary.
- Lace Edging with Peacot (Row 3):
- Ch 1, turn; sc 4 into the first loop.
- Work a peacot: ch 3, sl st into the front loop of the last sc.
- Sc 3 more into the same loop and sl st into the next sc from the previous row.
- Repeat this peacot edging across.
Step 3: Joining Panels Together
- Align Panels:
- Place the panels wrong sides together.
- Use clips or pins to align edges.
- Single Crochet Seam:
- Begin at one bottom corner.
- Work 1 sc into each dc and 2 sc into each chain space along the side and bottom edges.
- At corners: Work 3 sc to turn.
- Repeat for three sides (leaving the top open).
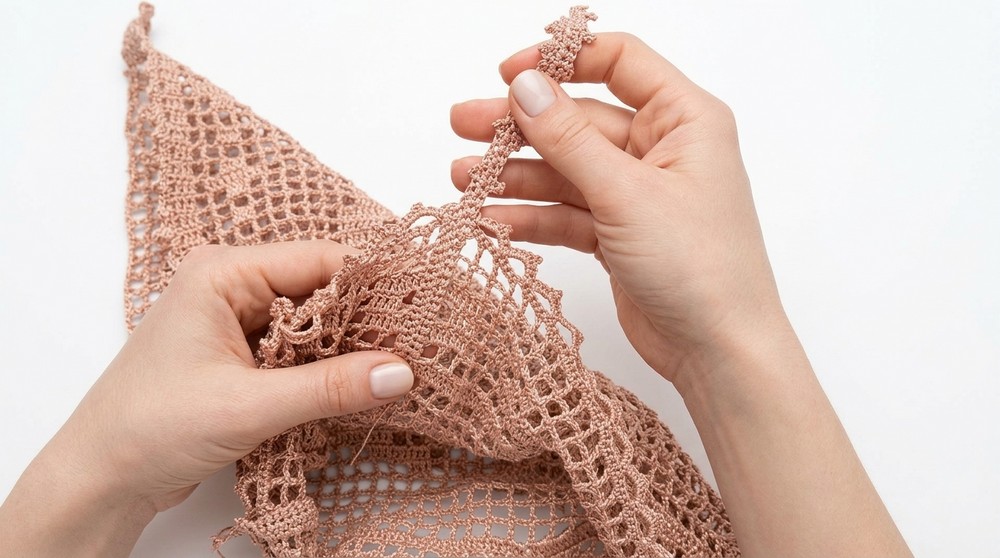
Step 4: Side Lace Edging
- Bubble Stitch and Peacot:
- Ch 1, turn; sl st into the next st.
- For a Bubble Stitch:
- Ch 3, work 7 dc together in the first chain, sl st back into the base st.
- Sl st 4 times, work a peacot (ch 3, sl st into front loop). Repeat three more times.
- After completing 4 peacots, repeat Bubble Stitch.
- Repeat for the other sides, starting at the bottom.
Step 5: Handles
- Base:
- Ch 2; sc into the first chain to form a loop.
- Work into side loops: sc into each side loop around until the handle is ~44 cm long (adjust as needed).
- Embellishments:
- Work sc around the handle's edges.
- Add peacot decorations: sc 4, ch 3, sl st into front loop repeated across the handle.
Step 6: Attaching Handles
- Position Handles:
- Align the ends of the handles to the inside top edges of the bag. Ensure symmetry before sewing.
- Sew Handles:
- With a yarn needle, sew around the handle ends securely.
Optional Features
- Drawstring Closure:
- Create a long twisted single crochet cord.
- Thread it through the top open squares above the double crochet rows.
- Lining:
- Optional for structure: Add a fabric lining to the interior of the bag.
Finishing Instructions
- Block the Bag:
- Wet block or steam block both panels and the assembled bag to smooth and shape the project.
- Secure Loose Ends:
- Weave in all loose ends using a yarn needle.
- Final Checks:
- Test the bag’s structure and lace edges for uniformity before use.
Final Words
Congratulations on completing your Miumu-inspired crochet handbag! Whether used as a casual or statement accessory, this elegant bag is a testament to your craftsmanship. Adjust colors, sizes, and embellishments to make the design truly your own.
Tips and Suggestions
- Reinforce Stitches: Secure connections (e.g., handles) with reinforced stitching to ensure durability during use.
- Practice Filet Crochet: Familiarize yourself with the chart beforehand if you’re new to filet crochet.
- Experiment with Yarn: Explore gradient or variegated yarn for a unique visual effect.