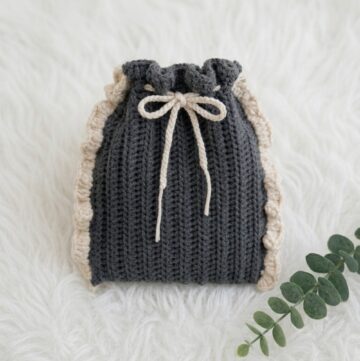
Celebrate creativity by stitching a trendy granny square woven bag with this free, beginner-friendly crochet pattern, perfect for adding charm and utility to your style.
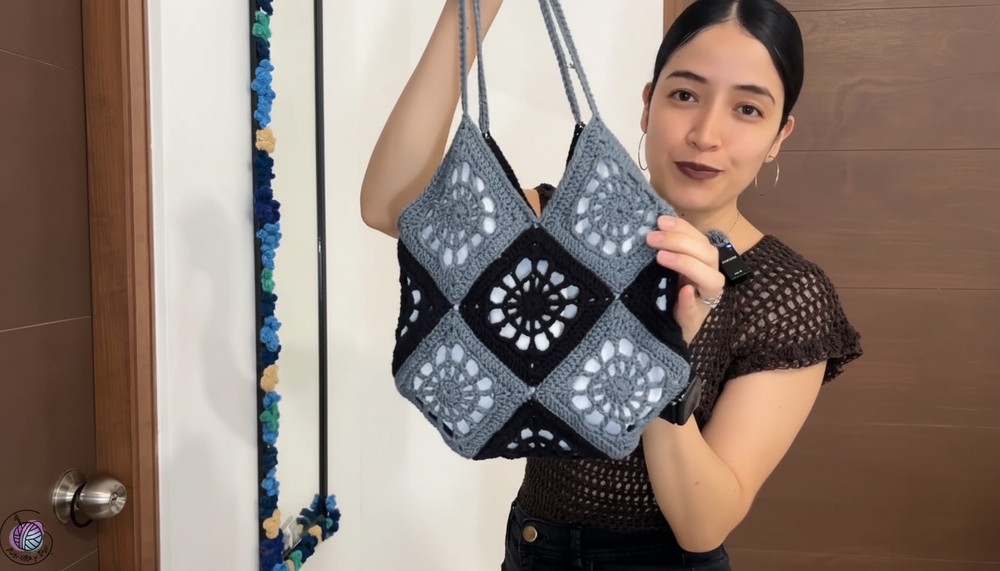
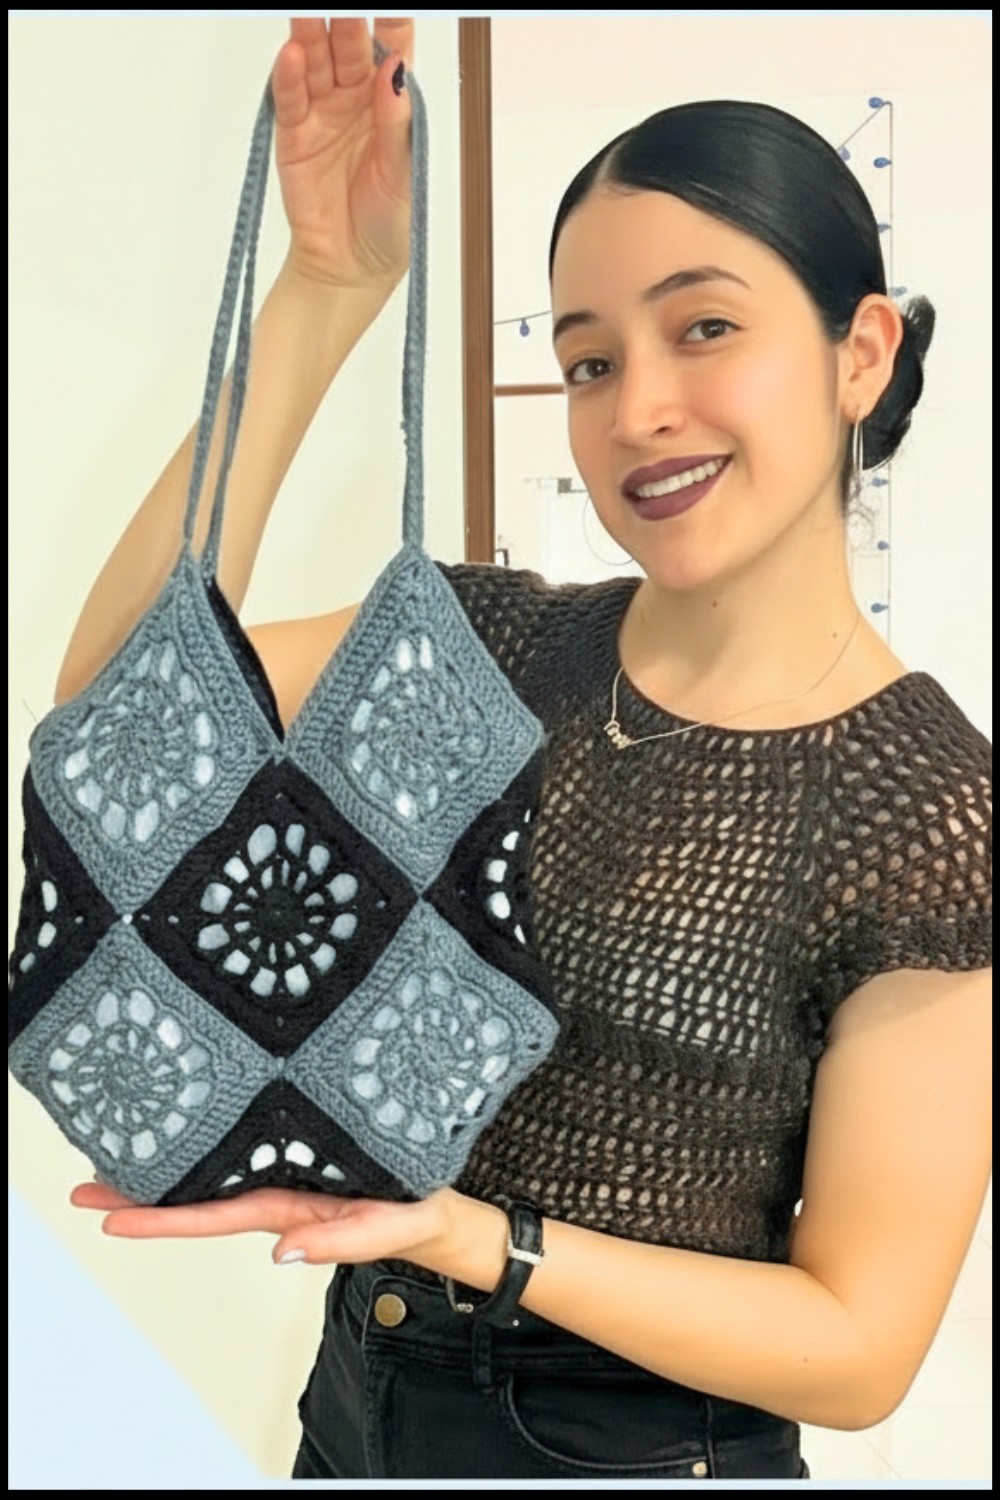
Nobody forgets the charm of handmade accessories, especially when they bring both beauty and utility into everyday life. A woven bag crafted from granny squares stands as a true testament to the timeless appeal of crochet work. With the Free Crochet Granny Square Woven Bag pattern, you can transform vibrant yarn into a captivating accessory that boasts pops of color and stunning textures. Each granny square comes together to form a uniquely woven masterpiece, creating a bag that’s perfect for carrying your essentials, whether you're headed to the market, strolling through town, or meeting friends.
Crochet Granny Square Bag – Simple and Trendy
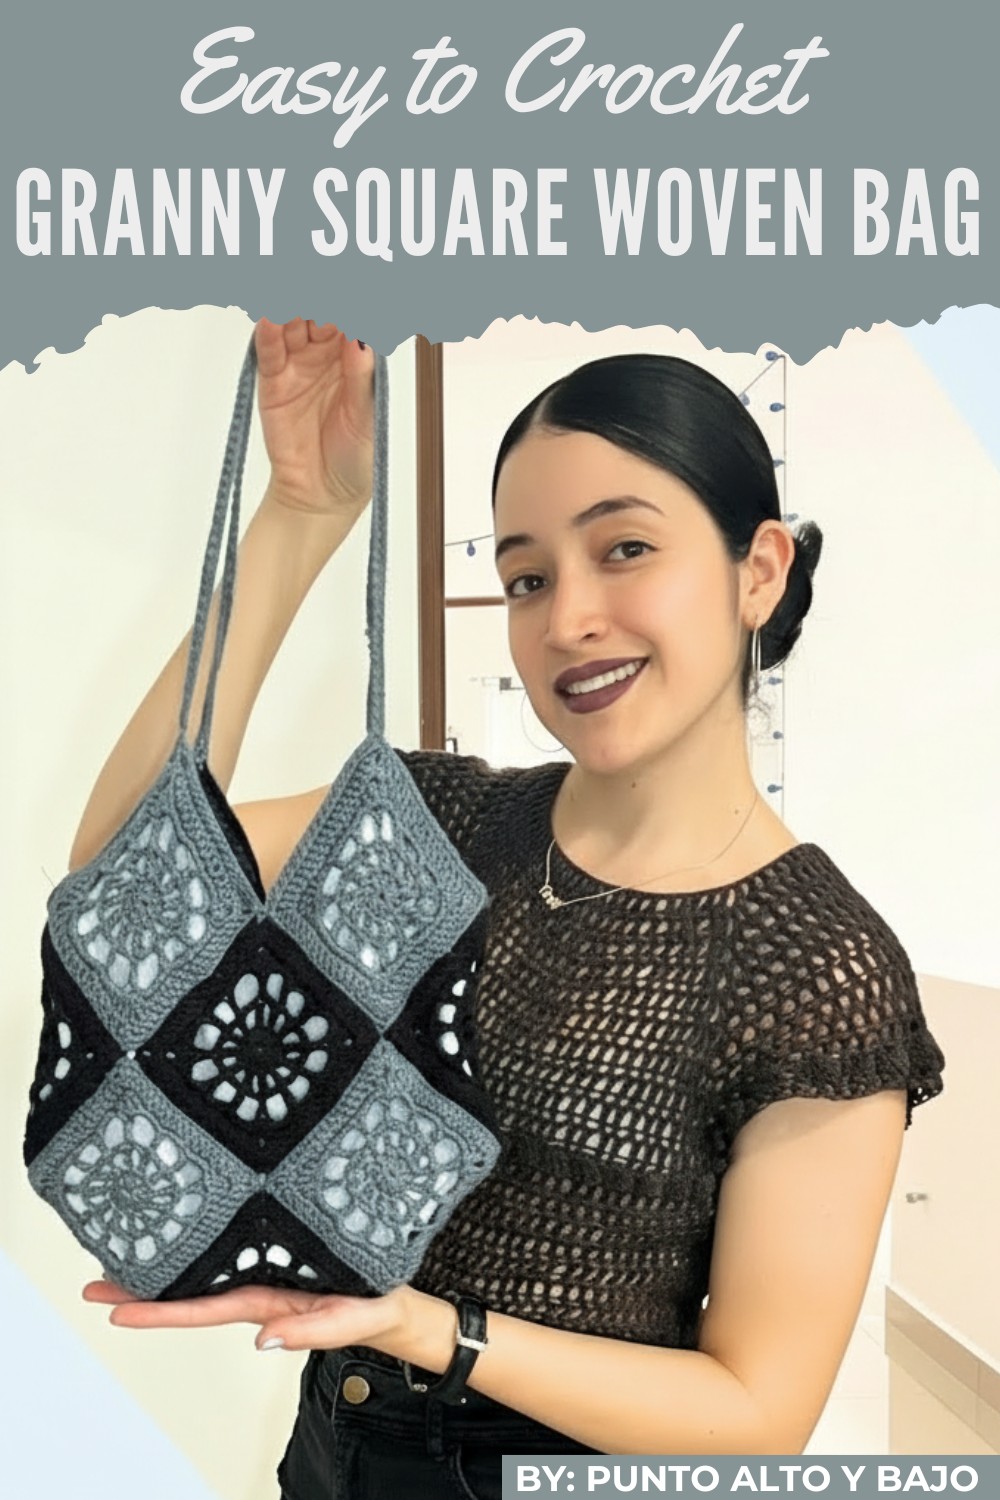
This bag doesn’t just serve its purpose, but also turns heads with its intricate, handmade design. Its lightweight and textured appearance adds charm you won’t find in mass-produced alternatives. Whether you’re new to crochet or already experienced, this free pattern gives you the chance to create something extraordinary, while adding a touch of your personality to every stitch. Bring a woven Granny Square bag to life and enjoy a standout accessory that’s stylish, functional, and completely yours.
Crochet Spider-Web Granny Square Bag Pattern
Finished Size
- Granny Squares Dimensions: Each square measures approximately 11 cm per side.
- Bag Size: Adjusted based on the number of granny squares used. The example provided features an attractive folded bag design with strategic placement of the spider-web granny squares.
Materials:
- Yarn:
- Cotton yarn, approximately 2 mm thick.
- Suggested colors: Dark gray and black. Feel free to customize to match your preference.
- Hook Size: 3 mm crochet hook.
- Thread for Sewing:
- Regular sewing thread matching the yarn colors.
- Yarn Needle: For joining squares and weaving in ends.
- Fabric (Optional): Approximately the same size as your bag for lining the interior.
- Blocking Tools:
- Blocking mat or foam board.
- Pins for shaping.
Gauge:
While precise gauge is not crucial for granny squares, it’s recommended to crochet one square and verify its dimensions (11 cm per side) to ensure consistency.
Special Techniques:
- Magic Ring: To begin the granny squares cleanly.
- Slip Stitch Joining: Creates invisible seams for neat assembly.
- Back Loop Only Joining: Ensures invisible and seamless connections.
- Blocking Squares: Enhances the uniformity and presentation of the squares.
Step-by-Step Pattern Instructions
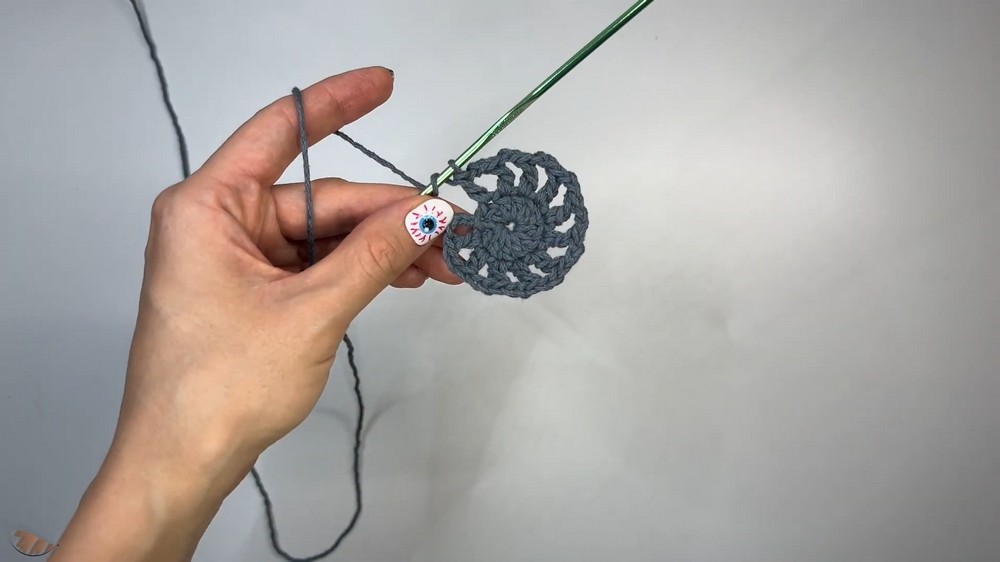
Spider-Web Granny Square:
Follow the instructions below to crochet each granny square. You will need multiple squares depending on your desired bag size.
Round 1:
- Begin with dark gray yarn and create a magic ring.
- Lift 2 chains (counts as the first double crochet).
- Crochet 11 double crochet stitches into the ring (12 total including the 2 chains).
- Pull the small strand of yarn to tighten the ring.
- Join with a slip stitch into the second chain to complete the round.
Round 2:
- Lift 2 chains (counts as the first double crochet).
- Crochet 1 double crochet stitch into each stitch, separated by 2 chains (total: 12 double crochets and 12 spaces).
- Close the round with a slip stitch into the second chain.
Round 3:
- Lift 2 chains (counts as the first double crochet).
- Crochet 1 double crochet stitch into each stitch, separated by 3 chains (total: 12 double crochets and 12 spaces).
- Close the round with a slip stitch into the second chain.
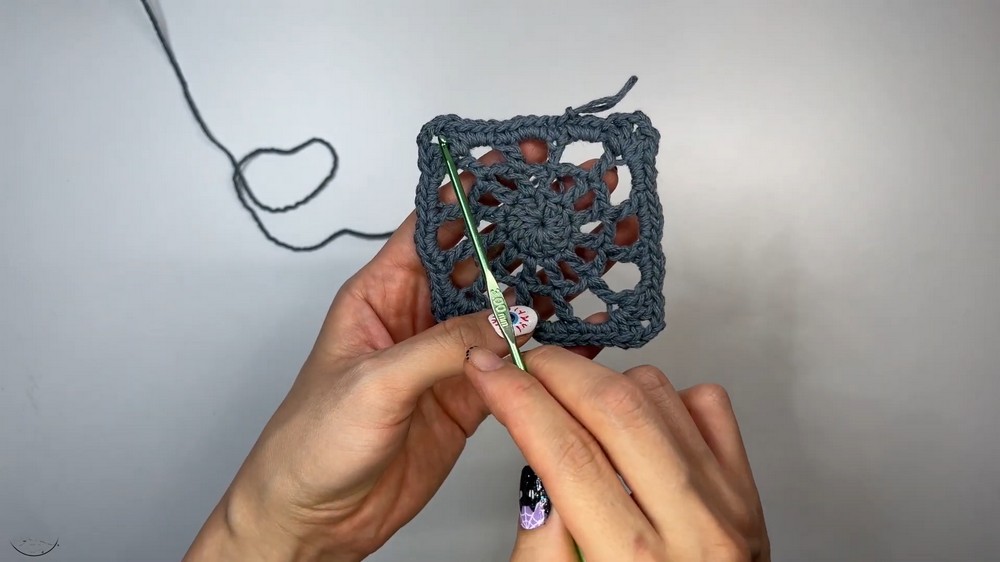
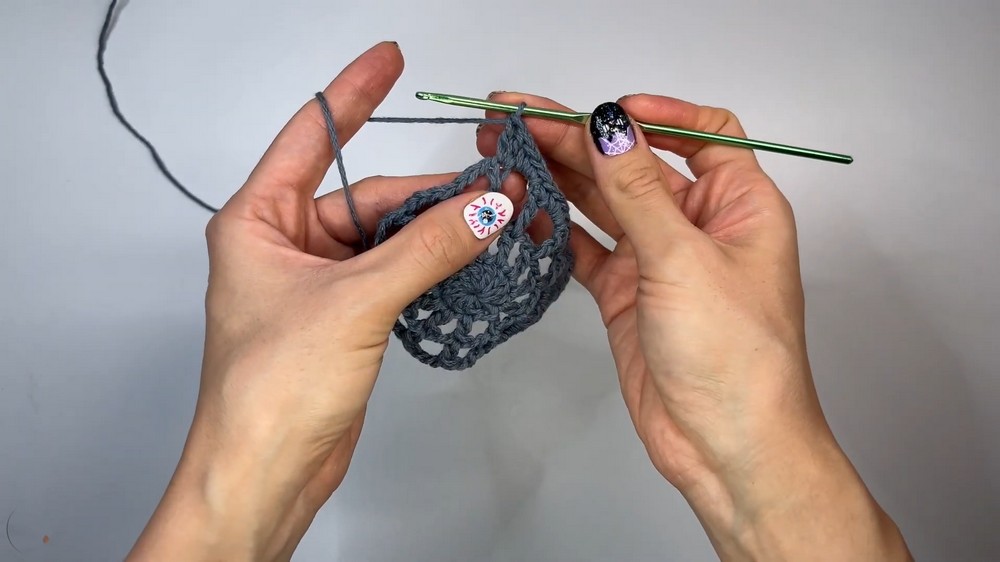
Round 4: (Shape into a Square)
- Lift 1 chain and crochet 1 single crochet stitch into the same space.
- In each space with 3 chains, crochet 3 single crochet stitches.
- Into each double crochet stitch, crochet 1 single crochet stitch.
- For each corner:
- Work 2 double crochet stitches, 2 chains, and 2 double crochet stitches into the same stitch to form the corner.
- Repeat pattern across all edges. Close with a slip stitch.
Round 5 (Final Round):
- Lift 2 chains (counts as the first double crochet).
- Crochet 1 double crochet stitch into each stitch across the edges.
- For each corner:
- Work 2 double crochet stitches, 2 chains, and 2 double crochet stitches into the corner.
- Close with a slip stitch into the second chain and fasten off.
Blocking Granny Squares:
Blocking enhances the shape and size uniformity of the squares.
- Place each square on a blocking mat or foam board.
- Pin each corner evenly to maintain symmetry.
- Lightly spray with water (using an atomizer).
- Leave overnight to dry.
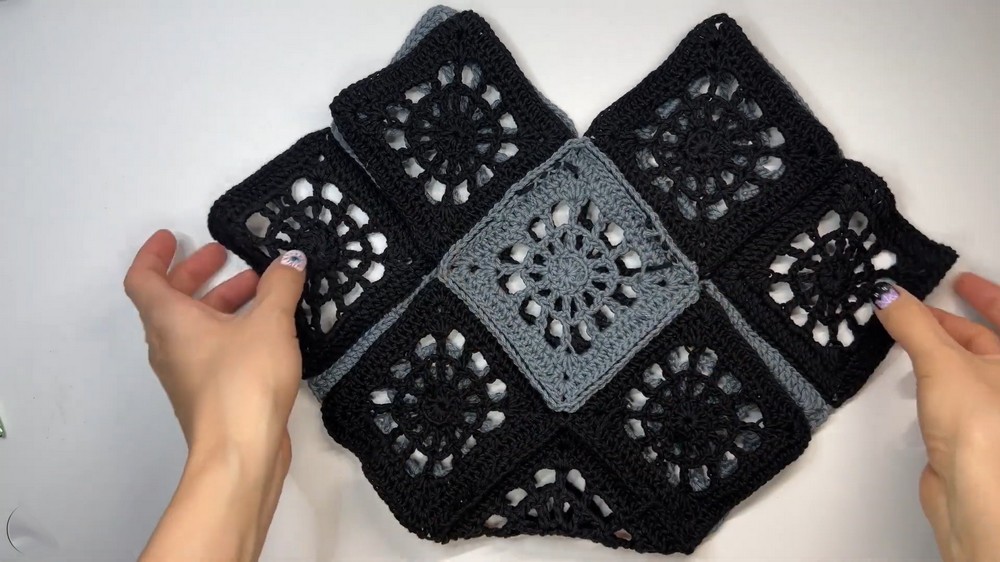
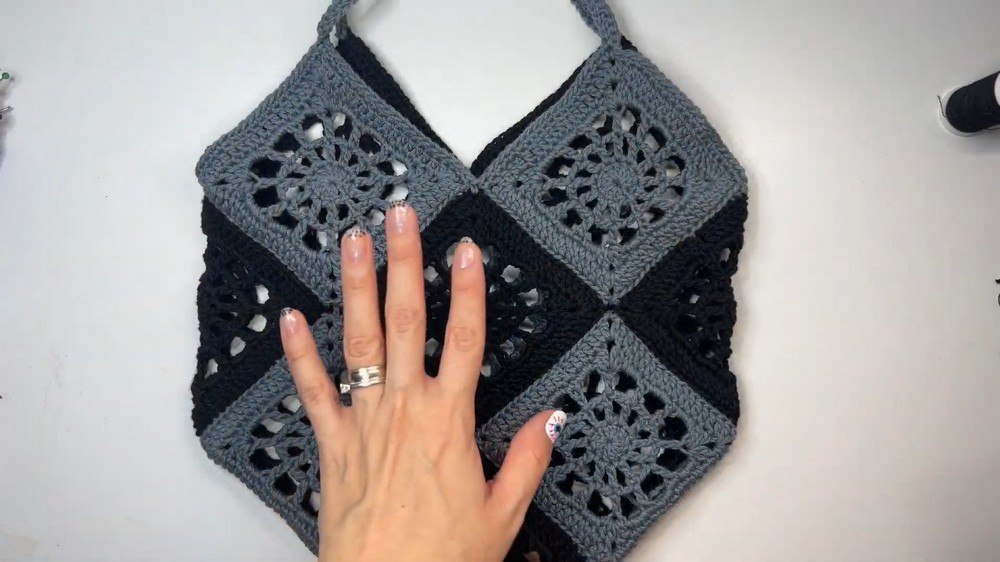
Assembly of Bag:
Step 1: Arrange Granny Squares
- Organize the squares to form the intended bag shape.
- If working with two colors, position them creatively. For example:
- Gray squares in the center.
- Black squares on the sides.
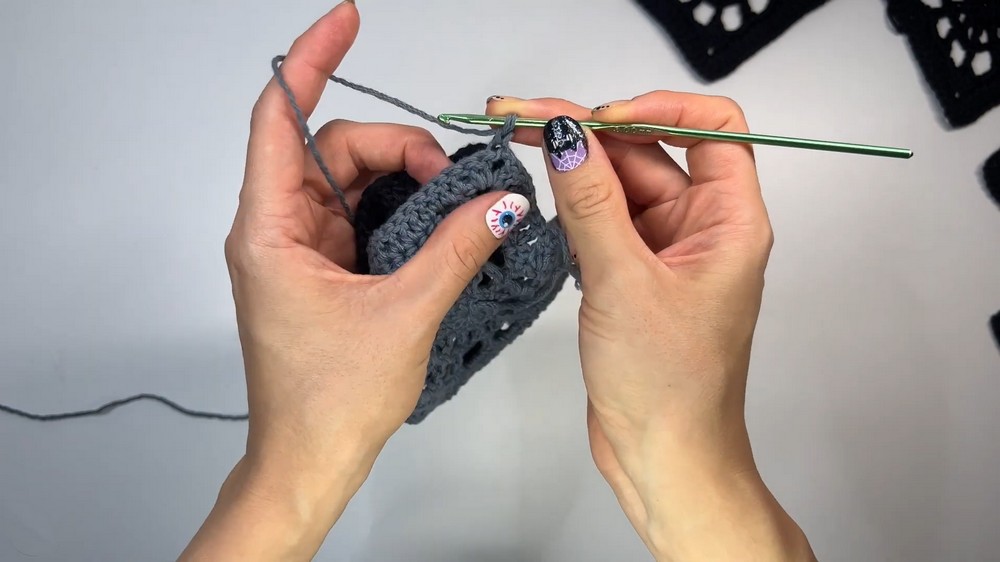
Step 2: Join Granny Squares
Use the slip stitch joining method:
- Place granny squares with the back sides together (wrong sides facing inward).
- Take the back loops only of both squares for joining:
- Insert hook into back loop of one square and back loop of the second square.
- Yarn over and pull through both loops.
- Repeat along the edge to join.
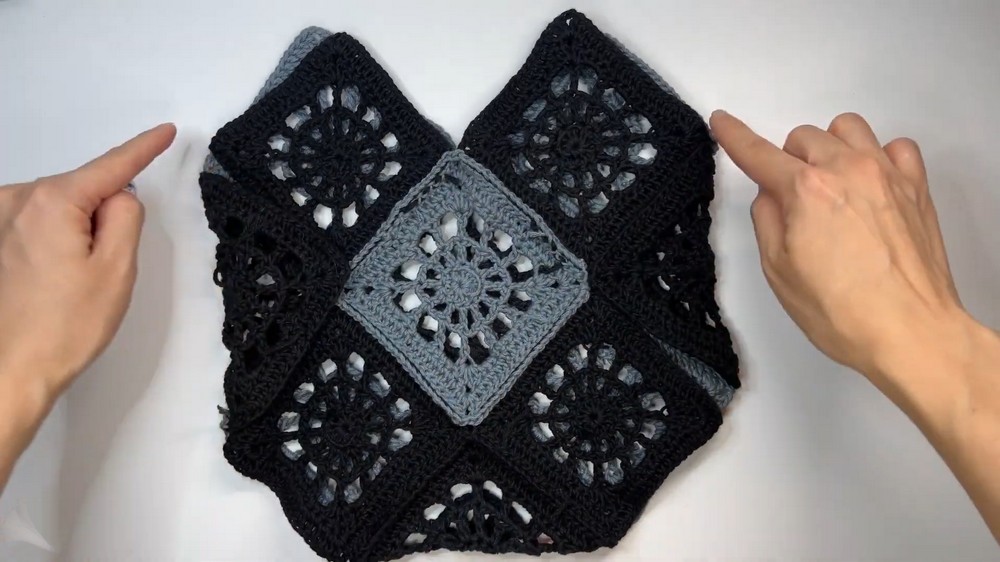
Step 3: Fold and Shape Bag
- Fold the assembled squares inward based on your desired bag design.
- Continue slip-stitch joining along the open edges to close the bag completely.
Additions and Enhancements:
Top Edge Border:
- With black thread, crochet single crochet stitches around the top edge of the bag.
- For corners, crochet 2 single crochets, 2 chains, 2 single crochets.
Bag Cord:
- Crochet 80 chains for the handle or adjust the length to preference.
- Work 1 single crochet stitch into each chain.
- Attach both ends to the bag’s corners with slip stitches.
Optional Fabric Lining:
- Cut fabric matching the bag size or slightly larger.
- Fold edges inward (approximately 1 cm) and pin fabric along the interior of the bag.
- Hand-sew the fabric using tiny, invisible stitches to prevent gaps.
Finishing Touches:
- Weave in all loose ends using a yarn needle.
- Re-block the bag if necessary to refine its shape.
- Inspect all seams for stability.
Final Words and Tips:
- Double-check tension consistency to ensure uniform granny squares.
- Customize colors and thread thickness based on personal style.
- Adding a fabric lining not only increases durability but also prevents items from falling out.
- Hand washing is recommended to maintain the texture and vibrancy of cotton yarn.