Make a cute cozy Chopper hat using this Free Crochet Chopper Hat Pattern with soft yarn, fun antlers, easy steps, and a warm cartoon style design.
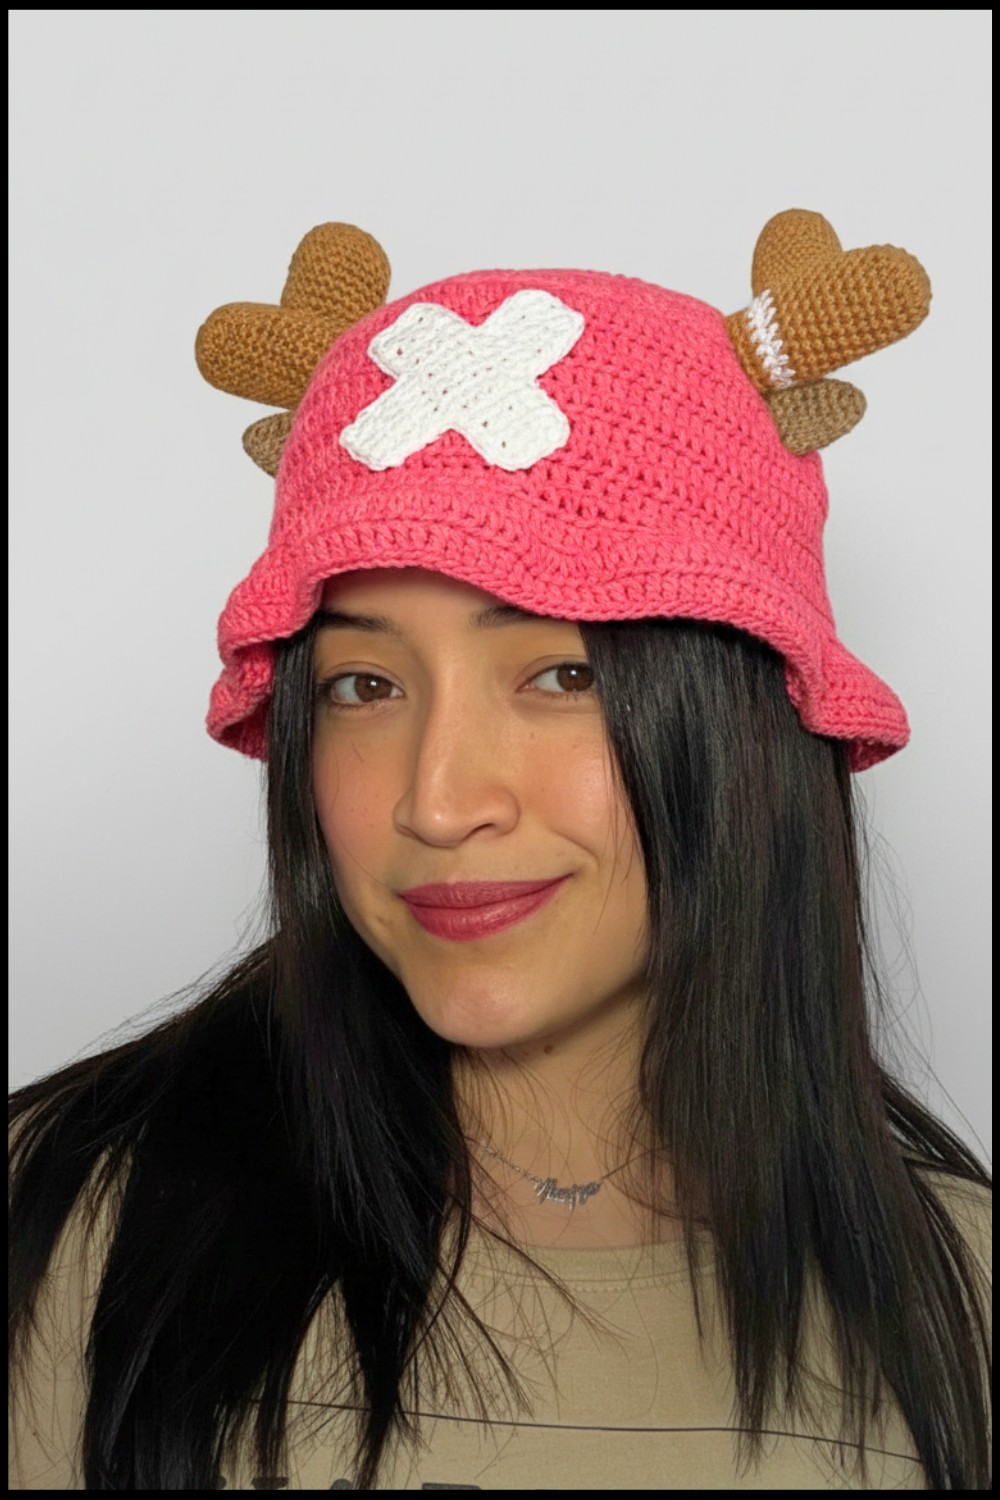
Not every hat feels special or brings a smile, but some designs can instantly catch the eye and lift the mood. The Free Crochet Chopper Hat pattern is one of those fun and lovable styles that turns a simple hat into something playful and full of character. It is inspired by a cute cartoon look, often shown with small horns, a round top, and bright, soft colors that make it stand out easily. The shape is neat and cozy, fitting nicely on the head while giving a warm and gentle feel.
Free Crochet Chopper Beanie Pattern Cute Cartoon Style
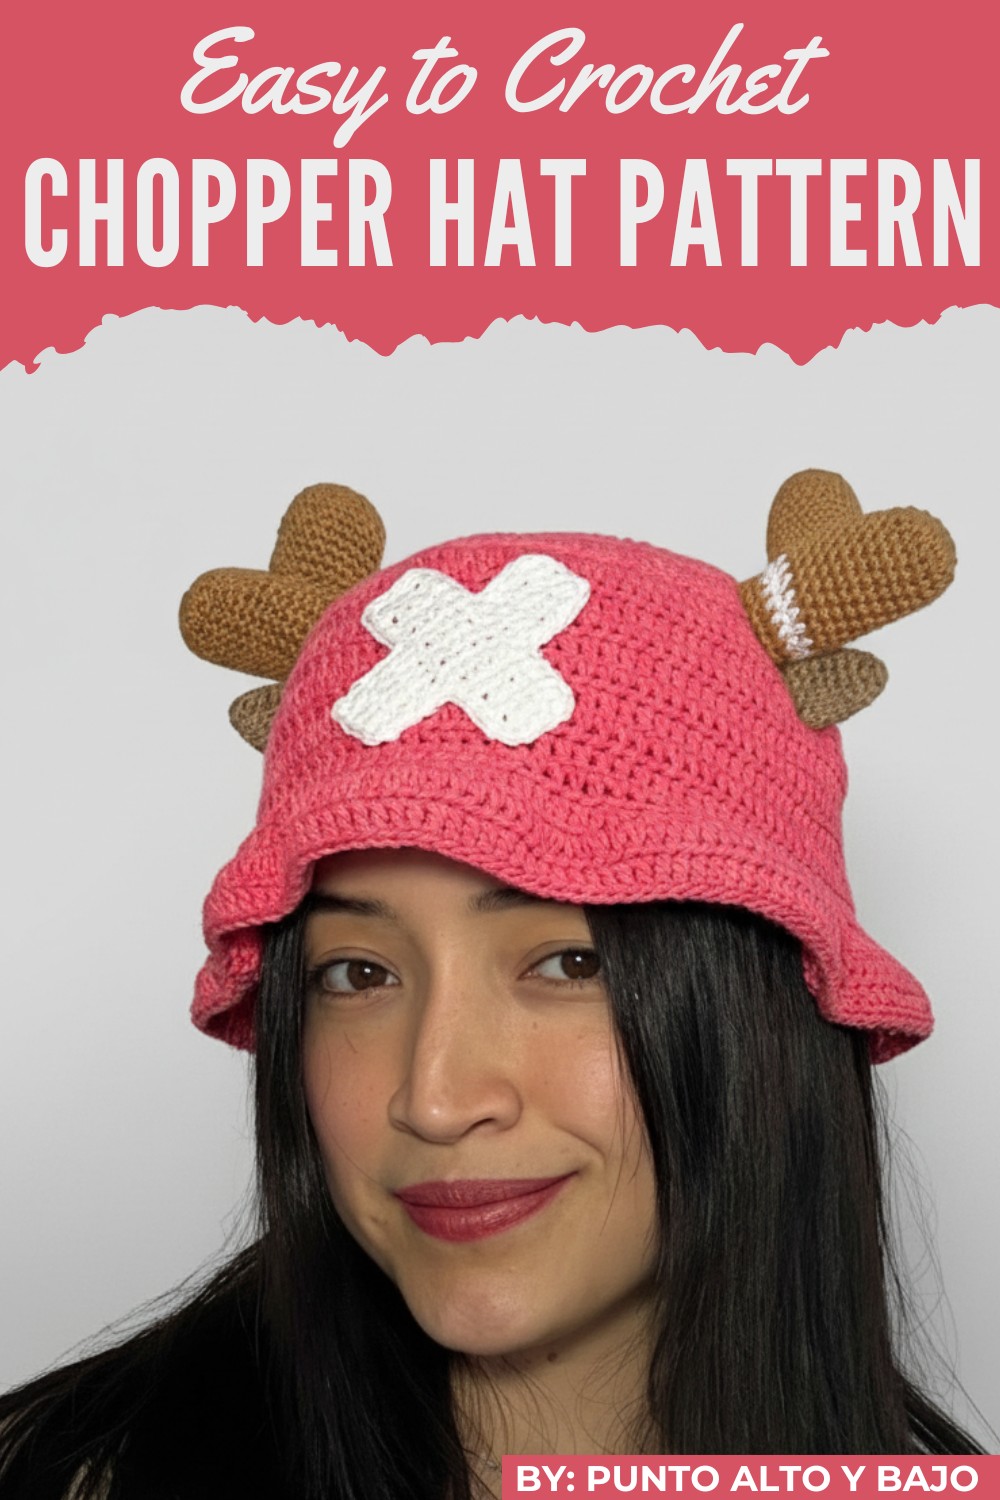
This hat looks beautiful because of its bold design and charming details. The little antlers on top and the wide front area give it a sweet and funny appearance that people of all ages enjoy. It is not just made for looks, but also for comfort, as it is created using soft yarn that keeps the head warm during cold days.
It can be used in many simple ways. People wear it in winter, at fun events, or when taking pictures to show a joyful style. It also makes a thoughtful handmade gift. This hat brings warmth, cuteness, and happiness together in one simple piece.
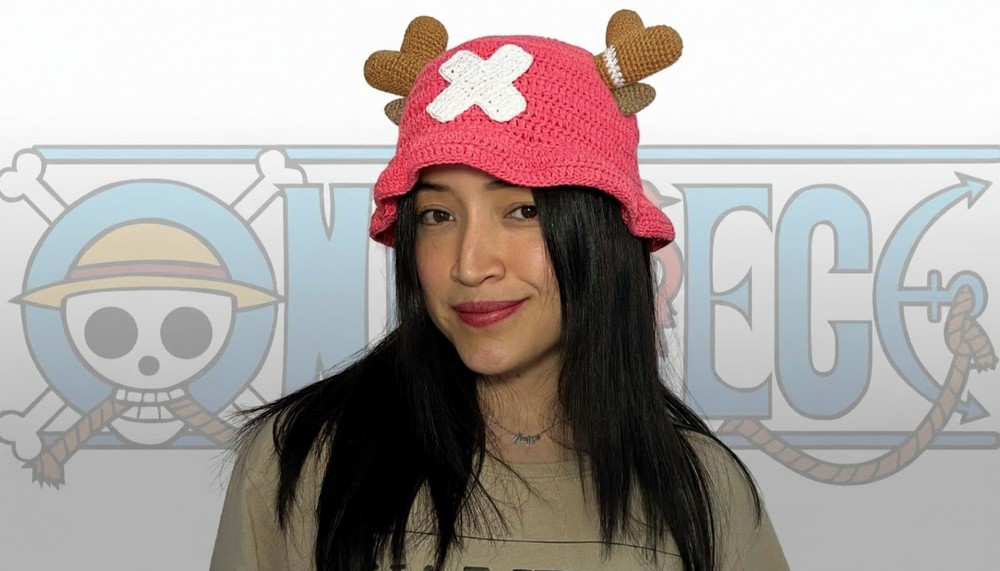
Chopper-Inspired Crochet Bucket Hat Pattern
Materials
To crochet this bucket hat you will need:
- Yarn: 100% cotton yarn (2mm thick). Suggested colors:
- Tobacco (main horn color)
- Khaki (ear color)
- Mexican pink (hat/body color)
- White (detail and X design)
- Crochet Hook: 3 mm.
- Stuffing: Small amount to stuff the horns.
- Tapestry Needle: For sewing pieces together and hiding yarn ends.
- Scissors
- Stitch Marker: To mark the start of rounds.
Finished Size
This hat is approximately adult or teen size. The finished diameter of the base top is 18.5 cm, with a height of 13 cm before the brim. Adjustments can be made to fit smaller or larger head sizes.
Gauge
- 36 double crochet stitches (dc) across 15 rows = 10 cm x 10 cm
Gauge is critical to ensure your hat matches the stated measurements.
Special Techniques
- Magic Ring: Creates a tight, adjustable center for crocheting in the round.
- Invisible Join: For smooth rounds.
- Working in the Back Loops Only (BLO): Provides a decorative ridge for the hat.
Pattern
All instructions are written in U.S. crochet terminology.
Hat Body (Mexican Pink Yarn)
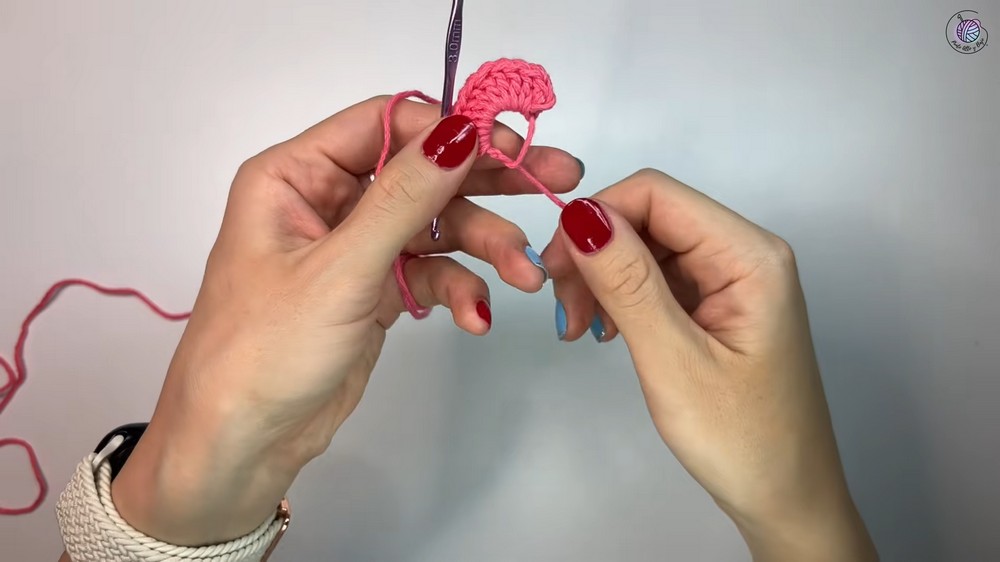
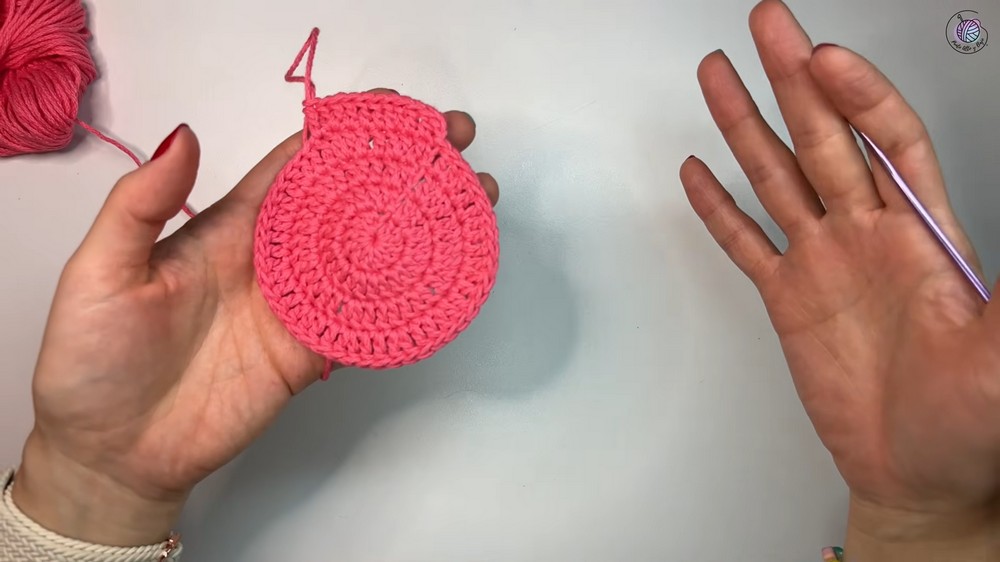
Round 1:
- Begin with a magic ring, and crochet 12 double crochet (dc) stitches into the ring.
- Pull the tail to tighten the ring and close it.
- Close the round with a slip stitch (sl st) into the 2nd chain of the starting chain.Stitch Count: 12 dc.
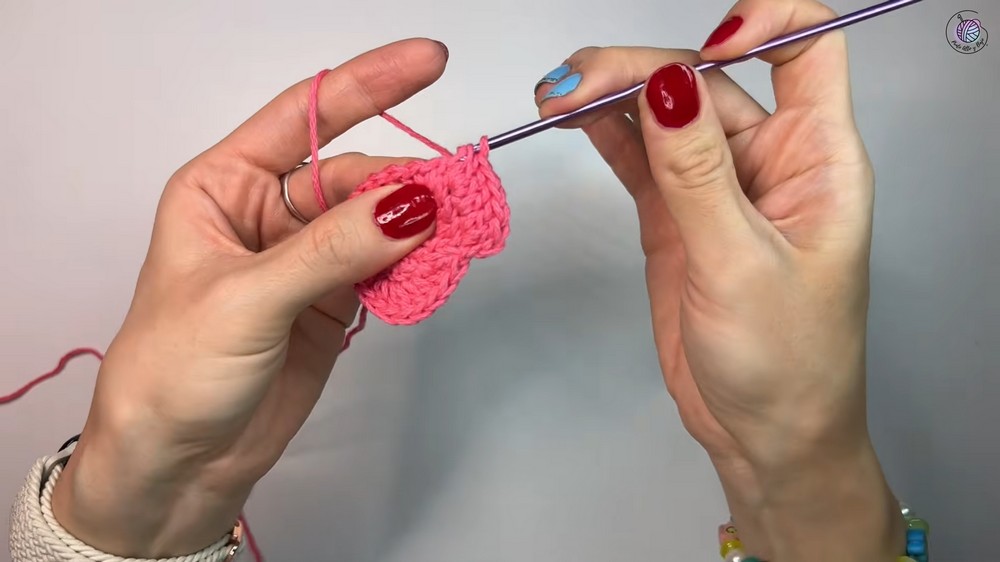
Round 2:
- Chain 2 (counts as the first dc), and crochet 1 dc into the same stitch (increase).
- Crochet 2 dc into each stitch around.Stitch Count: 24 dc.
Close with a sl st.
Round 3:
- Chain 2, 1 dc into the next stitch.
- Crochet 1 dc, 2 dc into the next stitch (increase) around.Stitch Count: 36 dc.
Close with a sl st.
Round 4:
- Chain 2, 1 dc in each of the next 2 stitches.
- Crochet 1 dc in the next 2 stitches, 2 dc into the next stitch (increase) around.Stitch Count: 48 dc.
Close with a sl st.
Round 5:
- Chain 2, 1 dc in each of the next 3 stitches.
- Crochet 1 dc in the next 3 stitches, 2 dc into the next stitch (increase) around.Stitch Count: 60 dc.
Close with a sl st.
Rounds 6–9:
Continue increasing. Each round adds one additional dc before the increase:
- Round 6: 4 dc, 1 increase → 72 dc.
- Round 7: 5 dc, 1 increase → 84 dc.
- Round 8: 6 dc, 1 increase → 96 dc.
- Round 9: 7 dc, 1 increase → 108 dc.
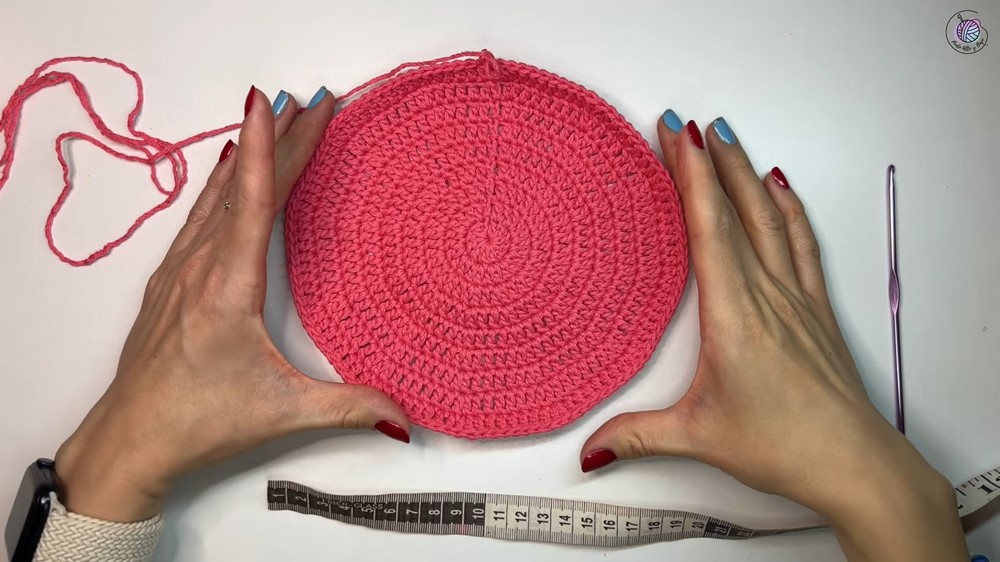
Stop once the diameter measures 18.5 cm for adult sizing. You may adjust for other sizes by stopping earlier or adding more increase rounds.
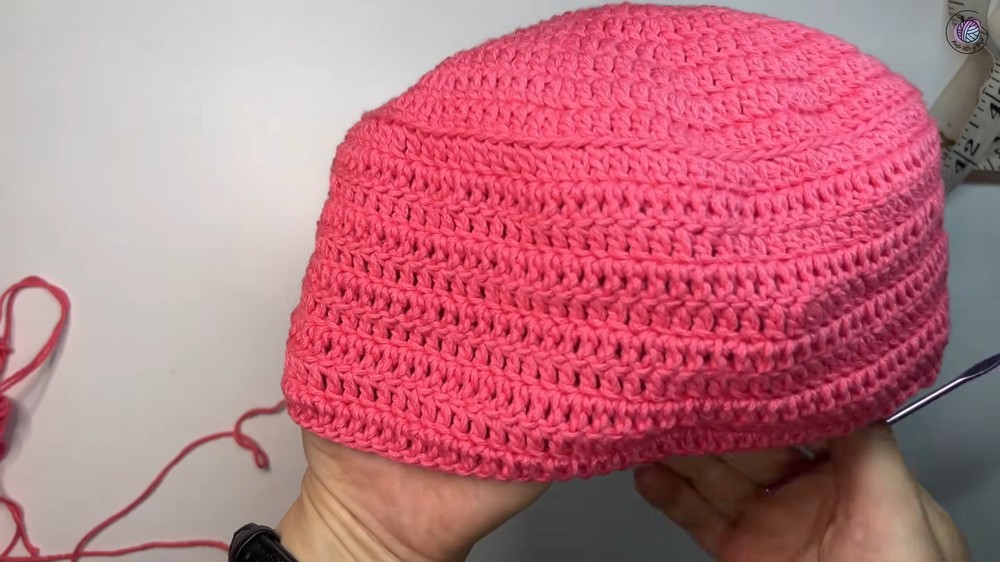
Rounds 10–19 (Sides of Hat):
- Chain 2 at the beginning of each round.
- Work in the Back Loops Only (BLO) for the first round (Round 10). This creates a ridge at the base of the hat's top.
- Continue with standard double crochet (dc) for the following rounds (11–19), turning your work after each round for texture.Height After 10 Rounds: Approx. 10 cm. Add or remove rounds to adjust the hat length.
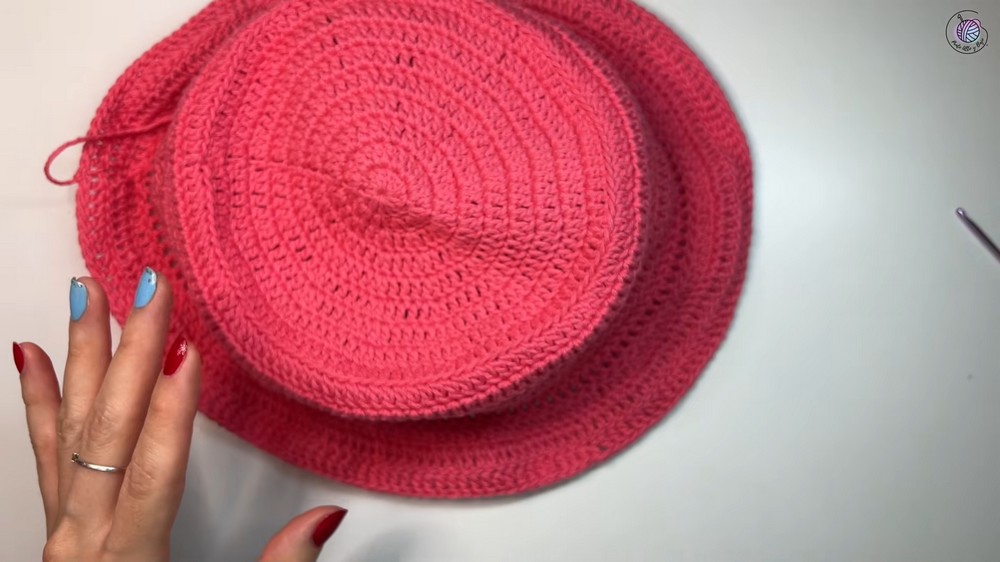
Brim:
- Chain 2, and begin increasing immediately. Crochet 2 dc stitches into every stitch around.
Stitch Count: 216 dc. Close with sl st. - Chain 2, and crochet 1 dc into every stitch around for 2 additional rounds.
Tip: Add more rounds for a wider brim.
The brim will have slight waviness due to the increased stitches.
Details
Ears (Make 2, Khaki Yarn)
- Create a magic ring and crochet 6 sc into the loop. Close the round.
Round 1–2: Work 1 sc in each stitch (6 sc in each round). - Round 3: Crochet 2 sc in each stitch (increase). Stitch Count: 12 sc.
- Crochet 5 additional rounds of sc without increases. Fasten off, leaving a long tail for sewing.
Horns (Make 4 Pieces in Tobacco Yarn)
- Create a magic ring and crochet 6 sc into the ring.
Round 2: Crochet 2 sc in each stitch. Stitch Count: 12 sc.
Round 3: Crochet 1 sc, 1 increase. Stitch Count: 18 sc. - For small horns: Crochet 8 rounds.
- For large horns: Crochet 15 rounds.
Stuff each piece lightly and sew a small horn to a large horn.
Optional Detail: Add 2 rows of white stripes to the large horn before finishing.
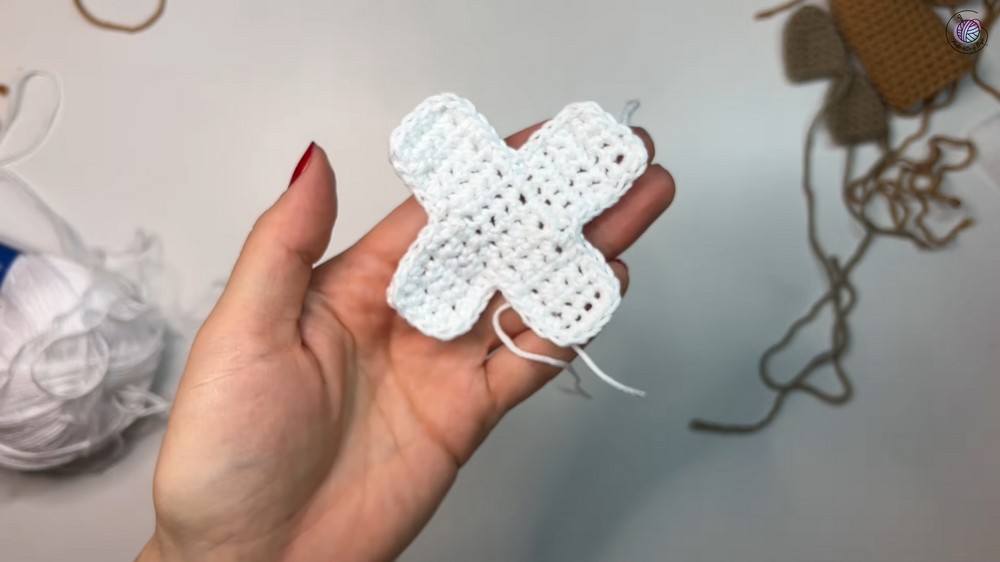
X Pattern (White Yarn)
- Chain 5. Work 1 sc into the second ch from the hook and into each remaining ch.
Stitch Count: 4 sc. - Chain 1, turn, and work 4 sc in each row for a total of 15 rows.
- Repeat to create 2 side arms for the "X". Sew or crochet them together into an X shape.
Assembling the Hat
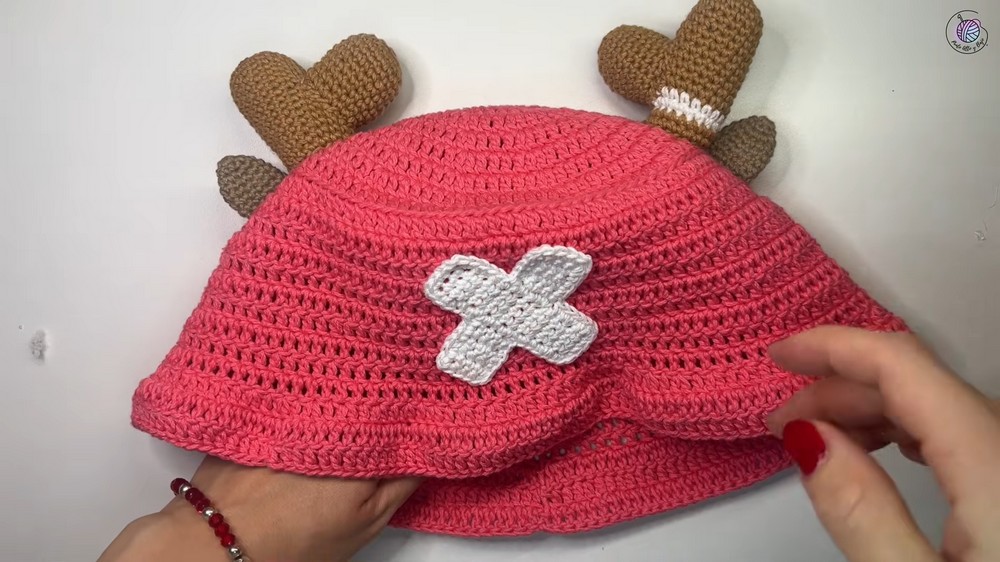
- Position the X: Center it at the front of the hat, one row above the brim. Sew or glue it in place.
- Attach the Horns: Measure 8 cm from the center front. Sew one horn above the ridge row, ensuring symmetry.
- Attach the Ears: Sew the ears below the horns.
Customization Ideas
- Color Variations: Experiment with different colors for a personalized look.
- Brim Size: Adjust brim length for varied styles (e.g., floppy bucket hat or top hat).
- Decor: Add embroidered details or other One Piece-themed accents.
Conclusion
This Tony Tony Chopper-inspired crochet bucket hat is a satisfying and fun project, perfect for fans of One Piece! With its whimsical design and cozy structure, it's both a functional and characterful accessory.
Important Remarks
- Block the final hat to shape and smooth the stitches.
- Maintain tension evenly to avoid a misshapen hat.
- Share your completed project on social media and connect with the crafting community!