
Brighten your holiday décor with a Free Crochet Christmas Tree Pattern that adds festive charm and spreads the joy of the season to your home.
Christmas is a joyful time when people love decorating their homes with handmade creations. A small crochet tree is a wonderful project that brings warmth, color, and a personal touch to the holiday season. It is easy to make, fun to decorate, and suitable for both beginners and experienced crocheters. Every finished tree has its own charm, making it a lovely part of Christmas celebrations.
Free Crochet Christmas Tree Pattern for Seasonal Gifts
A Free Crochet Christmas Tree Pattern helps you create beautiful handmade decorations without spending money on expensive designs. With this pattern, you can make ornaments, garlands, keychains, gift toppers, wall hangings, coasters, table decorations, bookmarks, appliqués, and cute toys. These handmade items are perfect for decorating your home, wrapping gifts, or sharing with family and friends during the holidays.
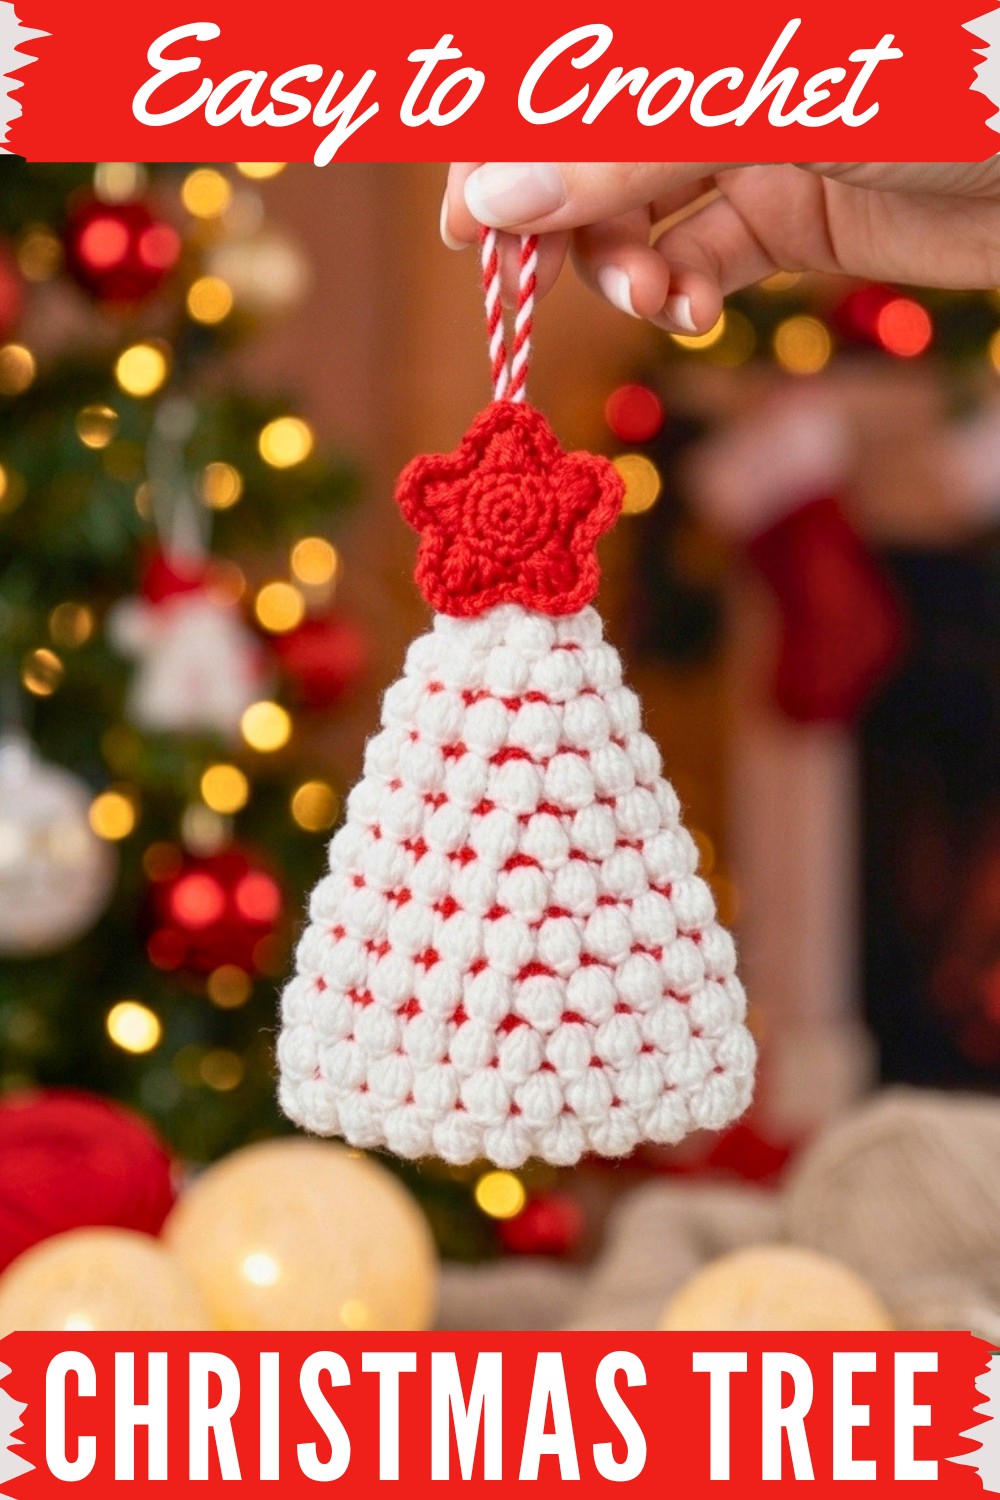
You can enjoy playing with different colors to match your Christmas style. Green gives a classic tree look, while white creates a snowy winter feel. Red, gold, silver, blue, pink, or even colorful rainbow shades make each tree look cheerful and unique. Small stars, ribbons, buttons, or beads can also be added to make every piece extra special.
The size is easy to customize. Thin yarn and a small crochet hook create tiny trees that are perfect for hanging on the Christmas tree. Thick yarn and a larger hook make bigger decorations for shelves, tables, or walls. This flexibility allows you to create projects for many different purposes.
The pattern mainly uses easy stitches, making it simple to follow. The single crochet stitch is the most important because it gives the tree a firm and tidy shape. Chain stitch and slip stitch are also commonly used to complete the design neatly and beautifully.
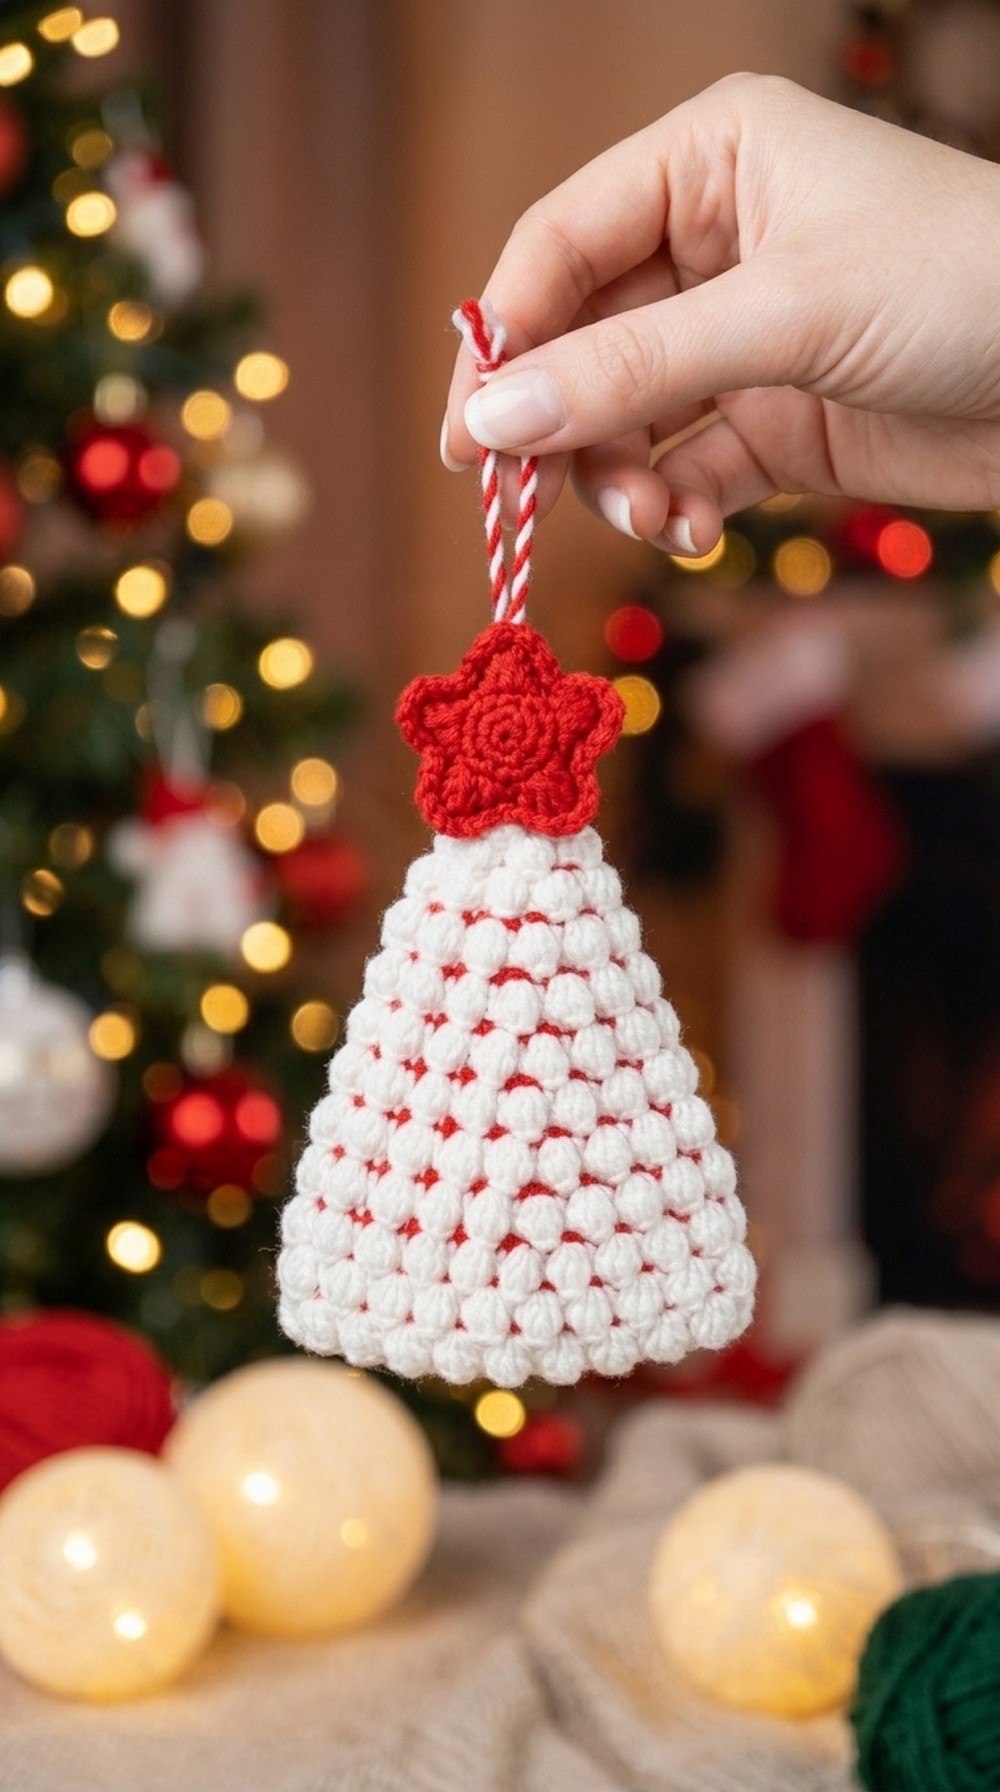
Lovely & Beautiful Crochet Christmas Tree Pattern
If you haven't subscribed to my channel yet, please, please, please subscribe, like, share, and comment on my videos. Today we are going to do this lovely and beautiful Christmas tree. The green one is made with 100% acrylic yarn, while the red and white one is made with 100% cotton yarn, both using a 3mm hook. Let's begin! I'm going to make this project in two colors: white and red.
Quick Overview of Pattern
- Worked in rounds
- Main tree body created using petals, comprised of double crochets
- Alternating rounds of single crochets and petal rounds increase stitches
- Base created separately and sewn to tree
- Stuffed for a plush look
- Optional star topper—referenced as a separate pattern
Notes
- All pattern instructions use US crochet terminology.
- The pattern is worked from the center out using a magic circle.
- Odd-numbered rounds are single crochet rounds and increase by multiples of four.
- Even-numbered rounds build petals using double crochets, increasing their count each round.
- Petals are formed by clusters of five double crochets, joined at the beginning of each petal.
- Base is crocheted separately and sewn to the main piece.
- For further guidance, check the description box of the video for a written pattern.
Skill Level
- Beginner to Intermediate
- Recommended for those comfortable changing colors, working in rounds, and sewing pieces together.
Materials
- 100% acrylic or 100% cotton yarn (green, red, white, or your choice of festive colors)
- 3mm crochet hook
- Yarn needle
- Scissors
- Fiberfill stuffing
- Optional: Amigurumi star topper (pattern available separately; see channel)
Measurements / Sizing
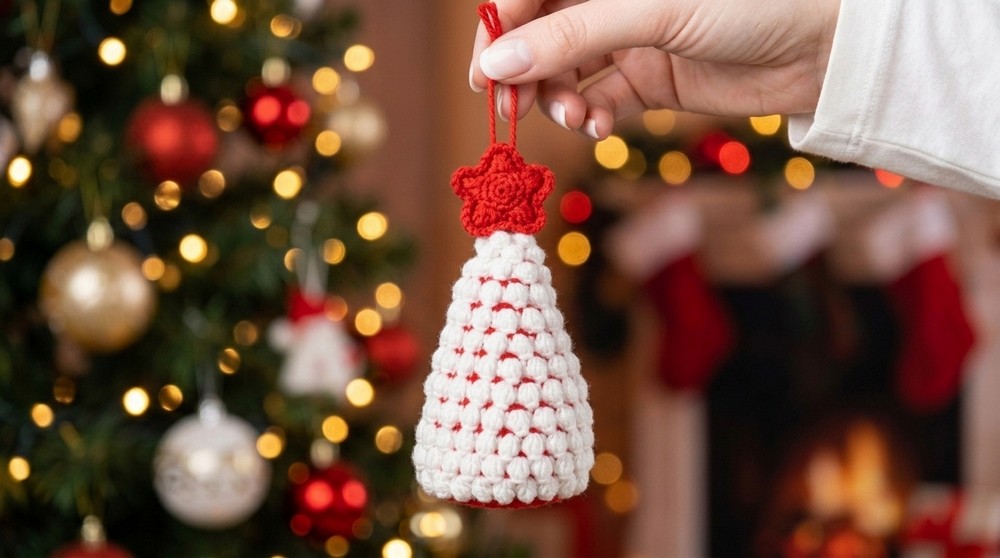
- Finished tree approximately 6–7 inches tall (with star topper) and 4–5 inches wide at base
- Slightly plush and thick due to stuffing; perfect for ornaments or display
Gauge
- Gauge is not crucial for this project.
- Pattern is worked in rounds that increase uniformly; adjust yarn or hook size for desired finished size.
Stitch Abbreviations
- ch – chain
- sc – single crochet
- dc – double crochet
- sl st – slip stitch
- st / sts – stitch(es)
- mc – magic circle
Special Stitches
- Magic Circle (mc): Create a ring; work stitches into the ring.
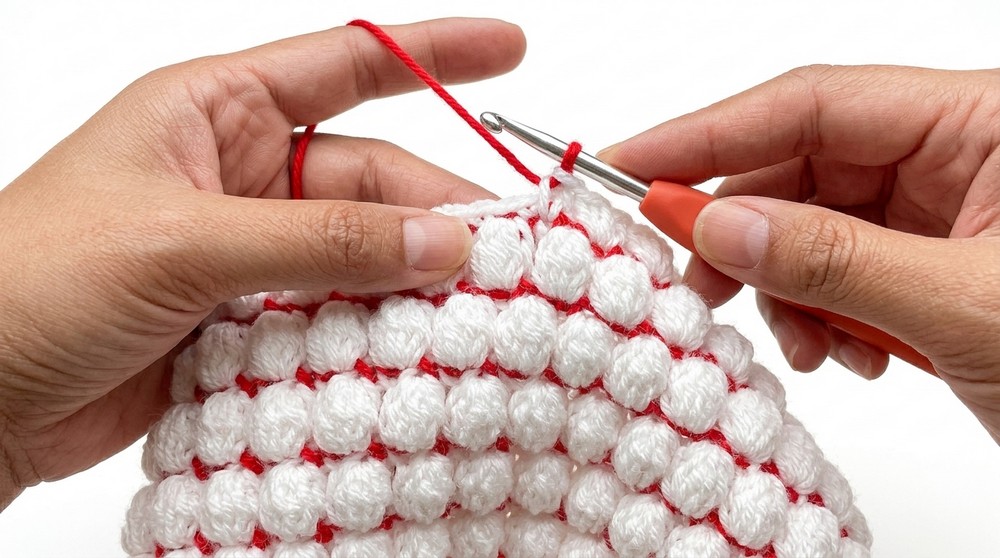
- Petal: Cluster of 5 double crochets joined into first dc of petal.
- Changing Colors: Drop previous yarn, tie new yarn to stitch, continue.
The Crochet Pattern
Main Body
Round 1
- Make a magic circle.
- Work 8 sc into the ring; pull yarn tight.
- Insert hook into first sc; sl st to join.
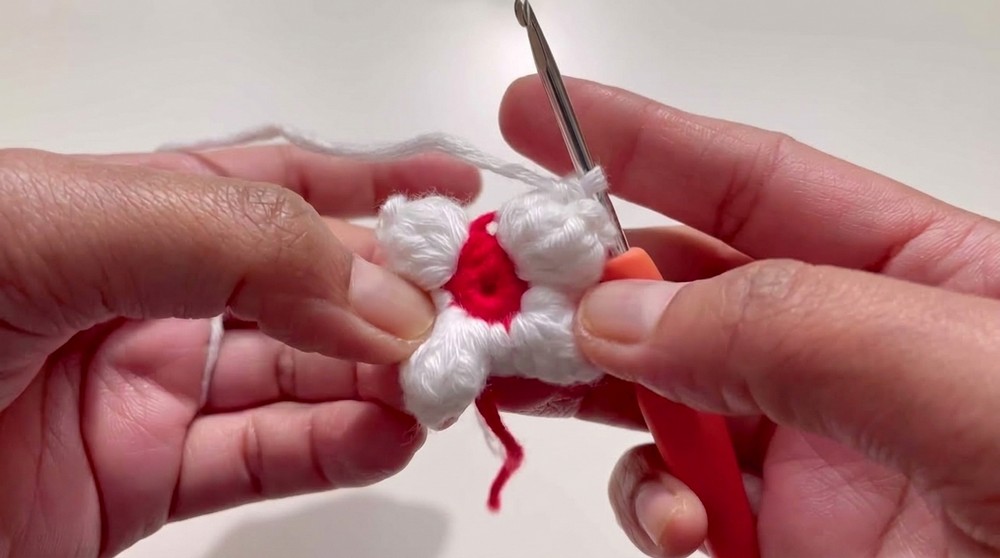
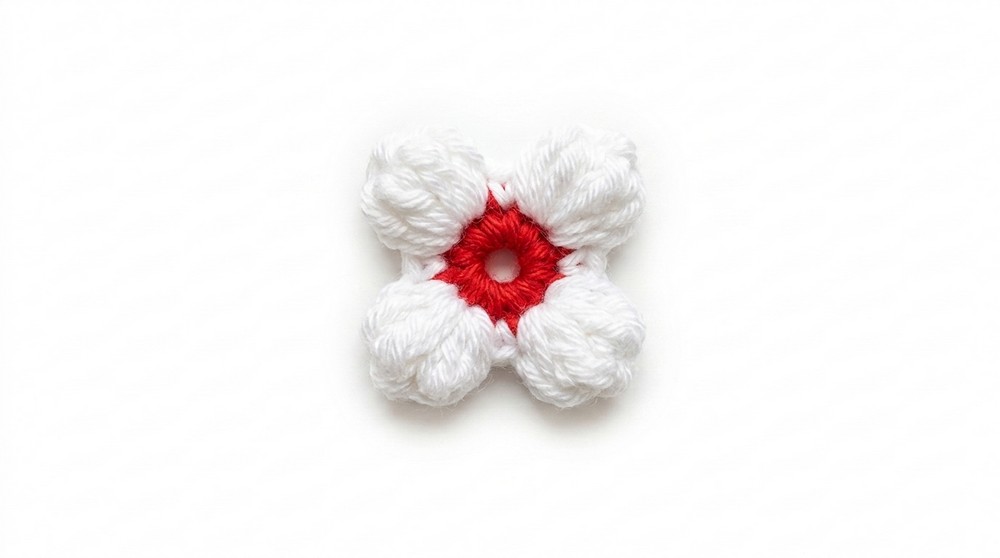
Round 2 (Petals)
- Change color (here, white).
- Ch 3 (counts as first dc).
- Into same st, work 4 dc (total 5 dc).
- Drop loop, insert hook into ch 3 to close petal, pull working yarn through, tighten.
- Ch 1.
- Into next st, work 1 dc.
- Into next st, work 5 dc (petal), close same as previous (insert hook into first dc, pull yarn through, tighten).
- Ch 1.
- Repeat sequence until you have 4 petals (each petal in every other stitch, with 1 dc between).
- Sl st into first ch 1 to join.
Round 3
- Change color (red).
- Ch 1 (counts as first sc), work 1 sc into same st.
- Next st: 1 sc.
- Next ch 1: 2 sc.
- Next st: 1 sc.
- Continue sequence: 2 sc into next, 1 sc into following, repeat around.
- At end, 12 sc total.
- Sl st into first st.
Round 4 (Petals)
- Change color (white).
- Repeat petal process as in round 2: ch 3, 4 dc into same st (total 5 dc).
- Drop loop, insert hook into ch 3 to close, pull yarn through, tighten.
- Ch 1.
- 1 dc in next st, then petal (5 dc) in following.
- Repeat around, ending with 6 petals and 6 individual dc.
- Sl st into first ch 1 to join.
Round 5
- Change color (red).
- Ch 1, work 1 sc into same st.
- Next st: 1 sc.
- Next st: 1 sc.
- Into following st: 2 sc.
- Continue sequence (2 sc, 1 sc, 1 sc), increasing by 4 sts to end with 16 sc.
- Sl st to join.
Round 6 (Petals)
- Change color (white).
- Ch 3, 4 dc into same st, drop loop, insert into ch 3, pull yarn through, tighten.
- Ch 1, 1 dc in next st, then petal in following.
- Repeat sequence around for 8 petals and 8 individual dc.
- Sl st to join.
Round 7
- Change color (red).
- Ch 1, 1 sc into same st.
- Next 3 sts: 1 sc in each.
- Next st: 2 sc.
- Next 3 sts: 1 sc in each.
- Next st: 2 sc.
- Repeat sequence (2 sc, 1 sc x 3) to end up with 20 sc.
- Sl st to join.
Continue Repeats
- Even-numbered rounds: Petal rounds, increase two petals and two dc each round.
- Odd-numbered rounds: Single crochet, increase four sc each round (by repeated [2 sc, 1 sc, 1 sc, 1 sc] sequence).
- Continue pattern up to Round 20 (44 sc, 22 petals & 22 dc).
- For Rounds 21–24: No increases. Repeat round 19 and round 20 as written.
- Round 25 (final): Work 1 sc in each stitch around (44 sc total).
- Cut yarn.
Base
Round 1
- Make a magic circle, work 8 sc into ring, pull tight.
- Sl st to join.
Round 2
- Ch 1 (counts as first sc), work 2 sc into each stitch around. (16 sc)
- Sl st to join.
Round 3
- Ch 1, work 2 sc into first stitch, 1 sc into next stitch.
- Continue: [2 sc, 1 sc] round, ending with 24 sc.
- Sl st to join.
Round 4
- Ch 1, 2 sc in first stitch, 1 sc in next 2 stitches.
- Continue: [2 sc, 1 sc, 1 sc], ending with 32 sc.
- Sl st to join.
Round 5
- Ch 1, 2 sc in first stitch, 1 sc in next 3 stitches.
- Continue: [2 sc, 1 sc, 1 sc, 1 sc], ending with 40 sc.
- Sl st to join.
Round 6
- Ch 1, 2 sc in first stitch, 1 sc in next 9 sts.
- Continue: [2 sc, 1 sc × 9], ending with 44 sc.
- Sl st to join.
Round 7
- Ch 1, work 1 sc into each stitch around (44 sc).
- Sl st to join.
- Leave a longer tail for sewing.
Assembly & Finished Size
- Place tree body and base together.
- Thread needle with long tail from base.
- Sew together around edges, matching up 44 stitches.
- Leave a small opening, insert stuffing, finish sewing, secure end.
- Insert all loose ends into inside.
- Optional: Attach amigurumi star topper using red yarn and a needle, sew securely to the top.
Conclusion
At the end of your project, you will have a beautiful, plush crochet Christmas tree, perfect for display or gifting. The step-by-step approach with carefully increased rounds ensures your tree is symmetrical and full. If you enjoyed this tutorial, please subscribe to my channel, like, share, and comment on my videos. See you in the next video—happy crocheting and happy holidays!



