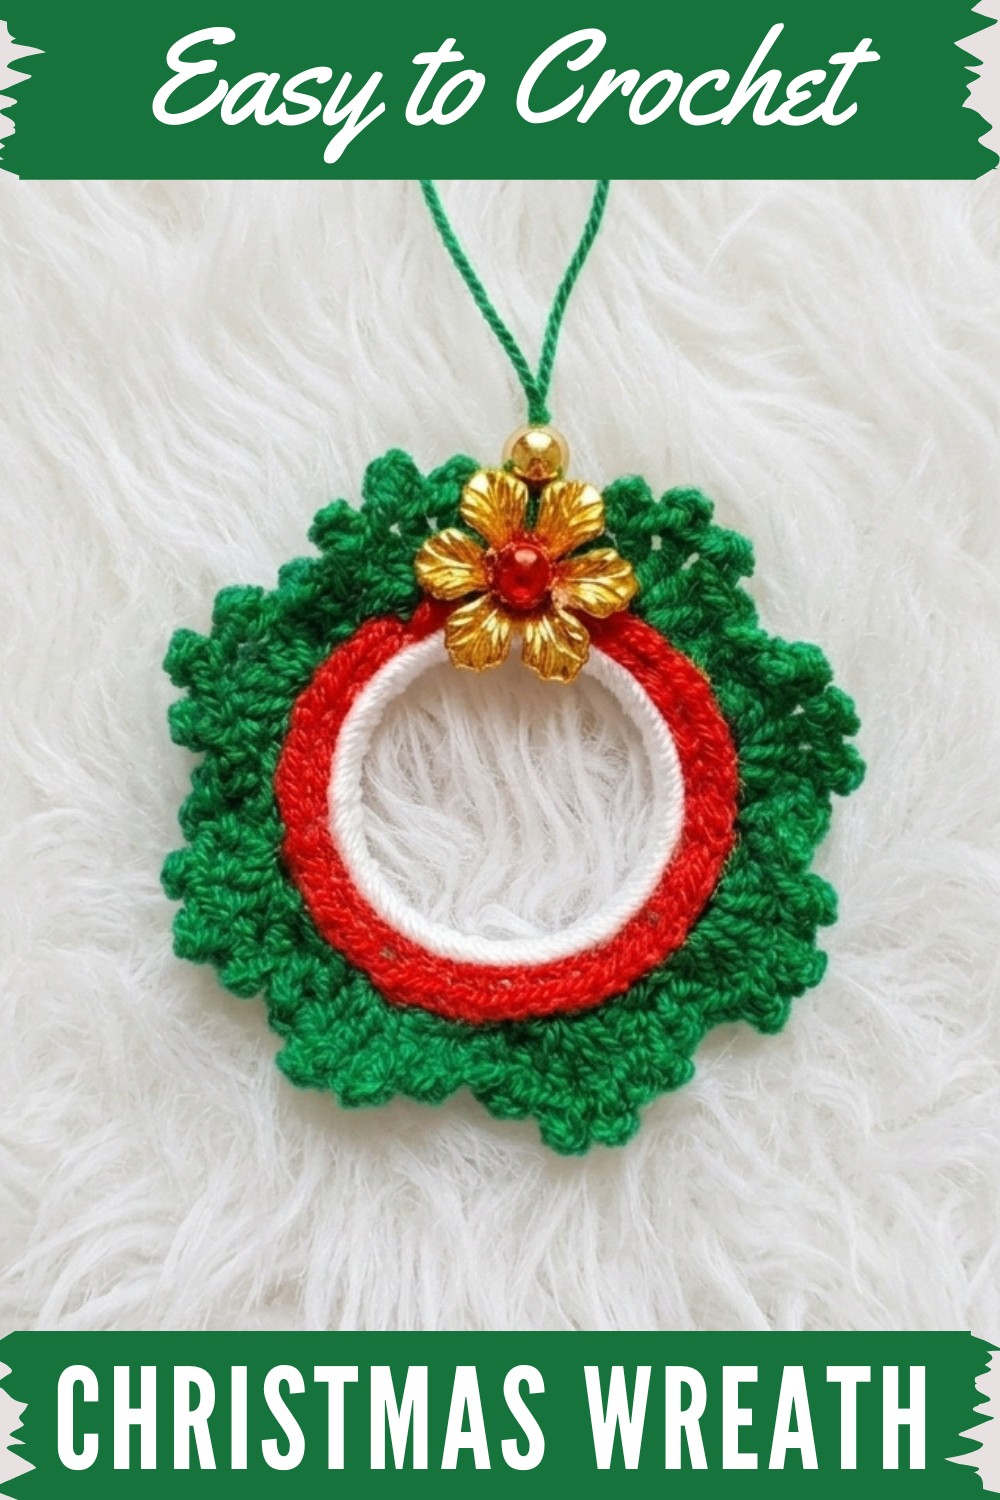
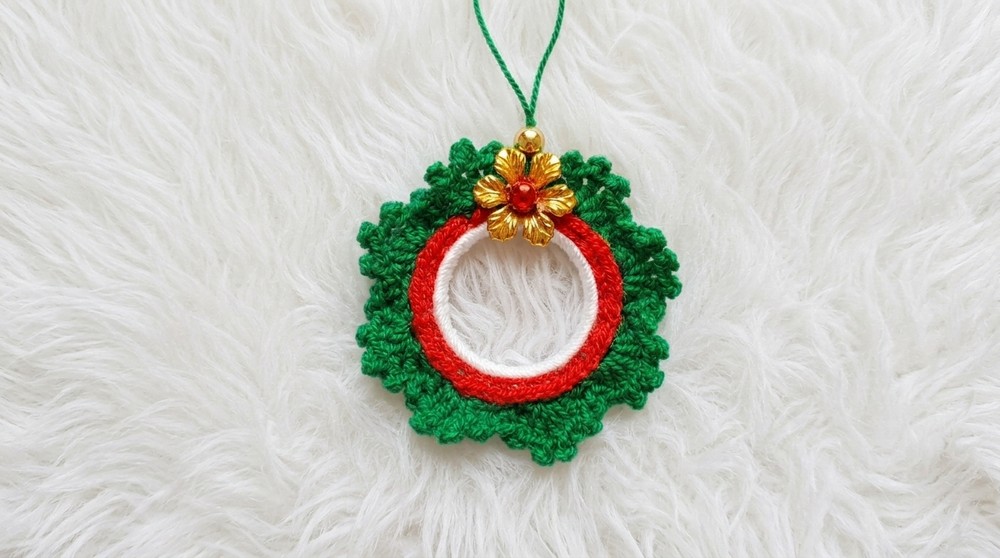
Brighten up your holidays with this Free Crochet Christmas Wreath Pattern, packed with easy steps to create a colorful, cheerful, and eco-friendly holiday decoration.
Add festive charm to your holiday décor with a playful crochet project that’s both easy and cheerful. The Free Crochet Christmas Wreath Pattern, which blends classic crochet stitches with bold holiday colors and resourceful materials. Red, white, and green stripes wrap neatly around a recycled plastic ring, giving the wreath a sturdy structure and an eco-conscious touch.
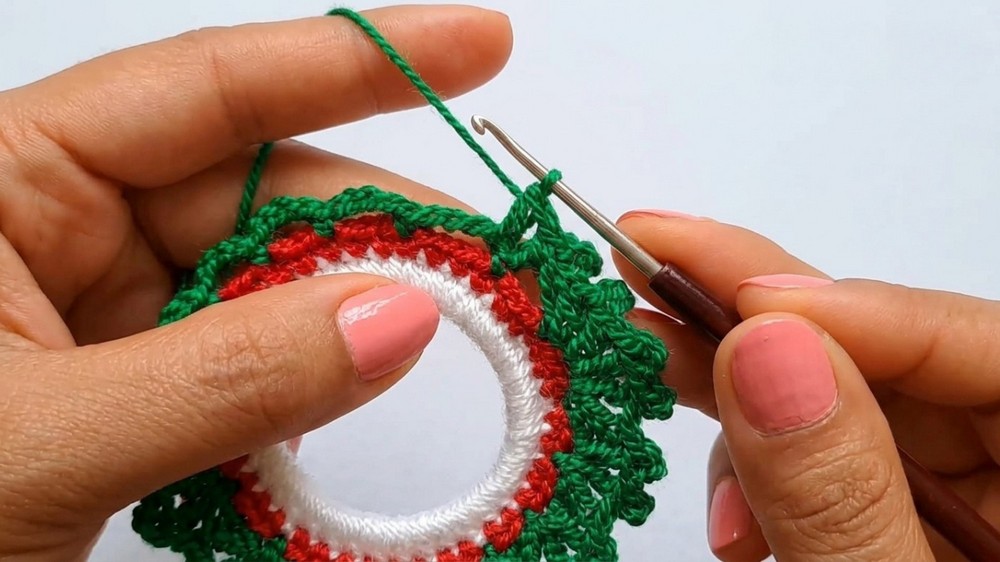
Easy Free Crochet Christmas Wreath Pattern Step by Step
Achieve a neat rounded form by working multiple rounds of single crochet, resulting in a dense and tidy appearance. Arches created by chain spaces outline the edge, forming graceful loops decorated with small peaks for extra texture. Personalize your wreath further by attaching gold pearls or other seasonal decorations, making each ornament unique.
This project is ideal for beginners and those wanting a quick crochet projects. The techniques used are simple, single crochet, double crochet, slip stitch, and changing colors, making the pattern accessible yet satisfying. Throughout, you’ll practice consistent stitch counts, smooth color transitions, and attaching finer details with glue or thread.
Use the Free Crochet Christmas Wreath Pattern as an ornament, gift topper, or wall accent. It offers a fun way to strengthen crochet skills, experiment with colorwork, and enjoy creating something special for your seasonal celebrations.
Key Project Details
Here's a quick look at the process of making this wreath.
- The pattern uses only basic crochet stitches, making it suitable for all skill levels.
- It’s worked directly onto a recycled ring so there’s no need for a special frame.
- Each colored section of the wreath is worked in rounds, changing colors as you go.
- The project finishes with a scalloped edge and optional loop for hanging.
- Decorations can be sewn or glued after the crochet is complete.
My Creative Outline
What you can create by using these stitches.
- Started with a recycled ring as the base.
- Completely covered with single crochet (sc) using white yarn.
- Added a red colored round of single crochet for extra festivity.
- Finished with a green round, worked as chain arches and a decorative scalloped edge.
- Added hanging loop and glued on beads/bows for decoration.
Festive Crochet Christmas Wreath – Step-by-Step Pattern
Bring holiday cheer to your crafting with this quick and easy crochet Christmas wreath! Designed to use up scrap yarn and recyclable household rings, it’s bursting with color and possibilities for décor, gifting, and more. Follow this clear guide for a perfect wreath every time.
Preparatory Steps
- Gather all yarn colors before starting. Pre-select traditional Christmas colors (red, white, green) or make it unique with your favorites.
- Choose a rigid, circular base (small plastic ring from a bottle or yoghourt container works great).
- Have your decorations and adhesives (glue, silicone, beads, ribbons) ready and within reach.
- Make sure your workspace is well-lit and comfortable, as color changes and small details require focus.
- Read through instructions completely before you begin your project.
Experience Needed
Beginner Friendly
Basic skills: chaining, single crochet, slip stitch, color change, and working around rings.
Final Dimensions
- Outer Diameter: ~8–9 cm (3–3.5") (using a typical plastic bottle ring)
- Inner Diameter: ~4–5 cm (1.5–2")
- Adjustable: Use any ring size; add more single crochets for bigger circles.
Required Tools & Supplies
- Small rigid plastic ring (recycled from a bottle cap or dairy container)
- DK or worsted weight yarn in white, red, green (scraps or small balls)
- Crochet hook (3.0–3.5 mm; adjust for tight coverage)
- Scissors
- Yarn/tapestry needle
- Optional: glue (hot or cold), small decorations (mini bows, beads, pearls, ribbons), thin crochet hook for pulling beads through
Measuring & Sizing Chart
- Base ring diameter: 4–5 cm (1.5–2" typical small ring)
- Finished wreath diameter: 8–9 cm (3–3.5")
- Increase the number of stitches evenly if using a larger ring.
Stitch Gauge & Sample Pattern
- Gauge is not crucial, but all single crochets should be snug around the ring for total coverage.
- For reference: ~70–73 single crochets completely cover a standard small bottle ring.
Abbreviation Reference
| Abbreviation | Definition |
|---|---|
| ch | chain |
| sc | single crochet |
| sl st | slip stitch |
| st(s) | stitch(es) |
| rep | repeat |
| dc | double crochet |
Highlight: Special Techniques
- Working Around a Ring: Insert hook under ring for each sc, completely encasing it.
- Color Change: Finish last pull-through of sc with the new yarn.
- Scallop/Picot Edge: Series of (dc, ch, sl st) in arches produces a neat, decorative finish.
- Hanging Loop: Pull up a long loop before fastening off, knot for a sturdy, integrated hanger.
Stepwise Instructions
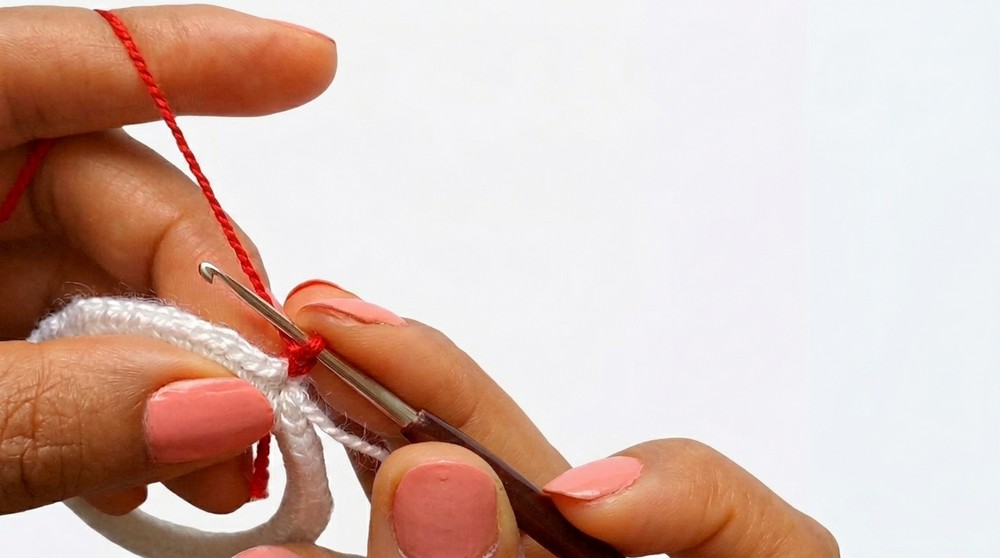
1. Foundation: Cover the Ring (White Yarn)
- Tie a slip knot and attach with a single crochet (sc) onto any part of the ring.
- Work sc around the entire ring:
- Insert your hook from front to back, yarn over, pull up a loop, yarn over and draw through both loops (sc).
- Hide the starting tail under your new stitches.
- Keep sc close together so the ring is completely covered, no gaps.
- Continue until the ring is fully encased (about 70–73 sc for a 5 cm ring).
- If needed, squeeze the stitches together to close gaps.
- Join with a sl st to the first sc.
- Fasten off and cut yarn.
For those new to reading patterns: You’re just wrapping the whole ring with lots of single crochets until you can’t see any plastic!
2. Second Round: Red Color Band
- Attach red yarn anywhere (preferably at the previous join/seam).
- Ch 1, then work 1 sc in each sc from the white base, all around.
- When you reach the beginning (about 73 sc), join with a sl st to your first sc.
- Cut red yarn and fasten off.
You’ll now have a candy-striped wreath in classic Christmas colors. If you want more stripes, add more rounds!
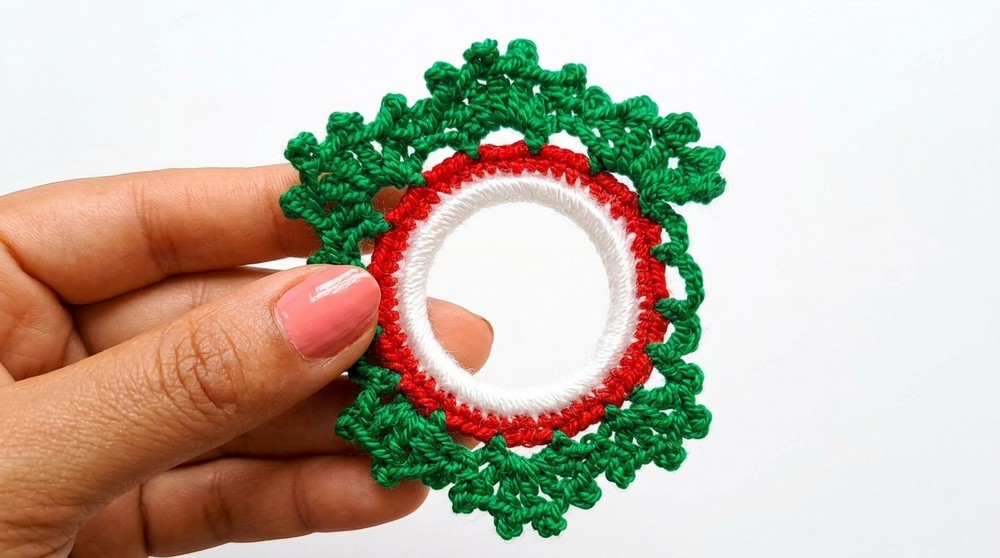
3. Third Round: Green Chain Arches
- Join green yarn at the seam (where previous rounds started).
- Ch 4 (creates first green arch).
- Skip 3 sc, sc in the next st.
- Repeat: Ch 4, skip 3 sc, sc in next.
- Continue making chain arches all the way around. You will have 18 small arches at the end.
- At the last repeat, ch 4, join with a sl st to base of first arch.
For visual learners: Make little loops, each loop bridged by skipping three stitches, then single crocheting to anchor it, all the way around the wreath.
4. Final Touch: Scalloped Edge
- In the first green arch, sl st, ch 3 (counts as dc), make dc in same arch.
- (Ch 3, sl st into same arch) for a picot/point.
- Rep: Dc in same arch, ch 3, sl st in arch, until there are 5 dcs (each with a ch-3 picot) in each arch.
- After the fifth dc, move to the next arch with a sc.
- Repeat for every arch.
- To finish, join to your starting round with a sl st, cut yarn, and fasten off.
For crafters who like things easy: Each arch gets five decorative points!
Construction & Polishing
- Add a hanging loop before fastening off: pull up a loop of 10–12 cm, tie a knot to secure.
- Weave in any loose ends with a tapestry needle.
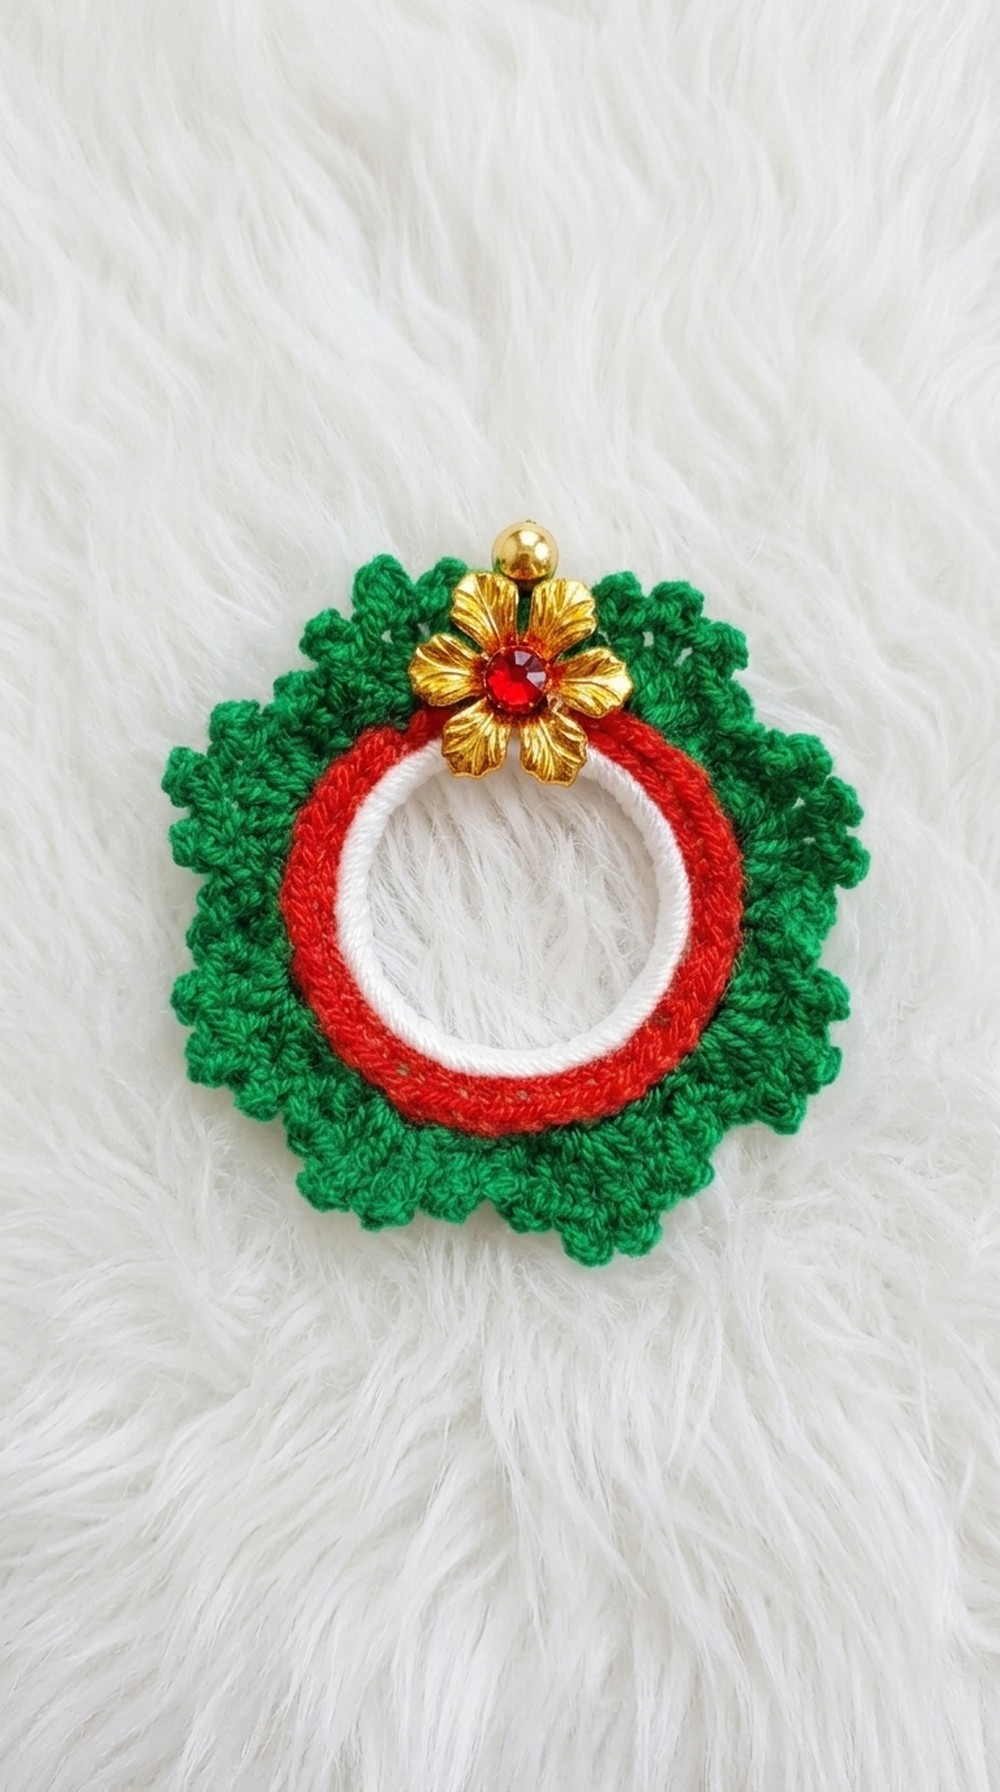
- Attach bows, glue on gem/pearl, or sew on beads as desired for festive decoration.
- Block gently if you want a perfectly round wreath.
- Allow any glued decorations to fully dry before hanging.
Troubleshooting (and Solutions)
Problem: Wreath is wavy or uneven.
Solution:
Make sure your stitches are snug and there are no large gaps. If arches are loose, use a smaller hook. To fix looseness after finishing, block the wreath using pins and light steam.
What you can make by using these stitches
- Ornaments for Christmas trees or holiday garlands
- Festive magnets (attach a magnet at the back)
- Appliqué for hats, stockings, blankets, or gift bags
- Napkin rings or place settings for holiday tables
- Brooches: add a pin at the back
- Package toppers for a special handmade finish
Easy Explanation for All
Take a colored yarn and cover a small plastic ring with single crochet stitches. Add other colors by single crocheting on top of that. Make little chain loops all around, then fill each loop with decorative double crochets and picots to make it scalloped and fancy. Add a loop to hang, stick on little bows or beads if you like, and enjoy your Christmas wreath.