Are you ready to try your hand at a cheerful crochet accessory that combines style and practicality? Look no further than this stunning Daisy Bag, complete with a free crochet Daisy Bag pattern that’s perfect for beginners and seasoned crocheters alike. This bag is a wonderful way to express your creativity while crocheting something functional and beautiful at the same time. Its round shape, textured petal design, and sturdy strap come together to create an accessory that’s as fun to make as it is to use.
Crochet a Daisy Bag Free Pattern for Summer Outfits
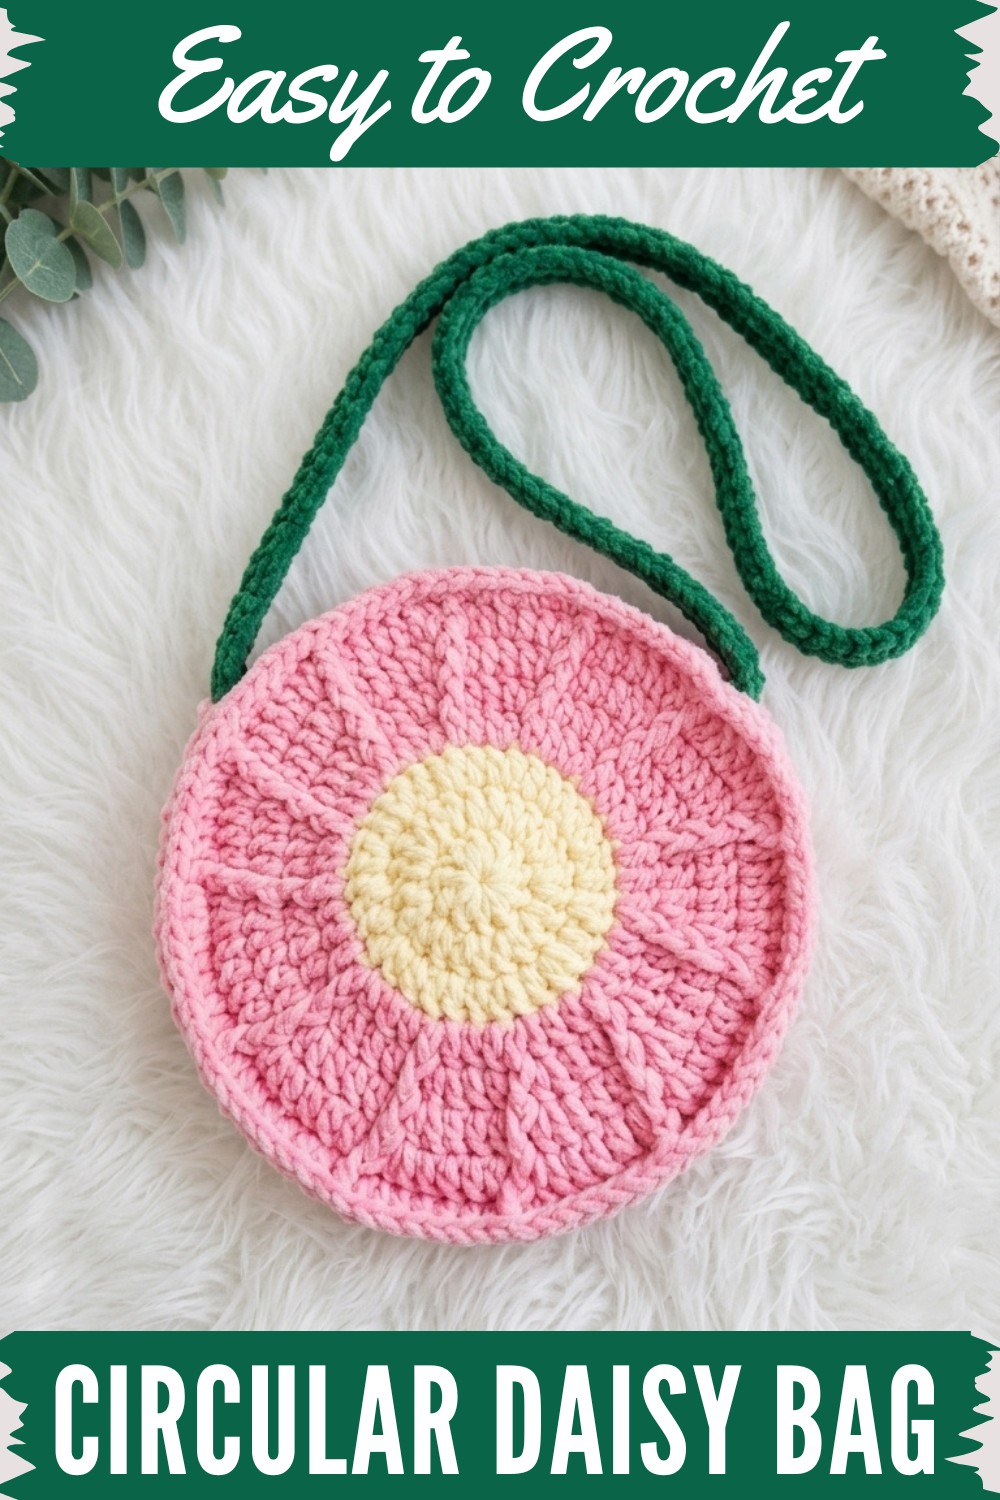
The design stands out with its playful floral motif, making it ideal for anyone who loves nature inspired items. The texture of the daisy petals gives the bag a unique character, while the smooth, flat base ensures it’s not only visually appealing but also highly practical.
The bag is lightweight yet sturdy, thanks to the choice of yarn, it works especially well with worsted weight acrylic or cotton blends, which showcase the raised stitches beautifully. Not only does the acrylic yarn make the bag durable, but it also makes care easy: just hand wash it gently when needed.
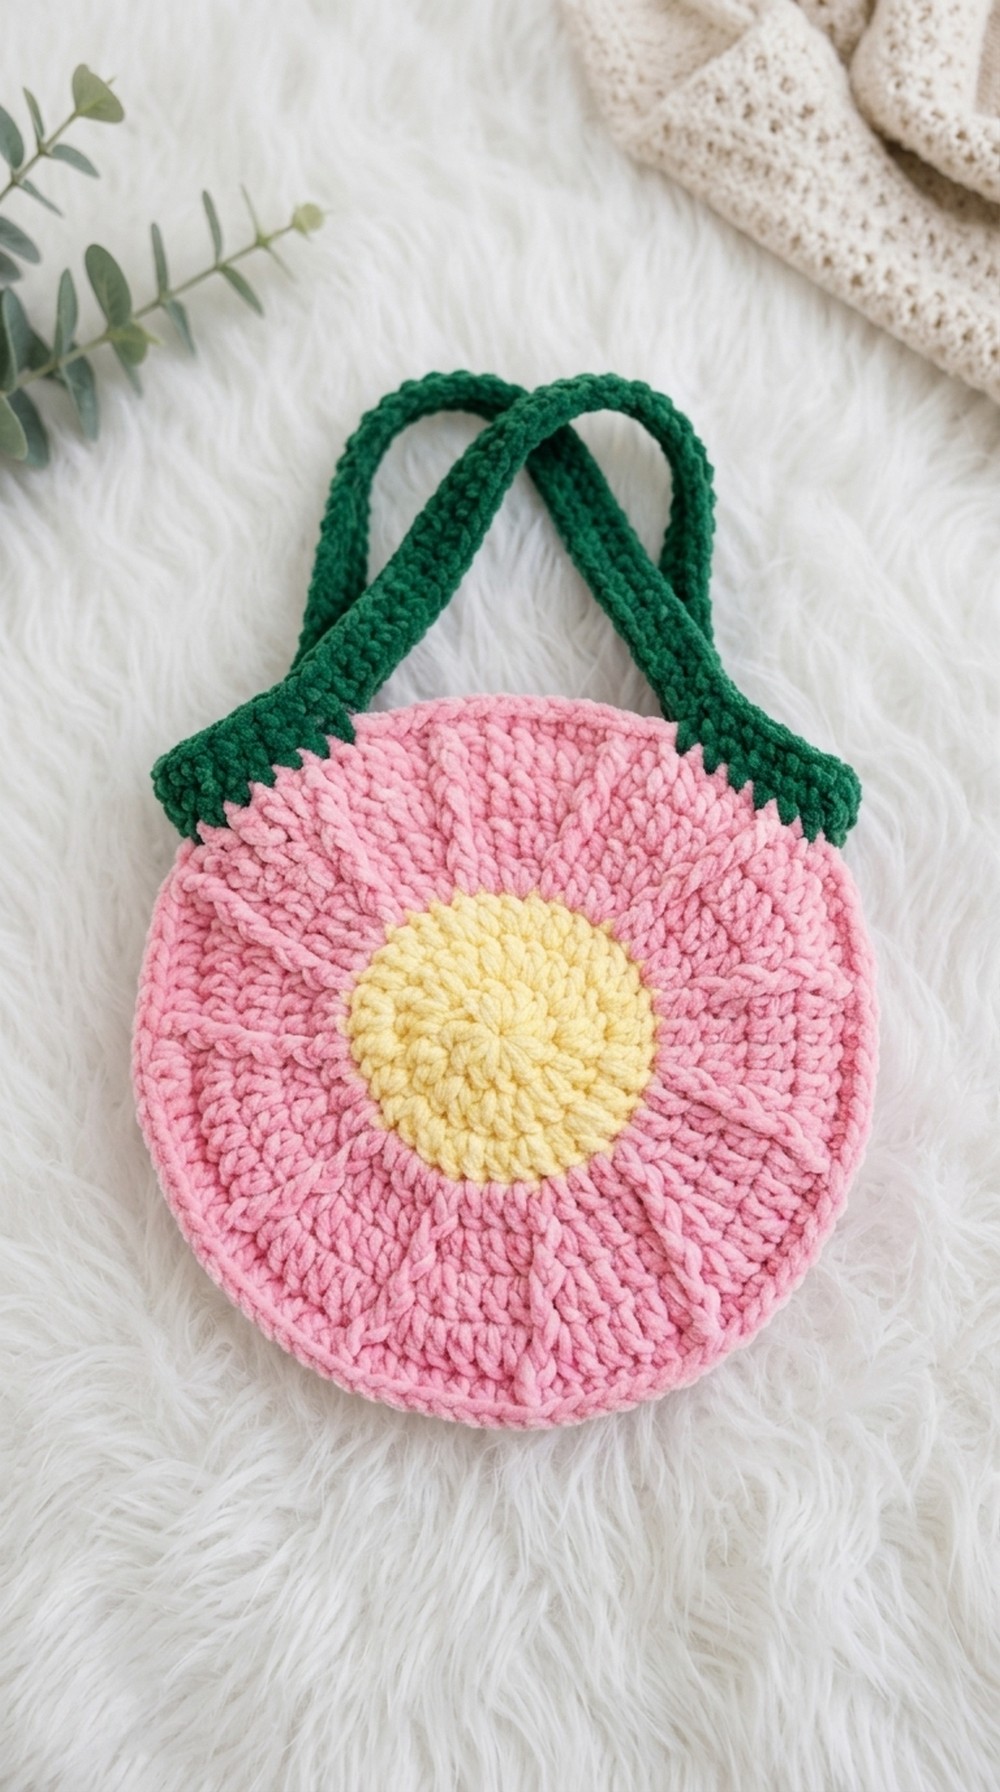
The bag is constructed in rounds with a focus on textured stitches, making it a great project to experiment with advanced techniques like post stitches while building your skills. One of the joys of this bag is how adaptable it is, adjust the size, strap length, or color palette to match your personal style. Add embellishments like buttons or leaf appliqués to make it even more special.
Inspired by the classic charm of daisies, this bag is perfect for casual outings, spring gatherings, or even as a gift for a loved one. With a little imagination, you’ll have a piece that’s truly one of a kind.
Crochet Daisy Bag Pattern
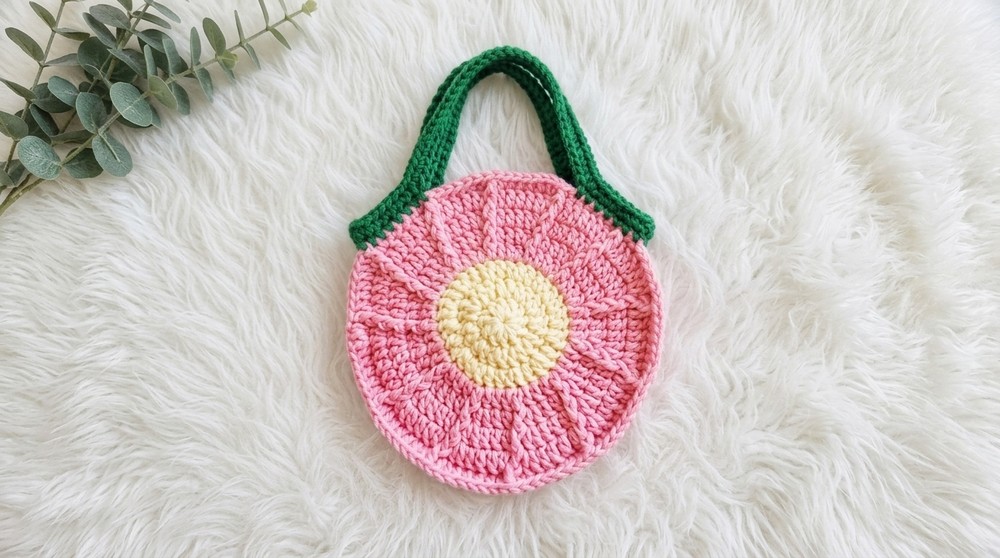
This pattern is for a highly requested Daisy Bag Crochet Pattern, featuring a beautiful raised petal pattern. The bag is functional, sturdy, and stylish, making it a perfect accessory for everyday use. With an off white center and pink petals, it’s great for adding a touch of elegance to your outfit. This beginner friendly project is easy to customize with a variety of color combinations, such as white and yellow or brown and yellow.
Quick Overview of the Pattern
- Construction:
- The bag is made from two identical circular panels for the front and back.
- These panels connect with a side gusset strip to add depth and shape for storage.
- Texturing:
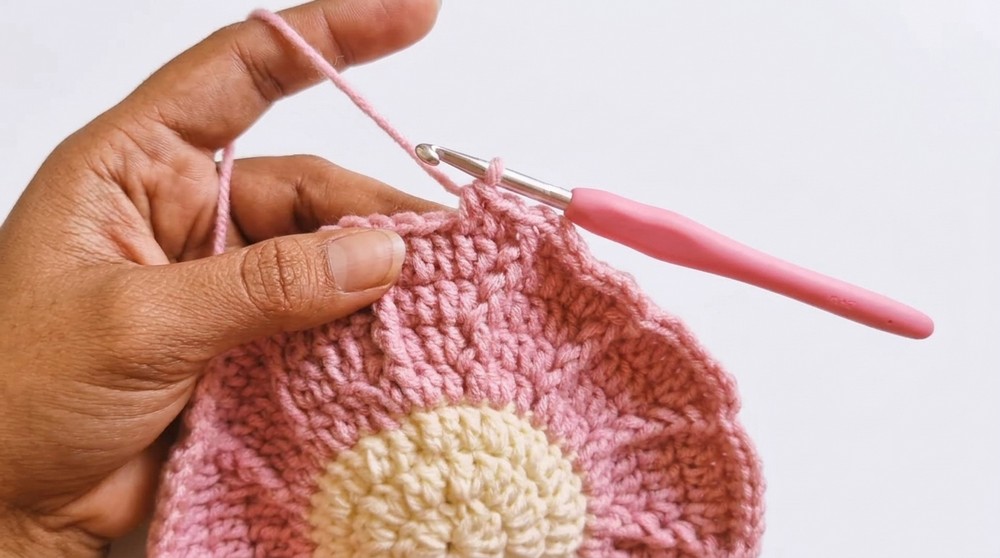
- Raised 3D petals in the pink section of the panel are created using front post double crochet (FPdc) stitches.
- Closure:
- A button or bead secures the bag with a loop crocheted onto the back panel.
- Strap:
- A sturdy green shoulder strap is made entirely of single crochet, ending with a decorative leaf motif near the bag's base.
Notes
- Two Strands of Yarn:
Use two strands of standard acrylic yarn held together while crocheting to give the bag a thick, structured shape. If using a chunky yarn, one strand may be sufficient. - Visual Stitch Tracking:
Because the panels are formed using distinct joined rounds, you won’t need extra stitch markers. - Crochet Over Yarn Tails:
Avoid tedious finishing work by crocheting over yarn tails as you change colors or join the gusset. - Acrylic Finishing Tip:
Lightly run a flame over the final bag to remove stray fibers (exercise extreme caution).
Skill Level
Level: Advanced Beginner
Skills Needed:
- Working in a magic ring or chain loop.
- Basic stitches: ch, sc, dc.
- Working in the front loops only (FLO) and back loops only (BLO).
- Post stitches (FPdc).
Materials
- Yarn: 100% acrylic yarn (or other available medium weight yarn), with the following colors:
- Color A: Yellow or off white for the center.
- Color B: Pink for the petals and side gusset.
- Color C: Green for the strap and decorative leaf.
- Crochet Hook: 3.0mm (or size C/D, depending on your tension).
- Fasteners: 1 decorative button or wooden bead for closure.
- Tools: Tapestry needle, scissors, and optionally a lighter (to remove acrylic fuzz).
Measurements / Sizing
- Bag Diameter: 7–8 inches (depending on yarn choice and tension).
- Side Gusset: 6 stitches wide, length to match the circumference of the circular panels.
- Strap: Adjustable to your desired length (crossbody or shoulder style).
Gauge
Exact gauge is not critical. The bag’s thick structure is created by crocheting with two strands of yarn. Ensure your stitches are tight and compact to prevent items in the bag from falling out.
Stitch Abbreviations
| Abbreviation | Definition |
|---|---|
| ch | Chain |
| sl st | Slip stitch |
| sc | Single crochet |
| dc | Double crochet |
| FPdc | Front post double crochet |
| inc | Increase (2 stitches in 1 st) |
| FLO | Front loop only |
| BLO | Back loop only |
| st(s) | Stitch(es) |
Special Stitches
Front Post Double Crochet (FPdc)
- Yarn over, insert the hook from front to back and then to the front again around the vertical post of the stitch below.
- Yarn over, pull up a loop around the post.
- Yarn over, pull through two loops.
- Yarn over again, pull through final two loops to complete the stitch.
This creates the raised, textured petal effect in the pink section of the bag.
The Crochet Pattern
Main Circular Panels (Make 2 Identical Pieces)
Center Core (Using Color A)
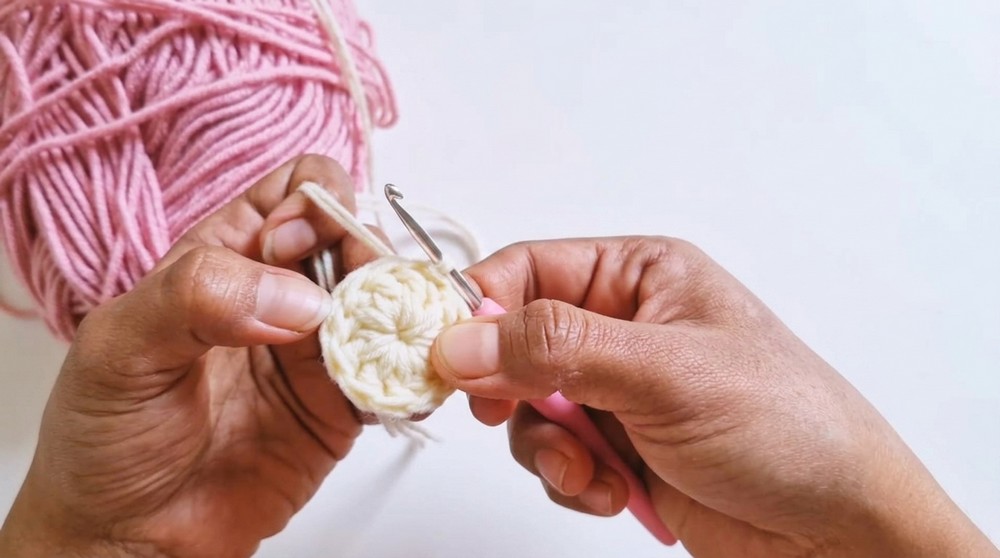
Round 1:
- Tie a secure slip knot with two strands of Color A.
- Ch 4, sl st into the first chain to create a ring.
- Ch 2 (does not count as a stitch).
- Work 12 dc into the center ring space.
- Join with sl st to the top of the first dc. [12 dc]
Round 2:
- Ch 2.
- Work 2 dc in each stitch around (increase in every stitch).
- Sl st into the top of the beginning Ch 2 to close. [24 dc]
Round 3:
- Ch 2, 1 dc in the first st, 2 dc in the next st.
- Repeat * to * around.
- Sl st into the top of beginning Ch 2 to close. Fasten off Color A and cut the yarn. [36 dc]
Petal Section (Switch to Color B)
Round 4:
- Create a slip knot with two strands of Color B and join it to the next stitch.
- Ch 2, 1 dc in the first 2 sts, then 2 dc in the next st (inc).
- Repeat * to * around.
- Sl st into the starting chain to join. [48 dc]
Round 5:
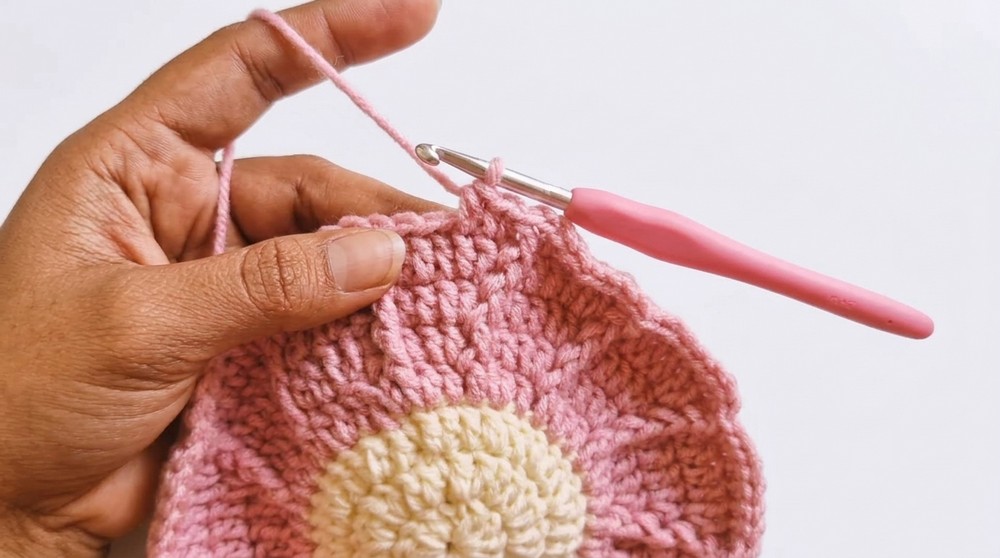
- Ch 2, 1 dc in the next 2 sts, FPdc in the third st, and inc (2 dc in one stitch).
- Repeat this sequence around.
- Sl st to join.
Round 6:
- Ch 2, repeat the sequence from Round 5.
- Work dc inc at the beginning of the round, FPdc into each raised post from the previous round, and inc at the next stitch.
- Continue with established pattern, sl st to join.
Round 7:
- Repeat instructions for Round 6 to add further width to the circle.
Round 8 (FLO Shaping Round):
- Ch 2, work a dc inc in the front loop of the first st.
- Continue with FLO dc and FPdc, working incs next to each FPdc.
- Sl st to close the round.
Side Gusset Strip (Using Color B)
- Foundation Row:
- Pull two strands of Color B together, create a slip knot, and Ch 7.
- Turn your work, skip the first ch, work 1 Sc into each of the remaining 6 chs. [6 Sc]
- Row 2:
- Ch 1, turn work. Work 1 Sc into each of the 6 sts.
- Ch 1, turn work. Work 1 Sc into each of the 6 sts.
- Repeat Row 2: Continue until the strip’s length is long enough to wrap around the panels from one corner of the top opening to the opposite side.
Adding the Button Loop (Back Panel Only)
- After completing Round 8 of Back Panel, position your hook at the top center of the back panel.
- Make Loop:
- Ch 10, skip the first two ch, and work 1 Sc into the 3rd ch, followed by Sc into each remaining chain.
- Attach the loop securely using Sc and fasten off.
Assembly
Joining Panels
- Align front and back panels with their right sides out.
- Position the side gusset strip between the panels. Use a tapestry needle threaded with two strands of Color B.
- Sew the gusset strip to the panels through the back loop of Round 8 stitches. Leave an opening at the top for the bag opening.
Adding the Strap
- Strap Crocheting:
- With two strands of Color C, Ch to your desired strap length.
- Turn, skip the first ch, and Sc into each ch to create a thick strap.
- Fasten off and leave long tails for attachment.
- Securing the Strap:
- Sew each end of the strap to the top corners of the gusset strip using the long tails and a tapestry needle.
(Optional) Adding the Leaf Accent
- Attach Color C yarn to the base of one strap.
- Leaf Pattern:
- Ch 1, work 1 Sc in the first two sts.
- 2 Dc in the next 2 sts.
- Into the tip of the leaf, work 3 Dc into the same st.
- Work back down: 2 Dc in the next 2 sts, followed by 1 Sc in the final 2 sts.
- Finish with a Sl st into the base.
- Fasten off yarn and weave in ends.
Adding the Button Closure
- Place the button loop over the front panel to mark the appropriate spot.
- Using a needle and sturdy thread, sew the decorative button or bead to the front panel securely.
Assembly & Finished Dimensions
- Right Side Out: Turn the bag inside out to hide all the seams.
- Dimensions: Final size approximately 7–8 inches in diameter, with a 6 stitch wide gusset for the bag depth.
Conclusion
Your Crochet Daisy Bag is now ready to use or gift! With its beautiful raised petal texture and practical design, it makes for an eye catching and sturdy accessory perfect for any occasion. Experiment with color combinations to create unique designs.
https://youtu.be/xZSEX7ffy-g