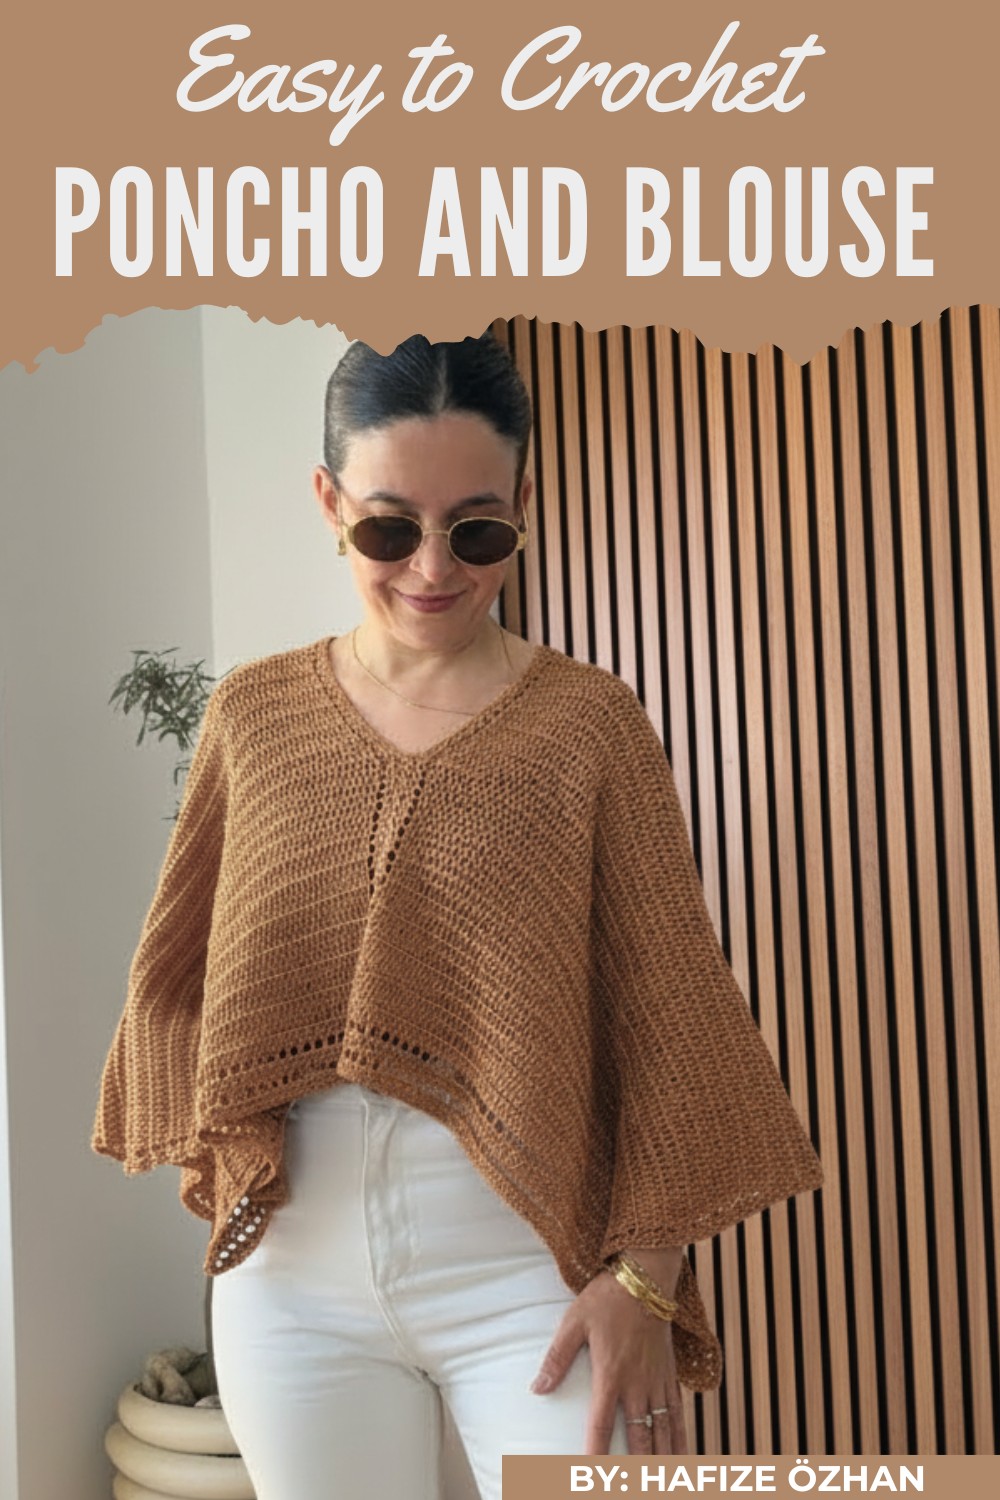
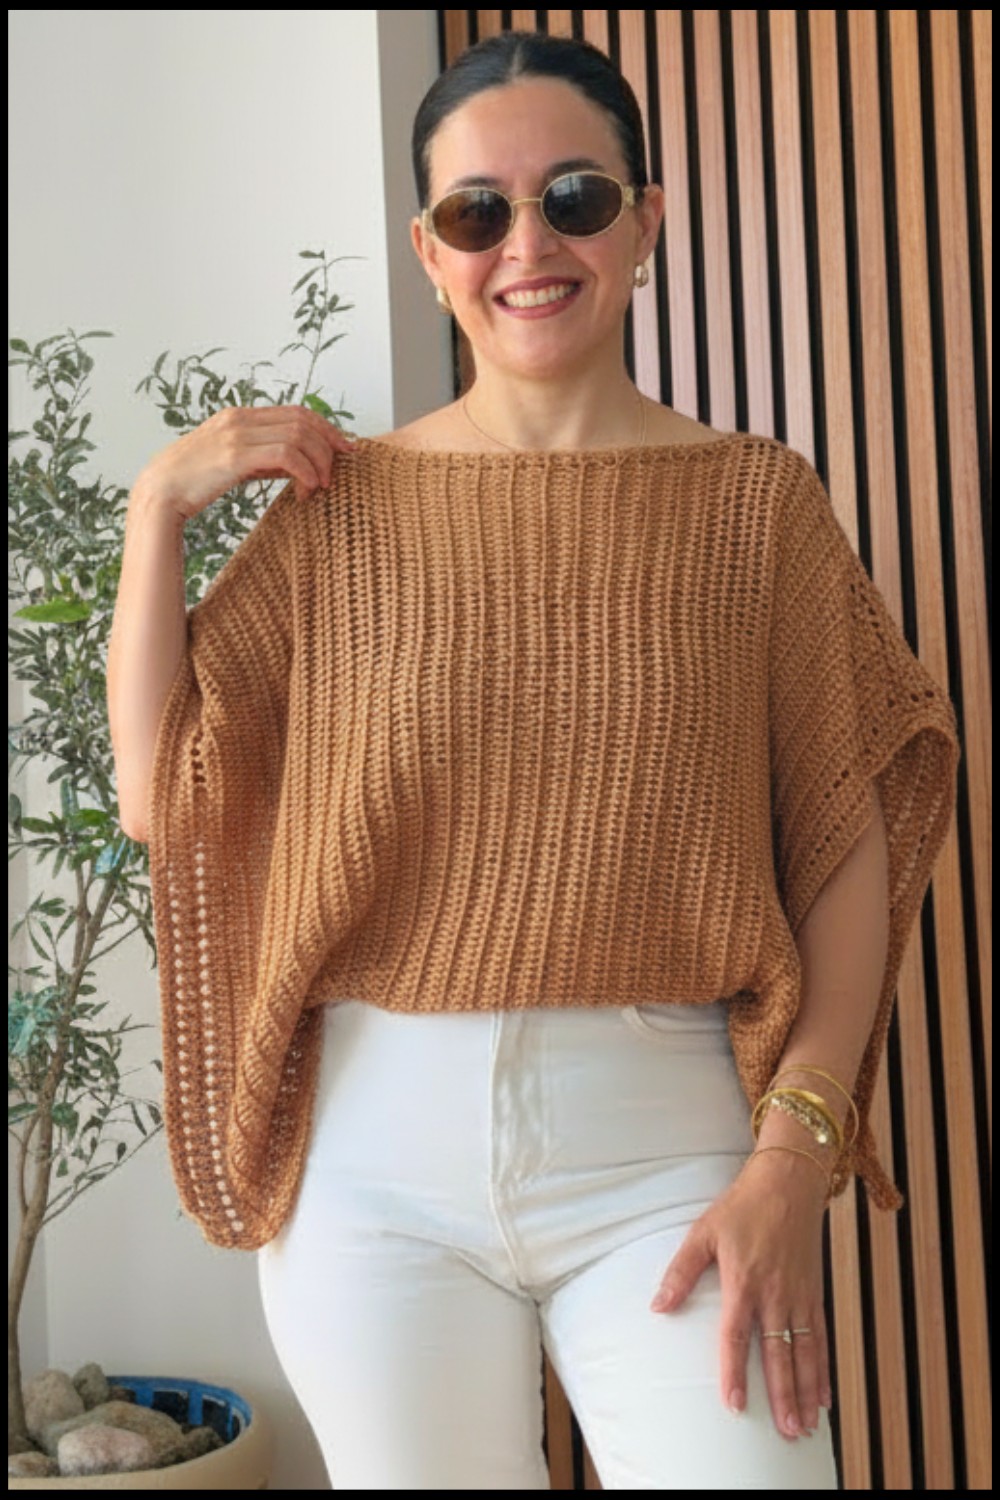
Master the art of crocheting a lightweight poncho blouse with step-by-step instructions, offering comfort, elegance, and a perfect fit for any occasion.
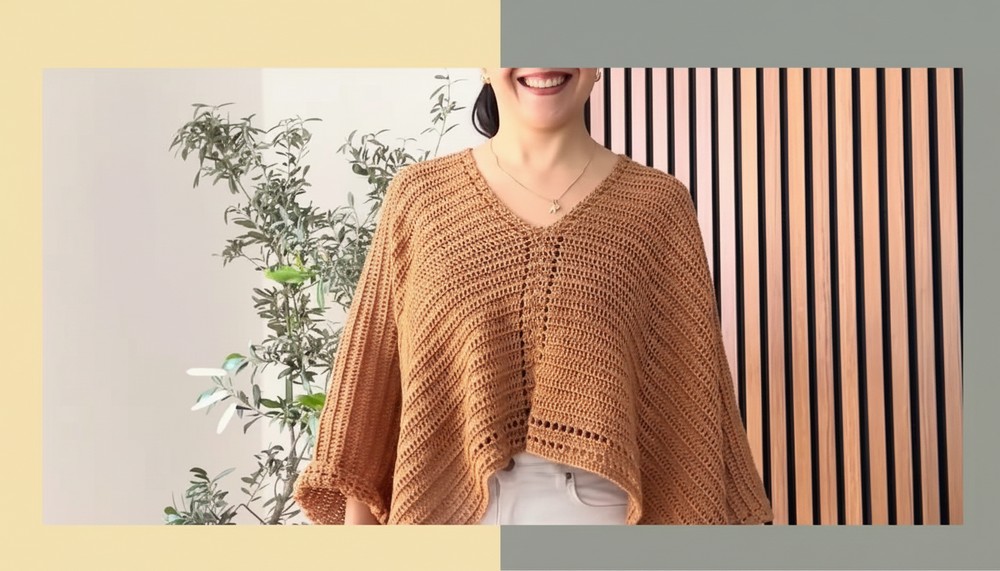
Wrapping yourself in a light, sparkly, and elegant handmade poncho blouse that not only looks stunning but feels incredibly comfortable too. This free crochet poncho blouse pattern is perfect for creating a stylish and versatile piece for any season. Made with a viscose blend yarn, the blouse features subtle shimmer and a warm honey beige tone that suits nearly every occasion, from casual outings to festive gatherings. Its lightweight design makes it easy to wear, while the airy openwork pattern keeps it breathable and practical for layering over your favorite outfits.
Free Crochet Poncho Blouse with Detailed Pattern
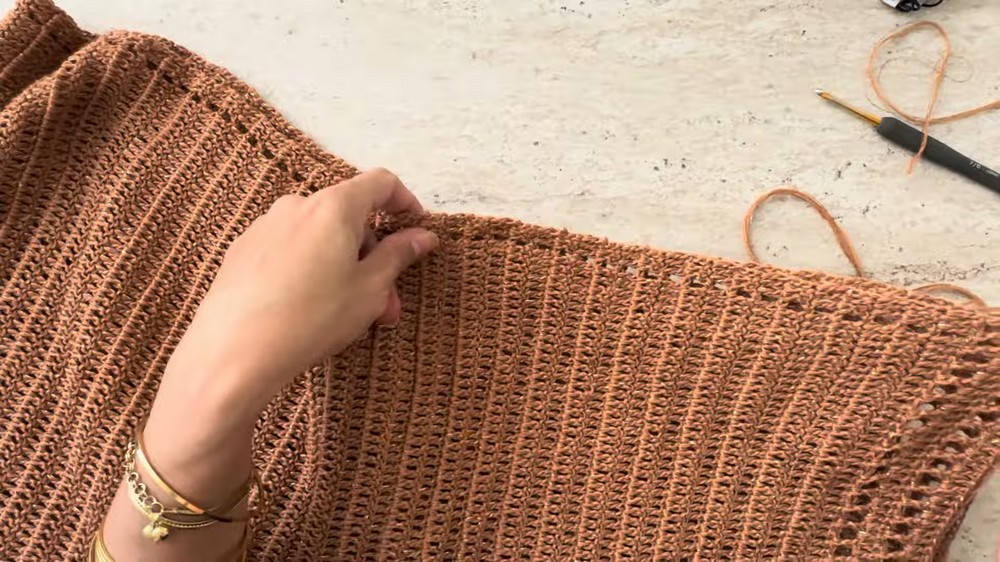
This blouse starts with two simple rectangular panels crocheted with a 4mm hook, using double crochet stitches to create a texture that is both structured and flexible. Once the panels are complete, they are sewn together at the shoulders, allowing for a flattering neckline and a loose, flowy fit.
The step-by-step process includes detailed guidance on adjusting measurements, ensuring the perfect fit for your body type. With approximately 410 grams of yarn needed and a straightforward approach to combining the pieces, the project is beginner-friendly and highly rewarding.
Poncho Blouse Crochet Pattern – Step-by-Step
Materials Needed
- Yarn: Approximately 410 grams of a mixed viscose yarn with a touch of sparkle or glitter.
- Recommended Yarn: Dream by Hayal Hobi (or any DK weight yarn, size suitable for a 4 mm hook).
- Yarn Weight: Size 3 (Lightweight).
- Yarn Fiber: Viscose blend, mixed and slightly sparkling.
- Crochet Hook: Size 4 mm (US G-6).
- Tapestry Needle: For weaving in ends and sewing the pieces together.
- Measuring Tape: To check dimensions throughout the project.
- Stitch Markers: Optional, to mark rows or specific points.
Gauge
- To achieve similar results, crochet a 10x10 cm (4x4 inch) swatch:
- 14 double crochet (DC) stitches and 9 rows.
Adjust the hook size if necessary to match the gauge.
Finished Size
- Width per piece: 50 cm (approximately 19.7 inches).
- Length per piece: After blocking, 83 cm (approximately 32.7 inches).
- Neckline Opening: 30 cm (approximately 11.8 inches).
- Shoulder Seam: 29 cm (approximately 11.4 inches).
Special Notes
- The poncho is constructed by creating two identical rectangular panels, which are sewn together at the shoulders.
- Accurate blocking is key for the finished piece to drape beautifully.
- Customize the length by increasing or decreasing the total number of rows.
- Work with loose tension, especially for the starting chain and cage-stitch rows, to avoid pulling the fabric.
Customization Ideas
- Length: Add or subtract rows depending on your height preference.
- Color Choices: Choose a gradient or solid color to match your wardrobe.
- Decorative Edging: Add a scalloped, picot, or shell stitch edging to give the poncho a unique touch.
Abbreviations
The pattern uses US Terminology.
| Abbreviation | Meaning |
|---|---|
| ch | chain |
| st | stitch |
| sp | space |
| DC | double crochet |
| rep | repeat |
Pattern Instructions
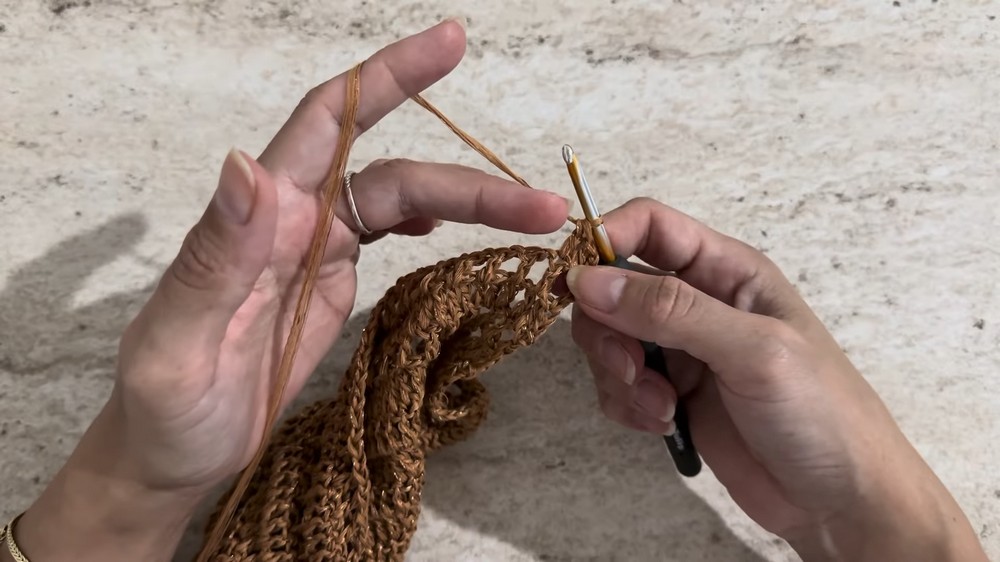
Step 1: Begin with the Foundation Chain
- Using the 4 mm hook, make a foundation chain of 98 chains.
- Ensure the chain is loose; avoid tight tension to ensure a smooth base for the first row of stitches.
- Customization Tip: Adjust the chain length based on desired width.
Step 2: First Row – Double Crochets
- Row 1: Skip the first 3 chains (counts as the first DC). Work 1 DC into the next chain and each chain across.
- Total: 98 DCs.
- Turn your work.
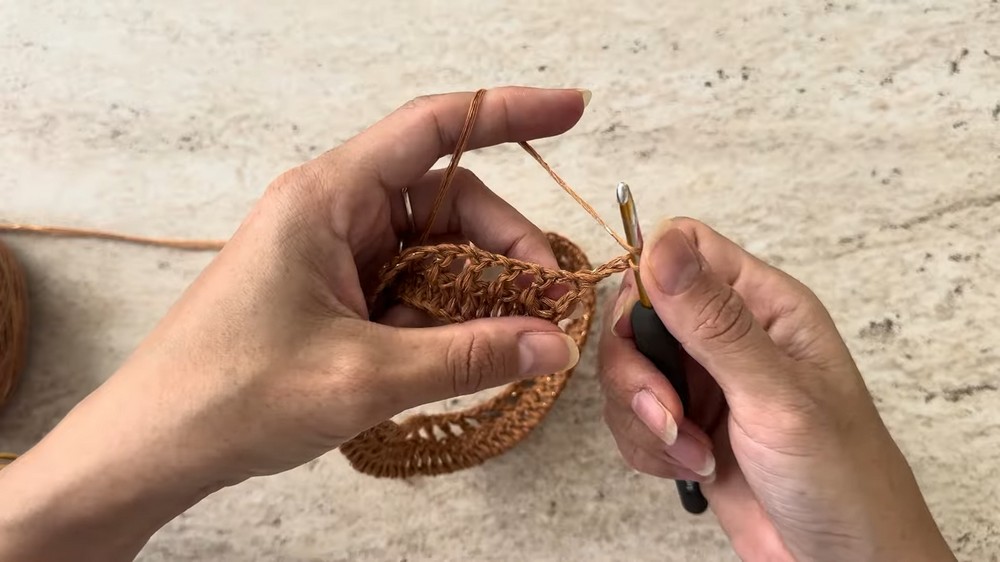
Step 3: Second Row – Cage Pattern
- Row 2:
- Ch 4 (counts as 1 DC plus 1 chain).
- Skip the next DC, work 1 DC into the top of the following DC.
- Repeat from
*across the row, creating cages (1 DC followed by 1 chain). - At the end of the row, skip 1 and place the final DC into the 3rd chain of the turning chain.
- Turn your work.
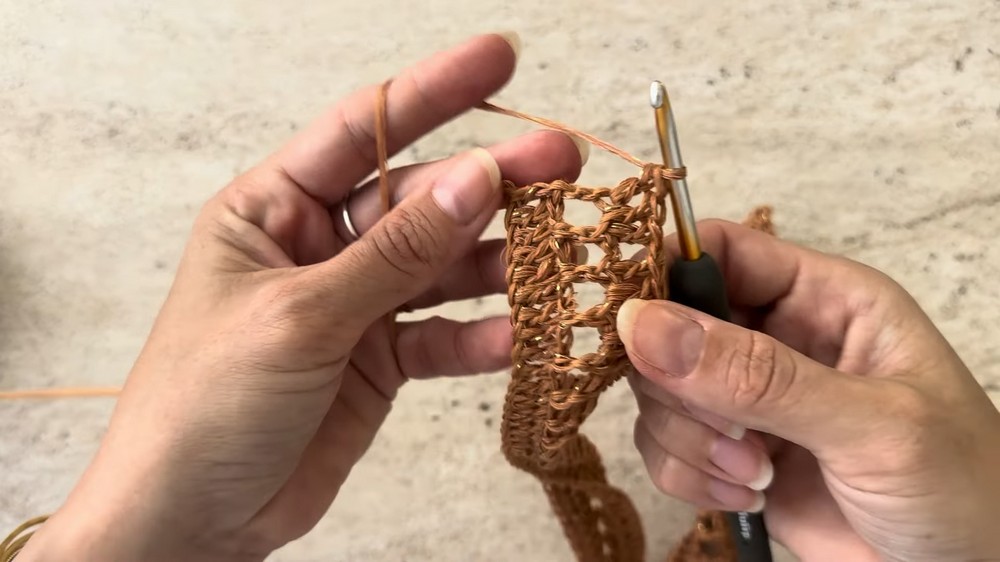
Step 4: Alternating Rows
- Row 3:
- Ch 3 (counts as DC), work 1 DC into the next sp, and 1 DC into the top of the next DC. Repeat.
- This row alternates a group of 3 DCs and 1 cage.
- At the end of this row, place 3 DC at the edge (one in sp and one in st).
- Row 4 & Onward: Continue alternating between:
- Even Rows: Complete cage rows with "ch 1 and skip 1" structure.
- Odd Rows: Complete the solid rows with clusters of 3 DCs and cages.
Customize the rows until the panel reaches 70 rows or approximately 77 cm unblocked.
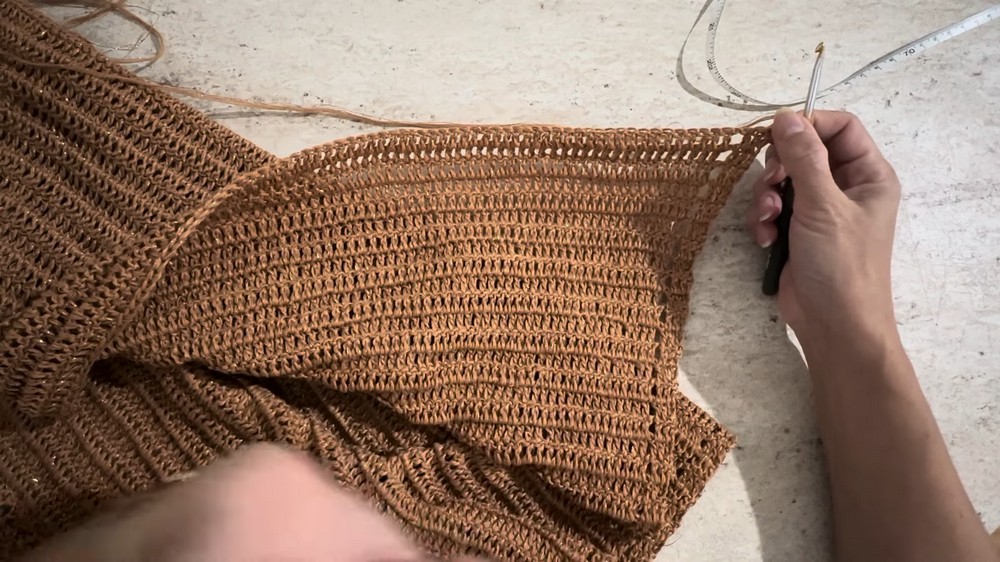
Step 5: Final Row for the First Panel
- Your last row will mirror Row 2 (a full cage pattern). Work 1 DC, ch 1 across the row.
Step 6: Create the Second Panel
- Repeat Steps 1–5 to create an identical panel.
Step 7: Blocking
- Before assembling, block both panels:
- Pin the fabric onto a blocking mat.
- Lightly steam or spray with water, ensuring it dries to reach the finished dimensions.
Step 8: Assembling the Poncho
- Position the Panels:
- Lay them flat with right sides facing each other.
- Shoulder Seams:
- Leave a 30 cm opening at the center for the neckline.
- Sew 29 cm seams on both sides of each panel for shoulders, using a whipstitch or slip stitch.
- Reverse:
- Flip the poncho to the right side after sewing.
- Weave in any loose ends with the tapestry needle.
Special Techniques
Whipstitch for Seaming
- Insert the needle through corresponding spaces on both panels. Pass the thread over and into the next space. Gently pull to tighten.
Blocking Tips
- Use rust-proof pins for pinning and let the yarn relax naturally.
Conclusion
Congratulations! You have successfully created a stylish Blue Poncho. This lightweight and elegant poncho is perfect for layering during transition seasons. The shimmering yarn adds subtle glamour, making it versatile for casual outings or formal attire.