Hook your way to a cute and functional strap bag with this free crochet pattern, ideal for keeping your essentials close while rocking a stylish look.
A strap bag is more than just an accessory; it’s a practical and stylish companion that suits your everyday needs. Whether you’re heading out for errands, hanging out with friends, or packing small essentials for a short trip, this crochet strap bag adds charm to your look while keeping your belongings secure. The beauty of the Free Crochet Strap Bag Pattern lies in its versatility and ease of customization, allowing you to tailor it to your preferences.
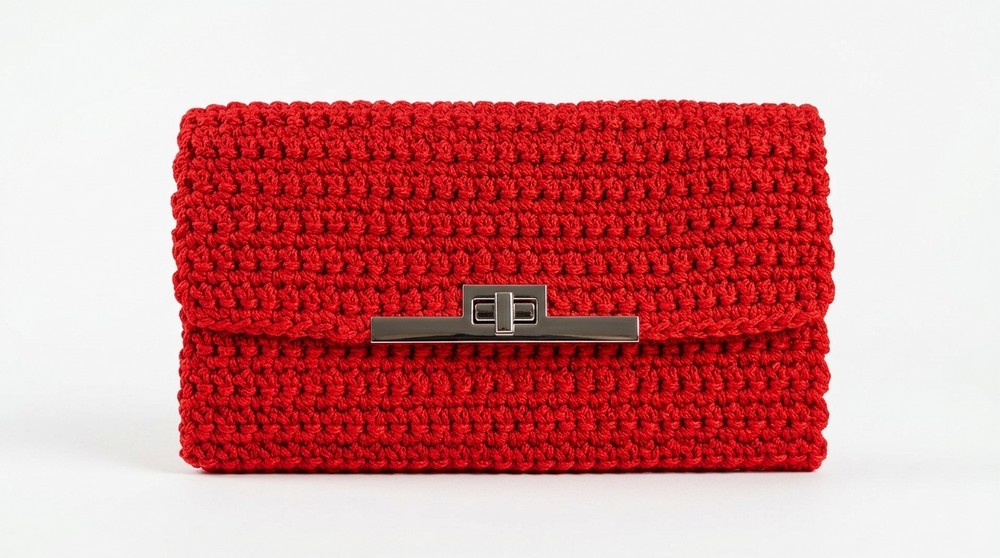
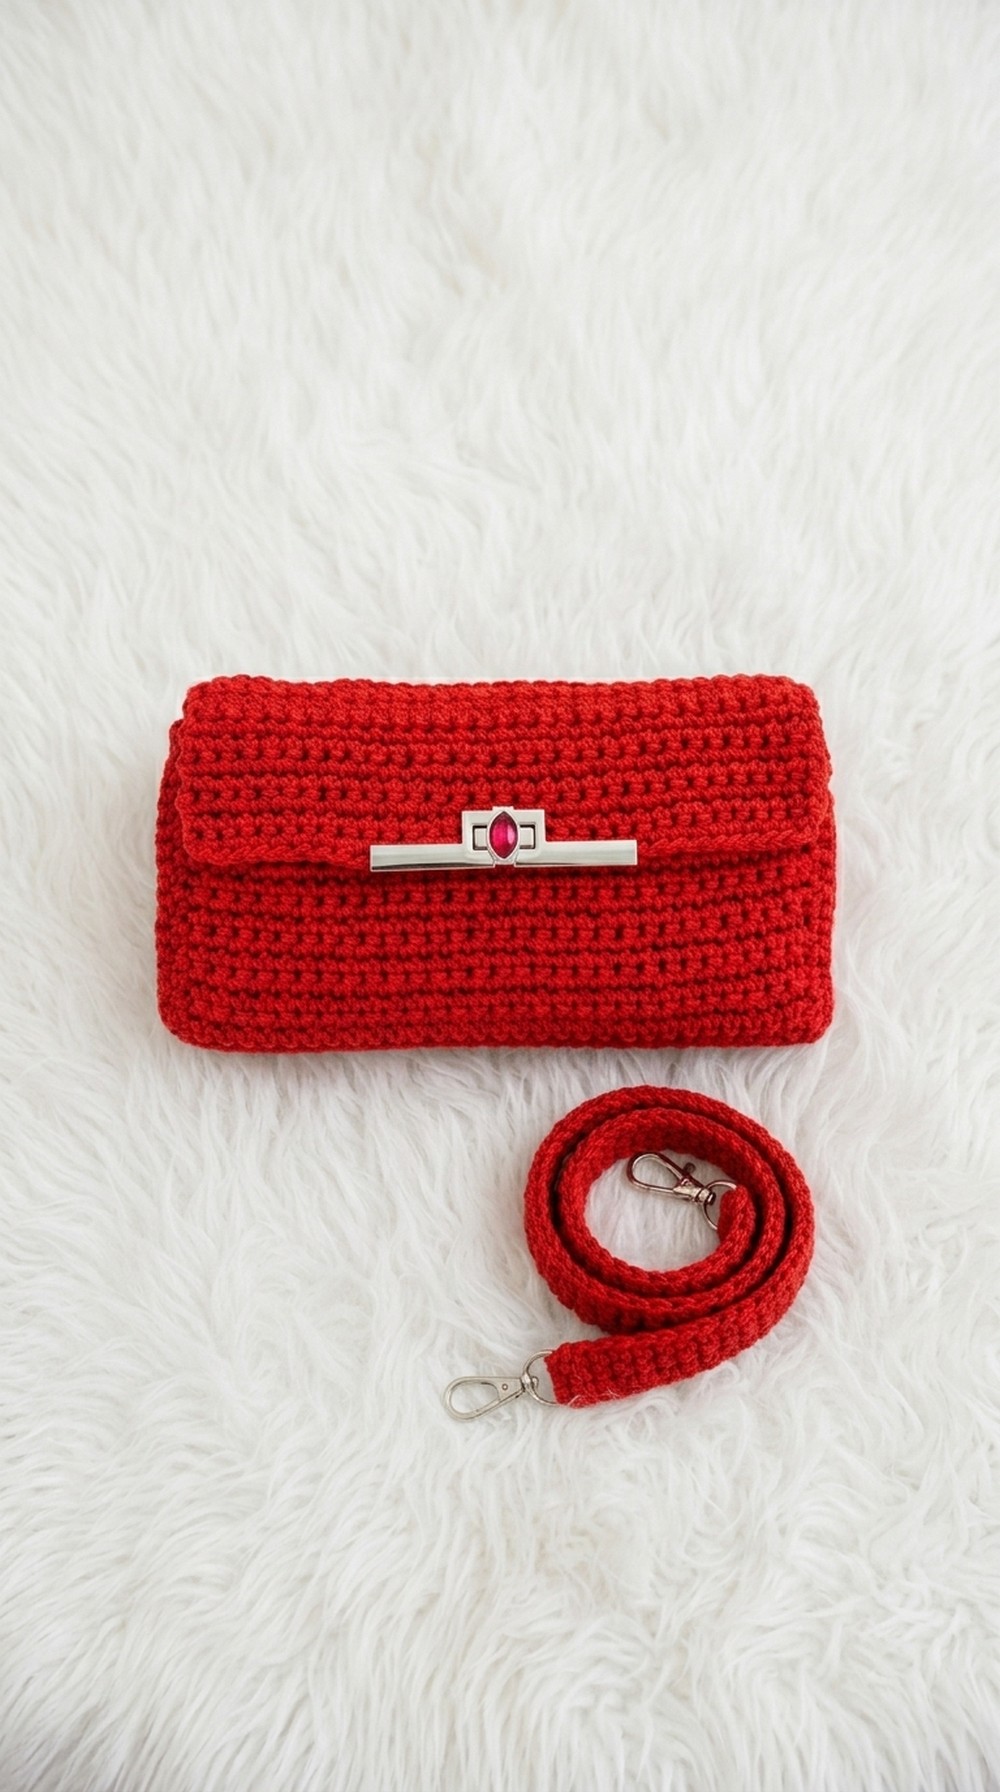
Elegant Crochet Strap Bag Pattern for Girls
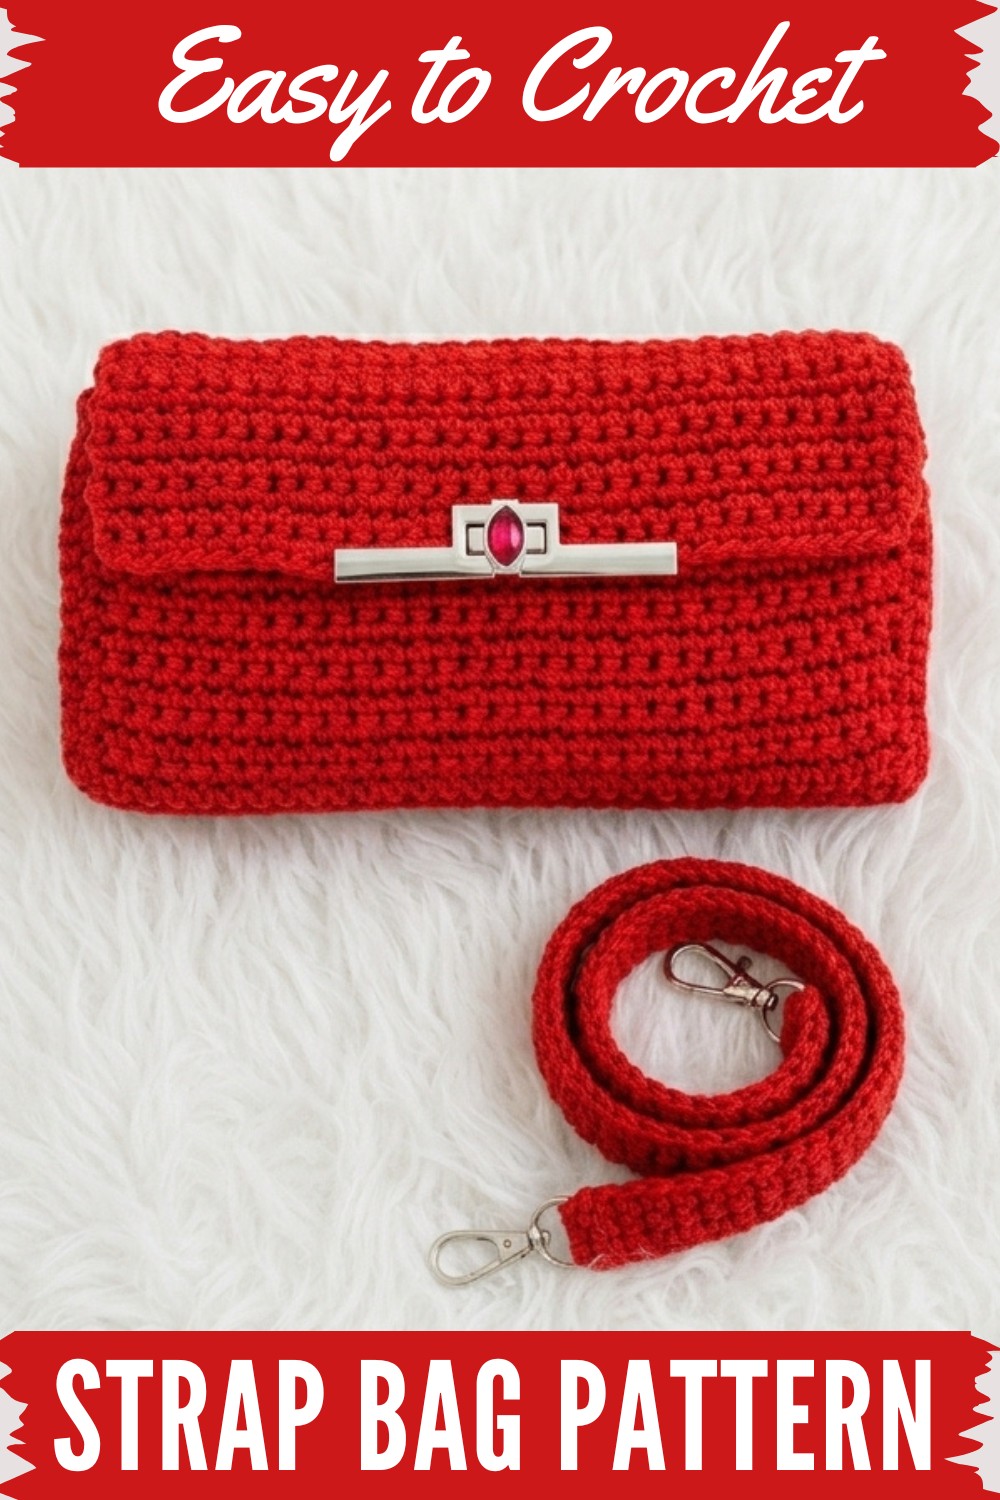
Featuring a simple yet elegant design, this bag is lightweight yet sturdy enough to hold your phone, wallet, and other daily items. The adjustable strap allows you to wear it as a crossbody or shoulder bag, adding flexibility to your outfit. Soft yarns and warm textures give it a cozy appearance, making it an ideal choice for casual outings or handmade gifts.
The pattern includes trendy elements like unique stitches and creative details, making the bag visually appealing while keeping its structure functional. Its compact design is convenient for travel or outings, while the spacious interior gives you enough room for essentials. Perfect for a minimalist yet stylish vibe, this crochet strap bag mixes practicality and creativity in a way that’s easy to achieve for all skill levels.

Crochet Beginner-Friendly Purse Pattern
Materials
- Yarn: Any firm, smooth yarn is suitable. Pattern uses macrame yarn for structure.
- Hook: Size 4 mm crochet hook (or hook suitable for your yarn type).
- Notions:
- Scissors
- Yarn needle
- Lighter (for macrame yarn, to secure ends)
- Stitch markers
- Purse hardware (optional: clasp/closure, chain, rings, etc.)
Special Techniques
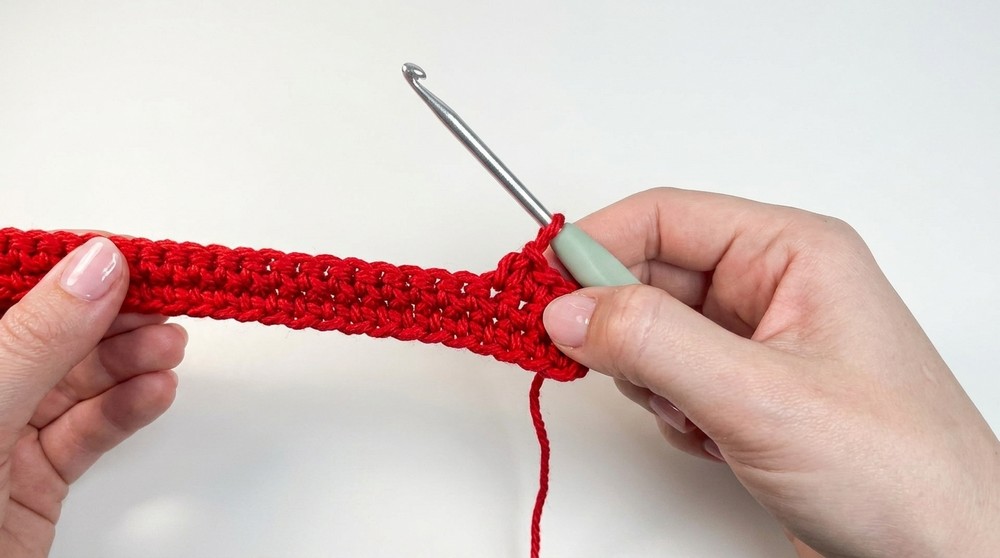
- Single Crochet (sc): The whole pattern uses only this stitch.
- Working into Back Bump of Foundation Chain: Creates a 'seamless' edge for the bag.
- Attaching Hardware: If using closures or clasps, some simple sew-on or screw-in techniques.
- Finishing with Burning Ends (macrame only): Seals yarn ends for additional security.
Purse Body
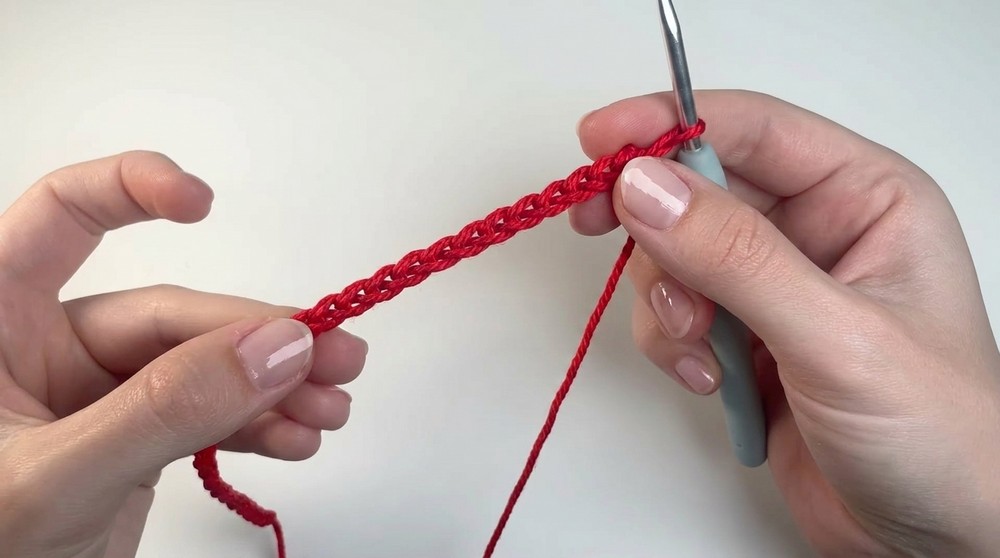
Step 1: Foundation Chain
- Make a slip knot.
- Ch 30 (or desired width of your purse).
- Ch 1 extra for turning (total: 31 chains).
Step 2: First Row
- Turn work to expose back bumps (not the front V’s).
- Skip the first chain next to the hook (turning chain).
- In second bump from hook, work a sc.
- Repeat a sc in each back bump to end.
- Stitch count: Should match your original chain (30 sc).
- Mark your first and last stitch to avoid skipping corners.
Step 3: Remaining Rows
- Ch 1, turn work for next row.
- Sc in first stitch (not the turning ch), and each stitch across the row.
- Repeat until you reach desired height (including purse flap). For the sample, 54 rows (34 cm).
- Always count your stitches to maintain shape.
Optional Closure Cut-Out
Skip if you don’t want a closure.
- Determine center width for closure hardware:
- Example: For 30 stitches, leave 2 in the center unworked (14 on each side).
- Working first 14 stitches only, sc across and turn for two rows.
- Fasten off on first side.
- Attach new yarn on opposite panel and repeat for the other set of 14 stitches.
- Fasten off, weave in ends.
Attaching Closure Hardware
- Slide closure into center opening.
- Attach as per hardware instructions (screws, teeth, sewing, etc.).
- Secure screws with appropriate tool.
Side Panels
Step 1: Panel Construction
- Slip knot, ch 6 (+1 for turning).
- Work sc across back bumps/bumps for first row (6 sc).
- Ch 1, turn and repeat sc across each row.
- Make as many rows as needed to match the height of the purse body. (Sample: 18 rows, ~11.5 cm tall.)
Step 2: Optional Attachment of Hardware
- If using a ring or clasp, attach hardware securely by crocheting stitches around it in appropriate panel rows.
- Continue working up the panel after hardware is attached.
Step 3: Fasten Off
- Weave in ends on one side panel.
- On the second panel, leave a long tail for sewing.
Assembly
Step 1: Mark & Align Side Panel
- Use stitch markers to position side panel at base and sides of purse.
- Side panel should align with purse edges; each row matches one stitch or row.
Step 2: Sewing Panel
- Using the tail, sew one sc per row along each edge:
- Attach to sides of purse body, then bottom panel, then opposite side.
- Use yarn needle, sewing through corresponding rows for neat finish.
- Remove stitch markers as you progress.
Step 3: Finishing Ends
- Weave in yarn tails on inside.
- For macrame yarn, burn ends lightly with a lighter to secure and harden.
- Only do this with synthetic or macrame yarn; skip for cotton or acrylic.
Strap Construction
- Slip knot, attach to clasp or directly onto purse edge.
- Ch 1, work 3 sc into clasp, purse edge, or starting point.
- Ch 1, turn, and work 3 sc across.
- Repeat as many rows as needed for desired strap length (sample: 90 cm).
- Attach second clasp (if using) in final row by working through clasp hardware.
- Fasten off, weave in ends (burn if macrame).
Finishing
- Ensure all yarn ends are secured inside the purse.
- Attach hardware according to manufacturer’s instructions.
- Check that all seams and strap are sturdy.
- If using macrame yarn, burn ends for extra security.
Final Words, Tips, & Suggestions
- Customization:
- Adjust the size to suit your needs; add stripes or color blocking for extra flair.
- Use thicker or thinner straps for desired look.
- Substitute chain, leather, or ready-made straps if preferred.
- Counting & Corners:
- Consistency is key. Always count stitches each row: your purse should remain rectangular and not skew.
- Mark corner stitches for accuracy.
- Accessories:
- Closures are optional; you can use magnetic snaps, buttons, or leave open.
- Add lining or pockets for advanced customizations.
- Yarn Type:
- Natural yarns (cotton, acrylic) do not require burning. Use only weaving-in for ends.
- Macrame yarn is strong and ideal for structure; burning prevents unraveling.