Start your next crochet project with this Free Crochet Heart Granny Square Pattern and make beautiful squares for gifts home décor and blankets.
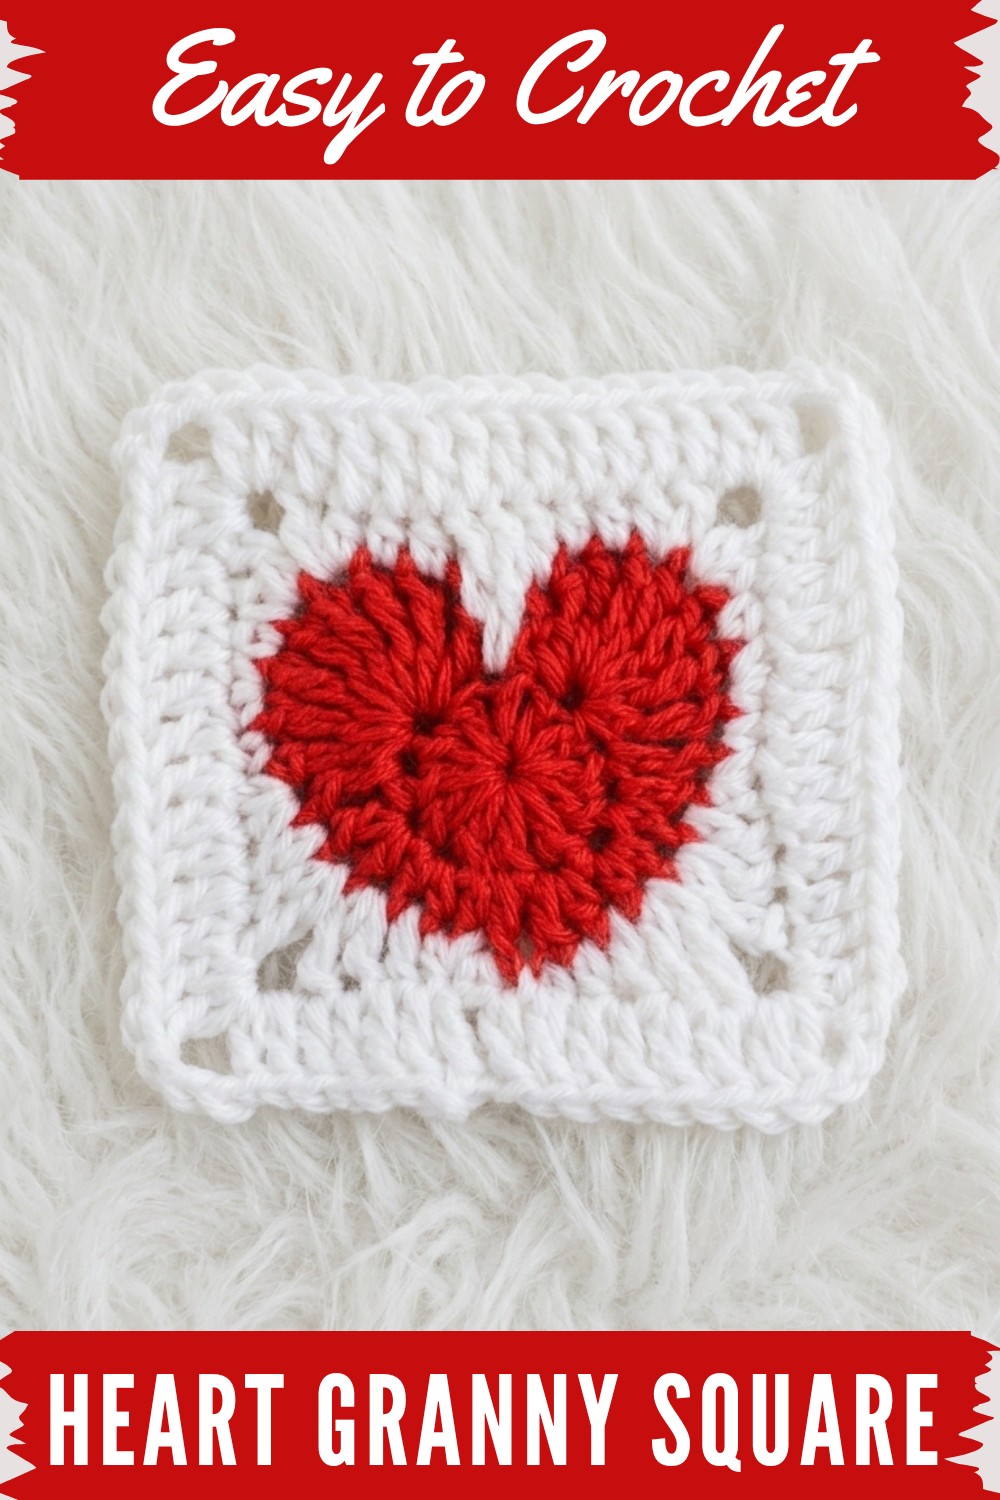
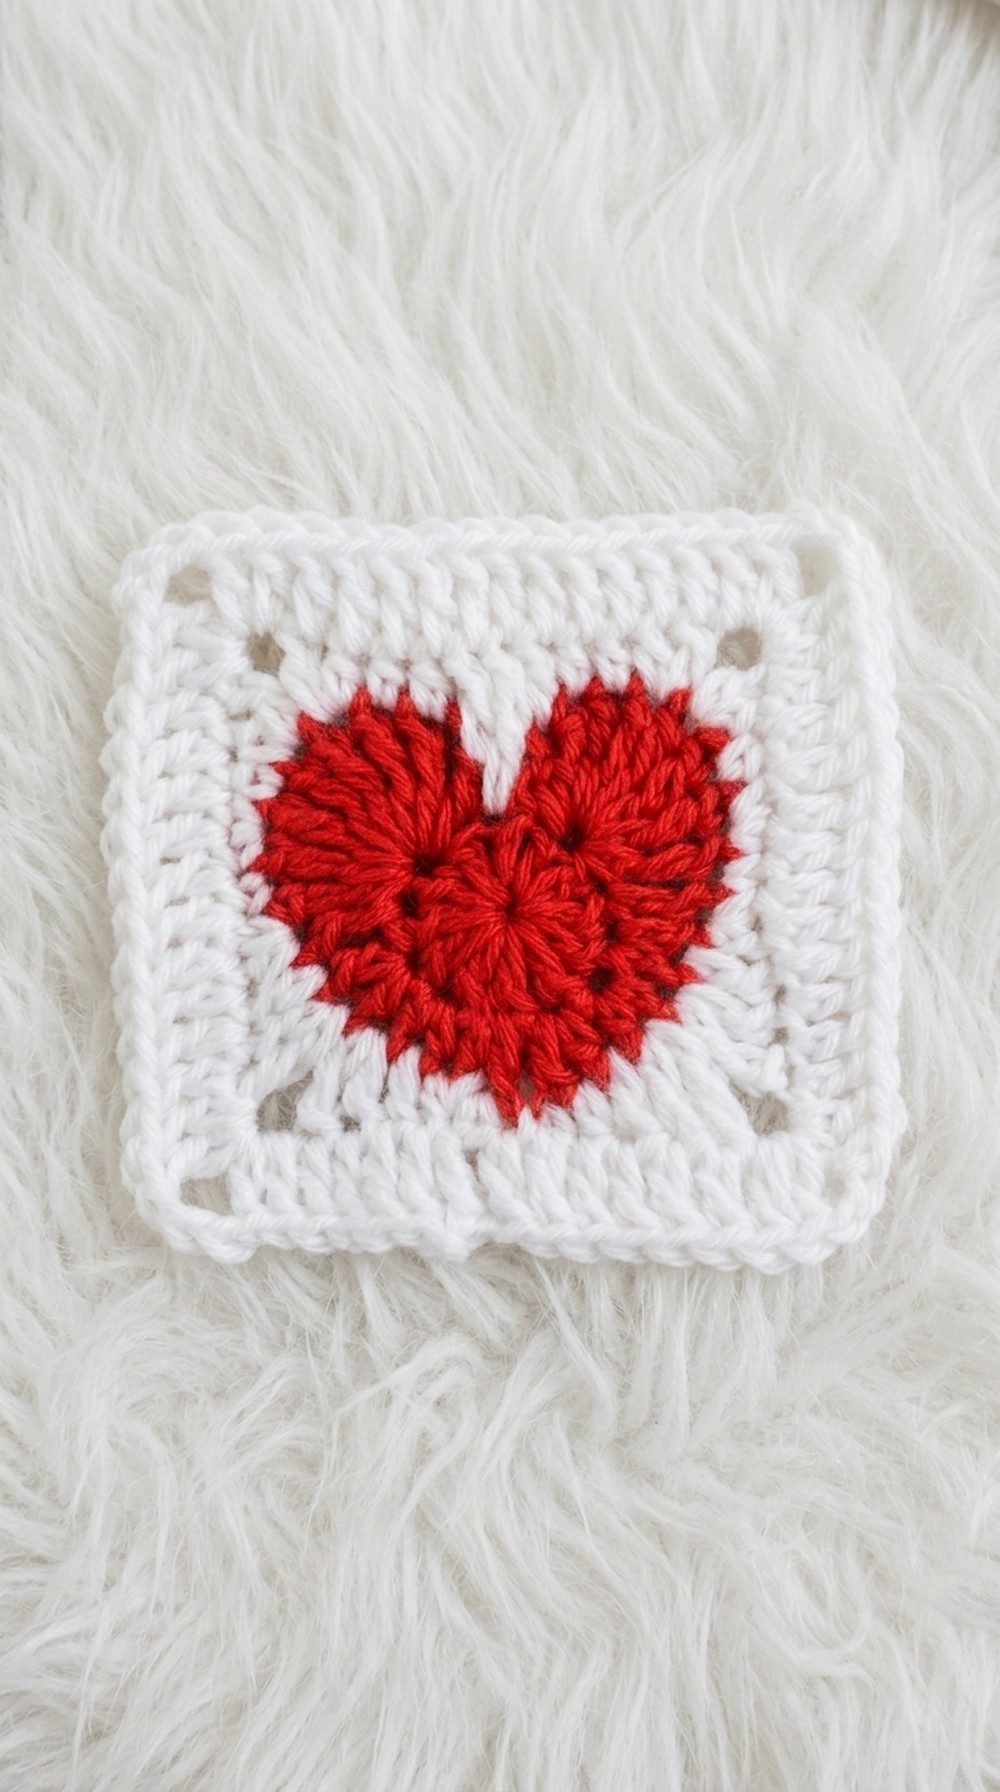
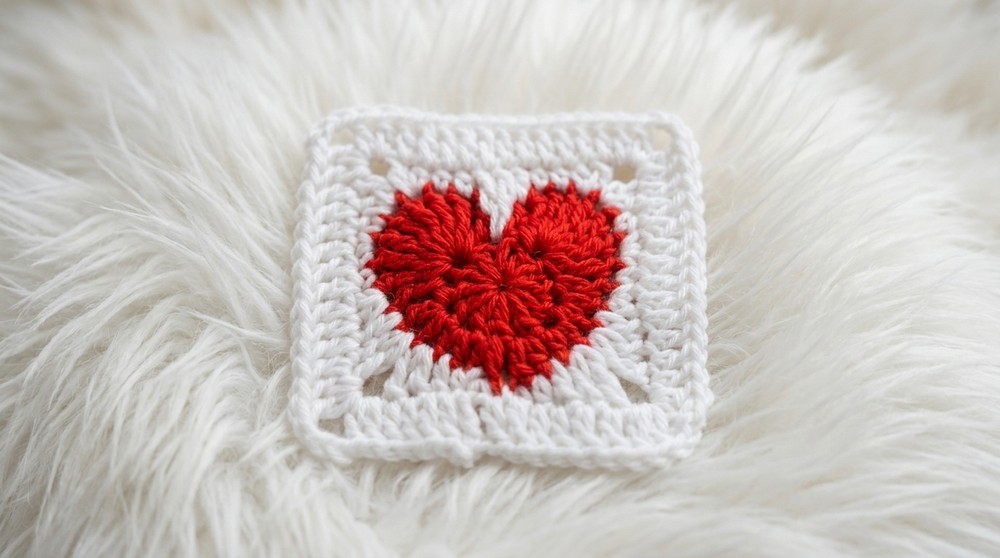
Looking to add some fun and flair to your crochet projects? The free crochet heart granny square pattern brings a playful twist to the classic granny square by featuring a sweet heart right at the center. This design showcases a delightful texture—soft and slightly raised hearts stand out beautifully against the traditional shell stitch background. The familiar square shape makes it incredibly versatile, perfect for creating blankets, cushions, scarves, or even colorful wall hangings.
Free Crochet Heart Granny Square Pattern
Designed for those comfortable with basic crochet stitches, this pattern offers a charming way to brighten any project. Sizes can easily be customized by changing yarn weight, hook size, or adding extra rounds, giving endless possibilities for personalization. Construction involves working in rounds with repeatable stitch patterns, making it a relaxing project to enjoy during downtime. Keeping consistent tension is key to maintaining those heart shapes crisp and clear—no floppy hearts here.
Inspired by a desire to spread warmth and handmade love, this pattern pairs beautifully with soft, medium-weight cotton yarn that enhances stitch definition while keeping the fabric cozy and durable. These heart granny squares make thoughtful gifts for occasions like Valentine’s Day, baby showers, or just to add a loving touch to everyday items. Mixing colors and joining multiple squares invites creativity, turning simple shapes into vibrant, heartfelt masterpieces. Time to pick up that hook and craft happiness stitch by stitch.
Heart Granny Square Crochet Pattern
This Valentine's Day special "Heart Granny Square" is a fun, stylish project great for blankets, bags, tops, or pouches. Granny squares are incredibly versatile, and this heart-in-a-square design is perfect for adding a loving touch to your creations. You will work in rounds starting with a heart motif and then square it off with traditional granny square techniques.
This pattern uses only a few basic stitches: magic ring, chain, slip stitch, single crochet, half double crochet, double crochet, and treble crochet. You'll learn to shape a heart, cleanly transition into a square, and finish with a solid, modern look.
Skill Level & Terminology
- Skill Level: Advanced Beginner to Intermediate
- Terminology: US Crochet Terms
Materials & Tools
- Yarn: Acrylic or cotton yarn, DK or worsted weight; red for the heart, white (or your chosen color) for the square
- Hook: 3.0 mm crochet hook
- Other Tools: Yarn needle for weaving in ends, scissors
- Pattern is adaptable to any similar-weight yarn; adjust hook size for your yarn if needed.
Gauge
- 4 rounds in double crochet with 3 mm hook = 2.5" (6.5cm) square.
- Precise gauge is not crucial, but a tighter stitch gives a crisper square.
- If unsure, work a quick swatch with double crochets to check your proportions.
Abbreviations List
- MR = Magic Ring
- ch = chain
- sl st = slip stitch
- sc = single crochet
- hdc = half double crochet
- dc = double crochet
- tr = treble crochet (also called triple crochet)
- st(s) = stitch(es)
- sp = space
Special Stitch Instructions
- Magic Ring (MR): Make an "X" with yarn around your fingers, insert hook under left strand, pull up right strand to create a loop, then work stitches into the ring. Pull tail to close after your first round.
- Treble Crochet (tr): Yarn over twice, insert into stitch, yarn over and pull up a loop, (yarn over and pull through two loops) three times.
- Solid Granny Square Joining (corners): (2 dc, ch 3, 2 dc) in each corner sp.
Finished Size
- Approximate size: 4" x 4" (10 x 10 cm) using recommended yarn and hook.
- Size will vary slightly with yarn/hook choice or tension.
How to Start & Stitches Used
To begin, start with a magic ring and create a round of double crochets to form the heart’s base. You’ll work in basic stitches: double crochet (dc), treble crochet (tr), half double crochet (hdc), single crochet (sc), and slip stitch (sl st). The heart motif is then transformed into a square with several more rounds using mostly double crochet.
The Pattern
Part 1: Heart Motif
- Make a magic ring (MR).
- Ch 3 (counts as first dc), 11 dc into ring (total 12 dc with starting ch-3).
- Pull yarn tail to close the ring tightly.
- Sl st into the 3rd ch of initial ch-3 to join. (12 sts)
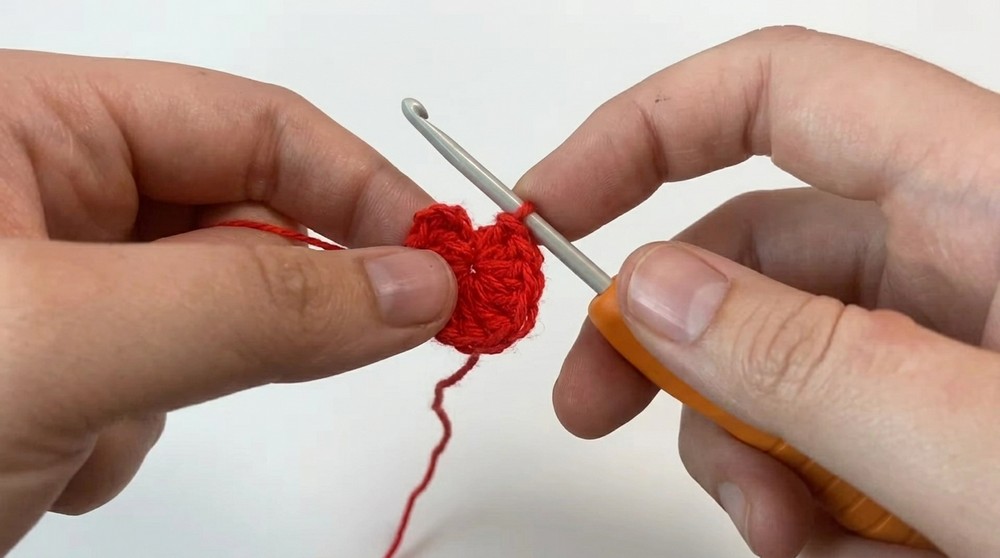
If you’re new to written patterns, this step creates a small round base using double crochets worked into a magic ring. When you close the ring, you'll have a perfect little circle. This is the start of your heart shape!
Part 2: Shaping the Heart
- Next row: SKIP the very next st from the join.
- 8 tr in the next st.
- 1 dc in next st.
- 1 dc, 1 hdc in next st (both in same st).
- 2 hdc in next st (same st).
- 1 hdc, 1 dc in next st (both in same st).
Now, if you flip your work upside down, half your heart is formed! You’re building the top curve and one side of your heart with a combination of tall and short stitches.
- Ch 1 (forms bottom point of heart).
- In next st, 1 dc, 1 hdc (both in same st).
- 2 hdc in next st (both in same st).
- 1 hdc, 1 dc in next st (both in same st).
- 1 dc in next st.
- 8 tr in next st.
- SKIP the next st. Then sl st to the initial st to join and finish the heart.
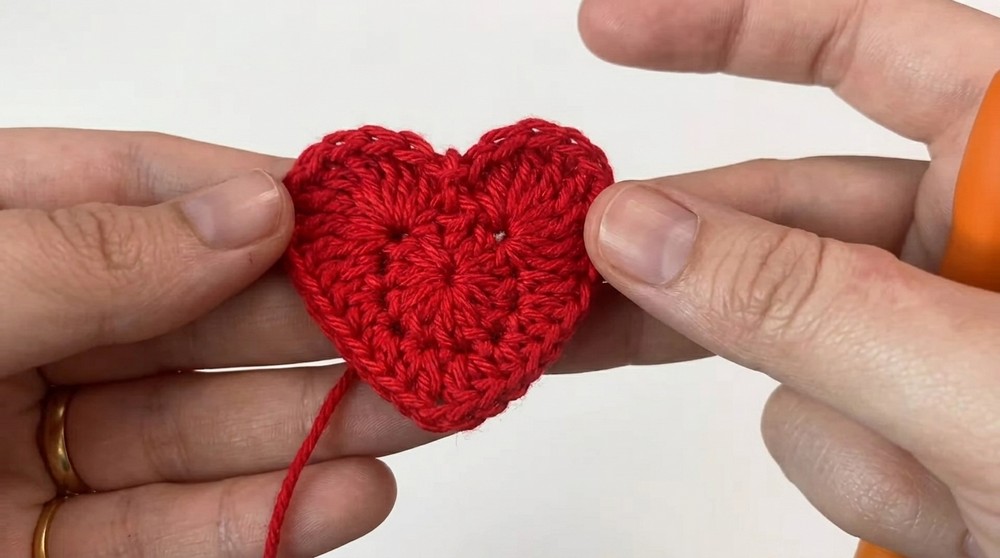
After the mirrored stitches, you’ve completed a full heart. Adjust shape with your fingers if needed.
Part 3: Squaring the Heart
- Turn the heart upside down.
- Attach white yarn (or background color) into the ch-1 bottom point.
- Sl st into current st.
- In same st, sc.
- In next sp, sl st.
- Next st, sc.
- Next st, 2 dc (both in same st).
- Next st, dc.
- Next st: dc, tr (both in same st) - this is first CORNER.
- Ch 3.
- Next st: tr, dc (both in same st).
- Next st, dc.
- Next st, hdc, sc (both in same st).
- Next st, sc.
- Next st, 2 sc (both in same st).
- Next st, hdc.
- Next st, hdc.
- Next st: hdc, dc (both in same st).
- Ch 3 (second CORNER).
- Next st: dc, hdc (both in same st).
- Next st, hdc.
- Next st, hdc.
- Next st: hdc, sc (both in same st).
- Next st, sc.
- Next st, 2 sc (both in same st).
- Next st, hdc.
- Next st: dc, tr (both in same st). Ch 3 (third CORNER).
- Next st: tr, dc (both in same st).
- Next st, dc.
- Next st, hdc.
- Next st, sc, hdc (both in same st).
- Next st, sc.
- Next st: 2 dc (both in same st).
- Next st: dc, tr (both in same st). Ch 3 (fourth CORNER).
- Next st: tr, dc (both in same st).
- Next st: dc.
- Next st: hdc.
- Sl st to first sc to join.

You have now squared off your heart! This section forms the corners and straightens the sides using plenty of double, half double and treble crochets. Carefully count stitches at corners for a neater square.
Part 4: Border & Finishing Row
- Ch 3 (counts as first dc), dc in each stitch across the side to the next chain-3 corner.
- In each chain-3 corner space: 2 dc, ch 3, 2 dc.
- Continue with 1 dc in each stitch across each side, working (2 dc, ch 3, 2 dc) in every corner space.
- When you return to the first stitch, sl st to join. Fasten off and weave in ends.
This round stabilizes your granny square, giving it traditional corners and even edges. Now your heart square can fit into any project. Square should lay flat after this row—if not, gently block/stretch your piece.
Assembly & Finishing
- Weave in all yarn ends using the yarn needle.
- Gently block the square: lay flat and shape edges with your hand, or lightly steam for a crisper result.
- Square is ready to join with others, or use as a motif in your favorite project.
Take your time finishing up. Weaving and blocking are the keys to a professional look for your square!
Pattern Recap for Beginners
- Stitches used: magic ring, chain, single crochet, half double crochet, double crochet, treble crochet, slip stitch.
- How to start: Begin with a circle of double crochets using a magic ring. Shape half the heart with trebles, doubles, and halves. Mirror the stitches to complete the heart. Square off by filling corners using taller stitches and chain-3 spaces. Finish with a solid round of double crochet.
- For those new to patterns: After each part, pause to review your work, gently stretch your piece to shape, and don’t be afraid to rewind if you miss a stitch or corner. Crocheting is forgiving and rewarding.