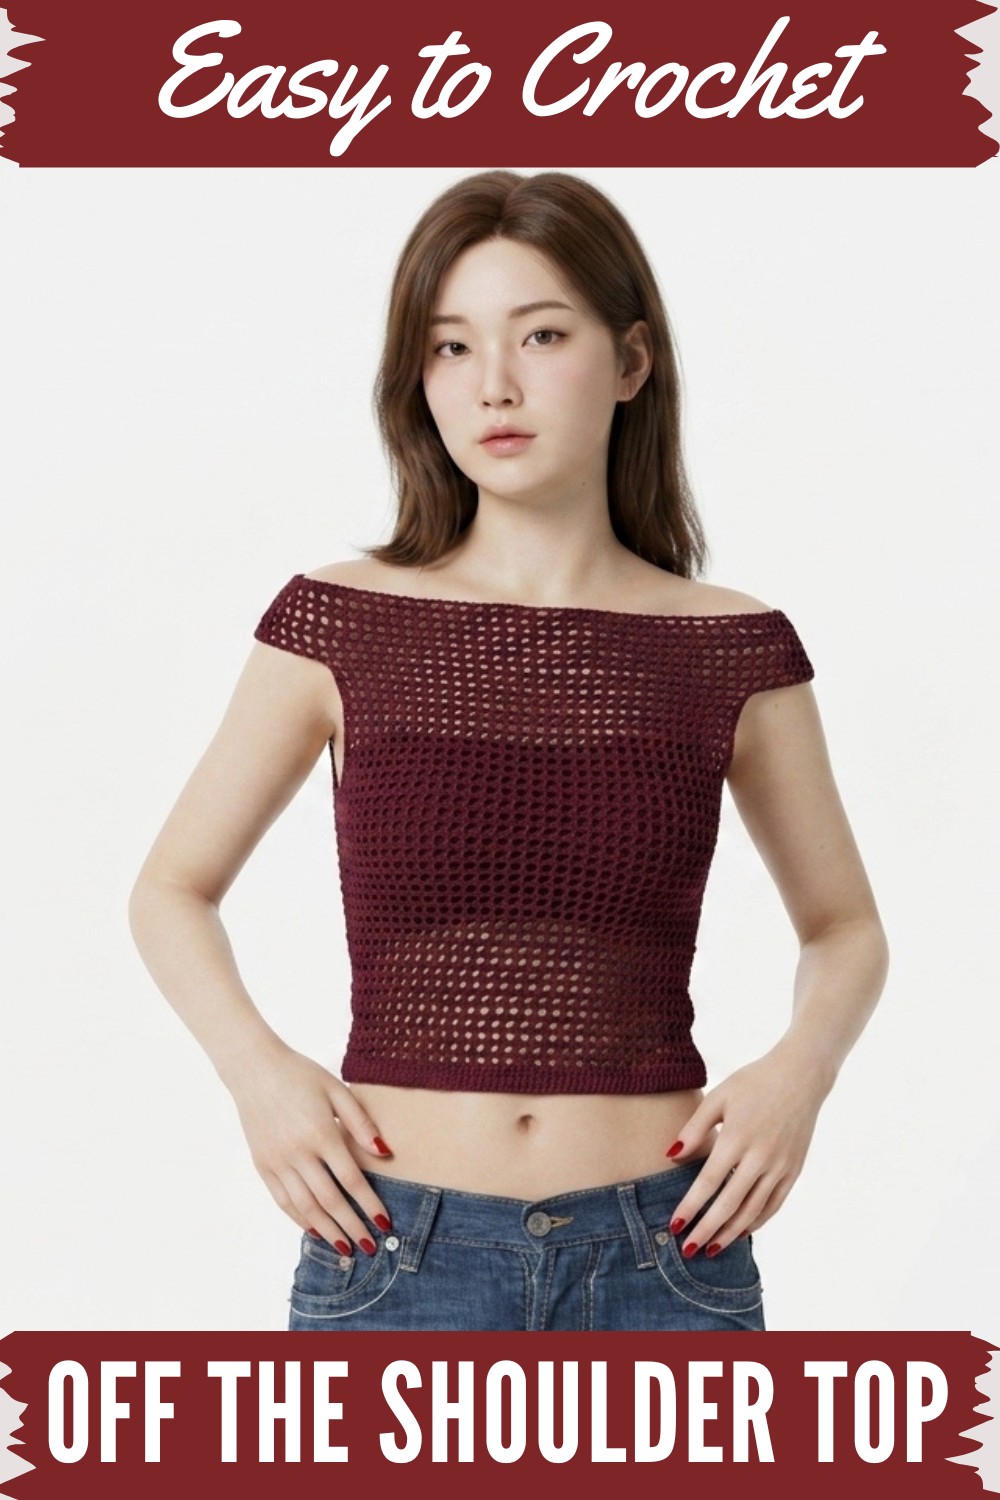
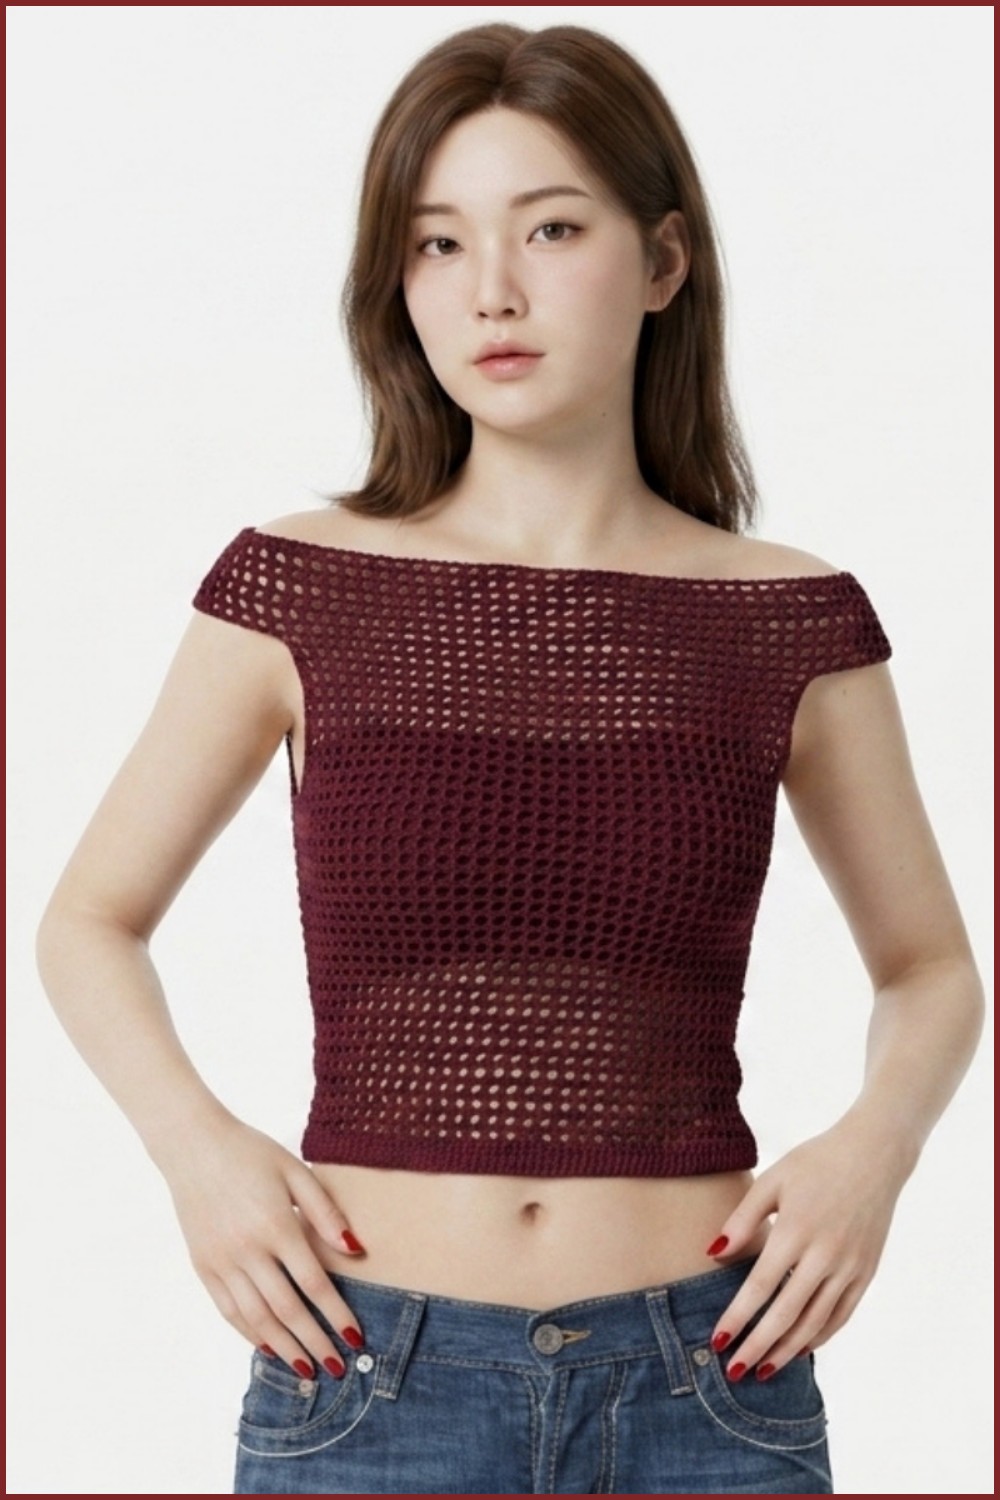
Style meets comfort with this crochet off the shoulder top, perfect for casual outings or cozy moments, offering a simple yet charming look for any day.
Wearing something that feels light, comfortable, and looks absolutely gorgeous. An off-the-shoulder crochet top is a perfect blend of both beauty and style. This unique piece of clothing is made with soft and intricate stitches, creating a design that stands out. It sits gently on your shoulders, exposing them in an elegant way while giving you a relaxed and fashionable look for any occasion. The top feels soft and airy, making it ideal for warmer days or layering with other outfits during cooler weather.
Easy Free Crochet Off Shoulder Top Pattern with Simple Stitches
The crochet design allows you to play with colors and patterns, so you can create a top that matches your personality and mood. Its appearance is charming with a handmade touch, making it a standout piece in your wardrobe. Whether you’re wearing it to a casual outing, a party, or just relaxing at home, this top is both stylish and versatile. It’s light, easy to wear, and adds a special touch to your look, making it a favorite choice for anyone who wants to feel great and look amazing all day.
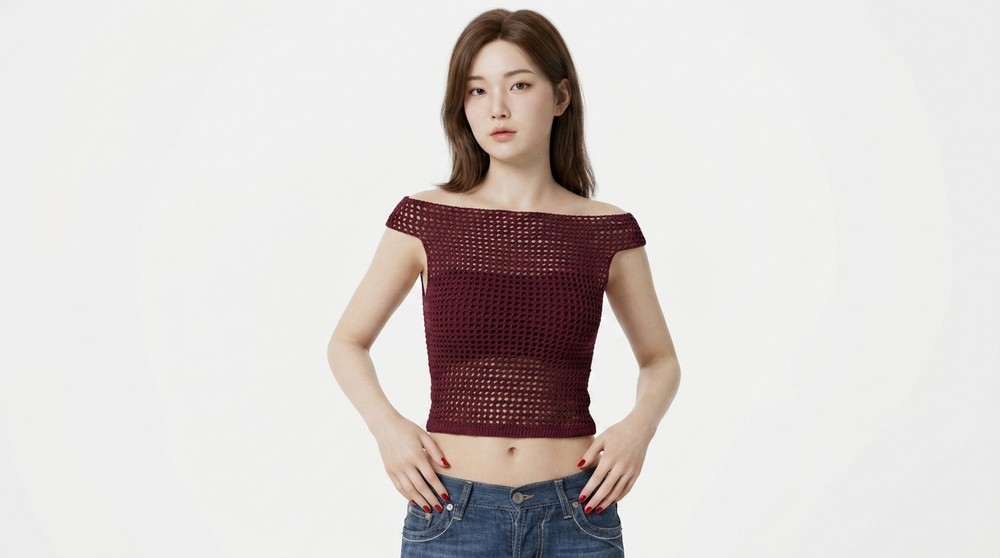
Off-the-Shoulder Crochet Top – Step-by-Step Pattern
Skill Level
Intermediate – The pattern uses simple stitches but requires accurate measurement and assembly.
Materials
- Yarn:
- 100% cotton yarn, DK weight (#3).
- Approx. 200+ g (4–5 skeins of 50 g each).
- Hook Size:
- 3.0 mm crochet hook.
- Notions:
- Stitch markers (for symmetry and marking).
- Yarn needle (for weaving in ends and assembly).
- Scissors.
Key Abbreviations (US Terminology)
- ch = chain
- dc = double crochet
- sl st = slip stitch
- sp = space
- st(s) = stitch(es)
- rep = repeat
Special Notes
- Gauge: Gauge is not critical but should fit measurements. Adjust hook size if the stitching feels too loose or tight.
- Custom Fit: Instructions depend on body measurements. Adjust chain lengths and panel rows as per personal sizing needs.
- Chain Count: To ensure the stitch count works perfectly for the mesh pattern, always start with an odd number of chains + 4 additional chains.
Pattern Instructions
Bust Panel (Also Used for Sleeves)
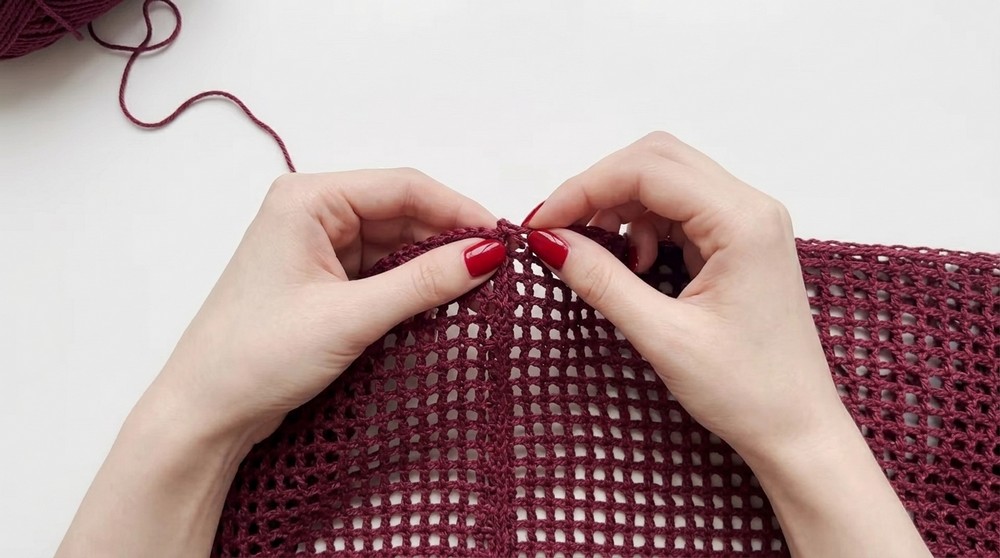
Step 1: Foundation Chain
- Start with a slip knot on your hook.
- Make a chain (ch) that measures the desired width – from one sleeve cuff, across the bust, to the other sleeve cuff.
- The chain count should be an odd number + 4 extra chains. Example:
- For the video sample: 133 ch + 4 = 137 total chains.
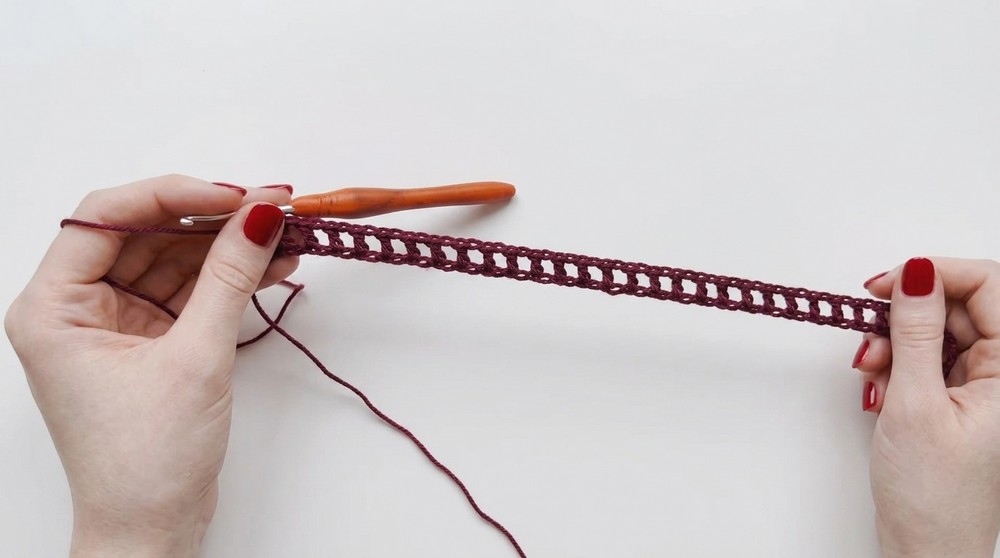
Step 2: Row 1 (Foundation Row)
- Beginning in the seventh chain (7th ch) from the hook, work:
- 1 dc.
- ch 1.
- Skip the next chain.
- Work the pattern:
- [1 dc, ch 1, skip 1 ch] across the entire chain, ending the row with 1 dc in the last stitch.
- Turn the work.
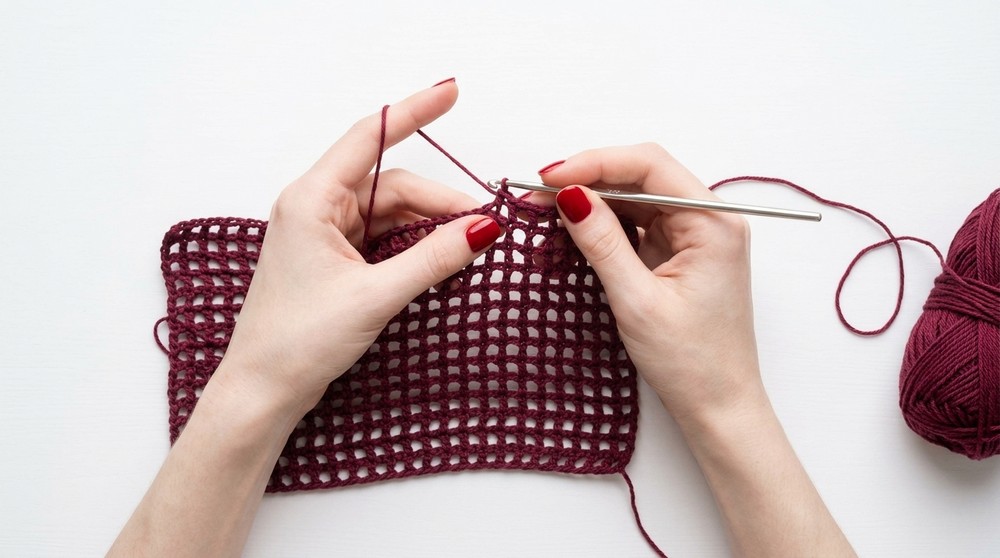
Step 3: Row 2 and Beyond
- Begin each row with 4 ch (counts as dc + ch 1 sp).
- Work 1 dc into the first available dc from the row below.
- Continue the pattern of [ch 1, skip ch sp, 1 dc in next dc] across the row.
- Repeat Row 2 until the panel measures from the shoulders down to just under your bust – 28 rows were made in the video example.
- Fasten off and cut the yarn once the panel is complete.
Body Panel
The body panel is worked directly onto the bust panel with additional chains to create the body section while leaving gaps for the sleeves.
Step 1: Measurements and Foundation
- Measure the distance across the front of your body (side seam to side seam). This is the panel width – approx. 65 sts in the video example.
- Use the stitch count of the bust panel to calculate sleeve gaps:
- Total bust panel stitches = 133.
- Body panel stitches = 65.
- Stitches for each sleeve = (133 - 65) / 2 = 34 sts for each sleeve.
Step 2: Attaching Yarn for the Body Panel
- To leave a sleeve gap, attach the yarn into the 35th stitch of the bust panel.
- Secure the yarn with a slip knot and pull it through the stitch.
Step 3: Body Panel Rows
- Chain 4 ch (counts as dc + ch 1 sp).
- Work the pattern:
- [1 dc, ch 1, skip 1 ch sp] across the next 65 sts (or your calculated body width).
- Turn the work.
- Repeat the pattern row (Row 2 of the bust panel) until the body panel reaches your desired length. 15 rows were made in the video.
- Fasten off and cut your yarn.
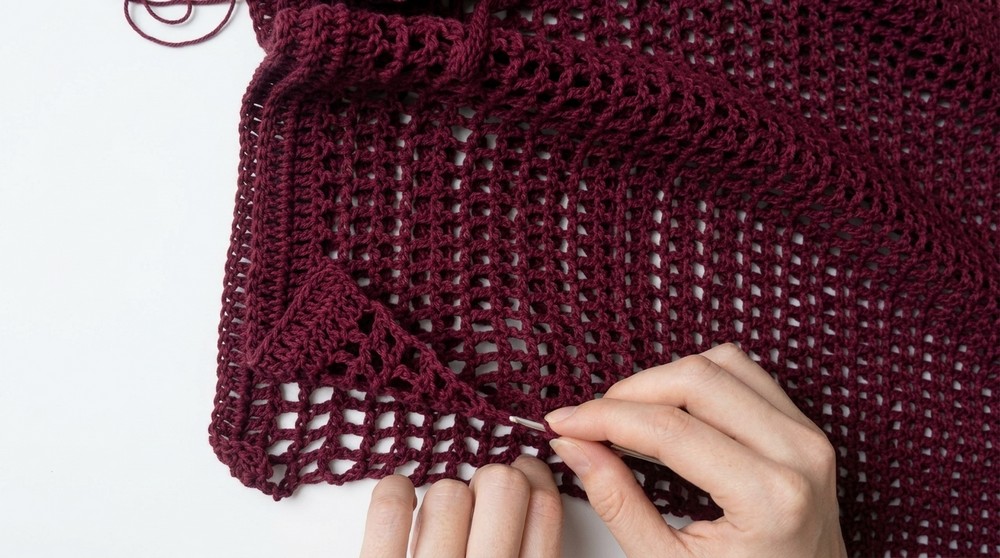
Borders for Panels
To give the edges a clean look, work 2 rows of double crochet as borders.
Bottom of the Body Panel
- Reattach yarn at the bottom corner of the body panel.
- Row 1 (Foundation Double Crochet):
- ch 2 (does not count as a stitch).
- Work 1 dc in each dc and ch sp across. Turn.
- Row 2:
- Repeat Row 1. Fasten off the yarn.
Sleeve Edges
- Work in the round along the sleeve edges (cuffs), making 2 rows of double crochet.
Attaching Panels
Seaming Under Sleeves and Shoulders
- Align the two panels (bust and body) with the right sides together.
- Leave holes for the neck and sleeve openings. Use stitch markers to mark:
- Sleeve seam: 34 sts (or calculated sleeve width).
- Neck hole: Mark the width you desire.
- Slip stitch to seam:
- Insert the hook into one stitch from each panel.
- Yarn over, and pull through both stitches and the loop on the hook.
- Repeat across the marked areas.
Adding Ties
For an adjustable fit, add side ties.
- Attach the yarn to the edge of the body panel, approximately at the midpoint of its height.
- Chain Tie:
- Make a chain of 25 ch (or desired length) + 1 ch for turning.
- Sl st back along the chain to the starting point.
- Secure with sl st to the panel, then fasten off.
- Repeat for all sides where ties are needed.
Conclusion
This off-the-shoulder mesh top combines simplicity with a touch of elegance. The loose-fit design makes it adaptable for various body sizes, and the borders and ties add a professional finish. The pattern’s mesh stitch ensures breathability, making it perfect for summer wear or as a lightweight layer.
Tips & Corrections
- Measuring is Key: Make sure to measure the bust and body panel appropriately for a perfect fit. Adjust chains, rows, or the stitch count as needed.
- Seaming: Work slowly and securely when slip-stitching the panels to ensure even seams.
- Customization:
- Add color changes to create stripes.
- Extend the panels for a longer, dress-style top.