Create a cozy plush featuring a lovable character that adds warmth and charm to any space with heartfelt personality and unique appeal.
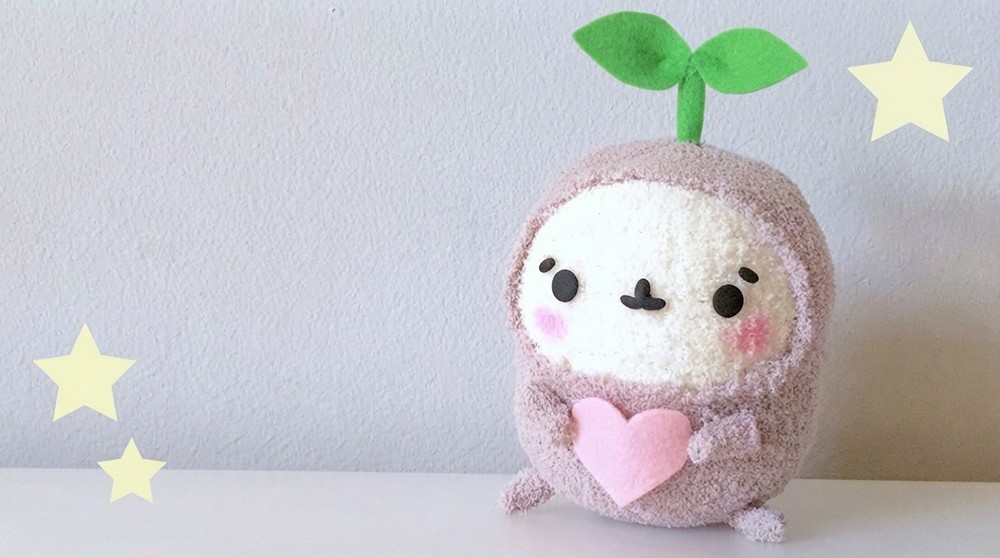
Soft, whimsical, and undeniably endearing, this plush character brings a unique charm to any space that welcomes it. The design features a potato-inspired shape with a gentle, rounded form that highlights its cute facial expression and tiny limbs, creating an inviting and lovable aesthetic. Its warm, earthy colors paired with delicate details like subtle blushes and a small felt heart elevate its personality, making it feel like a heartfelt companion rather than just a simple plush. This cozy figure stands out not only as a charming decorative item but also as a meaningful gift idea that radiates affection and comfort.
Handmade DIY Love Potato Sock Plush with Heart
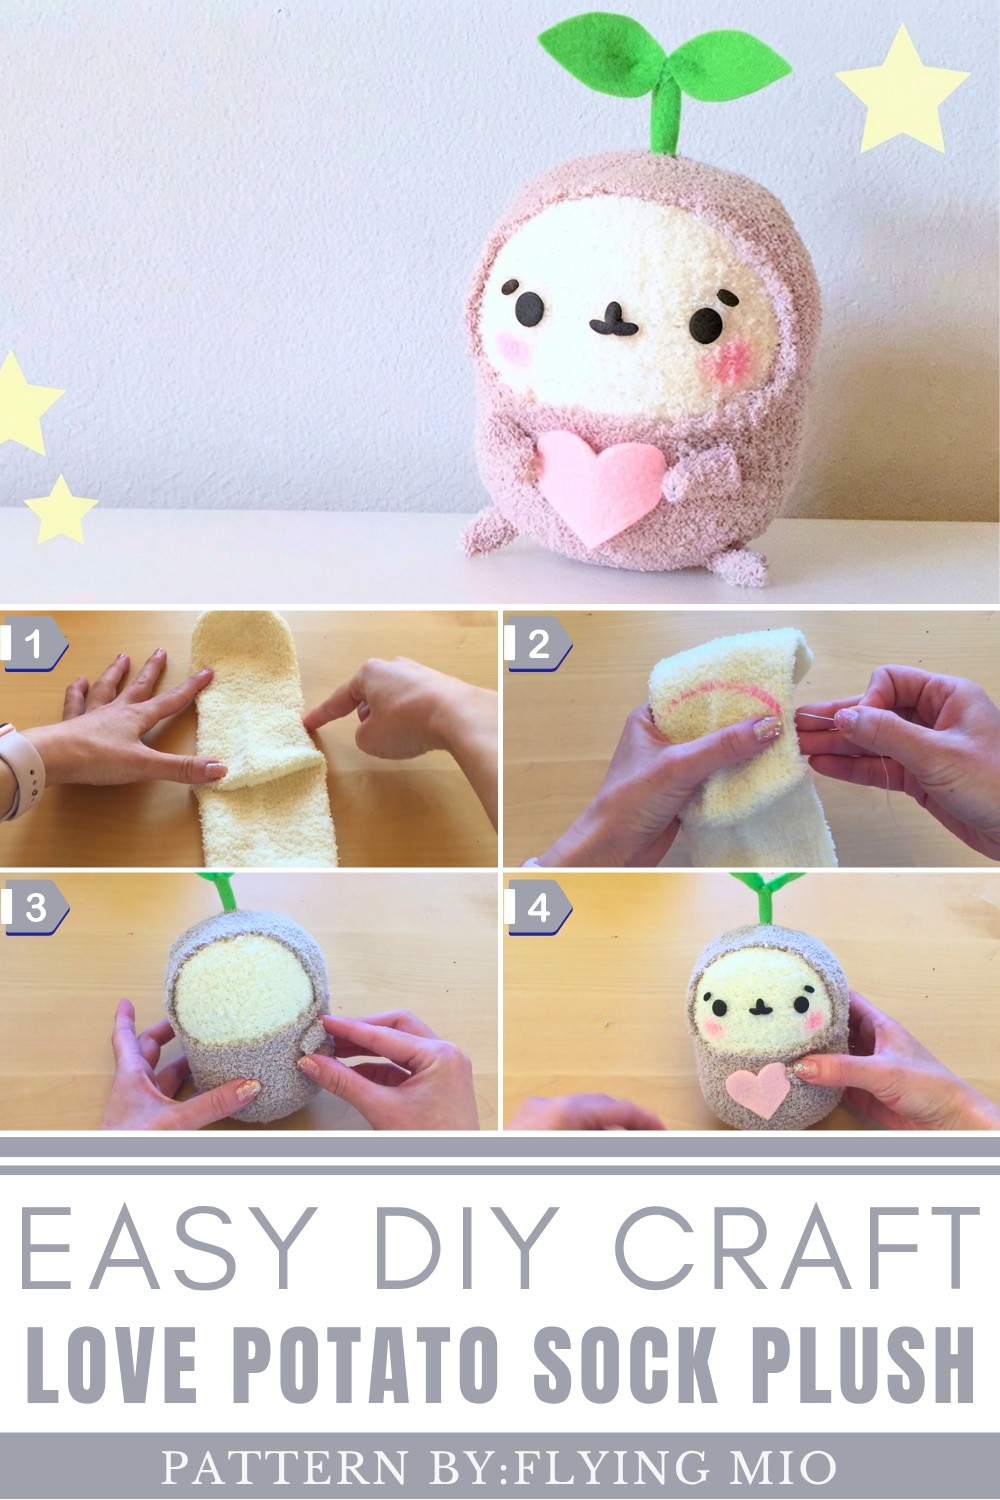
The DIY Love Potato Sock Plush perfectly captures a balance between quirky playfulness and tender warmth, making it appealing to anyone who appreciates handmade, character-driven crafts. Its approachable style, combined with the sweet “love potato” concept, turns it into a delightful keepsake that can brighten kitchens, living rooms, or personal collections with a touch of cozy whimsy.
Behind this charming creation is Flying Mio, a passionate crafter who delights in sharing cute and fun DIY projects. Her channel is a wonderful source of inspiration for anyone looking to add a handmade touch to their space or find new creative ideas. Check out more of her unique and cheerful designs on her YouTube channel Flying Mio.
How to Make a Love Potato Sock Plushy
What You Will Need
Socks and Stuffing
- One light yellow colored sock (this forms the inner flesh layer of the potato)
- One brown colored sock (this forms the outer skin layer of the potato)
- A large amount of pillow stuffing or polyester fiberfill stuffing
Sewing Supplies
- A needle and sewing thread in a color that matches each sock
- A fabric marker or regular marker for marking sewing lines
- A pair of scissors
- A hot glue gun and glue sticks (as an alternative to sewing certain parts)
For the Face
- Polymer clay in black or dark brown (for the eyes, nose, mouth, and eyebrows)
- Polymer clay in pink (optional for cheeks)
- Pink eyeshadow and a makeup brush (for a softer blush effect on the cheeks)
- An oven for baking the clay pieces
- Aluminum foil for baking
For the Sprout and Leaves
- Green felt fabric
- Hot glue gun and glue sticks
- Scissors
For the Arms, Legs, and Heart
- Leftover sock pieces from cutting earlier
- Pink felt fabric (for cutting out a heart shape)
- Hot glue gun and glue sticks
Part 1: Making the Inner Yellow Layer
This is the foundation of your entire plushy and getting this layer right will make everything else much easier.
Step 1: Position the Yellow Sock
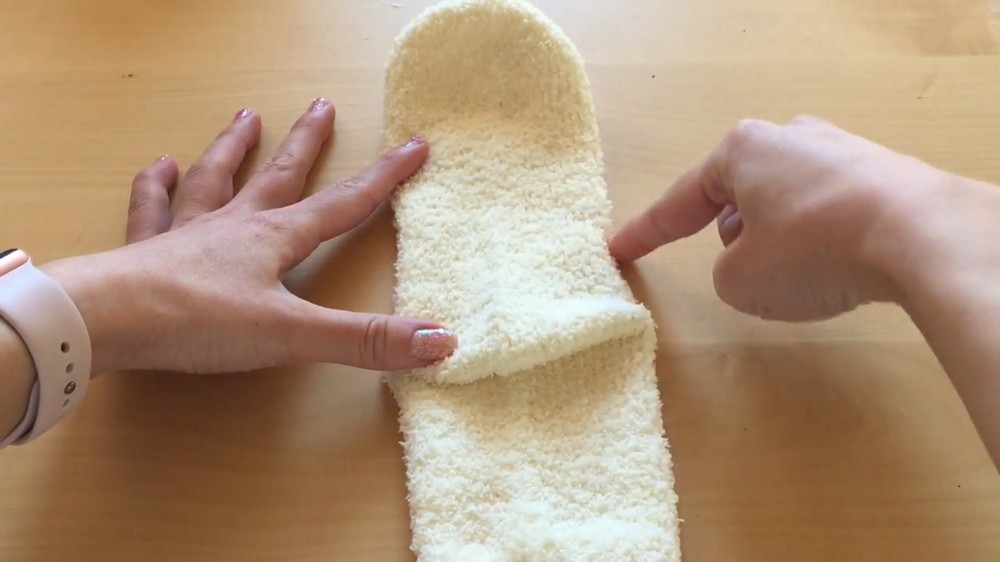
- Take your light yellow sock and hold it in front of you
- Position the sock so that the heel of the sock is facing upward rather than sitting at the bottom as it normally would
- The heel bump will naturally create a slight curve that helps form the rounded shape of the potato head
- Clump the heel area gently so it bends slightly downward
Step 2: Mark Your Sewing Line
- Using a fabric marker or any marker you have available, draw a horizontal line across the sock at the point where you want the top of the head to end
- This line tells you exactly where to sew so you do not have to guess while you are stitching
- The line should go straight across the width of the sock from one side to the other
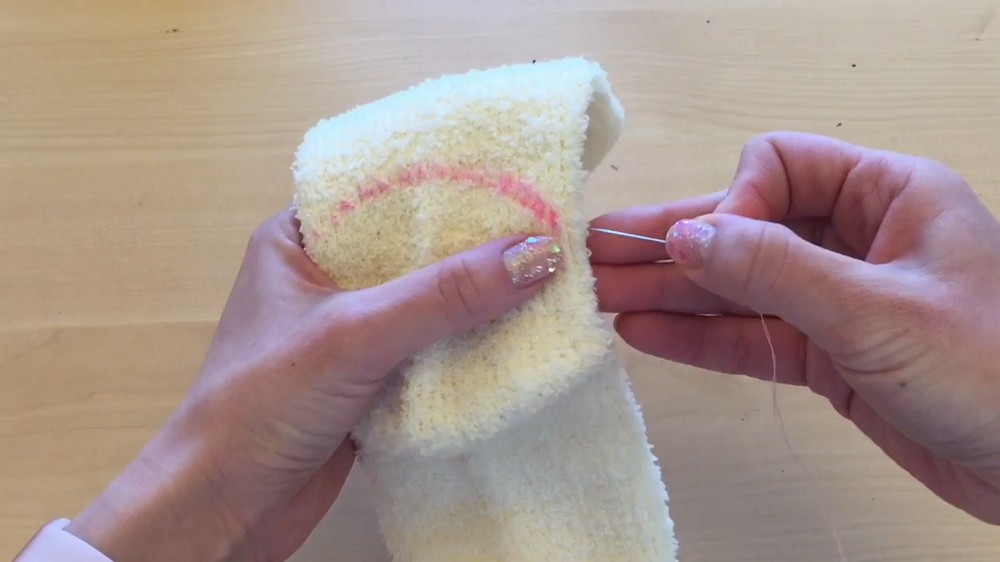
Step 3: Sew Across the Marked Line
- Thread your needle with a piece of thread that matches your yellow sock color
- Sew back and forth along the marked horizontal line using a simple running stitch going up and down through the fabric repeatedly
- Work all the way from one edge of the sock to the other along your marked line
- Sew slowly and keep your stitches as even as possible
- If you prefer not to sew, you can use a hot glue gun along this line instead though sewing will give a cleaner and more secure result
Step 4: Cut Off the Extra Sock
- Once your sewing is complete, use your scissors to cut off the excess sock fabric above your sewn line
- Leave approximately half a centimeter to one centimeter of fabric between the cut edge and the sewn line
- This small seam allowance prevents the stitching from unraveling over time
- Save the cut off pieces of sock as you will use them later for the arms and legs
Step 5: Turn the Sock Inside Out
- Carefully turn the entire yellow sock inside out so that the sewn seam is now on the inside and the outside looks smooth and clean
- Take your time with this step so you do not accidentally pull out any stitches
Step 6: Stuff the Yellow Sock
- Take a very large handful of pillow stuffing or polyester fiberfill
- Push the stuffing inside the yellow sock through the open bottom end
- Keep adding stuffing until the sock feels very plump and full all the way through
- The fuller you pack it the rounder and more potato shaped your plushy will look
- Pay attention to the heel area since this should also be stuffed well to help form the rounded chin area of the character
Step 7: Close the Bottom of the Yellow Sock
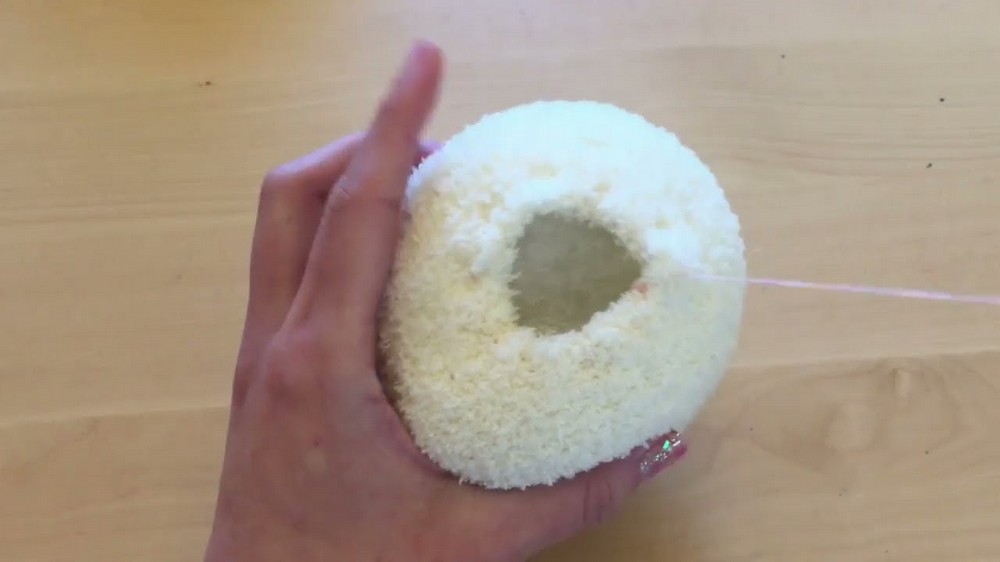
- Once you are happy with the shape and fullness, you need to close the open bottom of the sock
- Thread your needle and sew a running stitch all the way around the perimeter of the open bottom edge of the sock
- Once you have gone all the way around, gently pull both ends of the thread toward each other
- The fabric will gather inward like a drawstring and close the bottom opening
- Pull it tight enough to fully close the hole and then tie a secure knot to hold everything in place
- Your yellow inner layer is now complete and should look like a plump rounded ball
Part 2: Making the Outer Brown Skin Layer
Step 1: Position the Brown Sock
- Take your brown sock and position it the same way you did with the yellow sock with the heel facing upward
- The heel bump should be pointing upward just as before
Step 2: Mark and Sew the Top of the Head
- Use your marker to draw a horizontal line across the brown sock at roughly the same position as you did on the yellow sock
- Sew back and forth along this marked line using your needle and brown thread just as you did in the previous steps
- Sew all the way from one side to the other keeping your stitches even and secure
Step 3: Cut the Extra Brown Sock
- Cut off the excess brown sock above your sewn line leaving the same half centimeter to one centimeter seam allowance
- Save these cut off brown pieces as well for the arms and legs
Step 4: Turn the Brown Sock Inside Out
- Turn the brown sock inside out so the seam is on the inside and the outside looks smooth
Step 5: Place the Yellow Plushy Inside the Brown Sock
- Instead of stuffing this layer with filling, you are going to slide the completed yellow plushy inside the brown sock
- Push it in gently through the open bottom of the brown sock
- Position it so that the two layers sit together naturally with the brown sock fully covering the yellow one
- Adjust as needed so everything sits evenly
Step 6: Sew the Bottom of the Brown Sock Closed
- Just as you did with the yellow layer, sew a running stitch around the perimeter of the open bottom of the brown sock
- Pull the thread to gather the fabric closed and tie a secure knot
- Your two layered potato body is now fully assembled
Part 3: Cutting the Potato Skin to Reveal the Inner Layer
This is the most exciting and most delicate step in the whole project so go slowly and carefully.
Step 1: Plan Where the Face Will Be
- Hold your potato plushy in front of you and decide where you want the face to appear
- The face area should be on the front of the potato roughly in the center
Step 2: Carefully Cut Through Only the Brown Outer Sock
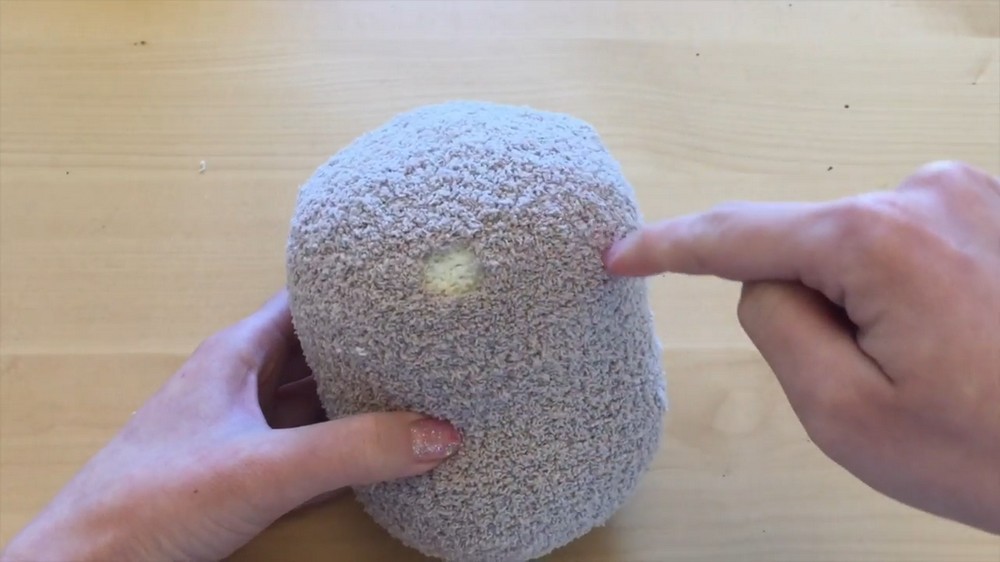
- Using the tip of your scissors, very carefully cut small sections of the brown outer sock in the area where you want the face to be
- Cut only through the brown outer layer and be extremely careful not to accidentally cut into the yellow inner sock beneath it
- Work slowly and take small snips at a time rather than trying to cut large sections all at once
- Gradually cut in a rounded circular shape that will frame the face area of your potato character
- As you cut away pieces of the brown sock, the yellow layer beneath will start to show through just like peeling a real potato skin
Step 3: Tidy Up the Cut Edge
- Once you have the shape you want, look around the cut edge and trim away any uneven or jagged bits of brown sock to make the face opening look neat and clean
- You do not need to sew or glue this edge since the layers of sock hold together naturally
Part 4: Making and Attaching the Face
Step 1: Shape the Clay Facial Features
- Take your black or dark brown polymer clay and begin shaping the facial features one at a time
- Roll two small equal-sized balls for the eyes and flatten them slightly
- Roll a tiny oval or rounded triangle for the nose
- Roll a very thin snake of clay and curve it gently into a small smile shape for the mouth
- Roll two slightly thicker short strips and curve them slightly for the eyebrows
- If you want clay cheeks, roll two small balls of pink clay and flatten them into discs though you can also skip this and use eyeshadow instead for a softer look
Step 2: Bake the Clay Pieces
- Place all your clay facial feature pieces onto a piece of aluminum foil on a baking sheet
- Bake in a preheated oven at 250 degrees Fahrenheit for approximately 20 minutes
- Once the timer is done, leave everything in the oven to cool down completely before touching any of the pieces
- Do not try to handle the clay while it is still warm as it can warp or break
Step 3: Attach the Face to the Potato
- Once the clay pieces are fully cooled and hardened, arrange them on the yellow face area of your potato to plan the layout before gluing
- Once you are happy with the placement, hot glue each piece firmly onto the yellow sock surface one at a time
- Start with the eyes, then add the nose, then the mouth, then the eyebrows
- Hold each piece in place for a few seconds after gluing to make sure it bonds securely
Step 4: Add the Blush to the Cheeks
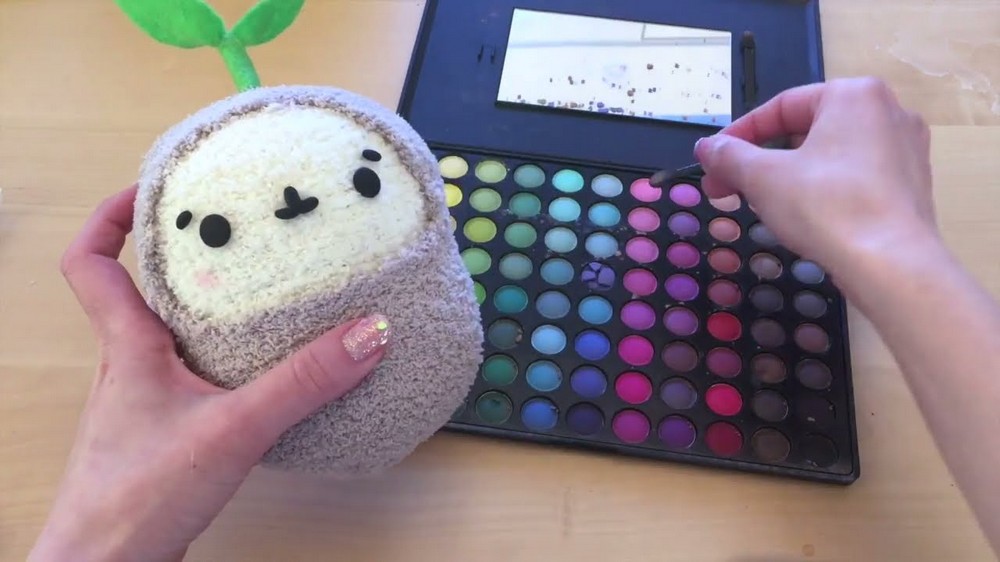
- If you are using eyeshadow for the blush instead of clay cheeks, take a fluffy makeup brush and dip it lightly into a pink eyeshadow
- Tap the brush gently onto the cheek areas on either side of the nose
- Build up the color gradually by tapping lightly rather than applying it all at once
- This creates a very soft and natural looking rosy blush that suits the character perfectly
Part 5: Making the Sprout on Top of the Head
Step 1: Cut Out the Leaf Shapes
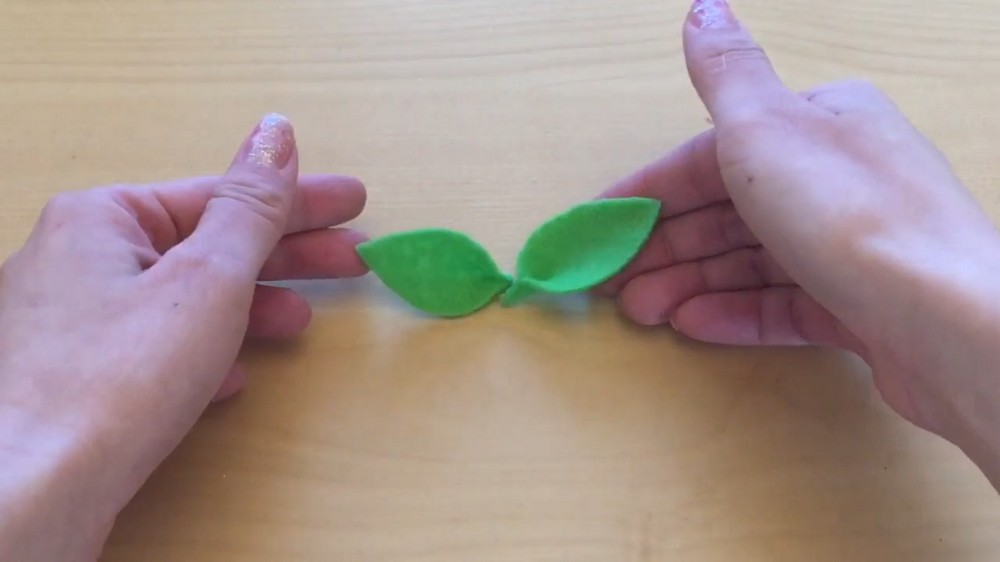
- Take your green felt fabric and use scissors to cut out two identical leaf shapes
- Each leaf should be a simple elongated oval with a slightly pointed tip at the top
Step 2: Make the Leaves Three Dimensional
- Take each flat leaf and pinch the bottom edge together between your fingers to create a gathered fold at the base
- This pinching makes the leaf curve upward and look more three dimensional and lifelike
- Apply a small dab of hot glue to the pinched base of each leaf and press it firmly to hold the shape
Step 3: Make the Stem
- Take a small square piece of green felt
- Roll it tightly into a narrow tube shape to form the stem
- Apply a line of hot glue along the edge of the felt as you roll to hold the tube closed
- The stem should be narrow and firm enough to stand upright on its own
Step 4: Attach the Leaves to the Stem
- Hot glue the base of each leaf onto the top of the stem one on each side
- Hold them in position for a few seconds until the glue sets
- Adjust the angle of each leaf so they fan outward attractively from the top of the stem
Step 5: Attach the Sprout to the Potato Head
- Hold the sprout up against the very top center of your potato head and decide how long the stem needs to be
- Trim any excess stem length with scissors so the sprout sits at a natural height
- Hot glue the base of the stem firmly onto the very top center of the potato head
- Hold it in place for several seconds until the glue has fully set and the sprout stands upright on its own
Part 6: Making the Arms, Legs, and Heart
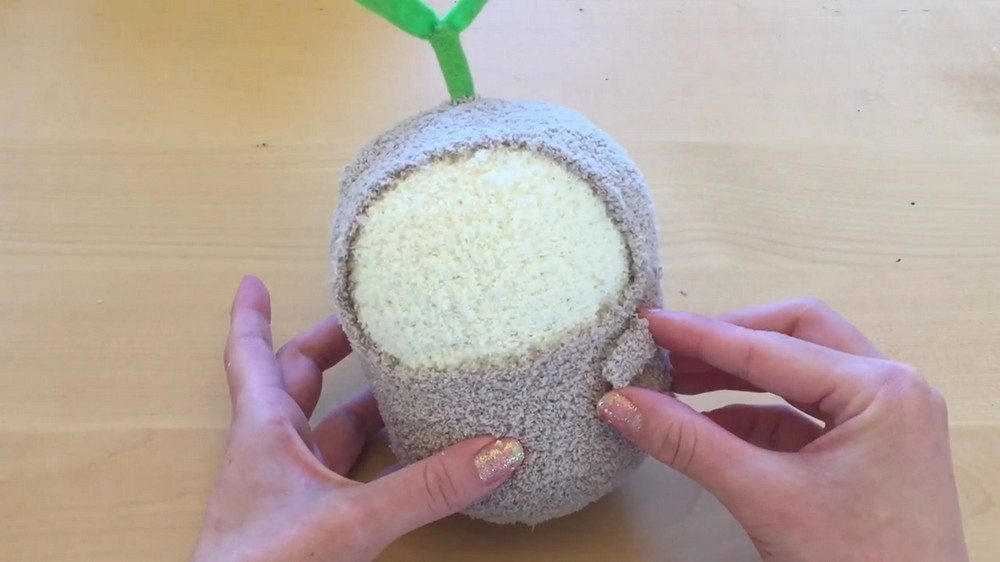
Step 1: Create the Arms and Hands
- Take your leftover pieces of brown and yellow sock fabric from earlier
- Cut and fold small pieces of sock into stubby rounded hand and arm shapes
- Hot glue the layers of sock fabric together to form each hand shape
- Make two of these, one for each side
Step 2: Create the Legs and Feet
- Using more leftover sock pieces, cut and fold small pieces into short rounded leg and foot shapes
- Hot glue them together the same way you did for the hands
- Make two legs with feet attached
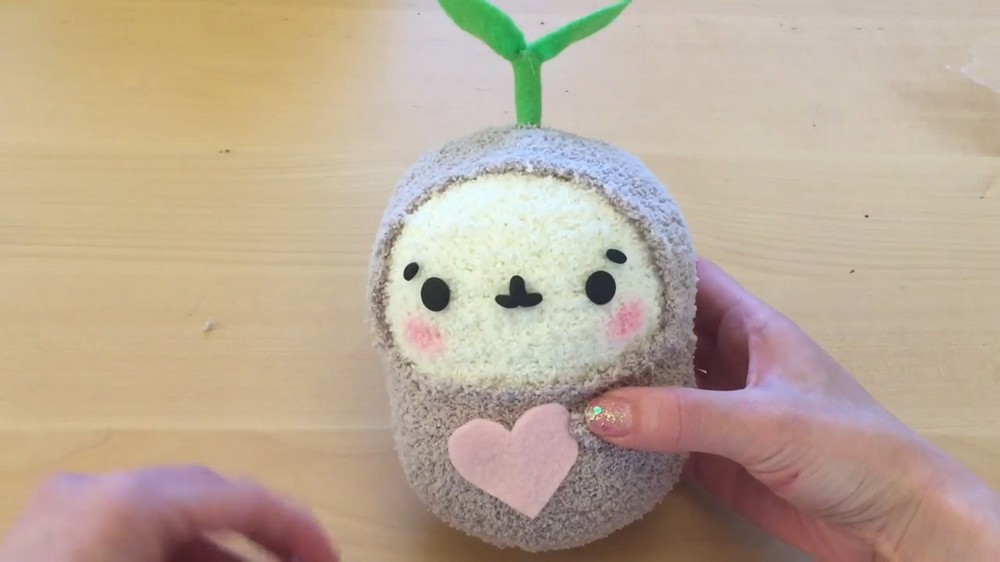
Step 3: Cut Out the Heart
- Take your pink felt fabric and cut out a small heart shape
- The heart should be large enough to be visible when held between the two arms of the potato but not so large that it overwhelms the body
Step 4: Attach Everything to the Body
- Hot glue one arm on each side of the potato body at roughly the mid chest level
- Position the arms so they angle slightly inward toward the front as if they are reaching forward to hold something
- Hot glue the pink felt heart in the center of the chest between the two arms
- Make sure the arms appear to be hugging the heart from both sides
- Hot glue the two legs and feet onto the very bottom of the potato body
- Position them symmetrically so the potato stands or sits in a balanced way
Quick Tips to Remember
- Go very slowly when cutting the brown outer sock to reveal the yellow layer since cutting too fast can easily snip the inner sock by mistake
- Pack the stuffing very generously into the yellow layer for the best rounded potato shape
- Let all hot glue dry fully before moving on to the next attachment step
- Cool the clay completely before gluing it onto the fabric surface
- Use light tapping motions when applying blush eyeshadow so the color builds up softly rather than looking too heavy
- Save all your leftover sock scraps from the beginning since you will need them later for the arms and legs