Bring charm and personality to your accessories with a playful mermaid cat piece featuring soft colors and a smooth glossy finish in a fun DIY style.
Flying Mio’s channel is a true haven for craft lovers who appreciate meticulous creativity and charming designs. Renowned for producing delightful, heartwarming projects, the channel consistently inspires and captivates its audience with unique characters and imaginative themes.
Quick DIY Pusheen Mermaid Charm Anyone Can Try
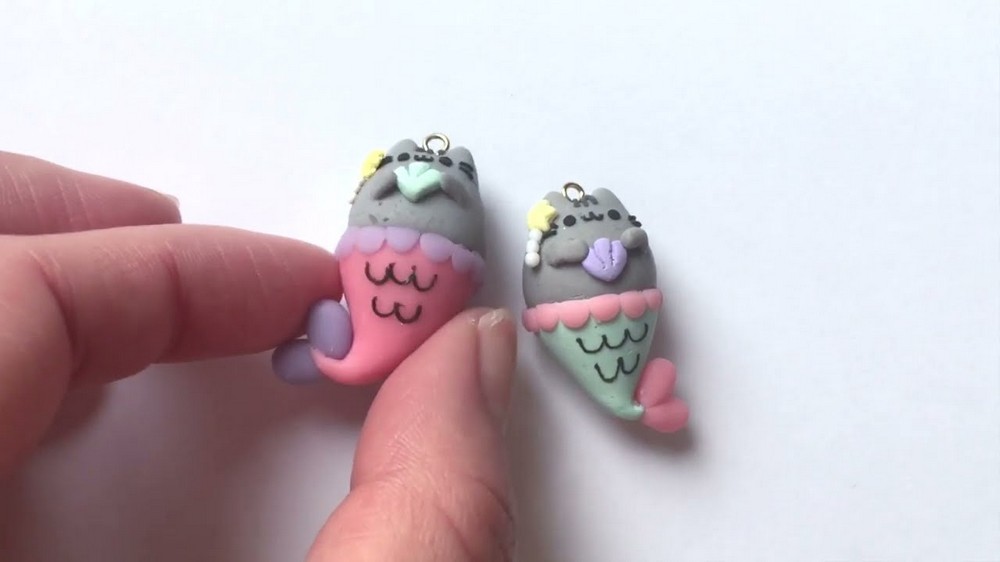
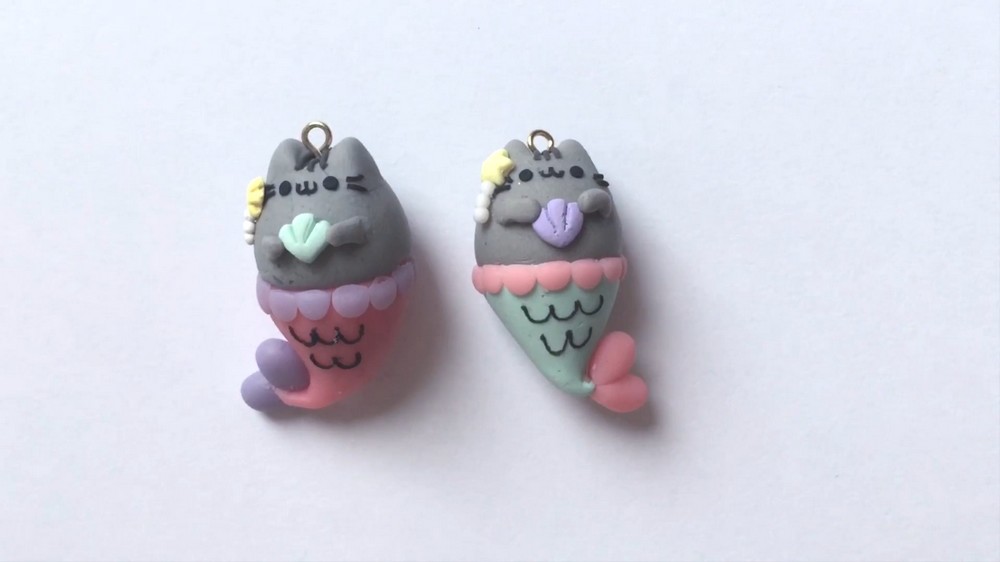
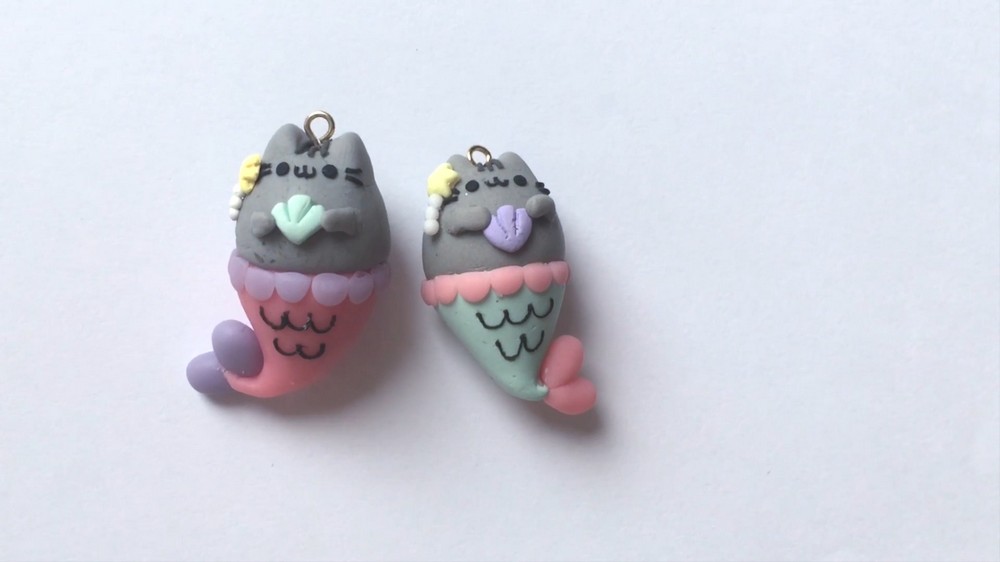
The DIY Pusheen Mermaid Charm perfectly exemplifies this style, showcasing an adorable blend of magical allure and playful personality. This pastel-colored charm highlights the beloved Pusheen cat’s signature roundness and sweet expression, merged seamlessly with a whimsical mermaid tail.
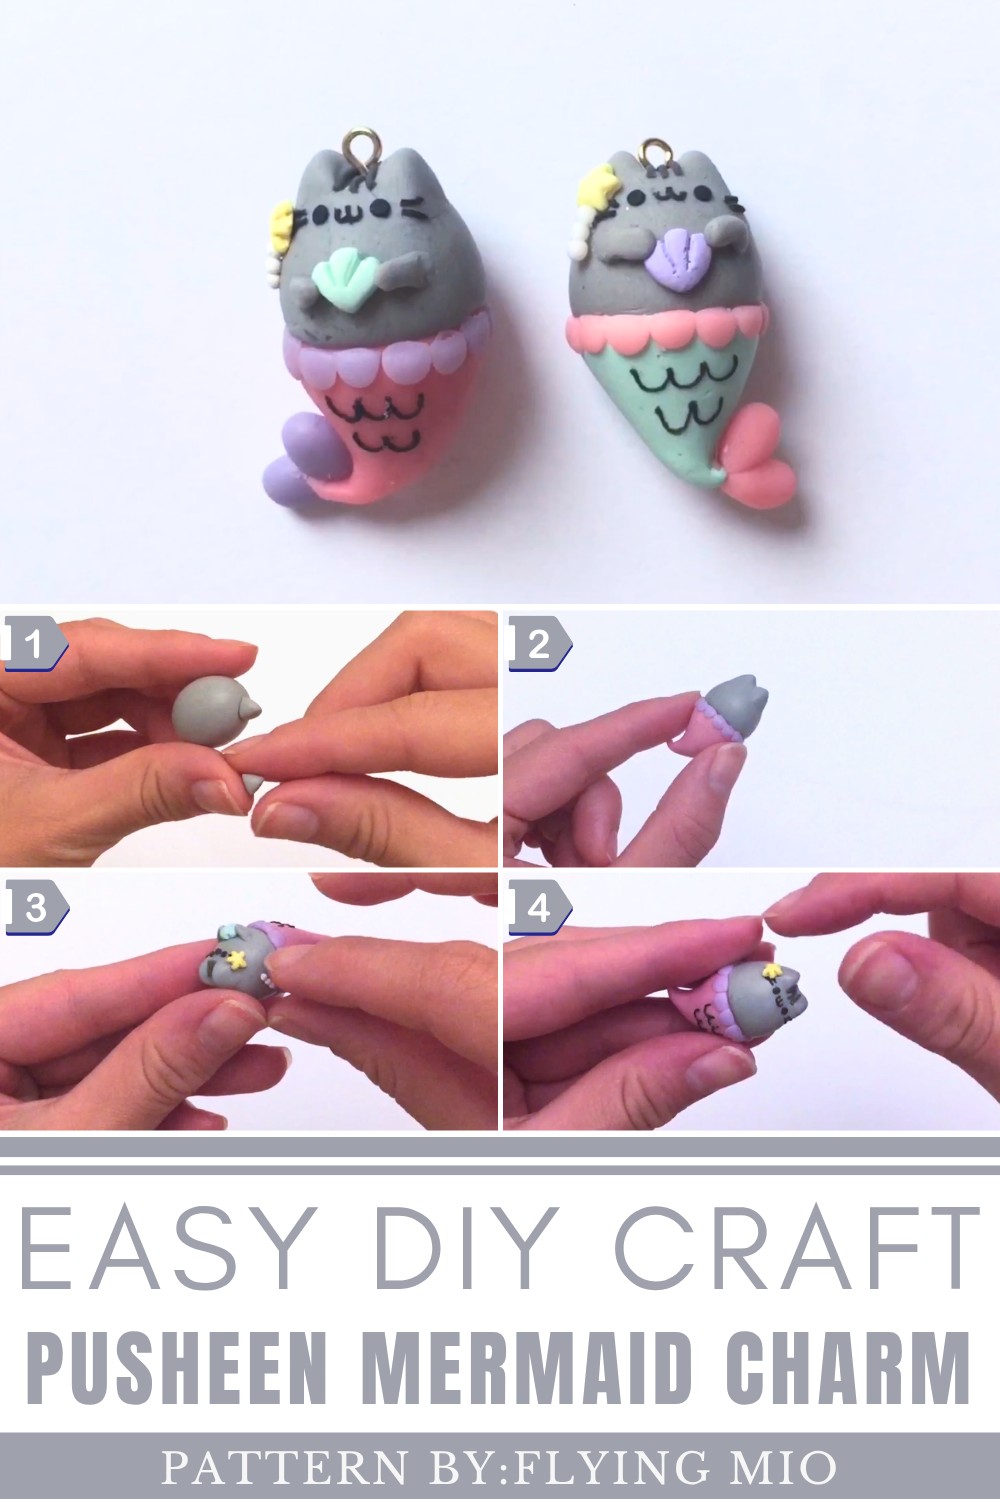
Its smooth, glossy finish and soft hues make it an eye-catching accessory that adds a touch of fantasy to everyday items like keys, bags, or phone cases. Beyond its cute façade, the charm radiates a calming, joyful vibe that resonates with fans of kawaii culture and collectors alike.
This design’s clever mix of familiar character traits and oceanic fantasy brings freshness and warmth, making the DIY Pusheen Mermaid Charm a standout piece for anyone who loves distinctive, heartfelt creations.
How to Make a Pusheen Mermaid Polymer Clay Charm
If you have ever scrolled through the internet and spotted that adorable chubby gray cat called Pusheen, you already know how irresistible she is. Now imagine combining that cuteness with the magical world of mermaids and you have got one of the most charming little clay creations you could ever make with your own hands. This Pusheen mermaid charm is small enough to wear as a piece of jewelry, sweet enough to give as a handmade gift, and detailed enough to make anyone who sees it stop and smile. Polymer clay can feel intimidating when you first start working with it but this project breaks everything down into manageable pieces so that even a complete beginner can follow along and create something truly beautiful.
What You Will Need
Clay Colors
- Gray polymer clay (for Pusheen's body and arms)
- Pink polymer clay (for the mermaid tail)
- Purple polymer clay (for the fish scales and tail fin)
- Dark gray and black polymer clay (for facial details and stripes)
- Yellow polymer clay (for the star accessory)
- Light blue polymer clay (for the seashell)
- White polymer clay (for the pearl necklace)
Tools and Supplies
- A clay blade or craft knife (for cutting and smoothing edges)
- Clay sculpting tools (for adding fine details and dents)
- An eye pin (if you want to turn your charm into a wearable piece of jewelry)
- An oven (for baking the finished charm)
- A baking sheet or oven-safe surface
Baking Instructions
- Bake your finished charm at 250 degrees Fahrenheit for about 20 minutes
- Allow it to cool completely before handling or wearing it
Understanding the Scale and Size
Before you start, it helps to have a clear picture of how big everything should be.
- The finished charm is small enough to wear as a pendant or attach to a keychain
- The mermaid tail should be approximately half an inch long
- The body should be wide enough to sit comfortably on top of the tail
- All the detail pieces such as the eyes, mouth, scales, and accessories are extremely tiny so patience and steady hands are your most important tools throughout this project
Part 1: Making the Mermaid Tail
The tail is the very first piece you will build and it sets the size for everything else that follows.
Step 1: Roll the Pink Clay Into a Tail Shape
- Take a small amount of pink polymer clay and warm it between your fingers by kneading it gently
- Roll it into a smooth ball first to remove any cracks or air bubbles
- Once it is smooth, begin rolling one end of the ball between your fingers to taper it into a cone shape
- The wide rounded end will become the top of the tail where the body sits
- The narrow tapered end will become the bottom tip of the tail
- The finished tail should be approximately half an inch long from the wide top to the narrow tip
Step 2: Refine the Tail Shape
- Look at your tail from all angles and make sure the shape is smooth and even
- If any cracks appear, gently press them closed and smooth over them with your fingertip
- Set the tail aside on a flat clean surface while you move on to building the body
Part 2: Making Pusheen's Body
Step 1: Roll the Gray Clay Into a Body Shape
- Take a piece of gray polymer clay and begin kneading it to soften it
- Roll it into a smooth ball and then gently press and shape it into a rounded chubby oval
- The body should be wide enough that when placed on top of the tail, the two pieces sit together naturally without one being dramatically larger than the other
- Think of it as a soft rounded rectangle that is slightly wider at the top than the bottom
Step 2: Make the Ears
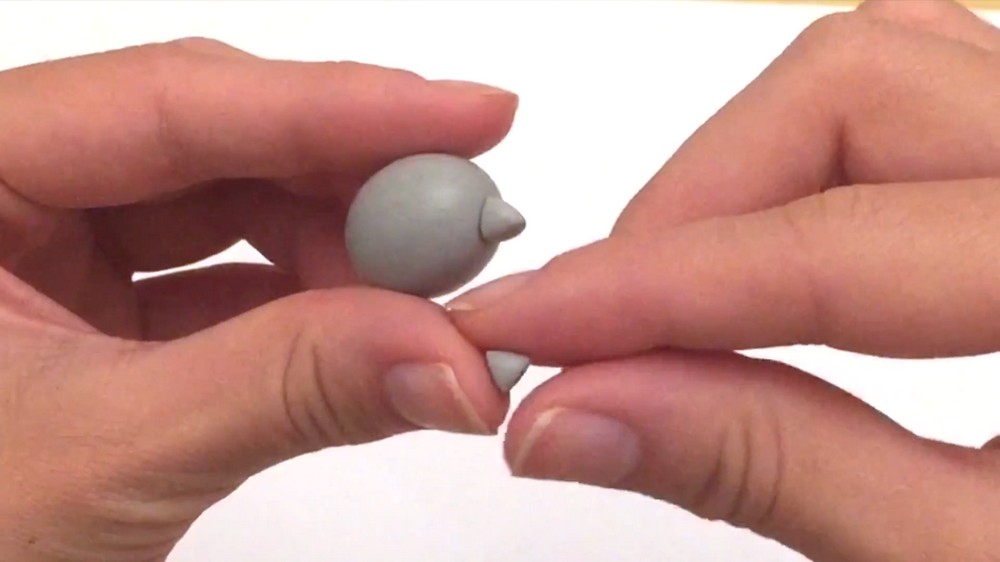
- Pinch off two very small pieces of gray clay from your main gray piece
- Roll each small piece into a tiny ball and then pinch the top of each ball between your fingers to form a small triangle shape
- These are Pusheen's signature rounded triangle ears
- Make sure both ears are roughly the same size so they look symmetrical when attached
Step 3: Attach the Ears to the Body
- Press one ear gently onto the upper left area of the gray body piece
- Press the second ear onto the upper right area in the same position
- Once both ears are in place, use your clay blade or a smooth clay tool to blend the base of each ear into the body
- You want the ears to look like they are growing naturally out of the head rather than sitting on top of it
- Smooth out any visible seam lines until the transition from ear to head looks clean and seamless
Step 4: Cut the Bottom Edge of the Body
- Using your clay blade, make a clean straight cut across the bottom of the gray body piece
- This flat bottom edge is where the body will connect to the top of the pink tail
- Make sure the cut is as flat and even as possible so the two pieces sit together neatly
Step 5: Cut the Top Edge of the Tail
- Similarly, use your clay blade to make a clean straight cut across the wide top of the pink tail piece
- This flat top edge is where the tail will connect to the bottom of the body
- Try to match the width of this cut to the width of the bottom of the body as closely as possible
Step 6: Join the Body and Tail Together
- Press the flat bottom of the gray body firmly against the flat top of the pink tail
- Gently smooth the seam where the two pieces meet using your fingertip or a clay tool
- If one piece is slightly wider than the other, carefully smooth and blend the edges to minimize the difference
- The join does not need to be completely invisible at this stage because the fish scale border will cover it later
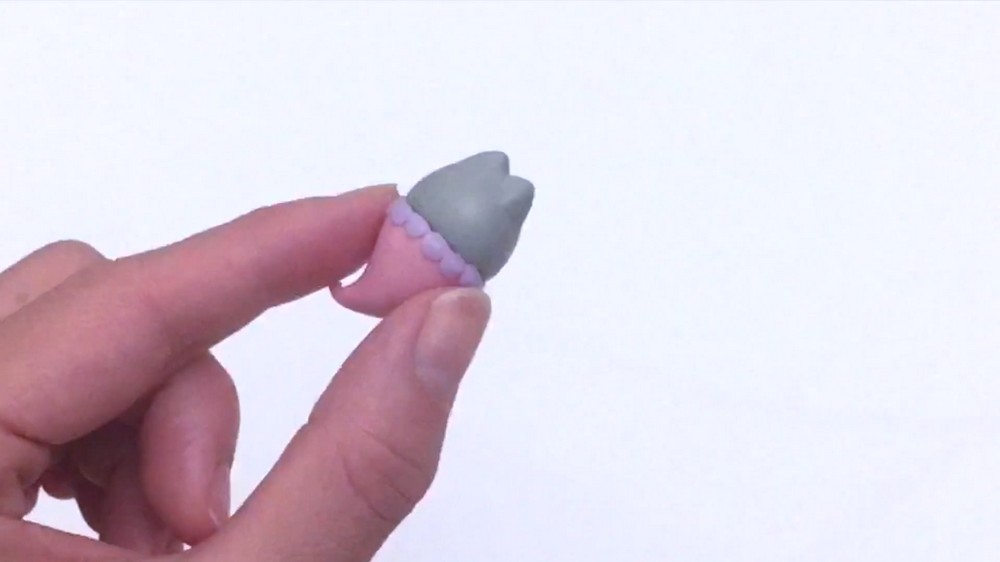
Part 3: Adding the Fish Scale Border
Step 1: Prepare the Purple Clay Pieces
- Take a small amount of purple polymer clay and knead it until soft
- Cut it into multiple small pieces that are all roughly the same size
- Roll each small piece into a tiny smooth sphere
Step 2: Flatten Into Circles
- Take each tiny sphere and press it flat between your fingers or against your work surface
- Each flattened piece should look like a small thin circle or disc
Step 3: Cut Into Semicircles
- Using your clay blade, cut each flattened circle in half
- Each half will now look like a tiny semicircle which perfectly mimics the shape of a fish scale
Step 4: Apply the Scales Around the Body and Tail Join
- Starting at the point where the gray body meets the pink tail, press each purple semicircle along the seam with the flat straight edge facing upward and the curved edge pointing downward
- Work your way all the way around the perimeter of the join so that the entire seam is covered by a neat row of fish scales
- Press each scale gently but firmly so it adheres to the clay beneath it
- Make sure the scales are evenly spaced and sitting in a consistent line all the way around
Part 4: Creating Pusheen's Facial Features
This is the most delicate and detail-oriented part of the entire project so take your time and do not rush.
Step 1: Make the Eyes
- Take an extremely tiny amount of black polymer clay
- Roll it into two very small balls that are as equal in size as possible
- These will become Pusheen's classic simple dot eyes
- Use a clay tool to gently press each dot onto the face in the correct position
- Pusheen's eyes sit in the lower half of the face area and are spaced slightly apart from each other
Step 2: Make the Mouth
- Take an extremely tiny amount of dark gray or black clay
- Roll it into a very thin snake or thread-like strip between your fingertips
- This requires patience so roll slowly and gently
- Shape this tiny strip into Pusheen's characteristic small curved mouth shape
- Use a clay tool to carefully press and position it just below the eyes on the face
Step 3: Add the Stripe Details on the Back
- Roll two very thin strips of dark gray clay
- Press these two stripes onto the back of Pusheen's body
- In the original Pusheen character, she has two horizontal stripes running across her back
- Position them evenly spaced apart and smooth their edges slightly so they look like part of the body
Part 5: Making the Accessories
These small details are what take your charm from cute to absolutely irresistible.
Step 1: Make the Star Accessory
- Take a small piece of yellow polymer clay and roll it into a tiny smooth ball
- Slightly flatten the ball between your fingers
- Using a clay tool or the tip of a pencil, press five small evenly spaced dents around the edge of the flattened disc
- Between each dent, gently pinch the clay outward with your fingers to form five little points
- You should now have a tiny five-pointed star shape
- Refine each point by gently pinching and shaping until you are happy with how it looks
- Position the star just below one of Pusheen's ears at the top of her head and press it gently in place
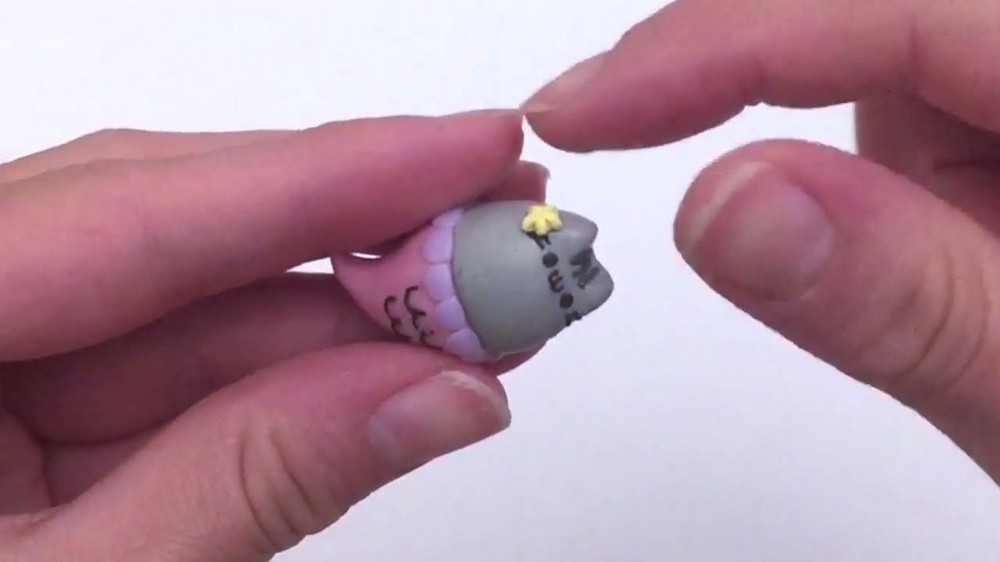
Step 2: Make the Seashell
- Take a small piece of light blue polymer clay and roll it into a ball
- Shape it into a small triangle by gently pinching and pressing it between your fingers
- Flatten the triangle slightly so it is not too thick
- Using a clay tool, press two small evenly spaced dents across the surface of the triangle
- These two parallel lines give it the look of a simplified seashell
- Position the shell in the center of Pusheen's chest area and press it gently in place
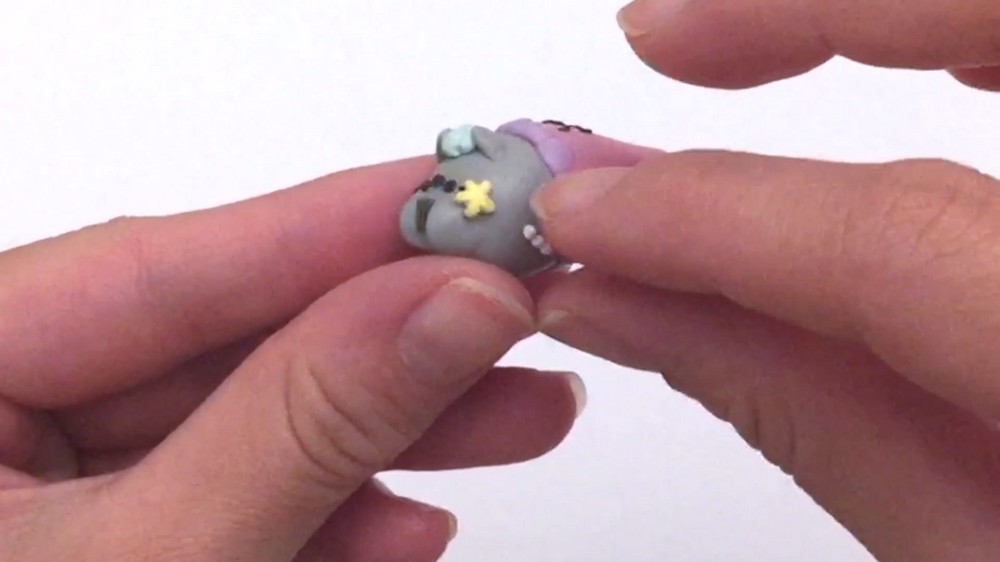
Step 3: Make the Arms
- Take two small equal pieces of gray clay
- Roll each one into a short stubby teardrop or arm shape
- Flatten each one slightly so it looks like a little paw or hand
- Press one arm on each side of the seashell so that Pusheen appears to be hugging the shell against her chest
- Smooth the top of each arm where it meets the body so the connection looks natural
Step 4: Make the Pearl Necklace
- Take small amounts of white polymer clay and roll them into several tiny equal-sized balls
- These will be the individual pearls of the necklace
- Line them up in a gentle curved row just below the star accessory at the top of the chest area
- Press each pearl gently into the clay surface so they stay in place
- Space them evenly so the necklace looks neat and delicate
Part 6: Making the Mermaid Tail Fin
Step 1: Shape Two Oval Pieces
- Take two small pieces of purple polymer clay
- Roll each one into a long thin oval shape
- Make sure both ovals are roughly the same size and shape
Step 2: Join Them Together
- Place the two long ovals side by side with their inner edges touching
- Press them gently together at the center where they meet
- Fan them outward slightly at the tips so they look like the two lobes of a mermaid tail fin
- Flatten the entire piece slightly so it looks like a proper fin rather than two thick cylinders
Step 3: Attach the Fin to the Tail
- Take the fin piece and press it firmly onto the narrow tip of the pink mermaid tail
- Smooth the connection point gently so the fin looks like it is growing naturally out of the tail
- Adjust the angle of the fin so it fans out symmetrically on both sides of the tail tip
Part 7: Adding the Eye Pin and Baking
Step 1: Insert the Eye Pin (Optional)
- If you want your finished charm to be wearable as a pendant or keychain attachment, now is the time to add the eye pin
- Take a metal eye pin and carefully insert it straight down into the very top center of Pusheen's head between the ears
- Push it in far enough that it feels secure but leave the loop of the pin visible above the surface so you can attach a jump ring or chain later
Step 2: Do a Final Check
- Before baking, look over your entire charm carefully
- Check that all pieces are firmly pressed together and no parts are lifting away from the surface
- Make any final adjustments to the position of accessories, facial features, or the tail fin
- Make sure the eye pin is straight and secure if you added one
Step 3: Bake the Charm
- Place your finished charm carefully on a baking sheet
- Bake at 250 degrees Fahrenheit for approximately 20 minutes
- Do not increase the temperature as polymer clay can burn or bubble if baked too hot
- Once the timer is done, turn off the oven and allow the charm to cool completely inside the oven or on the counter before you touch it
- Handling warm polymer clay can cause it to warp or bend so patience during the cooling phase is very important
Quick Tips for Beginners
- Always knead your clay before shaping it to make it soft and workable and to prevent cracking
- Work with very tiny amounts for the detail pieces since it is much easier to add more clay than to remove too much
- Use clay tools whenever possible for fine detail work since fingers can be too large for tiny precise placements
- Practice rolling thin snakes and tiny balls on a spare piece of clay before you work on your actual charm
- Take breaks if your hands feel tired since fresh steady hands produce much cleaner results than tired shaky ones
- Compare both sides of your charm regularly to make sure features like eyes and ears are symmetrical
Polymer clay has a way of drawing you deeper into the craft with every charm you finish. Once you hold your completed Pusheen mermaid in your hand and see all those tiny details you created piece by piece, you will start looking at every character you love and wondering what they might look like reimagined in clay. That curiosity is exactly where the most beautiful handmade things come from.