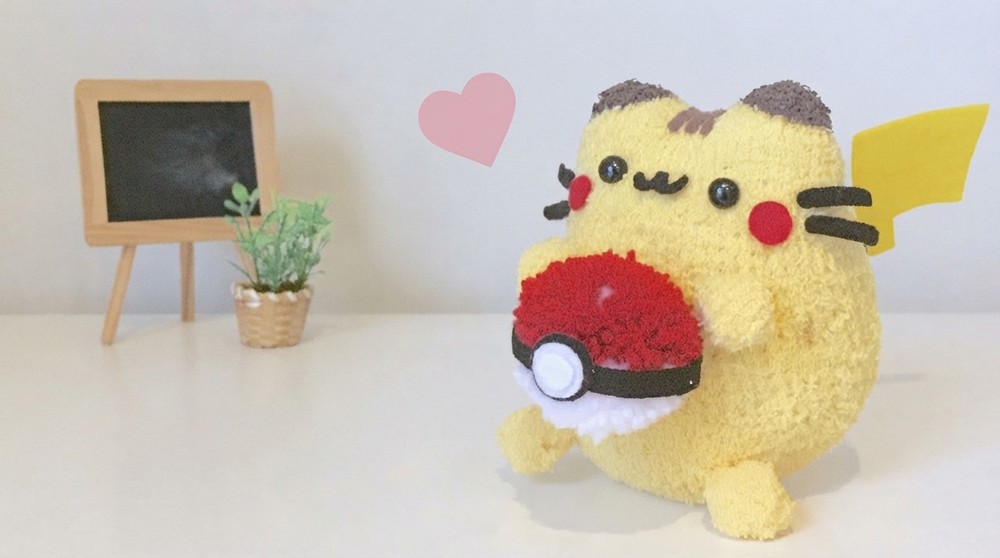
Turn your love for Pikachu and Pusheen into a charming plush that’s irresistibly cute, huggable, and perfect as a gift or delightful décor piece.
Radiating pure joy and whimsy, this charming plush seamlessly melds the playful essence of Pikachu with the lovable roundness of Pusheen. The DIY Pikachu Pusheen Plush exudes personality, from its vibrant yellow hue and rosy cheeks to its signature lightning bolt tail. Perfectly blending the iconic features of both characters, the finished design captures the hearts of collectors and crafters with its irresistibly cute aesthetic. Its purpose goes beyond being a simple plush, it’s an ideal gift, room décor item, or adorable companion, satisfying fans of both Pikachu and Pusheen alike.
DIY Pikachu Pusheen Plush: A Quick and Simple Project
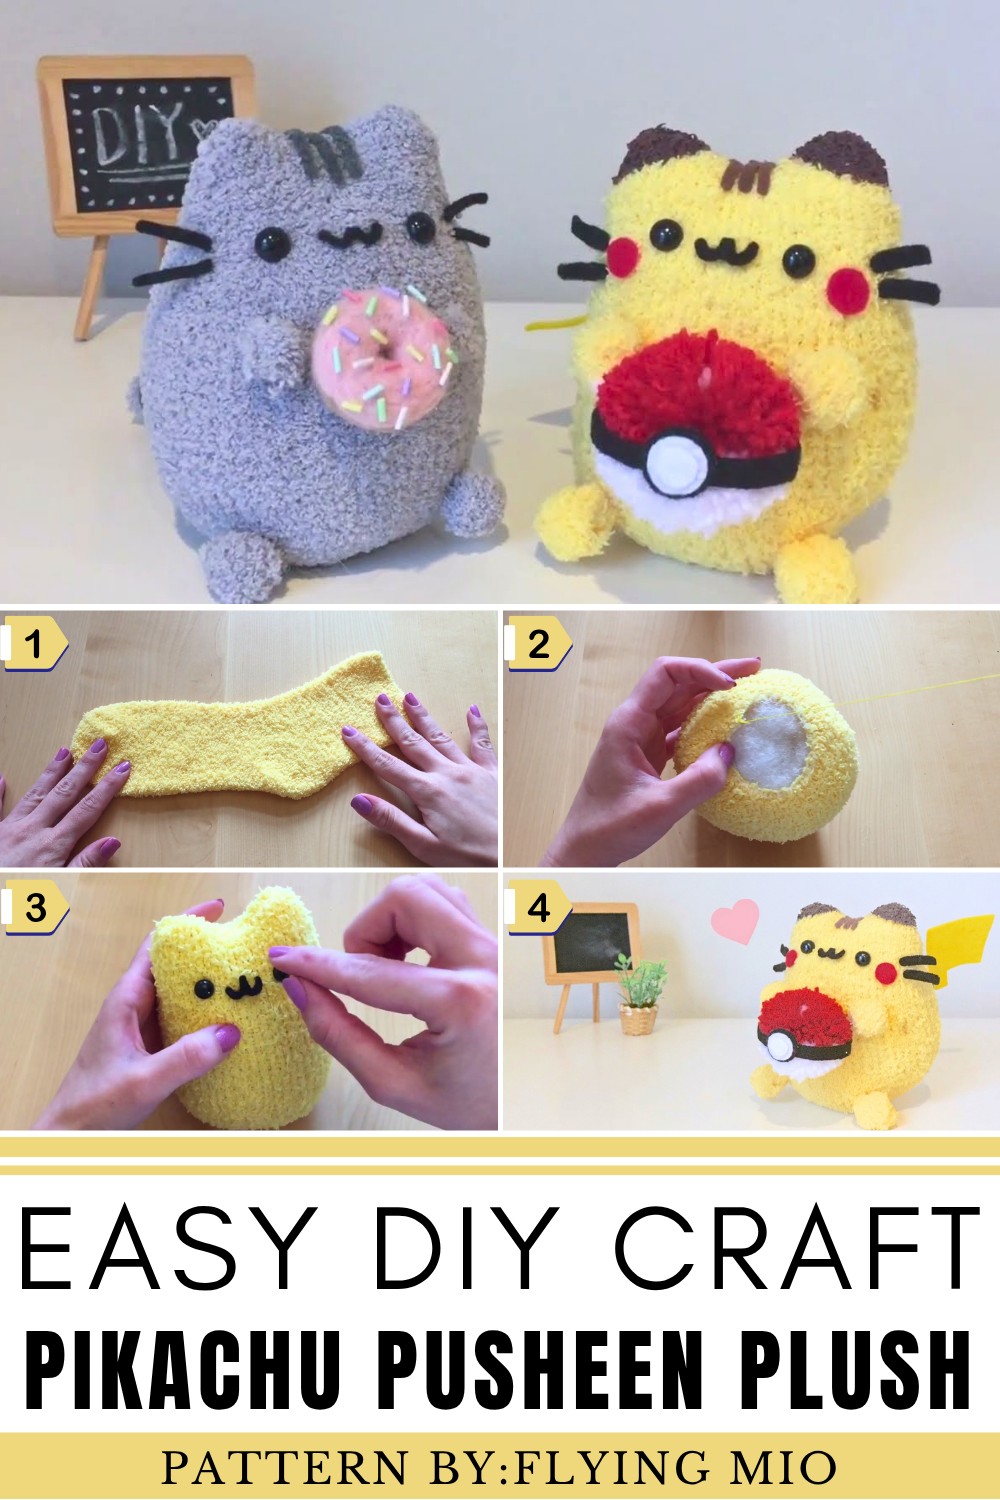
What makes this DIY Pikachu Pusheen Plush truly fascinating is how skillfully it combines two beloved characters into one cohesive and eye-catching design. Its rounded body, friendly expression, and soft texture make it both huggable and visually appealing. The playful vibe it delivers sparks a sense of nostalgia and creativity, making it an ideal keepsake for anyone who appreciates unique character-inspired crafts.
About the Creator!
Mio, the talent behind the "Flying Mio" YouTube channel, offers endless DIY inspiration through her delightful and creative projects. Her charming designs and approachable ideas make crafting fun and rewarding.
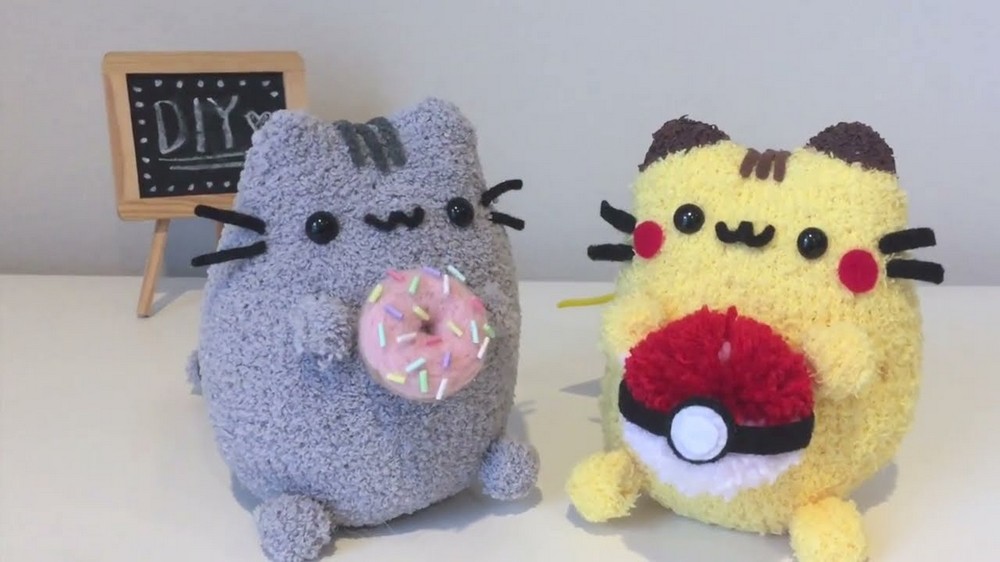
How to Make a Pusheen Pikachu Plush from a Sock
Beginner-Friendly Step-by-Step Guide
This tutorial will help you transform a simple yellow sock into an adorable Pusheen Pikachu plush. Featuring a mix of Pokemon and Pusheen, this craft is perfect for any fan. With a bit of sewing and creativity, you can create a handmade plush that’s cute, fun, and easy to make.
Materials You’ll Need
Sock and Stuffing
- 1 fluffy yellow sock (ankle or crew length works best)
- Polyester stuffing (can be found at craft stores or taken from an old pillow)
Sewing Supplies
- Needle
- Sewing thread (yellow, or a color similar to your sock)
- Scissors
For the Face and Details
- Safety eyes or animal eyes (~1 cm diameter)
- Black felt (for the mouth, body stripes, and Pokeball details)
- Red felt (for Pikachu’s cheeks and Pokeball accents)
- Brown felt (for Pikachu’s back stripes and tail details)
- Yellow felt (for the tail, if preferred over fabric paint)
For the Pokeball Pom Pom
- Red yarn
- White yarn
Adhesive and Markers
- Hot glue gun and glue sticks
- Fabric paint in brown (for ear tips)
- Marker (optional, for marking ears or other features)
Step-by-Step Instructions
Step 1: Prepare the Sock
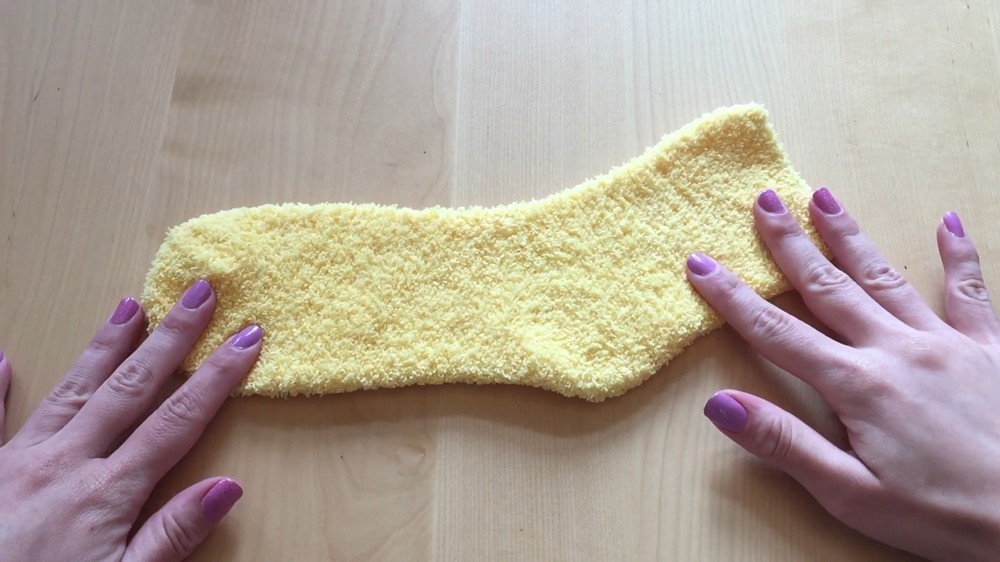
- Lay your yellow sock flat on a table with the heel facing up toward you.
- Use a marker to lightly draw two cat ears at the toe end of the sock. These will form Pusheen’s ears.
- Using a needle and matching thread, sew along the lines of the ears with an up-and-down running stitch, which secures the ear shapes.
Step 2: Trim and Flip the Sock
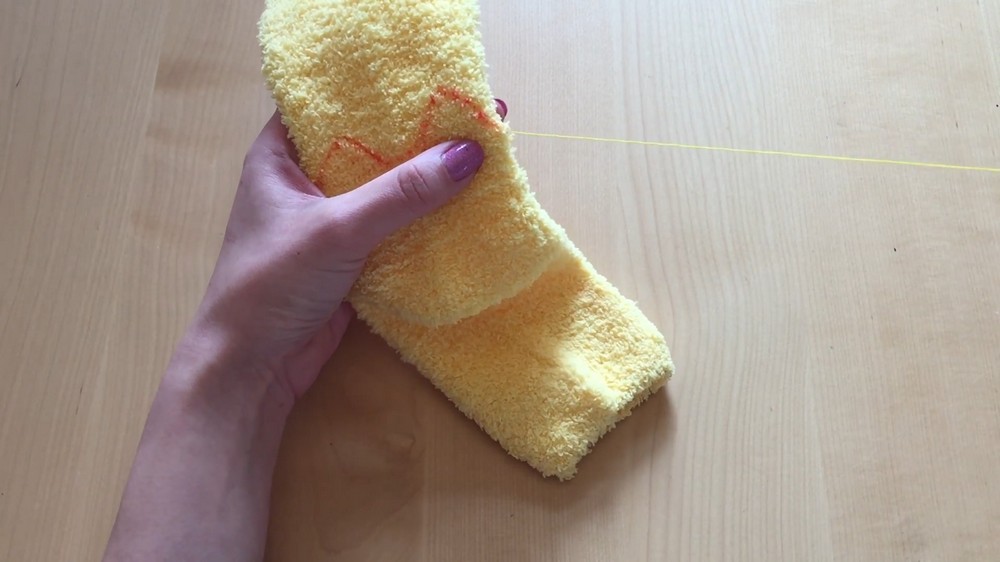
- Once the ear outlines are sewn, carefully cut away the excess fabric above the sewn lines.
- Flip the sock inside out so the sewn seams are inside.
- Adjust the ears so they pop out nicely and take shape.
Step 3: Stuff the Body
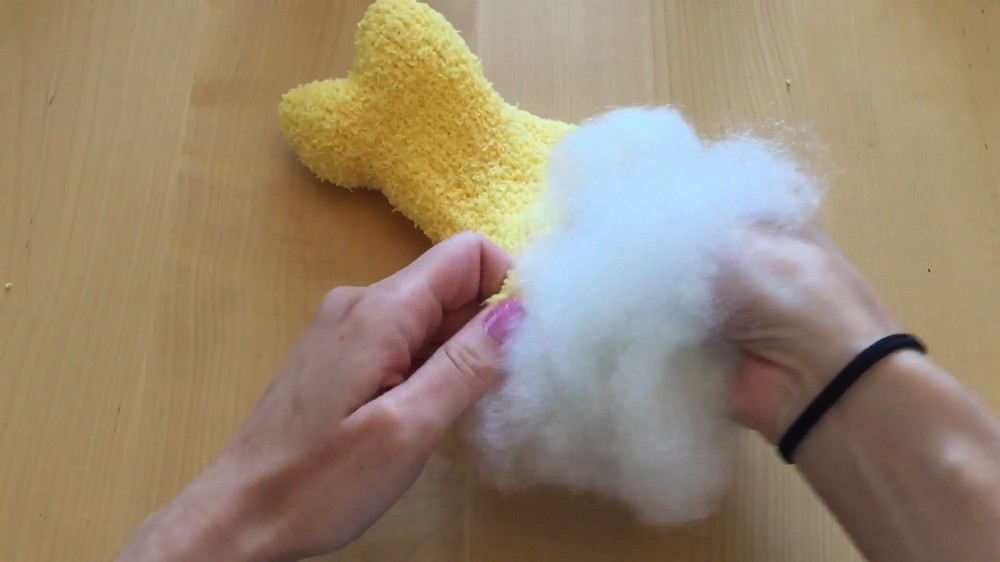
- Turn the sock right side out. Hold the open end and begin stuffing the sock with polyester filler.
- Be sure to push some stuffing into the ear areas to maintain their shape.
- Keep adding stuffing until the sock is plump and shaped like a round, chubby Pusheen body.
- Adjust the stuffing as needed to make the plush even and round.
Step 4: Close the Bottom
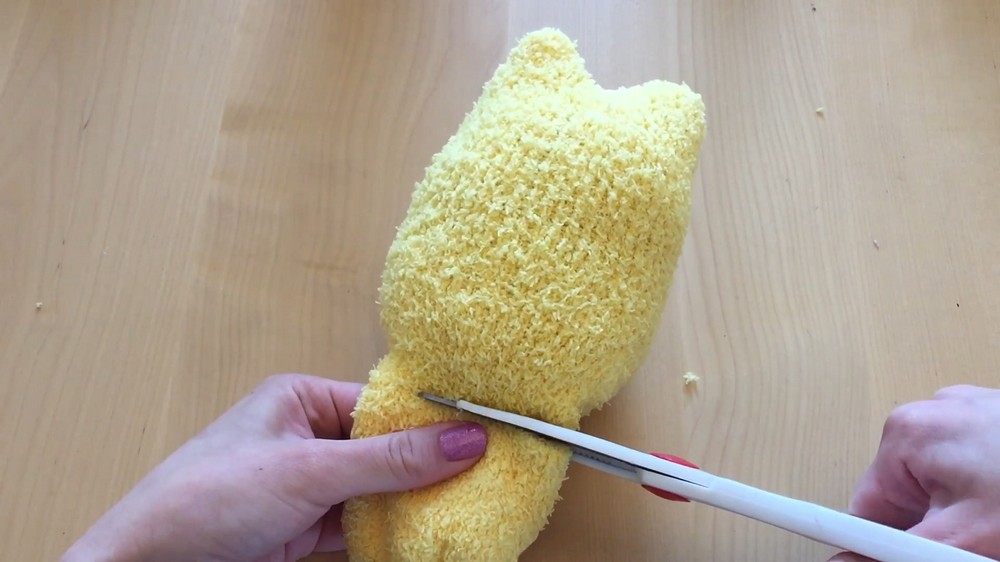
- Trim off any extra length of the sock at the open end.
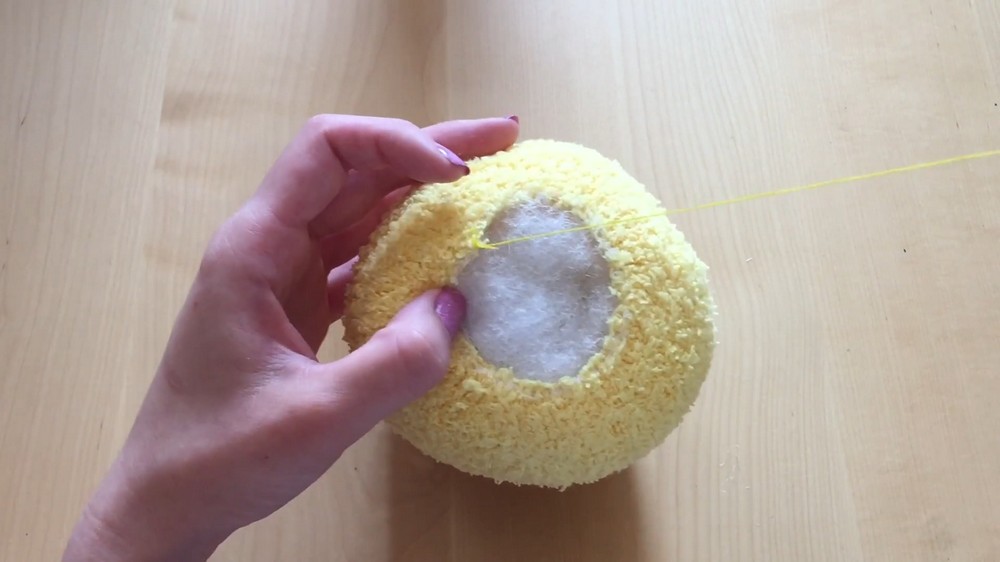
- Thread your needle with a long piece of thread.
- Sew a running stitch around the edge of the sock opening.
- Once the full edge is stitched, pull the thread to tighten it like a drawstring, closing the bottom.
- Tie the thread securely with a tight knot.
Step 5: Add the Facial Features
Eyes
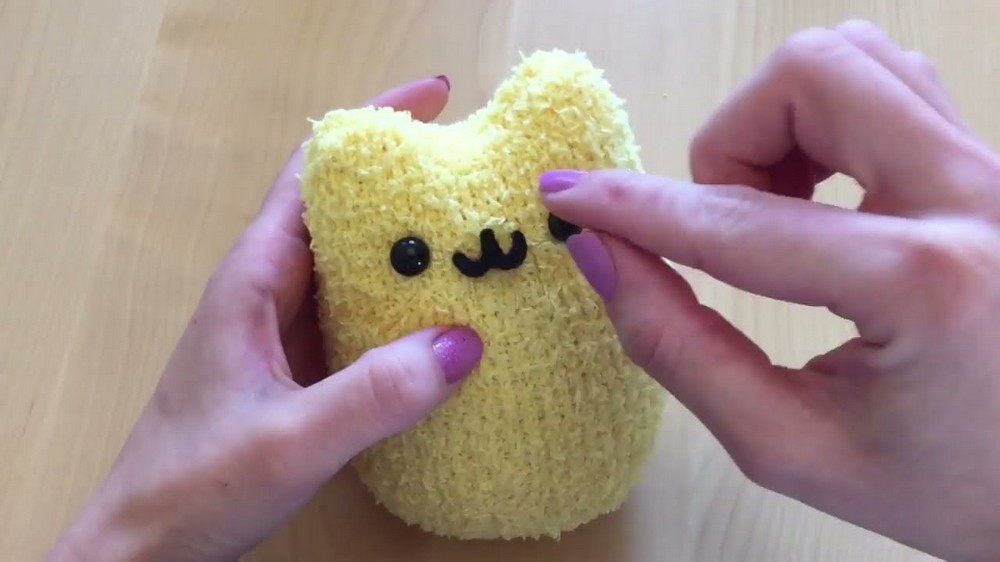
- Decide on the placement of the safety eyes.
- If you’re using safety eyes, poke a small hole in the sock fabric where needed or gently push the eyes through it.
- Firmly attach the safety eyes so they are secure.
Mouth
- Cut a small mouth shape from black felt.
- Use hot glue to stick it beneath the eyes.
Cheeks
- Cut two small red circles from red felt.
- Glue them on either side of the mouth for Pikachu’s signature cheeks.
Step 6: Add Back Details and Tail
Back Stripes
- Cut a few rounded rectangles from a piece of brown felt.
- Hot glue these to Pusheen Pikachu’s back to mimic Pikachu’s markings.
Tail
- Draw Pikachu’s zigzag tail shape onto a piece of yellow felt and cut it out.
- Cut a small stripe of brown felt and attach it to the tail’s tip using glue.
- Use hot glue or sew the tail to the back of the plush.
Step 7: Create the Arms and Feet
- Cut four small circles out of leftover sock material or felt. You’ll need two smaller ones for arms and two slightly larger ones for feet.
- Using a needle and thread, sew along the edge of each circle with a running stitch, forming a small pouch.
- Before closing the pouch completely, insert a small amount of stuffing, creating a ball shape.
- Pull the thread tight and tie a knot to seal the ball.
- Attach the arms near the front of Pusheen Pikachu and the feet at the bottom of the body using hot glue or a quick stitch.
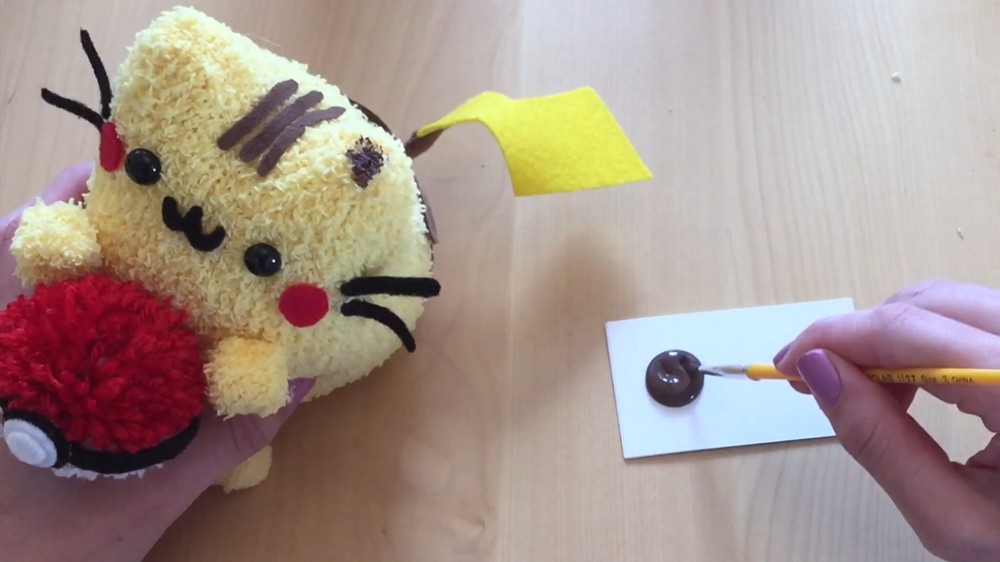
Step 8: Paint the Ear Tips
- Use brown fabric paint to carefully paint the tips of Pikachu’s ears.
- Let the paint dry completely before moving to the next step.
Step 9: Make the Pokeball Pom Pom
Wrap the Yarn
- Use an object like a small bottle, piece of cardboard, or your fingers to wrap white yarn around.
- Wrap the yarn 100 times.
- Slide the loops off the object and tie them in the middle with another piece of yarn.
Repeat with Red Yarn
- Repeat the same wrapping process with red yarn.
- Tie the red and white bundles together securely.
Trim and Shape
- Use sharp scissors to snip through all the looped ends of the yarn.
- Fluff the yarn to shape a ball. Rotate the pom pom while trimming to make it neat and even.
Step 10: Add Details to the Pokeball
- Cut a small circle from white felt to create the center button of the Pokeball.
- Cut a slightly larger black felt circle to frame the white circle. Glue them together.
- Cut a thin strip of black felt to create the Pokeball’s band. Glue this around the center of the pom pom.
- Glue the circular button where the black strip crosses the pom pom.
Step 11: Assemble the Plush
- Place the completed Pokeball pom pom in Pusheen Pikachu’s hands.
- Attach the plush’s arms to hold the pom pom in place using hot glue.
- Make sure the arms, feet, tail, and Pokeball are securely attached.
Final Adjustments
- Double-check that all parts are firmly glued or sewn to the plush.
- Trim any loose threads and fluff the stuffing.
- Allow any hot glue and fabric paint to fully dry before handling or displaying.
Your Pusheen Pikachu plush is now complete, featuring its iconic Pokeball and cute Pikachu-inspired design. Display it proudly or gift it to someone for a unique and handmade surprise. Keep crafting and let your creativity shine.