Cute cat themed gardening meets home decor in this DIY Pusheen Planter Pot making your indoor plants look stylish and playful on any shelf or desk
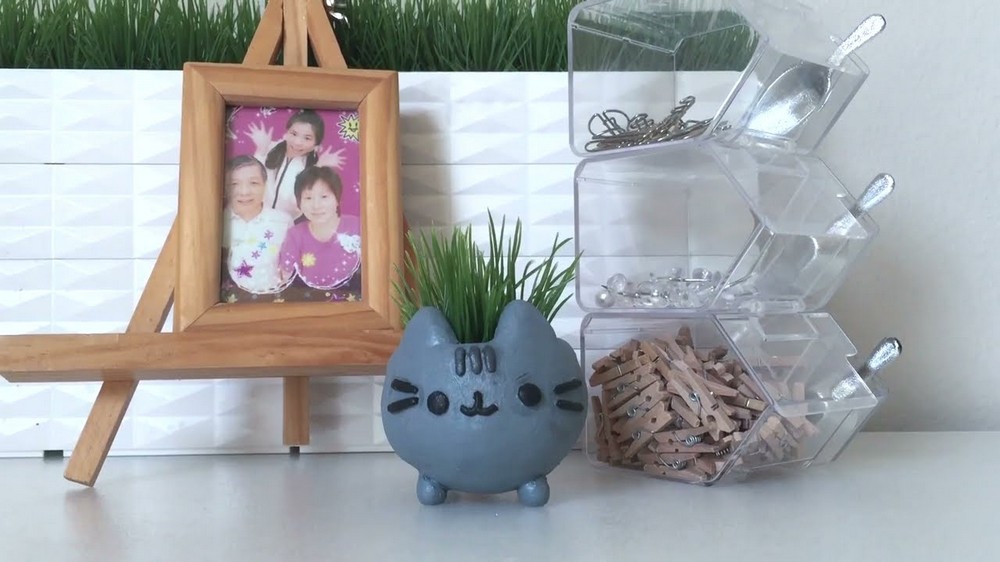
This whimsical planter pot perfectly merges function with fun through its playful design inspired by Pusheen, the beloved internet-famous cat. The DIY Pusheen Planter Pot stands out with its charming details, rounded ears, adorable whiskers, and signature cozy expression—making it a delightful addition to any home or workspace. Designed to hold small plants or succulents, this creative piece doubles as both a decor item and a functional planter, bringing personality and life to any corner of your space.
Adorable DIY Pusheen Planter Pot Idea for Cat Lovers
The creator behind this charming design is Flying Mio, a talented YouTube artist known for crafting miniature and creative designs inspired by cute characters and themes.
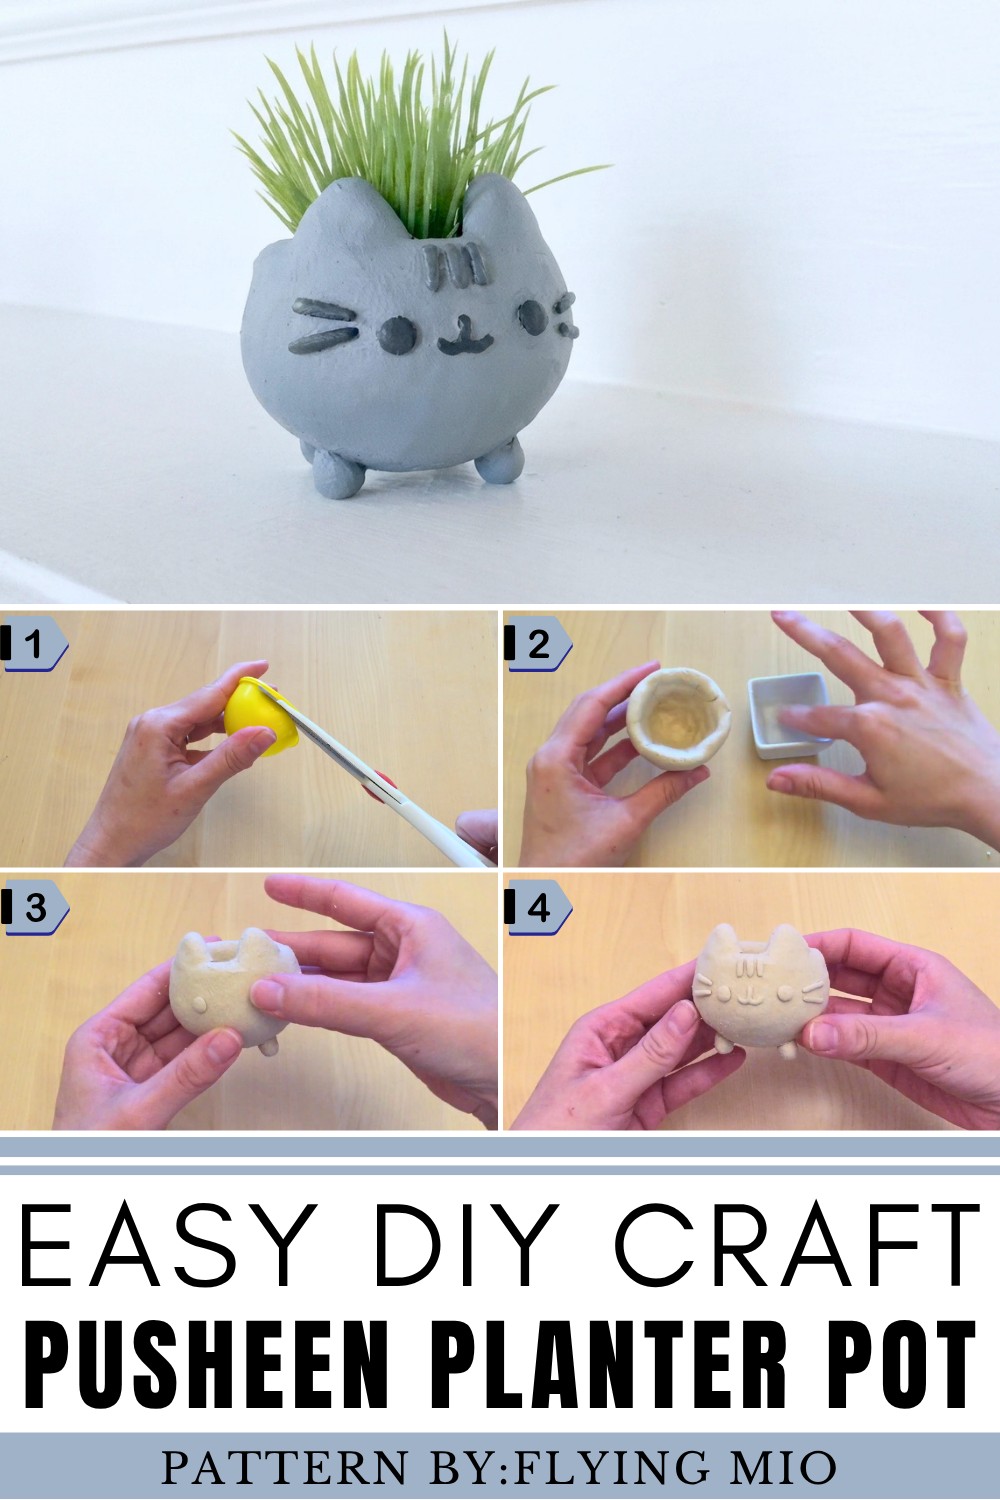
The soft, muted tones combined with Pusheen’s iconic features create a look that is effortlessly cute yet sophisticated. Whether placed on a desk, windowsill, or shelf, this planter adds a pop of character while showcasing your favorite greenery. Fans of Pusheen and those who appreciate lighthearted, modern designs will find this planter both irresistible and practical for elevating their indoor gardening game.
What makes this DIY Pusheen Planter Pot so interesting is its versatility—not only does it serve a practical purpose, but it also acts as a statement accessory for any room. Its playfully soothing design appeals to all ages, offering a unique way to express a love for plants and adorable characters in one creative item.
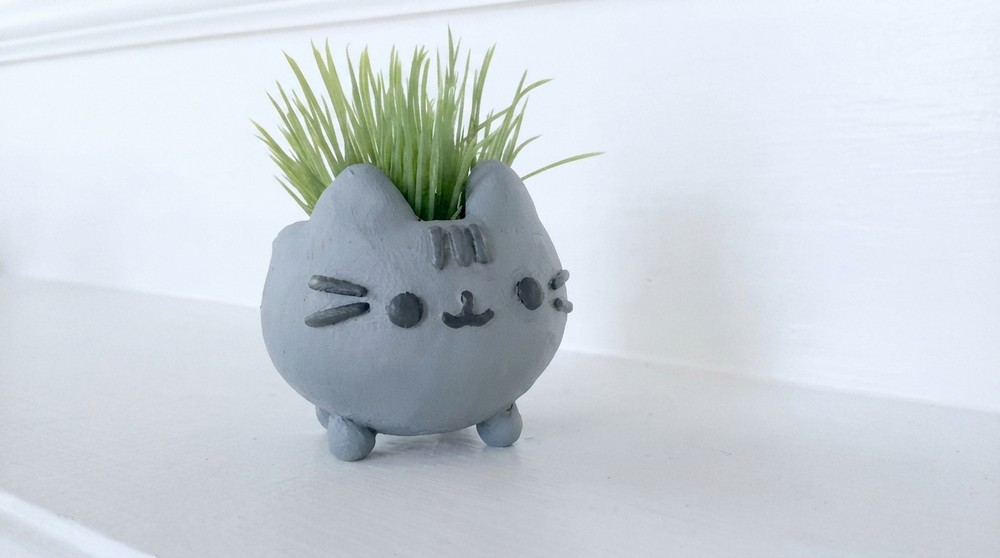
DIY Pusheen Planter Pot
Create a charming Pusheen-inspired planter pot that’s perfect for adding a touch of cuteness to your desk, home, or garden. Whether you use it for real plants or as a decorative display with faux greenery, this craft is simple, fun, and budget-friendly.
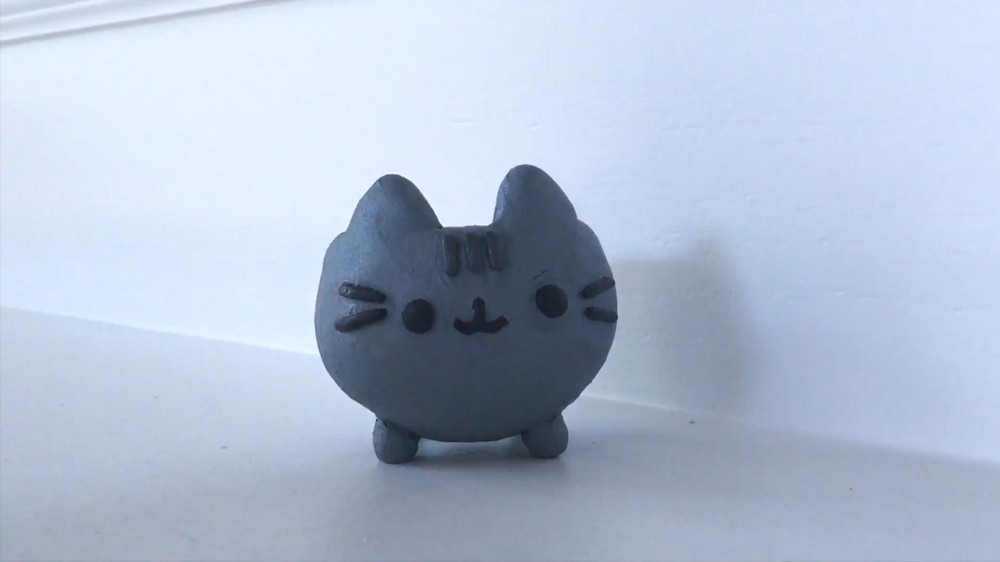
Materials You'll Need
- Air-drying clay (available at craft stores or online)—lightweight and easy to use.
- Plastic capsule base (from a toy vending machine or similar object for the pot’s structure).
- Water (to smooth edges and seams).
- Acrylic paints:
- Light gray (for the body).
- Black (for whiskers, mouth, and eyes).
- Dark gray (for stripes and detail).
- Paintbrushes (for painting details).
Optional:
- Fake plants or a small real plant (if you’re using this as a functional pot).
- Sealant if needed for waterproofing the planter pot.
Step-by-Step Instructions
Step 1: Prepare the Base
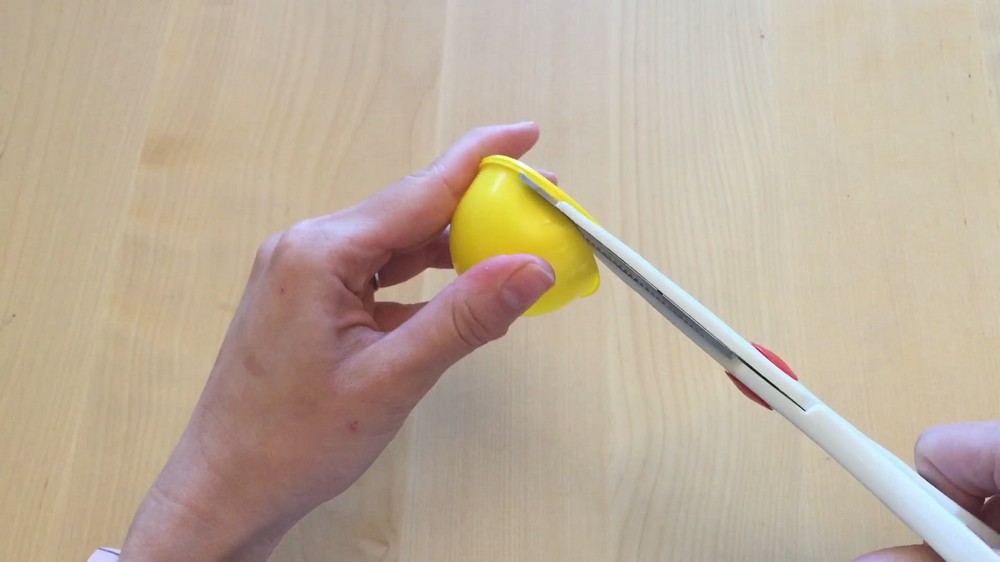
- Take the plastic base (such as the bottom of a toy capsule) to create the structure of the planter pot.
- If the capsule edge or rim is uneven, carefully trim it with scissors to make the surface smooth.
- You can skip trimming if it’s too difficult because the clay will cover it.
Step 2: Cover with Clay
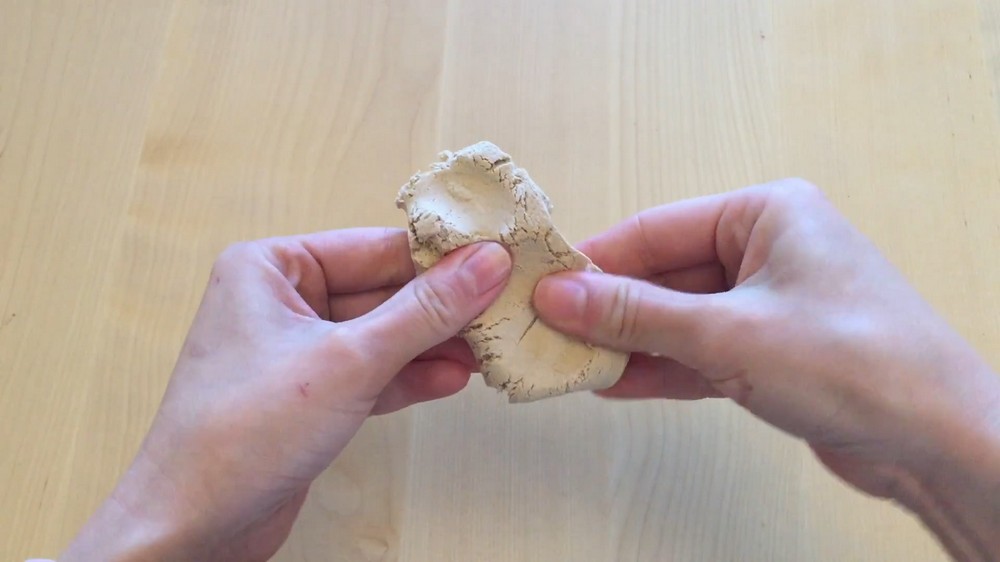
- Soften the Clay:
- Knead the air-drying clay in your hands until it’s soft and pliable.
- Wrap the Base:
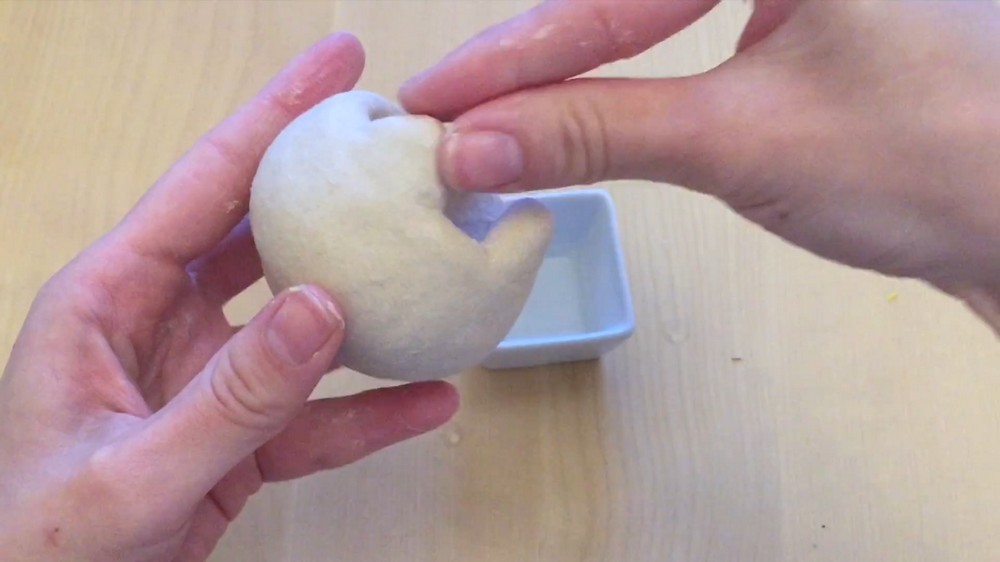
- Cover the outside of the plastic base with the clay completely. Use your hands or tools to ensure it is evenly spread around the surface.
- Cover the Inside (Optional):
- If you’re using a fake plant, you can also coat the inside of the capsule with clay for a more cohesive look.
- If you’re using a real plant, leave the inner surface uncovered to allow for proper drainage and easy use.
- Smooth the Surface:
- Use a small amount of water on your fingers to smooth out the surface of the clay. This will create a seamless and polished finish.
Step 3: Sculpt Pusheen’s Features
Ears
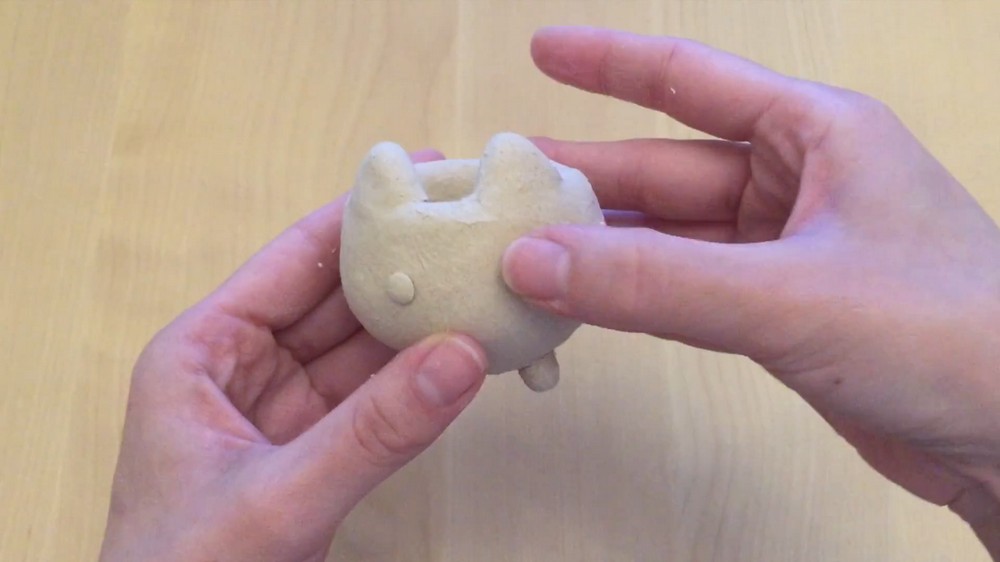
- Roll two small pieces of clay into triangles for the ears.
- Attach the ears to the top of the planter pot and blend the edges into the surface using a small amount of water.
Legs
- Roll tiny balls of clay for Pusheen’s legs, then shape them into small peg-like forms.
- Attach them to the bottom front of the planter to create a stable base. Use water to smooth the connection points.
Face (Optional: 3D Features)
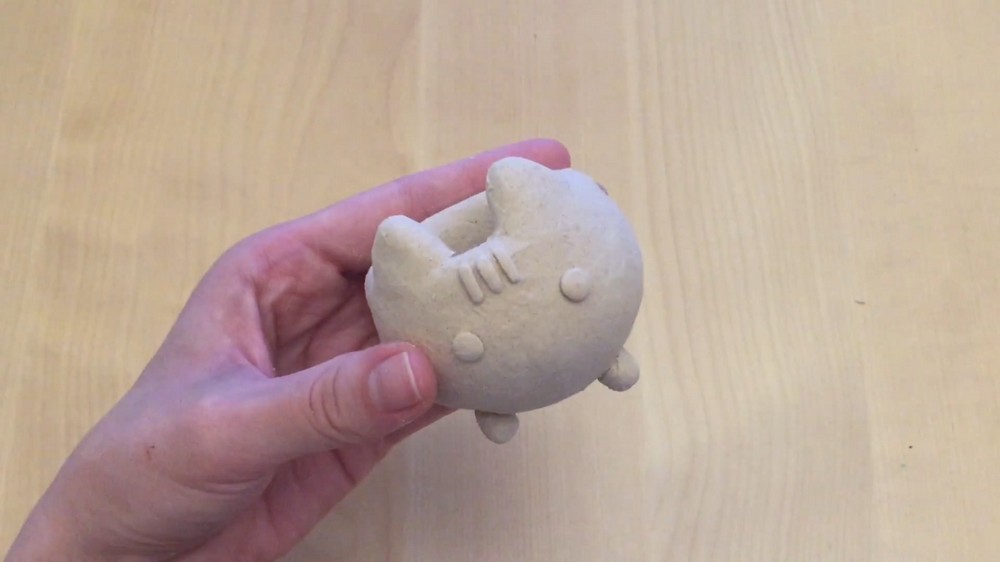
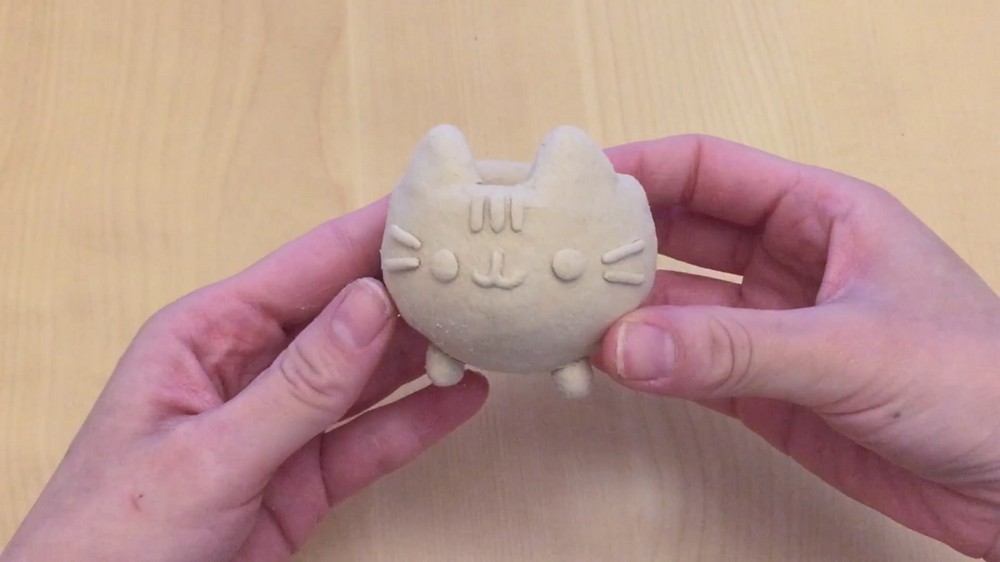
- For a 3D face, roll small pieces of clay and shape each element:
- Two tiny oval shapes for eyes.
- A small curved piece for the mouth.
- Thin strands of clay for whiskers.
- Attach the features to the front of the pot and adjust their placement to ensure symmetry.
Step 4: Let the Clay Dry
- Allow the clay planter pot to air-dry completely (this may take approximately 24–48 hours, depending on the brand of clay and humidity levels).
- Check the packaging instructions on your air-drying clay for the recommended drying time.
Step 5: Paint the Planter Pot
- Base Color:
- Paint the entire pot with light gray acrylic paint.
- Avoid using too much water in your paint, as air-drying clay can be sensitive to excessive moisture. Apply thin layers, allowing each one to dry before adding more.
- Details:
- Paint the eyes, whiskers, and mouth in black to mimic Pusheen’s facial features.
- Use dark gray paint for Pusheen’s signature stripes (one on the forehead and two on the back of her head).
- Adjust the details to your preference or replicate Pusheen’s original facial expression.
Step 6: Add Finishing Touches
- Seal Your Planter (Optional):
- If you’re using a real plant and want to water it, apply a waterproof sealant over the clay for durability.
- Decorate:
- Add either fake plants or a small live plant to your finished Pusheen planter pot.
Final Notes
Your Pusheen planter pot is now complete! It’s a cute and practical addition to your space and makes an adorable gift for any fan of this lovable feline. Whether you use it to hold plants, store stationery, or simply as a decoration, it’s sure to provide a cheerful touch to your home. Let your creativity flow by personalizing Pusheen’s look or trying out other cat-inspired designs.