Shape a funny game character with DIY Goomba Polymer Clay, featuring a rounded head, expressive eyes, and tiny feet for playful desk or shelf decoration.
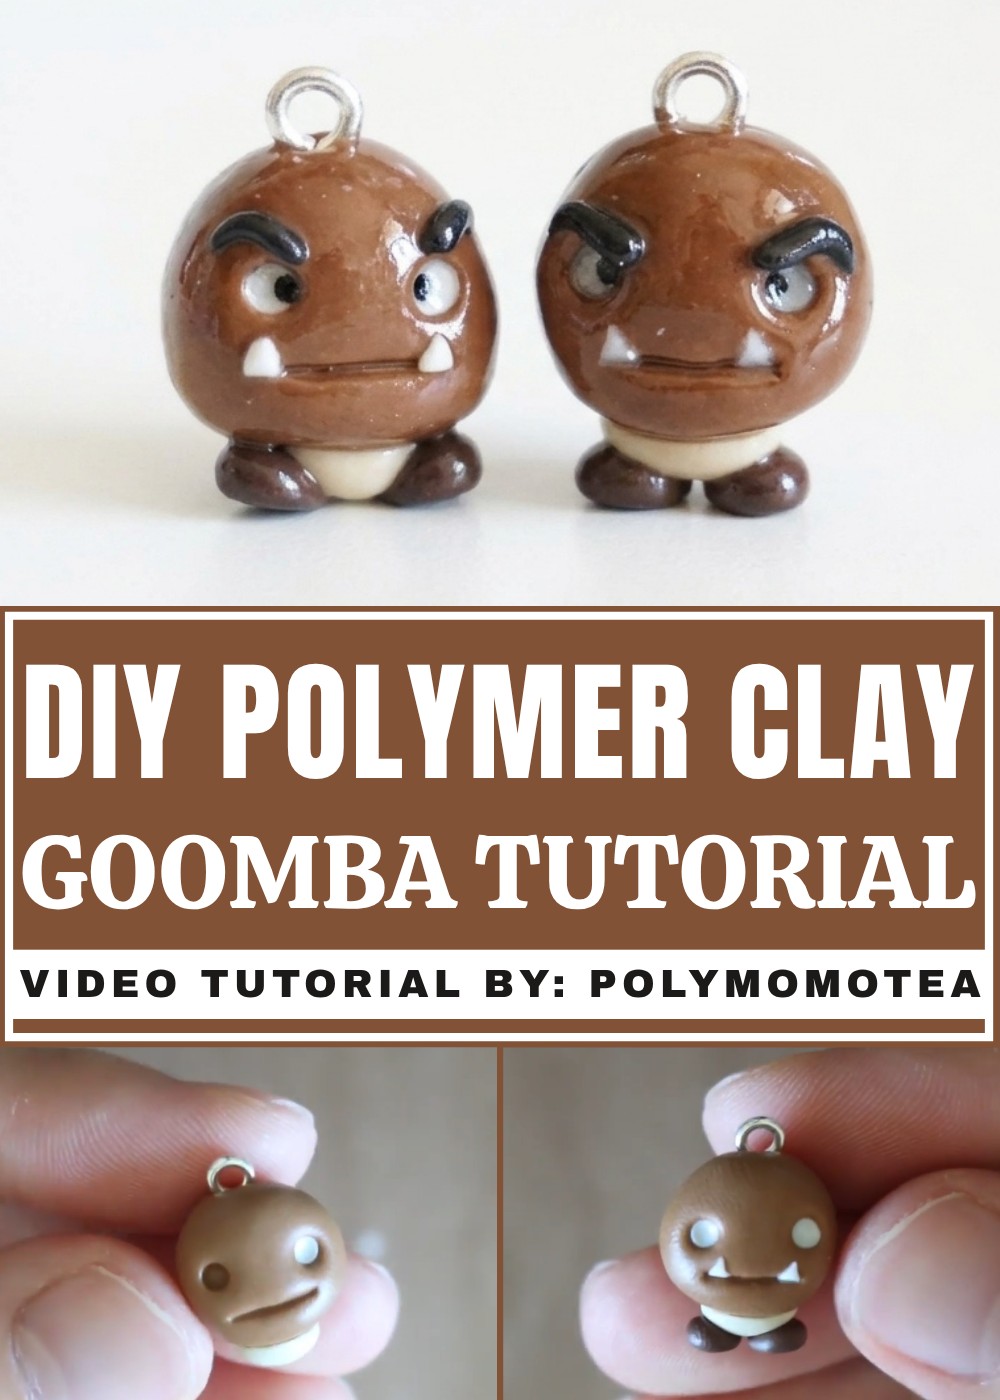
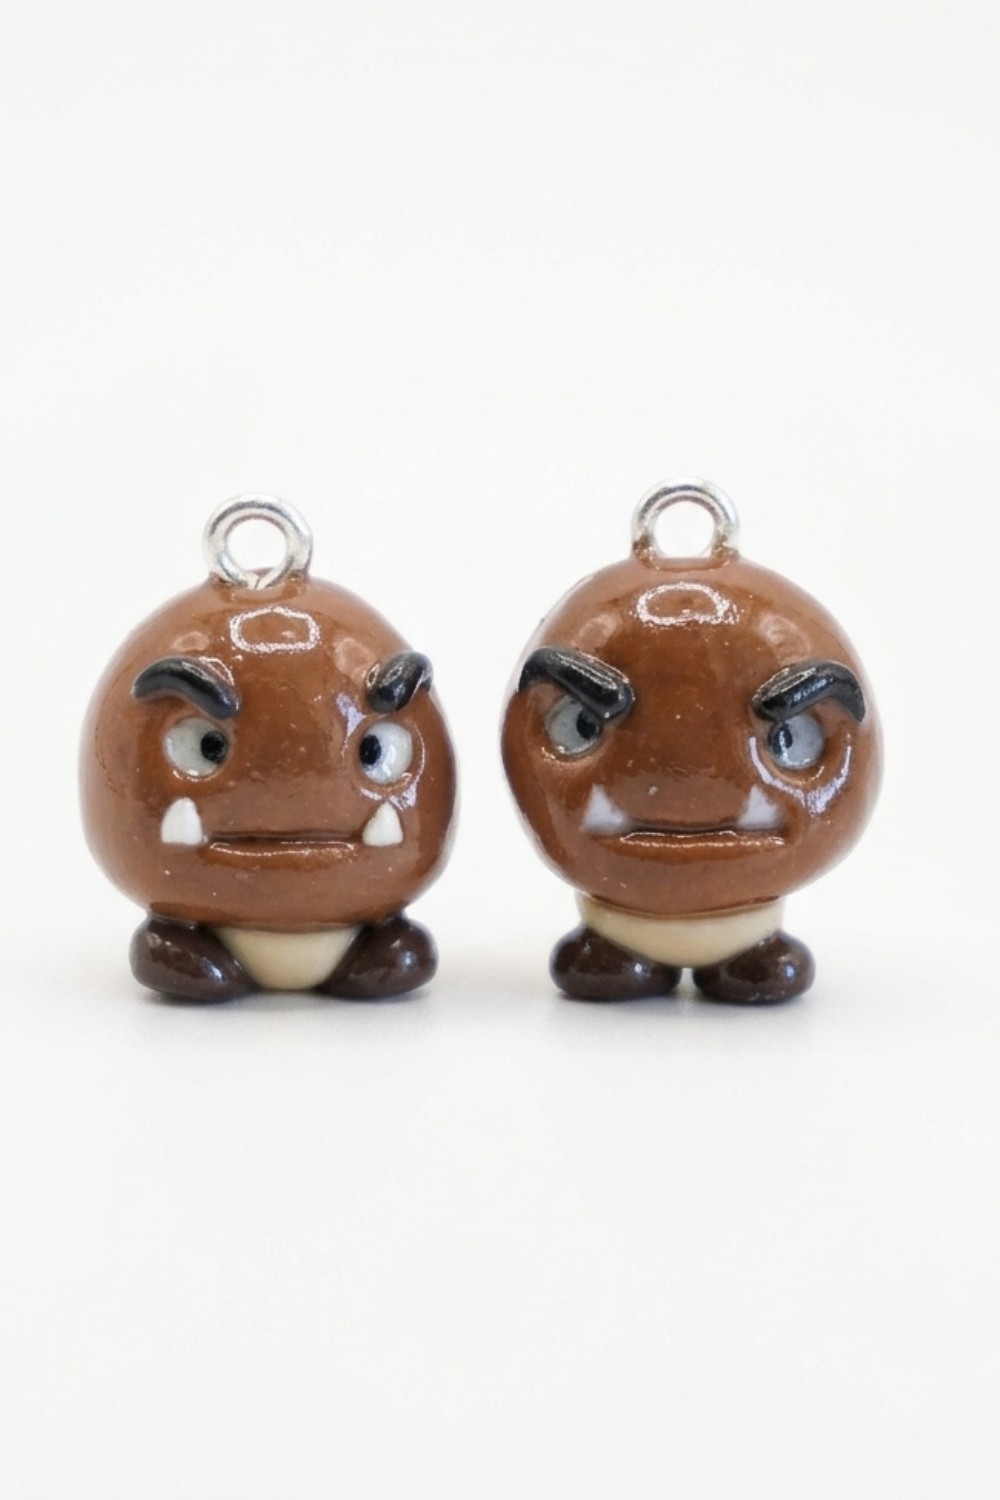
An empty corner of a gaming desk sometimes needs just one funny character to feel more personal. DIY Goomba Polymer Clay turns the familiar mushroom-shaped enemy into a small display piece with plenty of personality. Its rounded brown head, serious eyebrows, wide eyes, and little feet are the features that give this figure its recognizable look.
Gaming Shelf Decor: DIY Goomba Polymer Clay | Free DIY Ideas
The overall shape stays simple enough to keep the focus on the face. A smooth dome forms the upper part, while a shorter base helps the figure stand upright. Small pieces of clay can form the eyes, mouth, and feet. Careful shaping around the edges keeps each detail clear, especially the expression that makes Goomba so easy to recognize. A tidy finish also helps the brown and cream parts look neat beside each other.
Meet the Designer
Small characters have a special place on PolymomoTea, a channel known for playful polymer clay projects. The designer pays attention to expressive faces and recognizable shapes, keeping each subject lively. Game-inspired figures sit comfortably beside other miniature ideas, giving viewers plenty of charming subjects to admire and share with friends.
This character fits naturally beside game cases, a computer screen, or other small figures on a shelf. It could also be a thoughtful birthday surprise for someone who likes classic video games. The size can stay compact, so it does not take over the whole display.
Among Free DIY Ideas for game lovers, this project has a simple, cheerful appeal. The finished figure feels playful without needing complicated scenery. One small character can give an ordinary space a fun connection to a favorite gaming world.
How to Make Angry Goombas from Polymer Clay
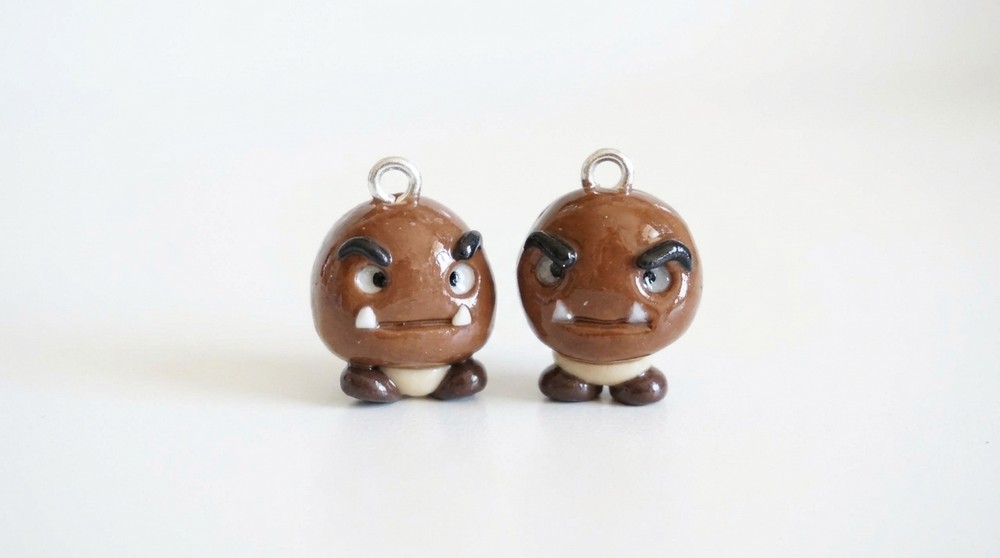
Your finished Goomba will be a small, mushroom-shaped figurine featuring an angry face with big eyes, sharp teeth, expressive eyebrows, and stumpy little feet. This project is ideal for beginners due to its basic shapes and straightforward assembly. You can customize your Goomba to use as a charm, a keychain, or simply a fun, decorative mini figure.
Materials and Tools
Before you begin, make sure you have all the necessary materials and tools. Each item was mentioned in the video tutorial and plays an important role in the sculpting process.
Materials
- Fimo Caramel Polymer Clay — for forming the main body of the Goomba.
- Fimo Sahara Polymer Clay — used for the base or stem underneath the body.
- Fimo Chocolate Polymer Clay — for sculpting the feet.
- White Polymer Clay — for making the teeth and the whites of the eyes.
- Black Polymer Clay — for the pupils and eyebrows.
- Eye Pin — optional, for making your Goomba into a charm or trinket.
Tools
- Dotting Tool — helps create perfect circular indents and smooth surfaces.
- Chisel Tool — useful for making sharp line indents, like the mouth.
- Cutting Tool or Blade — to cut out shapes and slices of clay.
- Oven — for baking and setting the polymer clay (follow your clay’s instructions for temperature and baking time).
- Glaze — optional, for giving your completed figure a professional, shiny finish.
Step-by-Step Instructions
Each step is designed for beginners, with clear actions and helpful tips for best results.
1. Sculpting the Goomba's Body
1.1. Shaping the Main Body
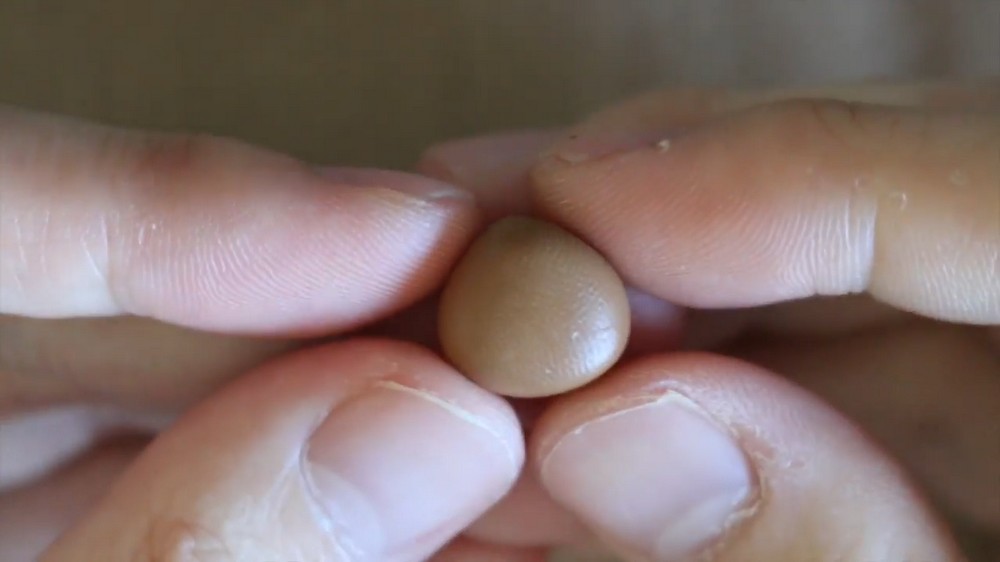
- Start with Fimo Caramel clay. Break off enough clay for a small figurine.
- Roll the clay into a smooth, even ball between your palms to remove any creases or cracks.
- Begin to form the basic triangle shape by pressing your fingers around the ball, pinching the bottom corners slightly and gently squishing the ball’s top to create a chubby, tapered shape.
- The result should be a fat, squat triangle—wider at the base and slightly rounded at the top, like Goomba’s iconic mushroom cap.
- Gently flatten the triangle just a little to create a slightly stable base, but don’t flatten it too much; you want the Goomba to look plump and three-dimensional.
2. Adding the Stem/Base
2.1. Creating the Cylinder
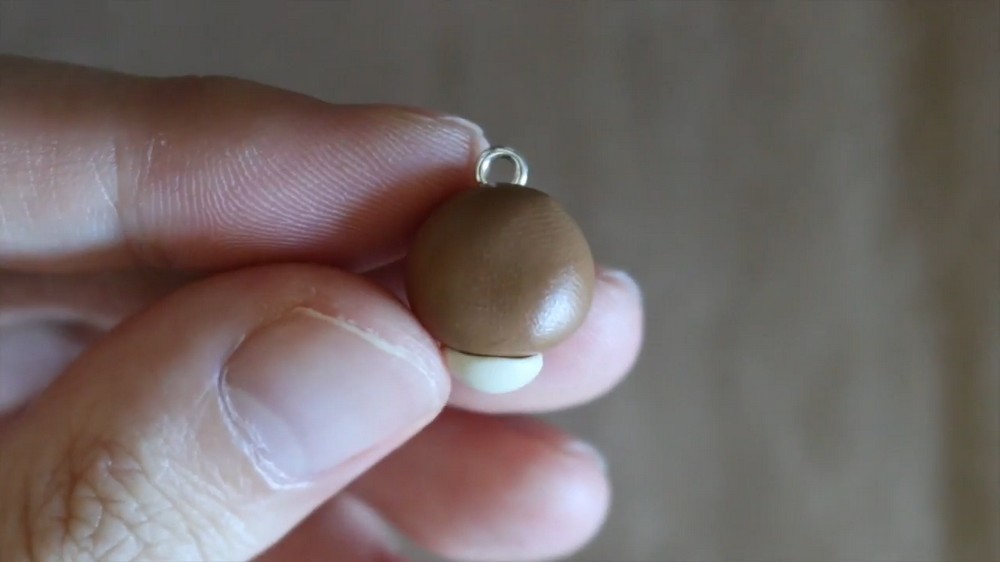
- Take a small amount of Fimo Sahara polymer clay.
- Roll it into a ball and then roll it back and forth on your work surface to turn it into a small, rounded cylinder or tube. This will be Goomba’s stem.
2.2. Preparing and Attaching the Base
- Using a cutting tool or blade, slice off just the very tip of the cylinder so that the end is flat.
- Gently press and blend the flat tip into the bottom of the triangle body shape, creating a seamless join where the “stem” meets the body.
- Smooth out any rough edges so the stem looks like a natural extension of the body.
3. Preparing for Assembly
3.1. Inserting the Eye Pin (Optional)
- If you want to hang your Goomba on a keychain or necklace, insert an eye pin into the center of the Goomba’s head.
- Push it down securely but not so far that it comes out of the bottom.
4. Sculpting the Goomba’s Face
4.1. Creating the Mouth
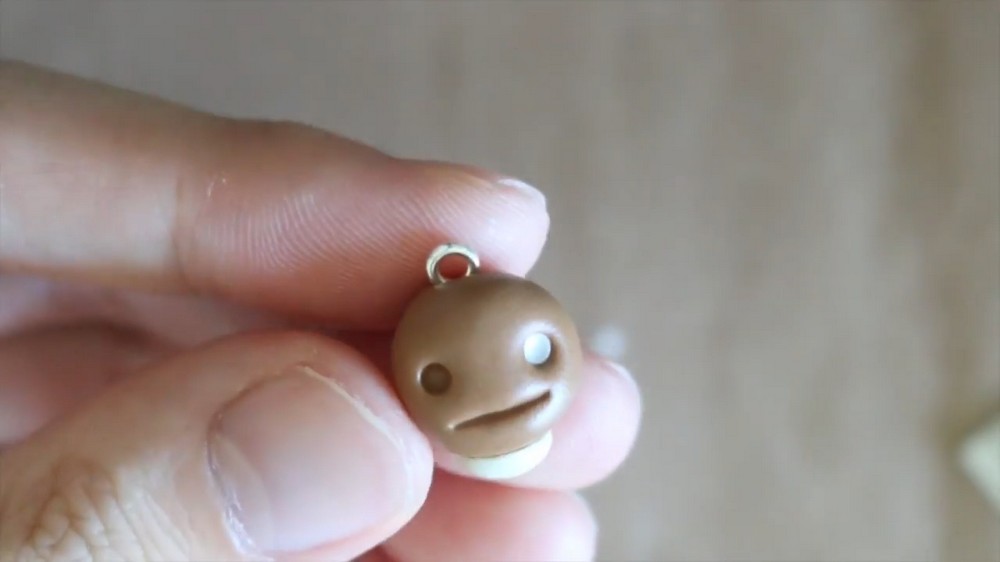
- Use a chisel tool or the thin end of a dotting tool to press a line indent across the lower front of the triangle body.
- Make sure the mouth is centered, and extend it wide enough to give Goomba a suitably angry expression.
4.2. Making Indents for the Eyes
- Take a large dotting tool or any small rounded object.
- Press two indents above the mouth, evenly spaced, for the eyes.
- Make sure the eyes are symmetrical and aligned horizontally.
5. Adding Goomba’s Teeth
5.1. Creating and Placing the Teeth
- Break off a small piece of white polymer clay.
- Roll it flat using your fingers or a smooth, round object like a pen barrel.
- Cut out two small triangles from the flattened clay—these will be the pointed teeth.
- Place one triangle onto each end of the mouth indent, press lightly so they adhere to the face. The pointed ends should face downward, resembling fangs.
- Make sure the teeth are secure but do not squish them completely flat.
6. Making the Eyes
6.1. Forming the Whites of the Eyes
- Roll two tiny balls of white clay.
- Place the balls into each eye indent, gently pressing them down and flattening them with a dotting tool so they fill the indents and become round, even eyes.
6.2. Adding the Pupils
- Take a very small amount of black clay and roll it into two tiny balls.
- Place one black ball onto the inner side of each white eye. The pupils should slightly face each other, making Goomba’s stare look intense and focused.
- Press each gently to stick them in place without distorting the eye shape.
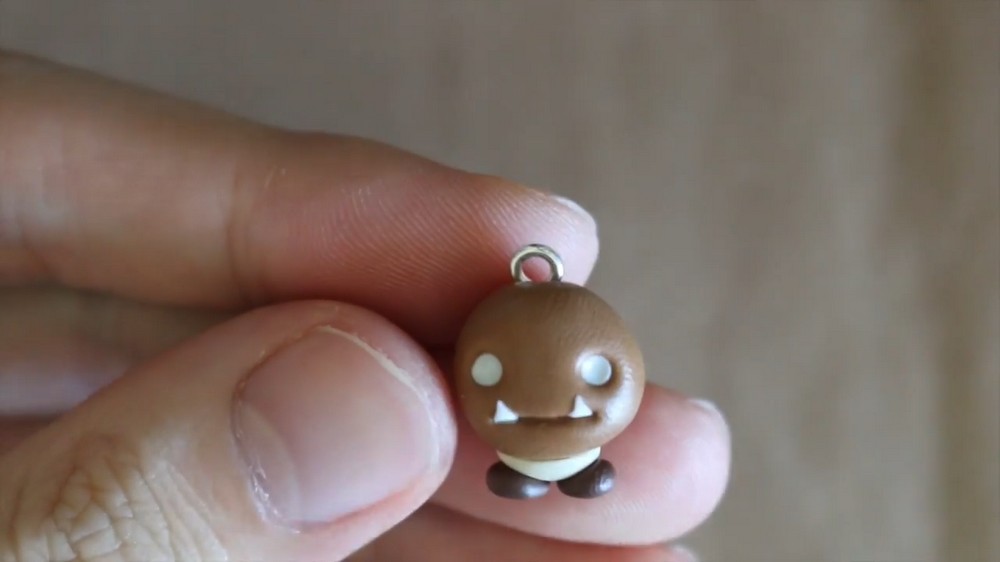
7. Attaching the Feet
7.1. Shaping and Attaching Goomba’s Feet
- Break off two small pieces of Fimo chocolate clay and roll each into a small ball.
- Shape each ball into an oval by gently rolling between your fingers.
- Slightly flatten the ovals so they become stout, blob-like feet.
- Attach each foot to the base of the triangle body, spacing them apart for balance.
- Press lightly to secure, ensuring the Goomba will stand upright.
8. Adding the Eyebrows
8.1. Sculpting Angry Eyebrows
- Take a small bit of black clay and roll it into a skinny, tapered cone shape.
- For each eyebrow, position the thicker end close to the inner corner of an eye.
- Arch the eyebrow so the thin end curves up and over, like a stretched “n” or a frown.
- Repeat for the other eyebrow.
- The eyebrows should have dramatic, angry curves that give character and emotion to your Goomba.
- Adjust as needed to make them symmetrical and expressive.
9. Baking and Finishing Touches
9.1. Baking the Goomba
- Carefully transfer your assembled Goomba to a baking tray lined with parchment or foil.
- Bake according to your polymer clay’s instructions (usually around 110–130°C or 230–266°F for Fimo, but always check your packaging). Baking time depends on the clay’s thickness, usually between 15–30 minutes.
- Let your Goomba cool completely before handling further.
9.2. Glazing the Figurine
- If you want your Goomba shiny and durable, apply a thin layer of glaze using a small paintbrush.
- Let the glaze dry thoroughly as per the manufacturer’s instructions.
Finished Goomba!
Your angry Goomba is now complete! Place your finished Goomba on display, use it as a charm by attaching a jump ring to the eye pin, or give it as a fun handmade gift. Every detail, from the triangle-shaped body to the expressive eyebrows, brings your Goomba to life.