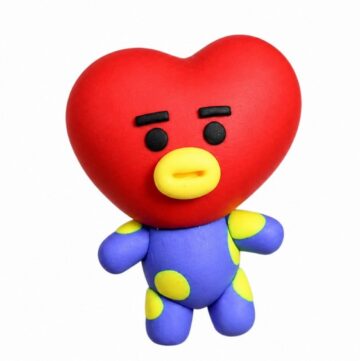
Shape a favorite character in bold colors with a sweet little face; DIY Polymer Clay Bt21 Mang looks right at home beside your albums and photo cards.
Favorite characters can give a small corner of a room a personal touch. DIY Polymer Clay Bt21 Mang is a fun option for fans who like character figures with a bold, cheerful appearance. Its compact size suits a display where a few special items are placed together.
Colorful DIY Polymer Clay Bt21 Mang for a Fan Display
Featured By: PolymomoTea
The focus here is on recognizable features rather than lots of extra decoration. Start by paying attention to the character's overall shape, face, and strong color areas. Form the larger clay sections first, then place smaller pieces where they help define the expression. Smooth connections keep the figure looking tidy. Checking a clear reference image can help the face and proportions stay close to the character people know. A steady hand is especially useful when adding tiny details.
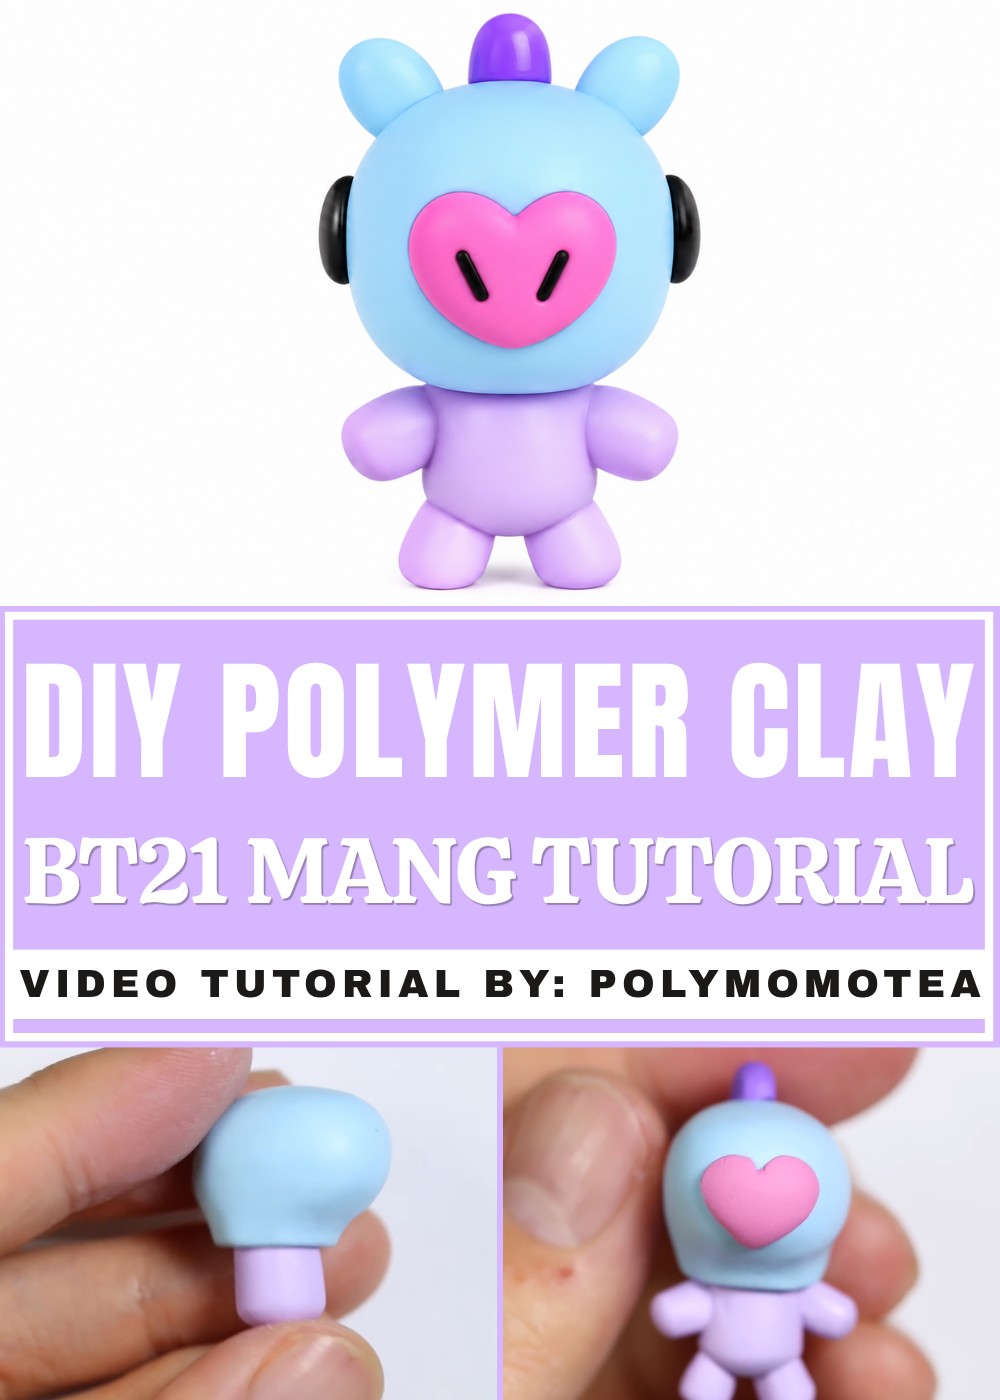
A finished figure can sit beside photo cards, albums, or other fan items. It may also be a thoughtful gift for a friend who follows BT21. For a neat display, a simple base can keep attention on the figure instead of the surroundings.
There is something satisfying about seeing a familiar character appear from separate pieces of clay. The bright look gives the display energy, while the small scale keeps it easy to place. Even a single figure can become the favorite item on a shelf.
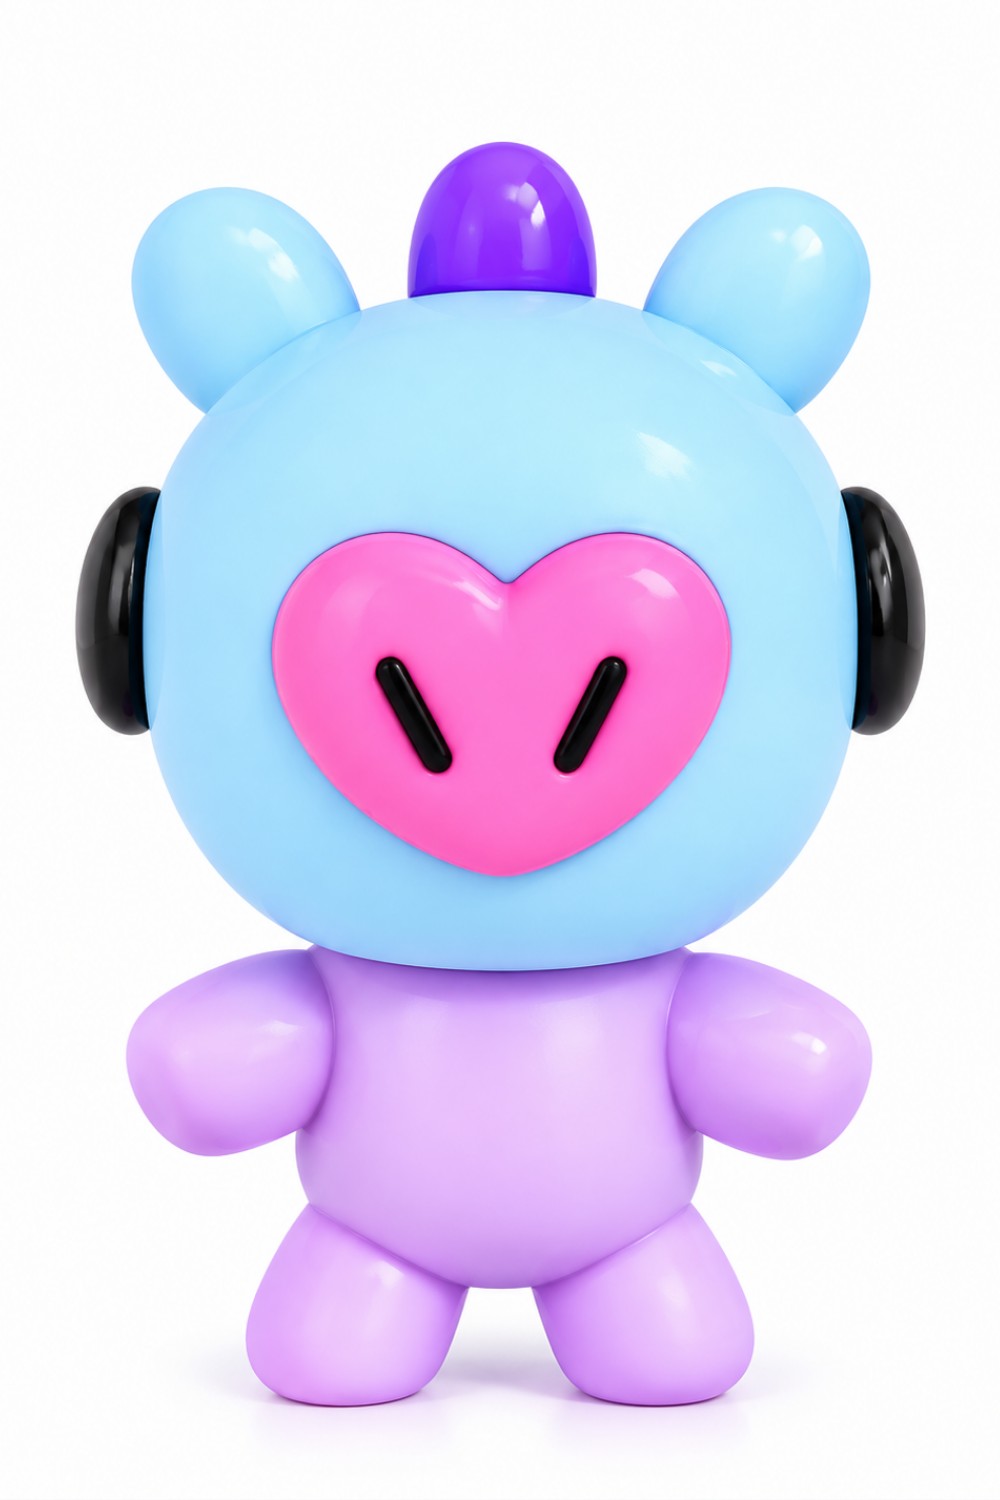
BT21 Mang (Masked Dancing Pony) Polymer Clay Pattern
Materials & Tools
Materials
- Blue polymer clay (for the mask/head and ears)
- Light purple polymer clay (for body, arms, legs, mane details)
- Pink polymer clay (for the heart-shaped nose)
- Black polymer clay (for eyes and nostrils)
- White polymer clay (for eyes)
Tools
- Clay blade or craft knife
- Round-ended tool (like the back of a Sharpie pen or marker)
- Sculpting tools (optional: to help with shaping, blending, and making indents)
- Rolling pin or acrylic rod (optional, for consistent shapes)
- Oven (to bake your creation, follow package instructions)
Step-by-Step Instructions
1. Make Mang’s Masked Head
- Shape the Mask:
- Take a ball of blue clay.
- Press/roll it into a cylinder shape.
- Use the back end of a Sharpie or similar item to gently press into one end of the cylinder, hollowing it out slightly to form the inside of the “mask.”
- Pinch the top of the mask so it has a shape similar to a golf club—this will help define where the “neck” is.
- Create the Neck:
- Pull down some clay at the pinched end to create a stub for the neck.
- Use your clay blade to trim off any extra clay from the neck so the base is flat.
- Remove Form:
- Carefully slide the Sharpie out.
- You should now have a hollow mask shape that looks like Mang’s face.
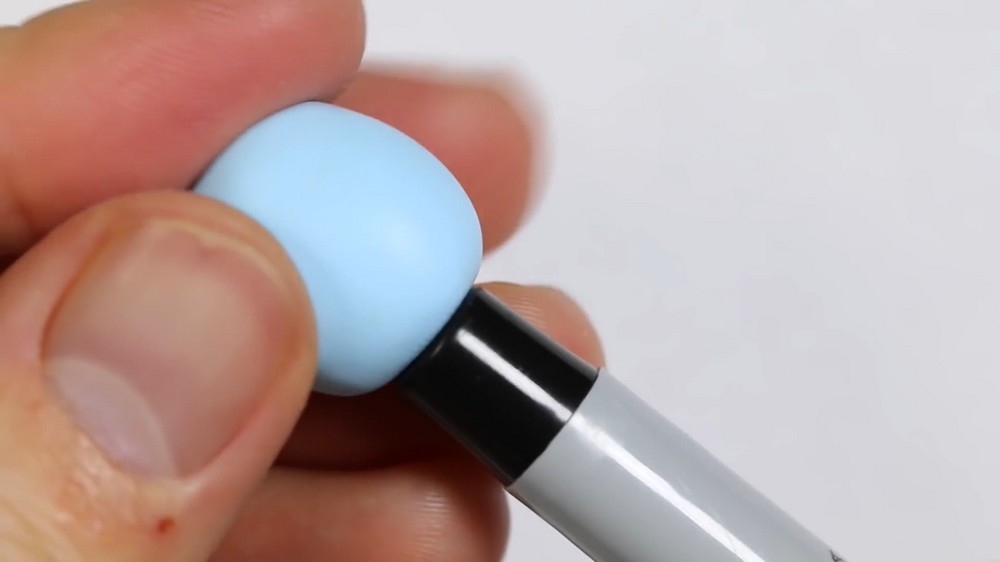
2. Make and Attach the Body
- Roll the Body:
- Take some light purple clay and roll it into a short, fat cylinder.
- Cut the ends flat with your blade.
- Attach:
- Fit the purple cylinder (body) into the hollow of the mask’s neck area so it connects securely.
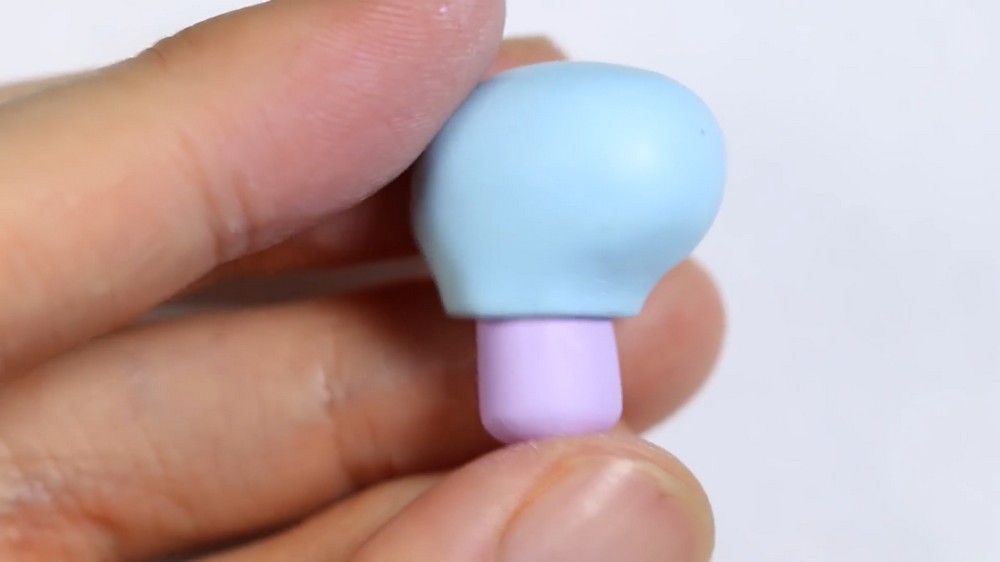
3. Add Mang’s Arms and Legs
- Roll Limbs:
- Roll four thin snakes from the same purple clay for arms and legs.
- Cut to size for each limb.
- Attach:
- Place two arms on the upper sides of the body and two legs at the bottom.
- Gently press and blend where needed for strength.
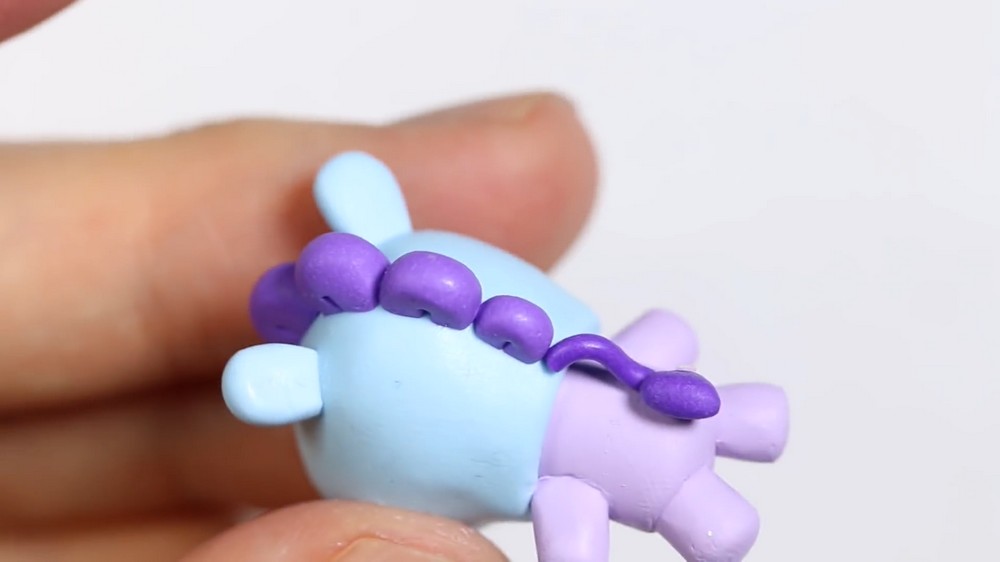
4. Add Tufts on the Mask
- Make Fur Tufts:
- Flatten a small ball of purple clay into a circle.
- Cut it in half to make two semi-circles.
- Make a small indent in the center of each with a tool or toothpick.
- Position:
- Place these tufts towards the back upper part of the mask.
- Make a few more, getting smaller as they go further back for a “mane” effect.
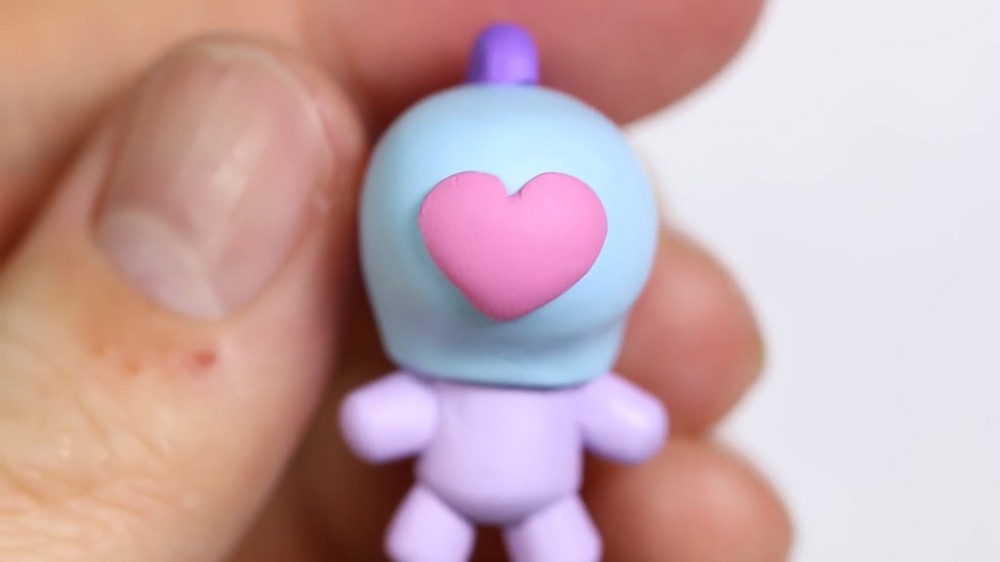
5. Create the Heart-Shaped Pink Nose
- Shape the Nose:
- Flatten a small ball of pink clay into a triangle and gently round each edge to form a heart.
- Use your blade to make a slight indent down the middle if you wish.
- Flatten and refine as needed.
- Place on Mask:
- Press the heart onto the center of the mask’s snout area.
6. Make the Ears
- Shape the Ears:
- Take small bits of blue clay.
- Pinch each into a teardrop shape and cut off the base for a flat edge.
- Attach:
- Place one ear on each upper side of the mask.
7. Create the Mane “Tail” Detail
- Mane:
- Make a teardrop from purple clay and blend it with a thin “snake” of the same color.
- Press or blend this at the bottom back of the mask for a whimsical, fluffy tail-like mane end.
8. Make the Eyes
- Layered Eyes:
- Flatten a small circle of black clay for the base.
- Add a slightly smaller flat circle of white on top.
- Add the smallest dot of black in the very center.
- Gently press the layers together.
- Attach Eyes:
- Place the completed eyes between the nose and ears, but a little closer to the ears.
9. Add Nostrils
- Nostrils:
- Roll two tiny snakes of black clay.
- Place them on the heart nose in a wide V shape to mimic nostrils.
10. Bake and Finish
- Bake:
- Bake your figure according to your polymer clay’s instructions (usually around 110–130°C / 230–265°F, 15–30 minutes).
- Let cool completely.
Tips & Explanations
- Blending: Use fingers, tools, or a small brush to blend clay seams for a smooth look.
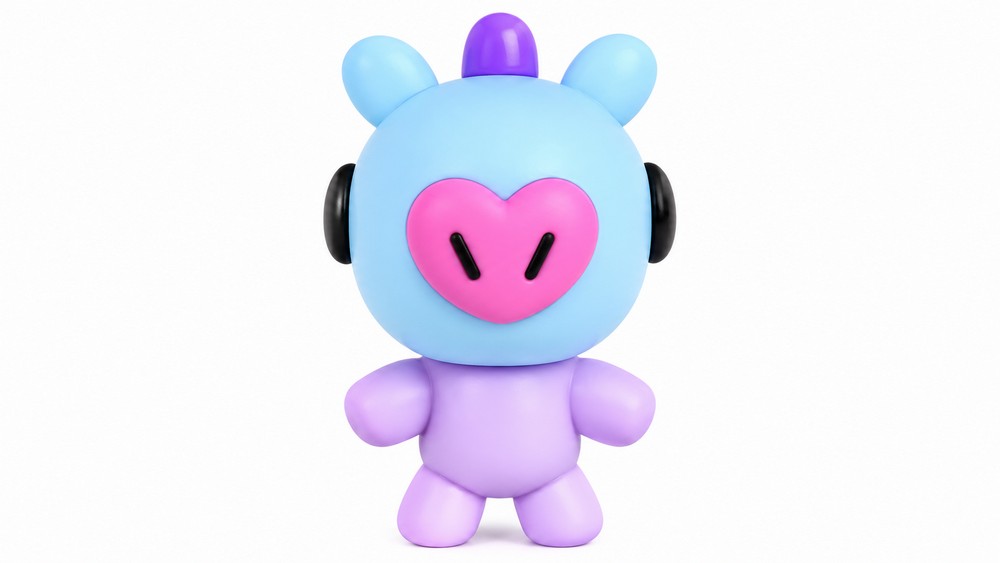
- Size: Keep each part in proportion—look at reference photos of Mang for color placement!
- Don’t stress about perfection: The slight differences give your Mang unique charm.
Display & Enjoy
Your own Mang (BT21’s masked dancing pony) is now complete!
Show it off, gift it, or keep crafting more BT21 friends.