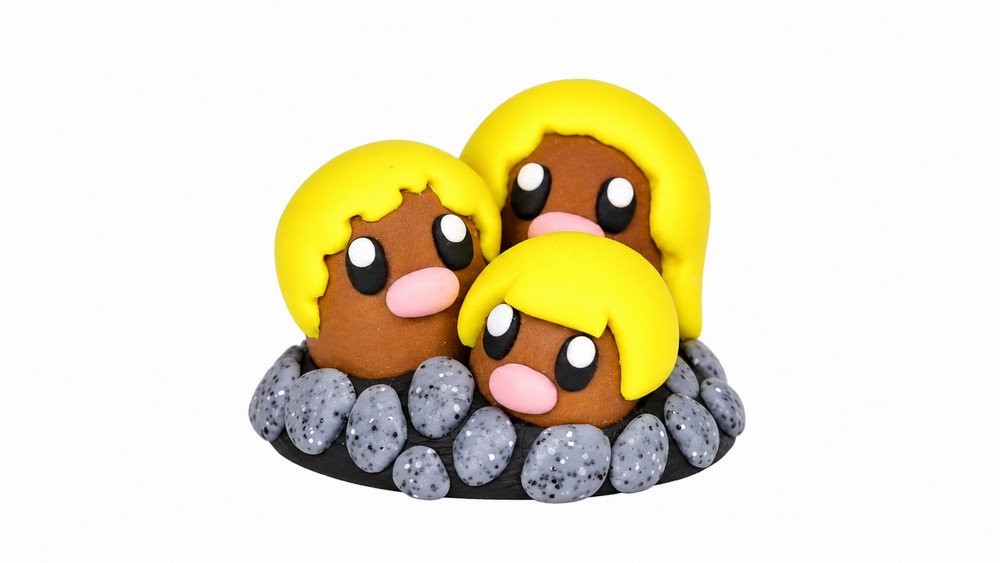
Shape a golden-haired trio with Polymer Clay Alola Dugtrio Pokemon, browse DIY Ideas for a funny little figure that gives your gaming shelf extra personality.
A favorite game character can turn an ordinary desk into a place full of personality. DIY Polymer Clay Alola Dugtrio Pokemon is a playful choice for anyone who likes small figures with funny details. This version of Dugtrio has three brown heads popping out of the ground, but the real stars are their long golden hairstyles. Each head can have its own hair shape, so the finished piece looks lively even when it stays still. Tiny eyes and pink noses give the faces their familiar expressions. A simple clay base helps the three heads stand together and keeps the group easy to display.
Free DIY Polymer Clay Alola Dugtrio Pokemon
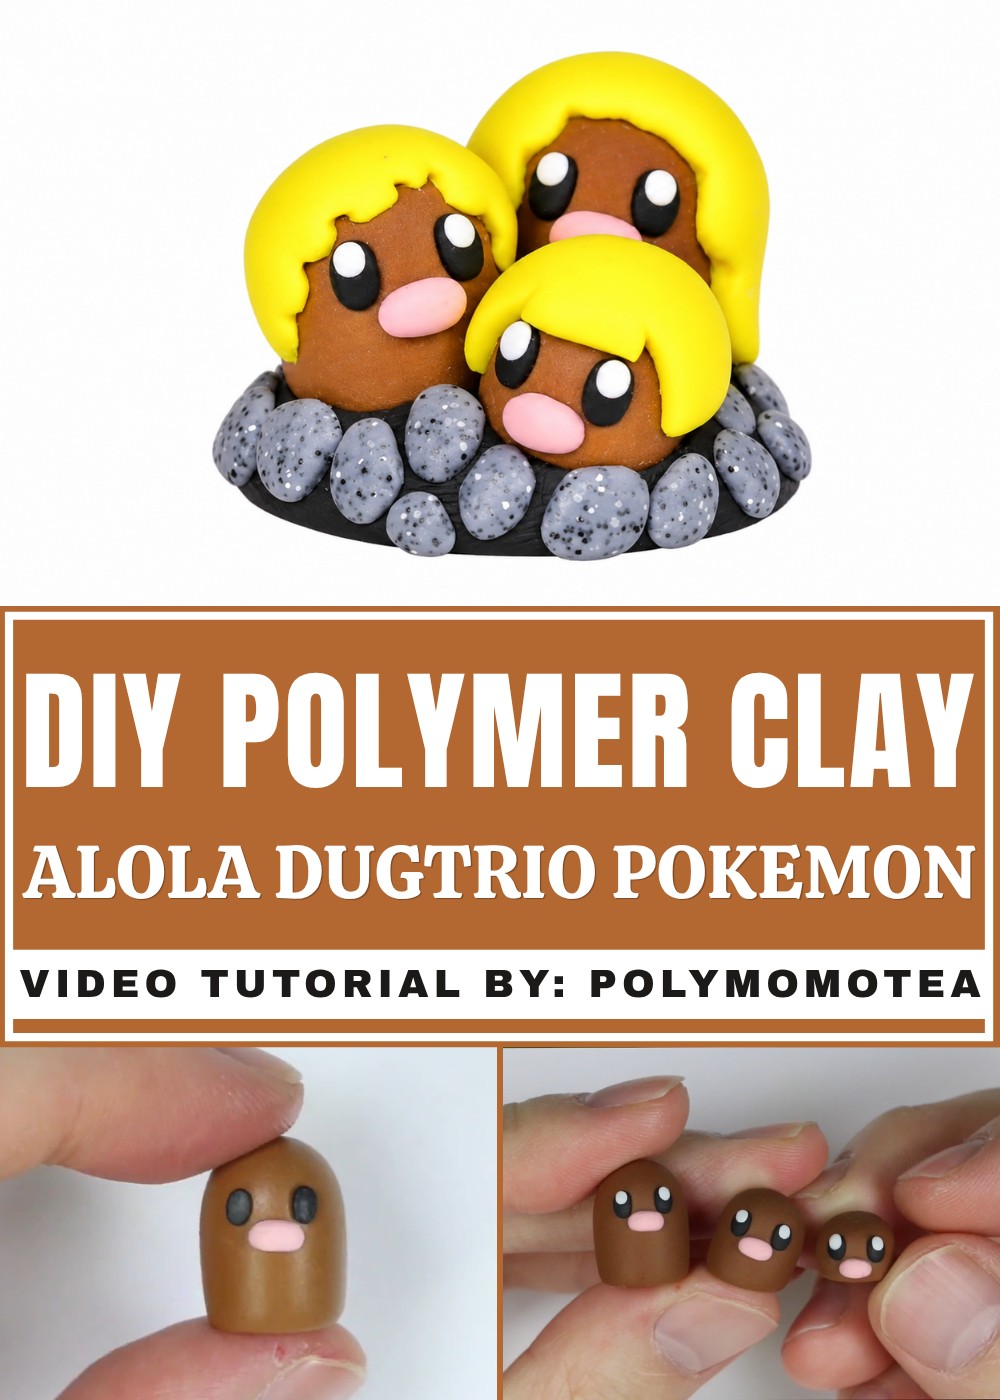
Start by shaping the heads in slightly different heights. Press them into a flat mound, then roll thin strands of yellow clay for the flowing hair. Gentle curves and separate strands help the hairstyles stand out. Take your time with the facial details, since small changes can give each head a different mood.
Among character-inspired DIY Ideas, this one has a great sense of humor. Place the finished figure beside a gaming setup, on a bookshelf, or near a collection of Pokémon items. It is also a thoughtful little present for someone who likes unusual game characters. The best part is that its fun look comes from a few simple shapes and some careful detail work.
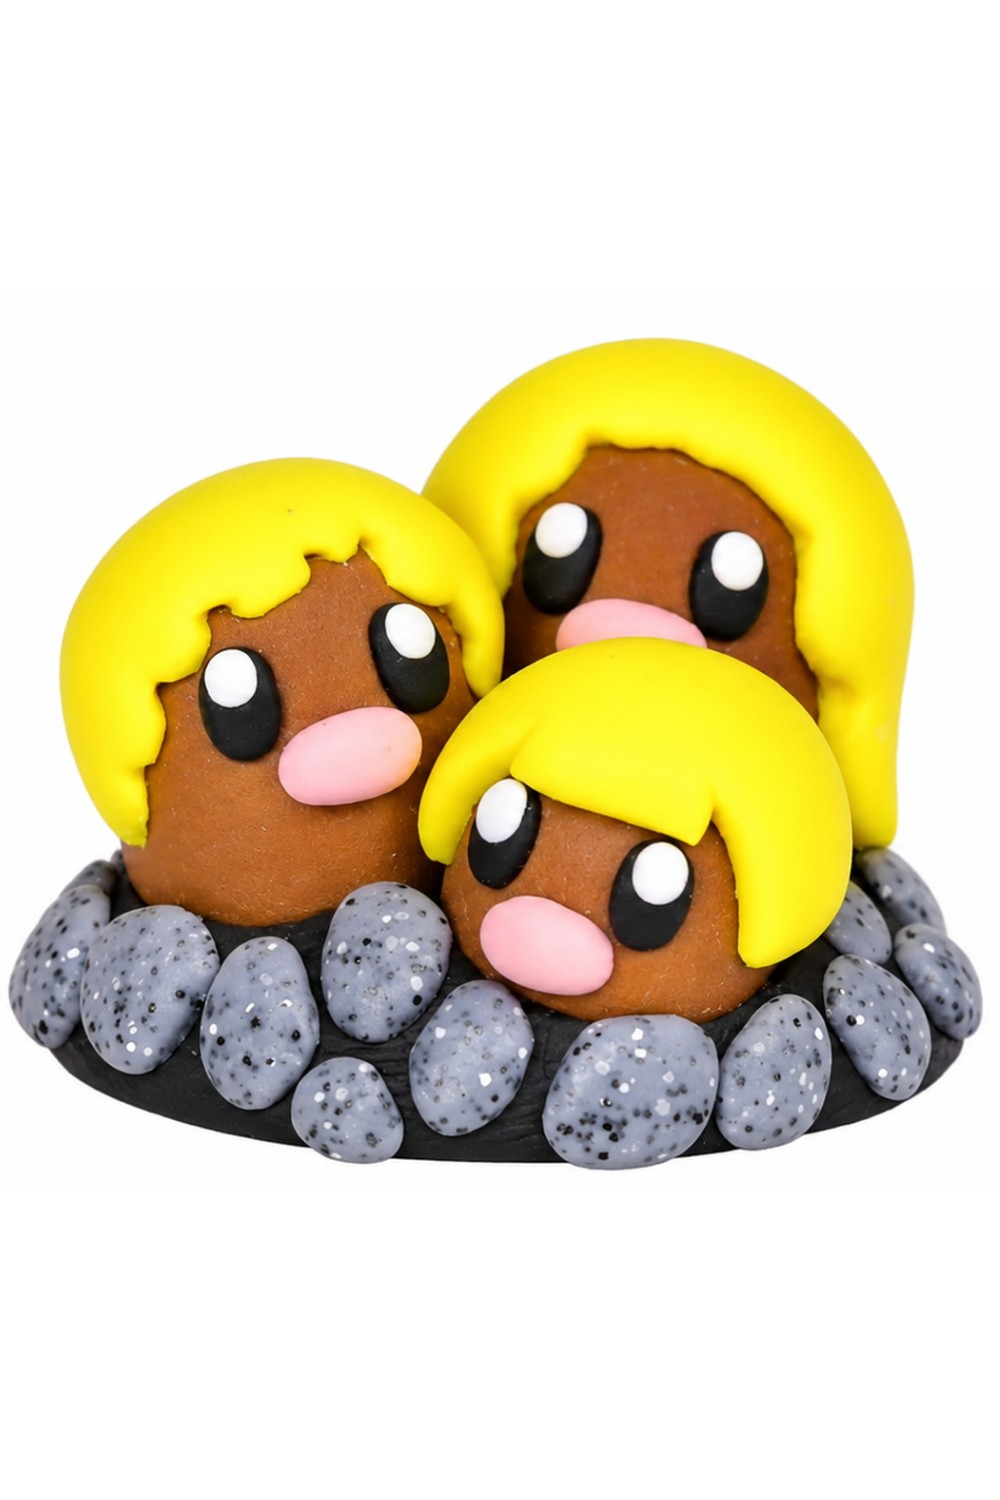
Alolan Dugtrio Polymer Clay Sculpture Pattern
This is a full-length, beginner-friendly sculpting tutorial for making Alolan Dugtrio—the fabulous, golden-haired "trio of Digletts" from Pokémon’s Alola region—out of polymer clay. Inspired by the fan-favorite with their iconic flowing blonde hair and expressive faces, this project will introduce you to a variety of clay techniques: shaping cylinders and ovals, combining basic forms, texturing, and assembling a dynamic group sculpture on a base.
Essential Materials & Tools
Materials
- Polymer Clay (such as Sculpey, Fimo, or Cernit) in these colors:
- Brown (for the Diglett heads)
- Pink (for the noses)
- Black (for the base and eyes)
- White (for eye highlights/shine)
- Yellow (for Alolan Dugtrio’s hair)
- Granite or Gray (for stones on the base—granite or marbled gray looks great for rocks!)
- Optional: Polymer clay glaze for sealing and extra shine.
Tools
- Craft knife or clay blade (for precise cutting and trimming)
- Dotting tool, needle, or toothpick (for details and texturing)
- Rolling pin or smooth bottle (for flattening clay)
- Baking tray (lined with parchment paper or a ceramic tile for baking)
- Clean workspace (glass or ceramic recommended, to keep clay dust-free)
- Oven (needed for baking polymer clay; do NOT use a microwave)
Step-by-Step Instructions
PART 1: MAKE THE DIGLETT HEADS
Step 1: Shape the Three Digletts
- Brown Clay:
Take your brown clay and condition (knead) it until soft. - Form Cylinders:
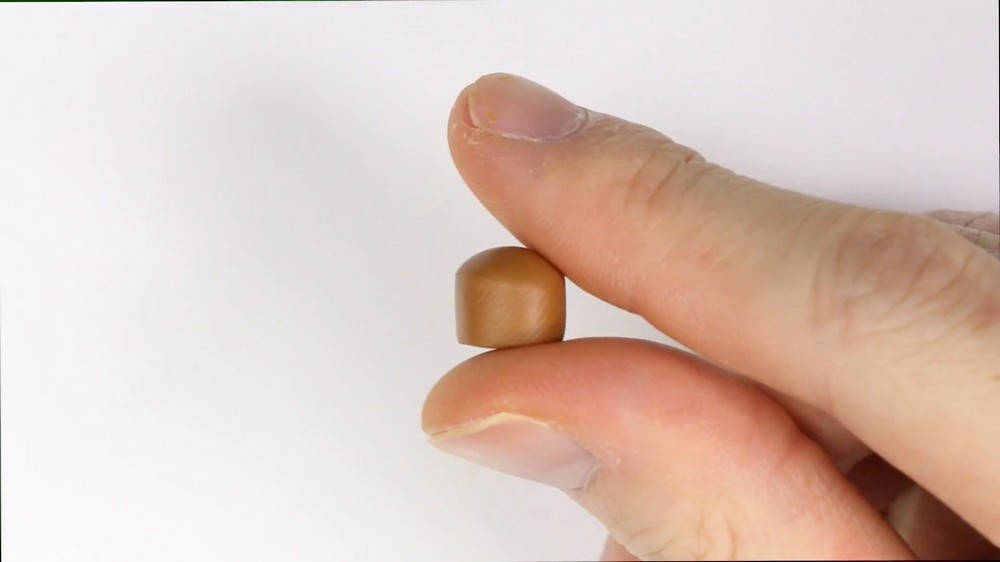
Roll three separate, fat, short cylinders. Each will become one Diglett "head." - Vary the Size:
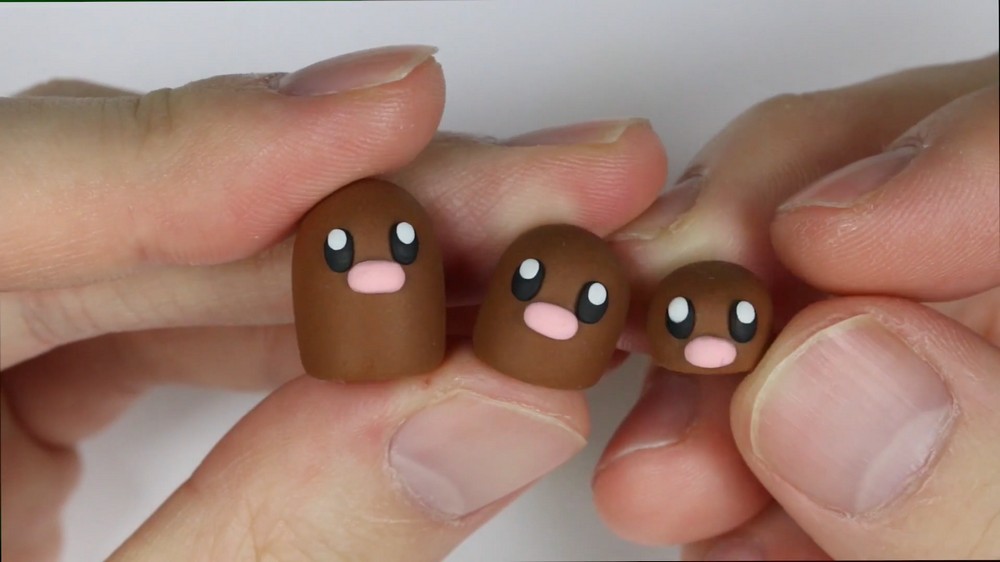
Make them three different heights—one short, one medium, one tall—just like Dugtrio. This gives your sculpture a dynamic, natural arrangement. - Cut Flat Bases:
Cut the bottom of each cylinder flat with your clay blade so they can stand securely and will stick well to your base later.
Tip:
Leave the tops rounded—not flat—for a cartoonish, cute Diglett look.
Step 2: Create and Attach the Noses
- Pink Clay:
Roll out a small snake of pink clay. - Cut Noses:
Slice the snake into three even pieces (about the same diameter as a pencil’s eraser, but feel free to adjust!). - Make Ovals:
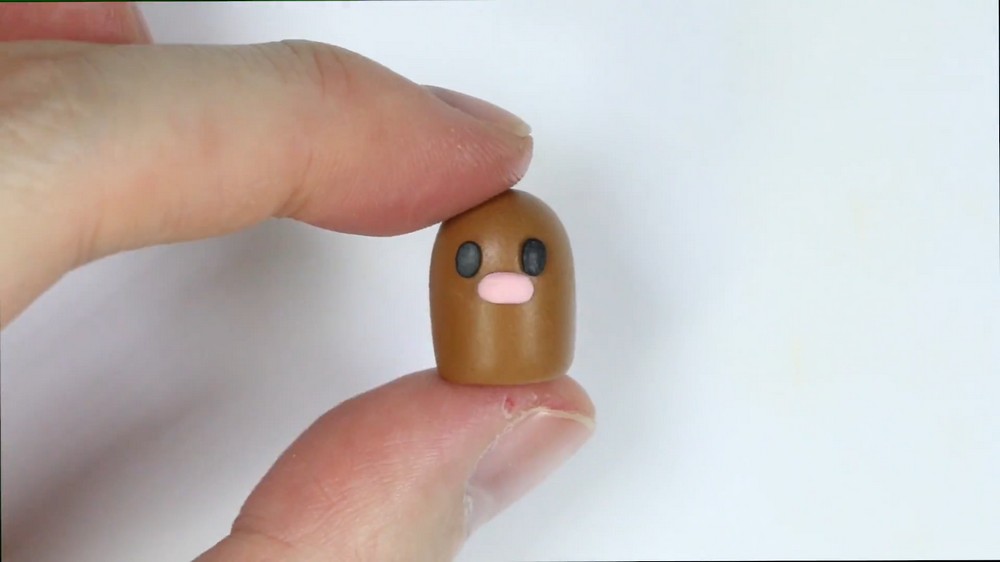
Slightly flatten each into a rounded oval, then press one onto the very front of each Diglett cylinder, slightly lower than center (Diglett noses are a little closer to the bottom of the face). - Blend:
Tap gently to secure, but don't lose the oval shape.
Step 3: Make and Attach the Eyes
- Black Clay:
Roll out tiny balls of black clay, flatten slightly to make oval shapes for the eyes. - Attach:
Place two eyes on each Diglett, slightly above the nose and spaced just a bit apart. - White Clay (Highlights):
Roll out miniscule balls of white clay (the size of pin-heads). Place one on each eye’s upper right or left to give that classic “shiny” cartoon look.
Tip:
Use a toothpick or dotting tool to pick up tiny bits of clay!
PART 2: MAKE THE FAMOUS ALOLAN DUGTRIO HAIR
Each of the three Digletts in Alolan Dugtrio has its own unique hairstyle—this is what makes them so special. Below are step-by-step instructions for making each style:
Step 4: Hair for the Smallest Diglett (The "Bowl Cut")
- Yellow Clay:
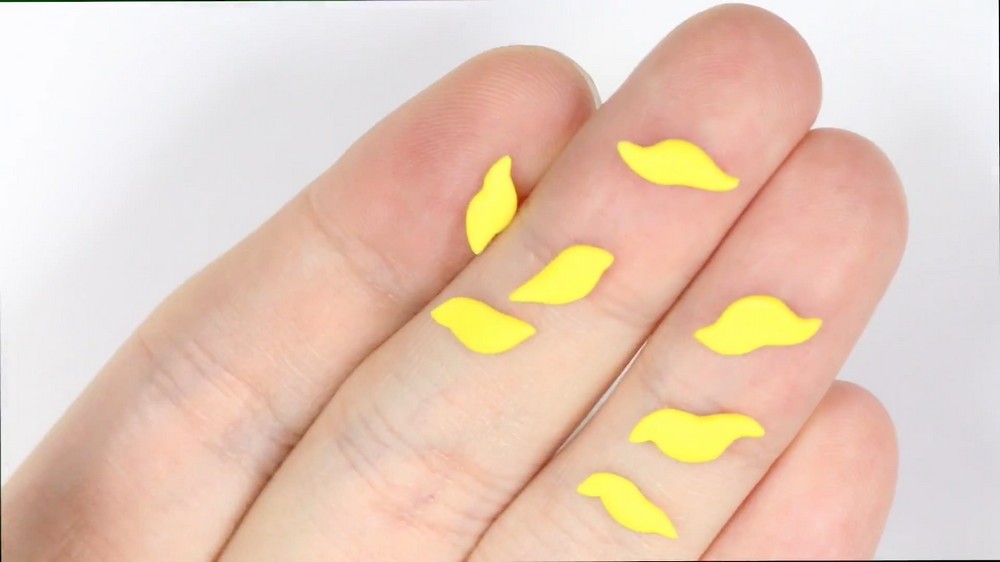
Condition and flatten out some yellow clay to about 2-3 mm thickness (like thick paper). - Trim Strips:
Use your blade to cut several square or rectangular strips from the flat sheet. - Bangs:
Take one strip to make the middle "bangs"—and position it at the center front-top of this Diglett. - Side Hair:
Wrap a strip around the Diglett’s head, encircling the bang you just added. Trim where the ends meet and gently blend them with your finger.
The result should look like a neat helmet of blonde hair! - Texture:
Use your craft knife or needle to gently press in some shallow lines, mimicking the strands.
Step 5: Hair for the Middle Diglett (The "Curly Curls")
- Yellow Clay:
Roll out multiple thin snakes of yellow clay, 2–3 mm thick, and cut to various lengths. - Form Curls:
Curl or spiral each strip gently with your fingers, then lightly flatten them. - Arrange Radiating Curls:
Starting from the center top of the Diglett’s head, press curls outward in a radiating, flower-petal pattern. Mix up the directions and lengths for a full, wild mane, just like Alolan Dugtrio. - Blend:
Blend at the scalp/roots for a natural look. - Dimension:
Use your dotting or needle tool to press in gentle “curl” indentations. This adds depth and makes the coils pop.
Step 6: Hair for the Tallest Diglett (The "Spiky Long Hair")
- Yellow Clay:
Roll out flat strips of yellow clay, about 1 cm wide and 3–4 cm long. - Cut to Shape:
Cut one end of each strip into a point. - Form Spikes/Curls:
Curl each strand slightly using your finger, but keep the shape elongated and not too curly. - Attach:
Press the flat base of each strand into the top of this tall Diglett’s head, letting the rest flow down and around its back, with the points sticking up or out. Vary the length and direction for a lively, wind-swept look.
Tip:
Overlap some strands for fullness, and use your tool to press in grooves for realism.
PART 3: ASSEMBLE THE BASE
Step 7: Make and Shape the Base
- Black Clay:
Condition and flatten black clay into a thick disc, about the size of your palm. - Flatten:
Use a rolling pin or your fingers to flatten the base evenly. - Smooth Edges:
Shape the edge with your fingers for a neat appearance.
Step 8: Add Rocks/Stone Details
- Granite or Gray Clay:
Roll small, irregular “pebbles” or “boulders.” Granite or a marbled gray clay makes these more realistic. - Attach to Base:
Place randomly around the black base, leaving space in the middle for the Diglett trio. - Press and Secure:
Press each stone into the base to make sure they stay put.
Optional: Use the needle tool to add surface textures to the rocks.
PART 4: FINAL ASSEMBLY
Step 9: Place Your Digletts on the Base
- Arrange:
Position your three Digletts in a cluster in the center of the base, with the tallest in back and the shorter ones in front or to the side. This gives the finished piece visual interest and depth, just like in the games! - Attach Firmly:
Press each Diglett gently into the clay base. If your clay is very soft, you can secure with a little "slip" (soft clay) at the base or after baking with a dot of glue. - Final Touches:
Adjust hair and stones for balance and effect.
PART 5: BAKING AND FINISHING
Step 10: Bake Your Sculpture
- Carefully move your assembled sculpture (on the tile or baking tray) into a preheated oven, following your brand of clay’s instructions:
- Most brands: 110°C–130°C (230°F–265°F) for 30 minutes for every ¼ inch (6mm) of thickness.
- Let it cool completely before handling.
Safety Tip:
Polymer clay should never be baked in a microwave.
Step 11: Add Details & Glaze (Optional)
- Extra Highlights:
Use acrylic paint for highlights or shadows if desired, or to clean up facial details. - Glossy Finish:
For a shiny, durable finish, brush on a thin layer of polymer clay glaze or varnish once fully cool. Let dry as instructed.
Tips
- Condition All Clay Well:
Kneading clay until soft prevents cracks and makes details easier. - Color Cleanliness:
Wash hands or wipe tools between color changes, especially from yellow to brown/black to prevent staining. - Scaling Up or Down:
You can make your Dugtrio larger or smaller—just keep all parts in proportion. - Details:
Hair is where you can have the most fun—make it as wavy, curly, or wild as you like! - Base Variations:
Add tiny flowers, more rocks, sand (buff clay), or even a tiny pokeball for extra scene detail.
Conclusion
You’ve created your own adorable, stylish, and iconic Alolan Dugtrio out of polymer clay. With three expressive Diglett heads, unique golden hairstyles, and a natural base setting, your sculpture is a great addition to any Pokémon, clay, or figure collection.