Style your desk like a little ocean story with a sweet kitty face, curling tail, and sea colors in DIY Polymer Clay Cat Mermaid Mug, a charming pencil holder.
Ordinary household items can feel more personal when a little imagination goes into their decoration. DIY Polymer Clay Cat Mermaid Mug mixes a sweet animal theme with a playful sea-inspired look. The result can be both a colorful display piece and a reminder of favorite fantasy stories.
Featured By: PolymomoTea
Dreamy DIY Polymer Clay Cat Mermaid Mug
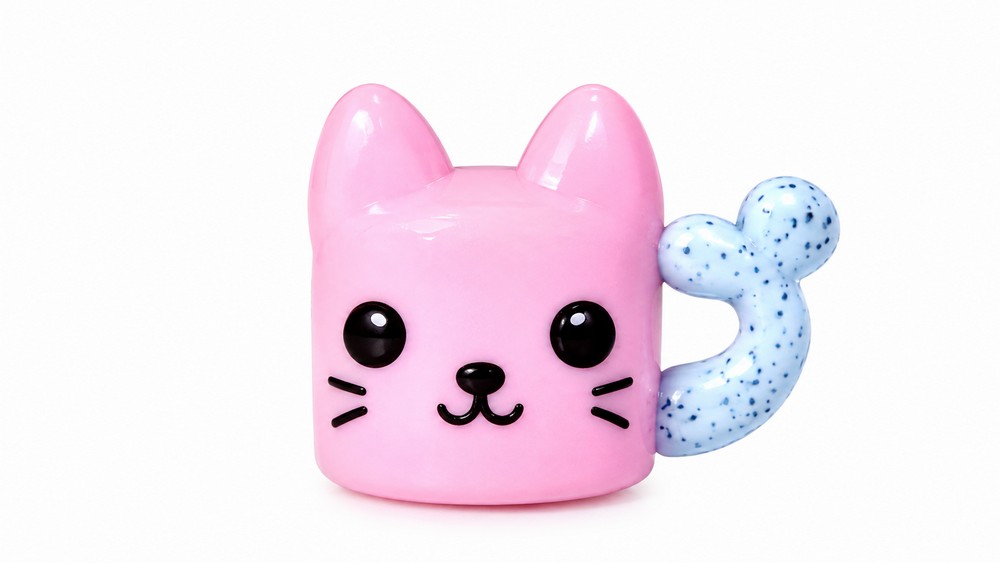
The main feature is the unusual character combination. A small feline face, pointed ears, and a curved mermaid tail give the design its special appearance.
Soft blue, green, and purple shades can suggest the sea, while small scales and gentle lines help the tail stand out. Keeping the face simple balances the busier details around it. A few tiny bubbles or shell shapes can support the ocean theme without covering the main character.
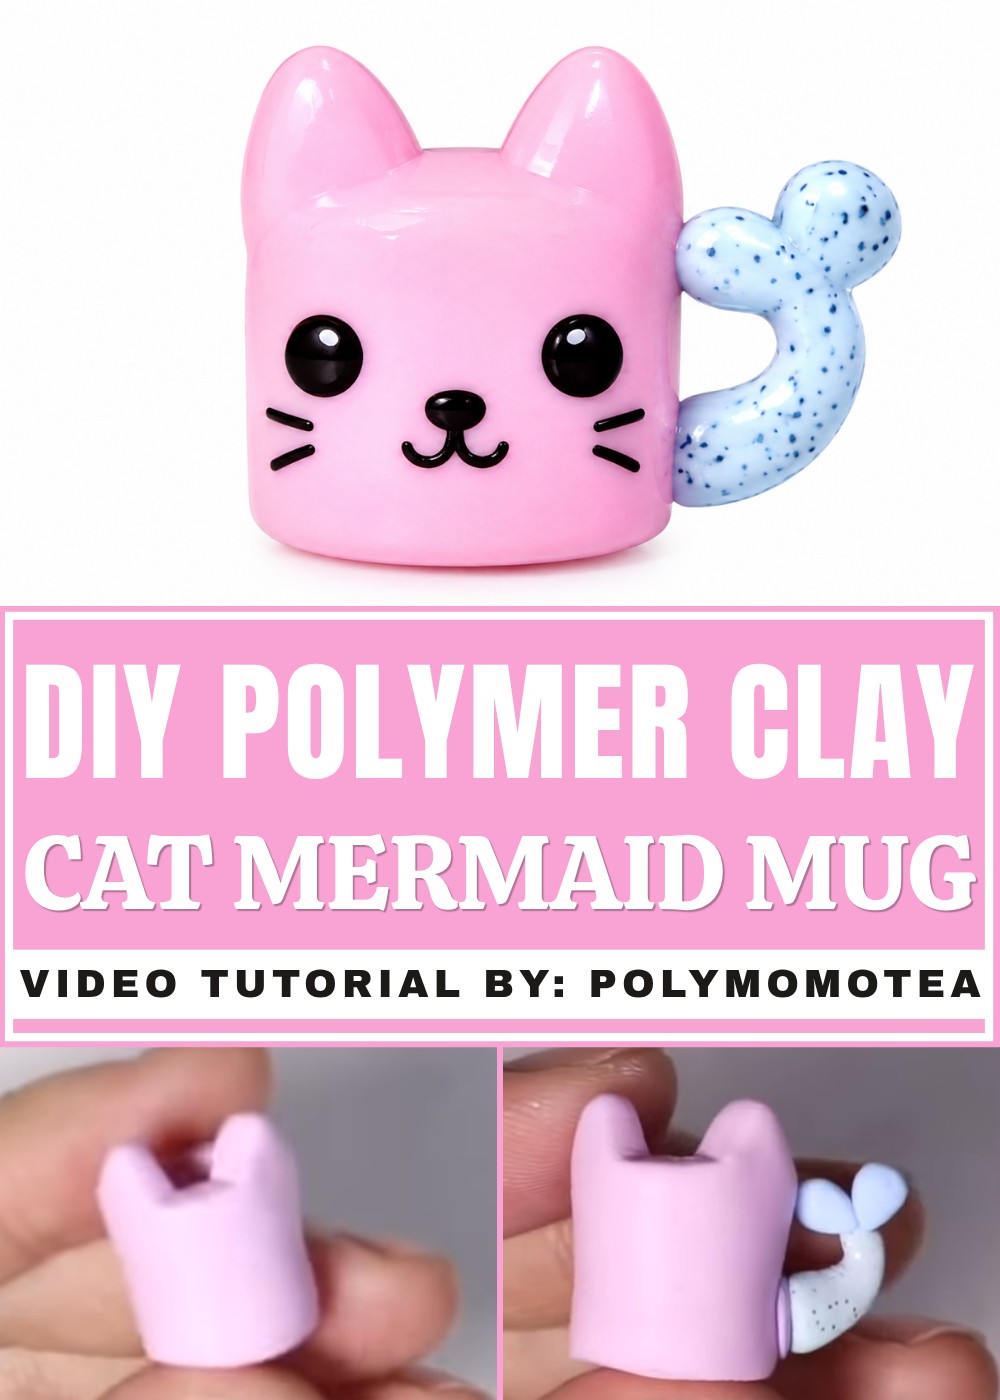
For a practical display, a decorated mug can hold pencils, brushes, or other dry desk supplies. It also looks sweet on a bedroom shelf or as a birthday present for someone who loves cats and mermaids. The clay decorations should stay away from areas used for drinking unless the materials and finish are specifically food-safe.
What makes this idea memorable is the combination of two familiar favorites. The rounded face adds warmth, and the flowing tail gives the piece movement. Together, they turn an everyday shape into a lively little scene.
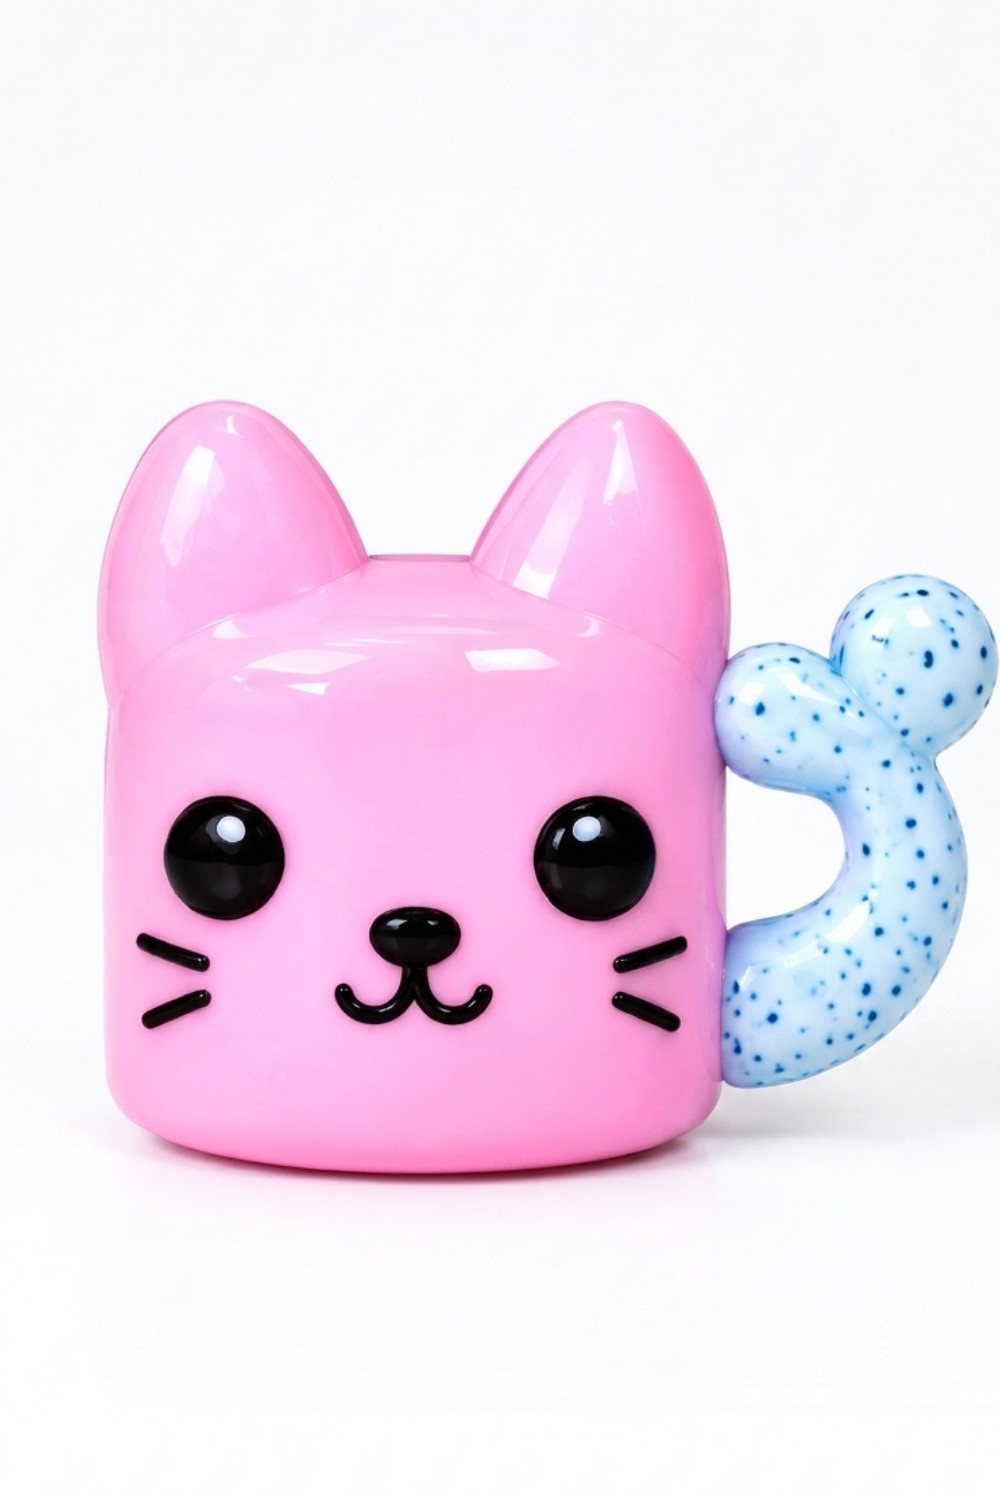
Pastel Cat Mug with Mermaid Tail Handle
(Polymer Clay Craft with Glittery Resin)
Materials & Tools
Materials
- Polymer clay in pastel colors: pink, mint, purple, yellow, light blue
- Extra fine glitter (silver or your choice)
- UV resin (for glazing and adding glitter to tail)
- A little bit of scrap clay (for cleaning up or testing colors)
Tools
- Clay blade or craft knife
- Clay rolling pin or round object for flattening
- Sculpting tools (optional, for details)
- Q-tip with acetone (to clean dust off clay after baking)
- Cheap paintbrush (for applying resin)
- UV lamp (for curing resin)
- Work surface/protective sheet
Step-by-Step Instructions
1. Pick and Prepare Your Colors
- Gather your pastel clays: pink, mint, purple, yellow, and light blue (or whichever pastels you prefer).
- If needed, mix colors to get the shades you want.
2. Form the Cat Mug Base
- Shape the Mug:
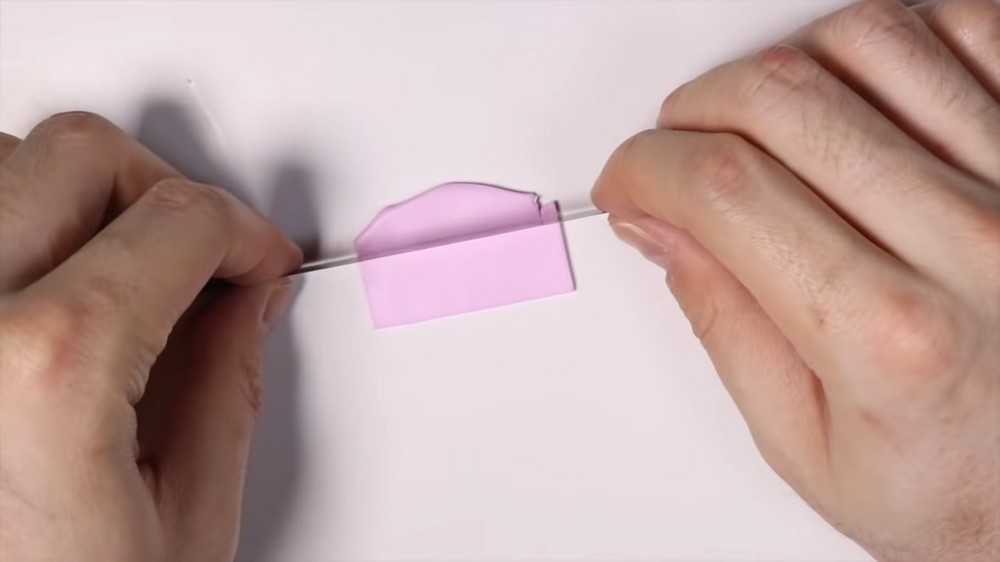
- Roll out pink clay to a thick, even slab—it should be thicker than you’d use for flat charms to allow room for shaping.
- Cut off any rough edges for a neater rectangle/square.
- Create the Cat’s Ears:
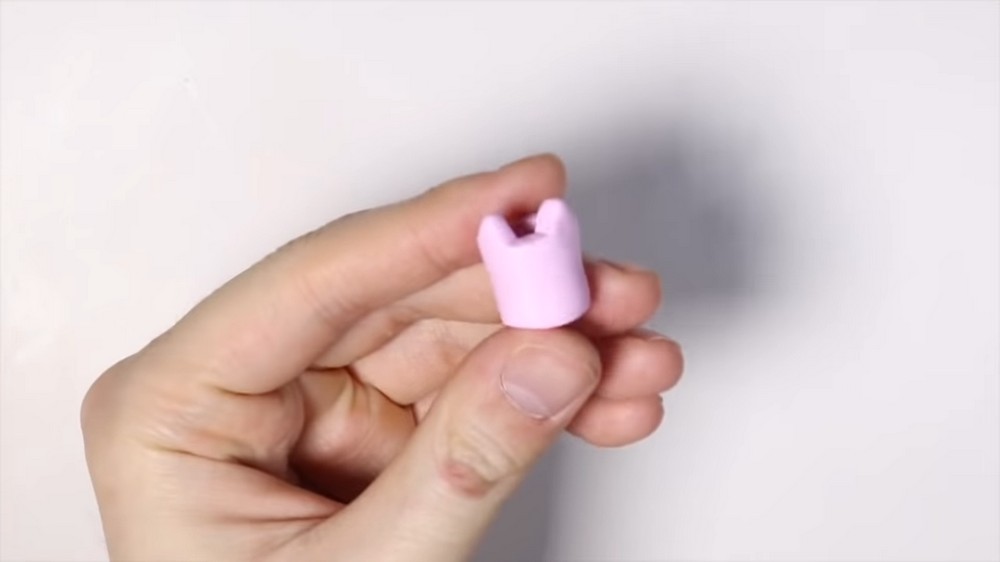
- At the top two corners, cut inward diagonally on both sides to make cat ear points.
- Round off the ear tips slightly with your fingers for a cuter, softer look.
- Shape the Mug:
- Gently bend or soften the sides so your mug looks more round/circular.
- Roll up the slab into a cylinder/mug shape and carefully blend the edge so there’s no visible seam.
3. Make the Mermaid Tail Handle
- Prepare mint clay (or pastel blue/green, as you like).
- (Optional) Add Glitter:
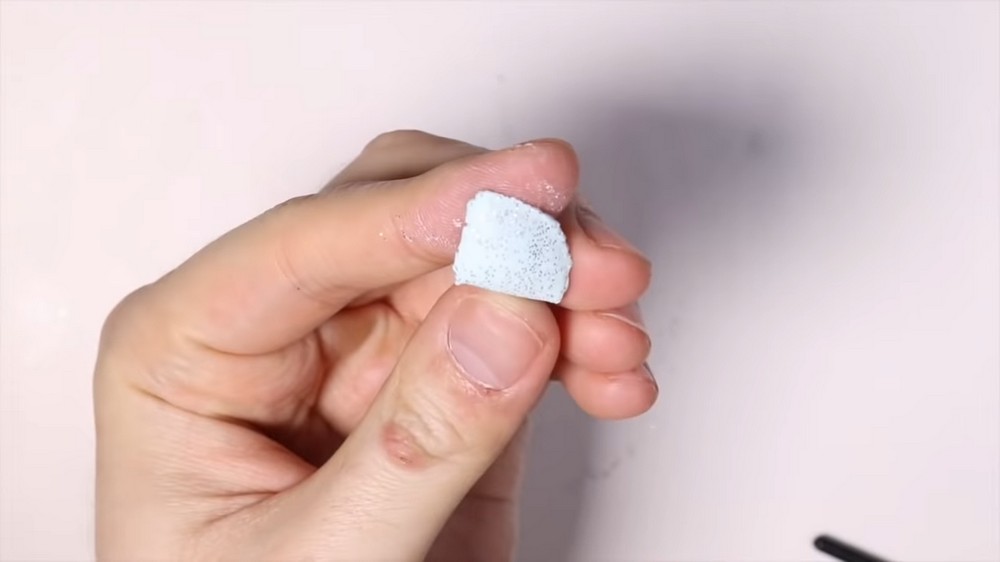
- Flatten out the mint clay and sprinkle extra fine glitter onto it.
- Fold and knead to mix the glitter into the clay for a magical, mermaid look!
- Shape the Tail:
- Roll a ball of the mint clay.
- Shape it into a teardrop cone: fatter at one end, skinnier at the other.
- Make the Fins:
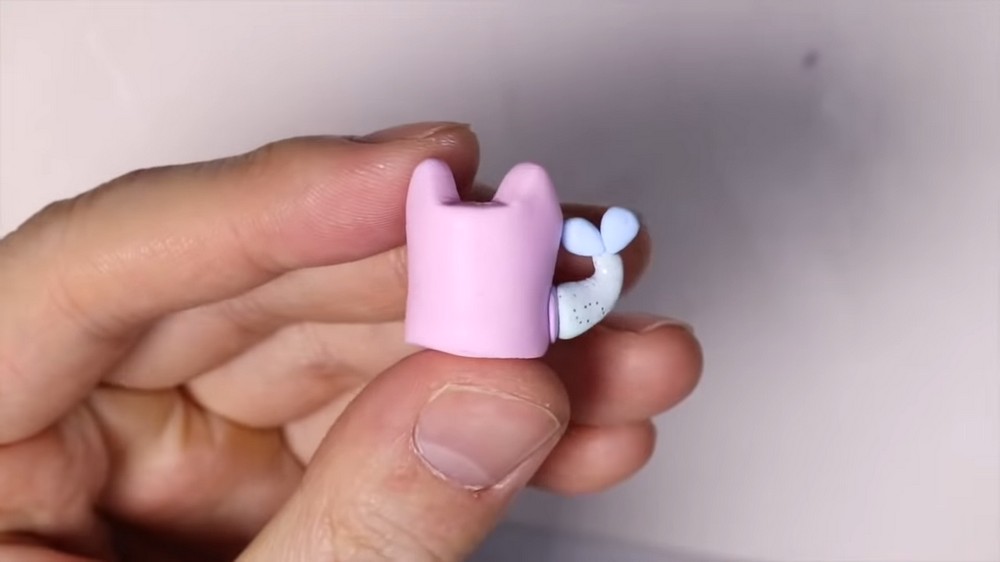
- Pinch two small balls of mint clay into tear-shaped fins.
- Attach these to the fatter end of the tail (adjust for size and appearance).
- Gently bend the tail into a handle shape.
- Attach Handle:
- Attach the skinny end of your tail to the side of the mug, like a mug handle.
- Press gently to secure. Adjust the bend and look as needed.
4. Add Extra Cute Details
- Decorate with purple or other pastel accents:
- Add a small purple dot or spot to the mug or use other colors for more interest.
- Blend gently for best results.
5. Add the Cat’s Face
- Eyes:
- Roll tiny balls of black, dark brown, or another color for the dot eyes.
- Place them on the mug above the middle.
- Nose & Mouth:
- Add a tiny oval for the nose.
- Shape a little “W” curve for the mouth under the nose (the classic cat mouth).
- Whiskers:
- Roll very thin snakes of clay and attach as whiskers on each side.
- (Optional, but makes it extra cat-like.)
6. Bake the Mug
- Place your assembled mug on a baking tray.
- Bake according to your clay’s package instructions (typically 15-30 minutes at 110-130°C/230-265°F).
- TIP: Let cool before moving on.
7. Clean-Up and Sparkle
- Dust Removal:
- Use a q-tip with acetone to gently rub away any dust particles from the baked clay.
- Add More Glitter (Optional):
- If the tail needs more sparkle, mix UV resin with extra silver glitter.
- Use a cheap paintbrush to dab this glitter-resin mix onto the tail.
- Cure under UV light until set.
- (You can glaze only the tail for shiny/sparkly contrast and keep the mug itself matte.)
8. Final Finishing (Optional)
- Add extra glaze if you want your whole mug to be shiny—but the matte mug vs. shiny tail contrast is very cute.
- Check that all small details are secure.
- Adjust the face or repeating for a different style if desired.
Tips & Explanations
- Experimenting is part of the process: Try different ear shapes, face styles, or tail placements.
- Don’t worry if you need to redo something: Polymer clay is very forgiving before baking.
- Matte vs. shiny: Leaving the mug matte but the tail sparkly makes a very appealing contrast.
- Glitter application: Layering glitter with resin after baking allows you to adjust the sparkle to your liking.
- Cleaning up: Acetone and a q-tip are perfect for removing dust and making your clay look extra clean before glazing.
Conclusion
You’ve created an adorable pastel cat mug with a mermaid tail handle! This project is perfect for beginners and for mixing and matching your favorite pastel colors and glitters.