Shape an adorable DIY Miniature Pusheen Polymer Clay figure using this free design made for clay enthusiasts.
Tiny DIY Miniature Pusheen Polymer Clay Planter Tutorial
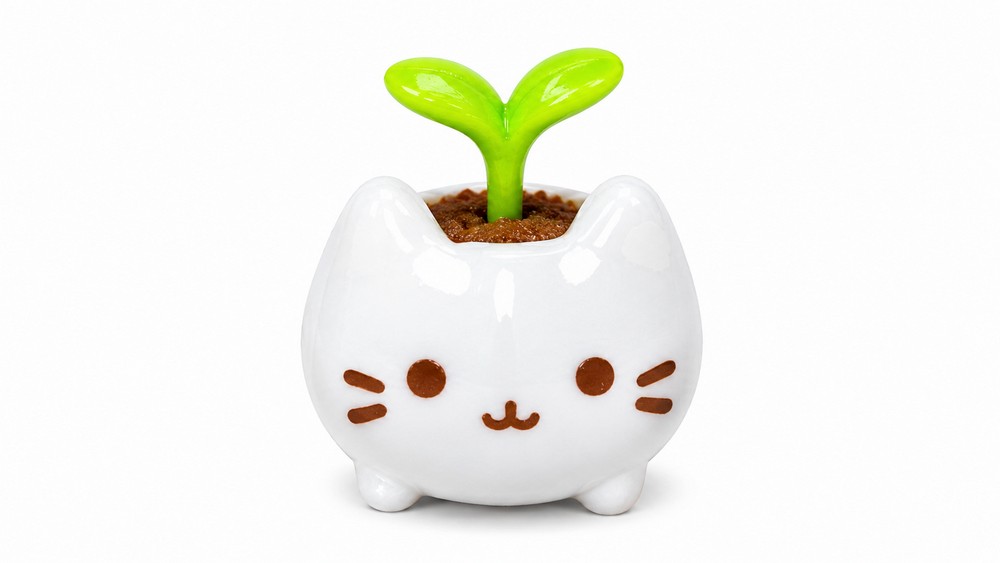
Plain flowerpots are useful, but a cat-shaped one can be much more fun to see every day. DIY Miniature Pusheen Polymer Clay turns the popular round cartoon cat into a tiny planter with a sweet face and simple body.
Featured By: PolymomoTea
The planter idea gives the figure a purpose beyond being a normal cat model. Its open top is part of the look, while the ears, paws, and small face marks help it look like Pusheen. Keep the opening in mind from the start, because it needs to stay clear as you shape the outer walls. Smooth the clay gently so the sides have an even finish.
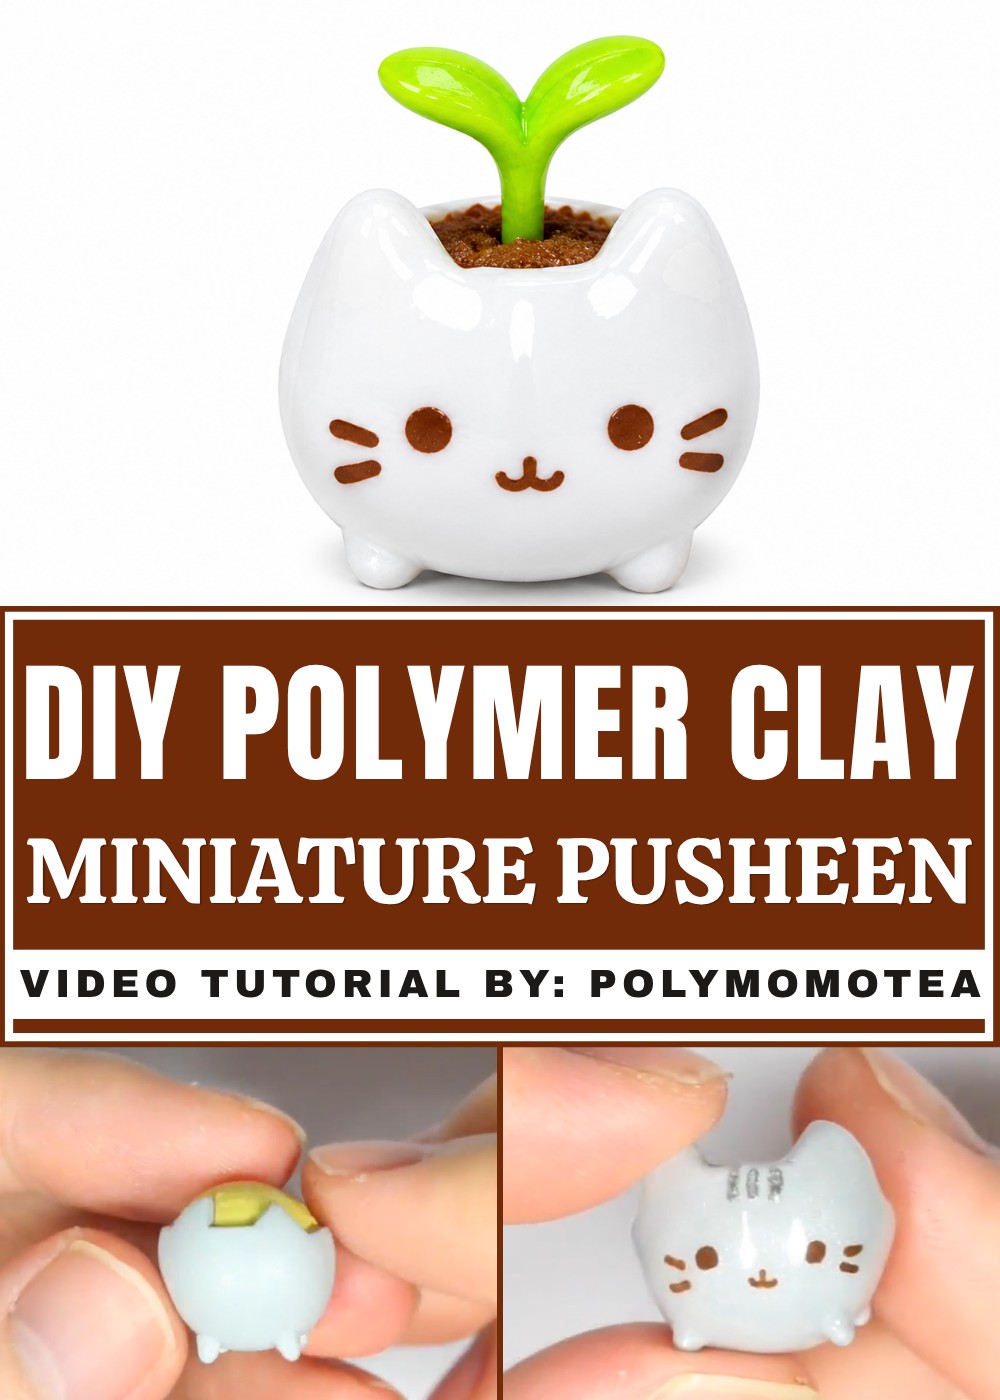
A good way to work is to form the main body first, then attach the ears and other little details. Checking the front from eye level can help you see whether the face is balanced. The small parts are easier to place with clean fingers or a simple clay tool. Follow the directions on the clay packet before hardening your planter.
Set the finished miniature on a windowsill, study desk, or bedroom shelf. You can leave it empty as a cute decoration or use it with suitable artificial greenery. Since it is a decorative clay model, do not assume it is safe for water or live plants. Among free DIY ideas for character fans, this one has a fun twist: it looks like a cat and a little pot at the same time.
How to Make a Pusheen Planter with Polymer Clay
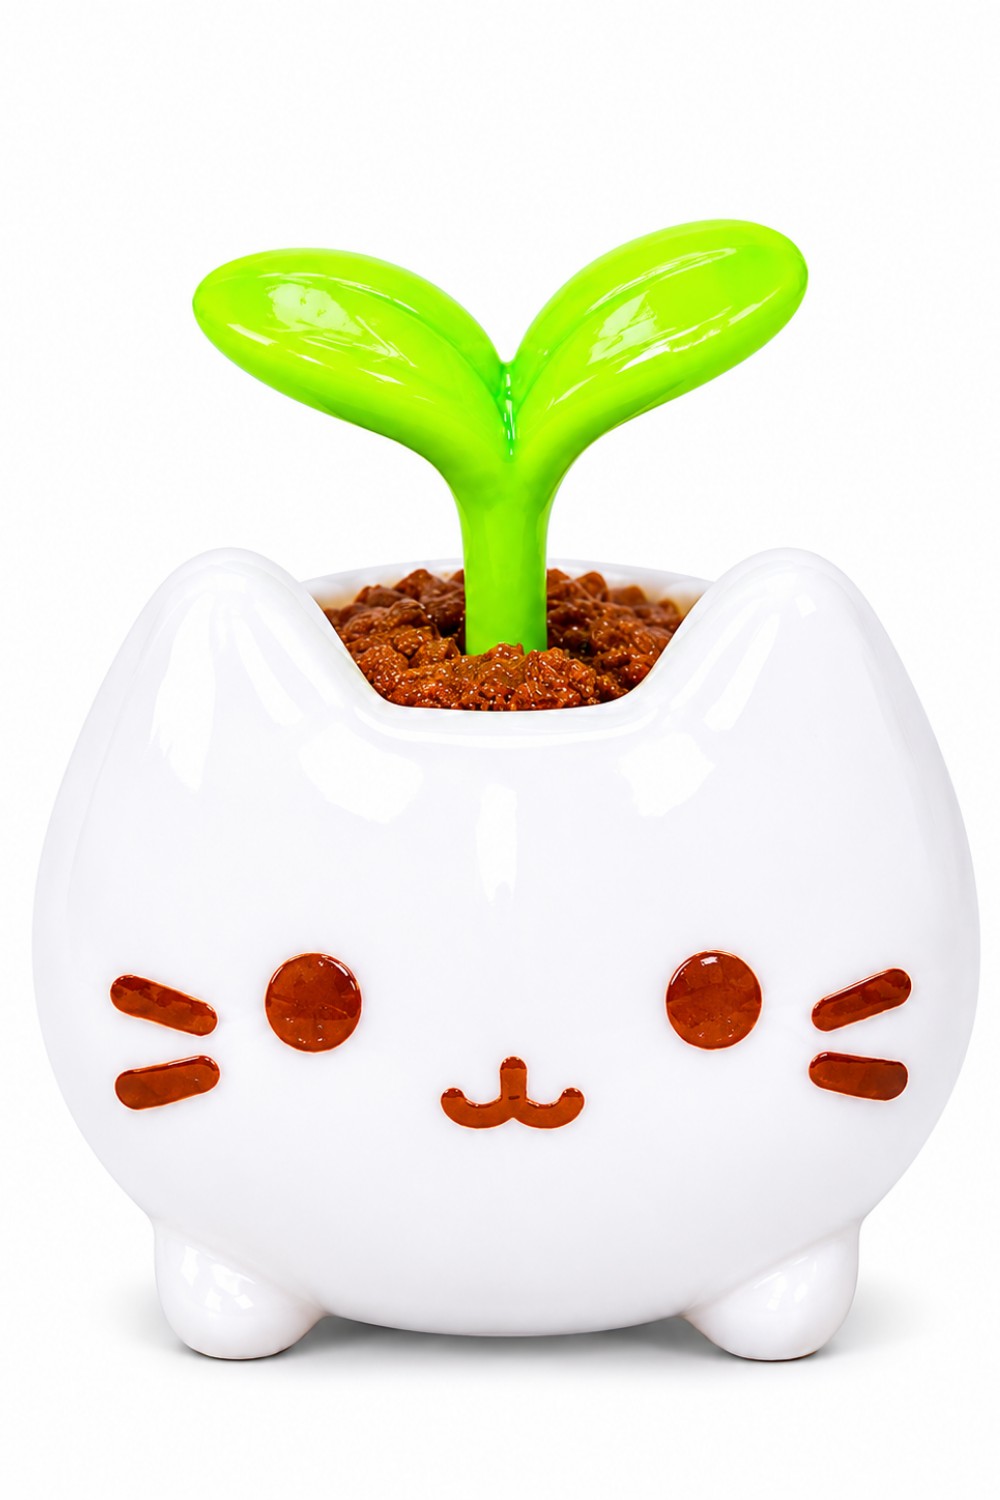
If you’re a fan of adorable cat characters and love adding a touch of cuteness to your workspace or home, this Pusheen Planter project is perfect for you! Inspired by the charming Pusheen planter from a subscription box, this tutorial walks you through creating your own version using polymer clay and a simple homemade mold. Not only is it a fun and relaxing craft, but the finished planter is also versatile—you can use it for tiny plants, stationery, or even just as a desk buddy.
This guide is beginner-friendly and includes practical tips for sculpting, detailing, and finishing. Read on to learn how to create your very own Pusheen-shaped planter!
Essential Materials & Tools
Materials
- Polymer clay (gray for the main planter, brown for plant “soil,” and green for the sprout or plant)
- Silicone mold putty (for shaping the inner form of the planter)
- Acrylic paint (brown, black, and pink for facial details and stripes)
- Air-dry clay (optional, for faux soil)
- Glaze or clear varnish (for a glossy finish)
Tools
- Clay roller (for evenly rolling clay sheets)
- Craft blade or X-acto knife (for cutting and shaping)
- Dotting tool or toothpick (for painting details and blending clay)
- Paintbrushes (small detail brushes for painting)
- Baking tray and oven (for curing polymer clay according to package instructions)
- Work surface (clean and non-stick)
- Scrap clay (to help with glazing process)
Step-by-Step Instructions
1. Creating the Planter Base
Step 1: Make a Mold with Silicone Putty
- Form the core shape:
- Take a small amount of silicone mold putty and shape it into a rounded ball, roughly the size you want the inner space of your planter to be.
- This mold will act as the support and help you create a hollow center in your planter.
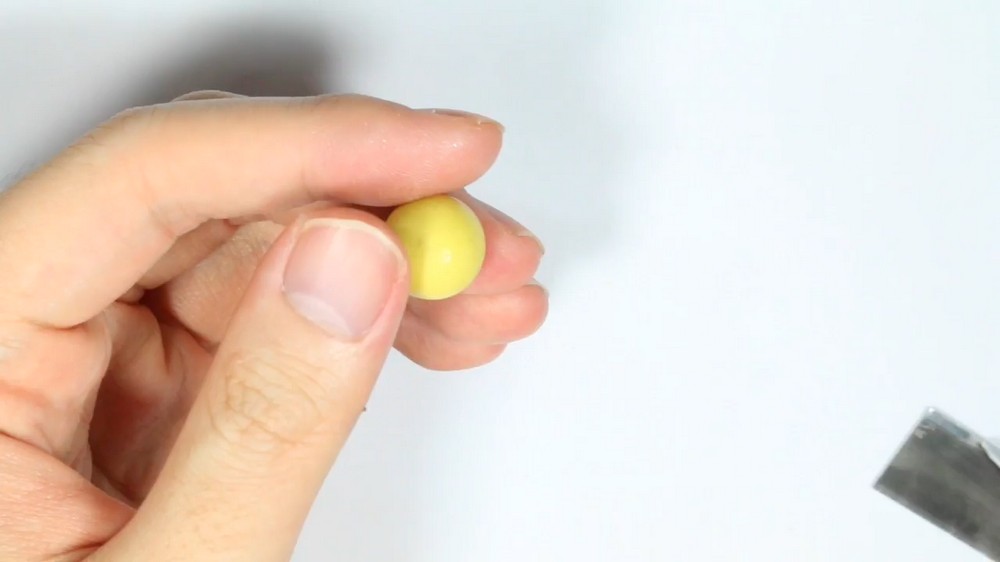
Step 2: Roll and Wrap Gray Clay
- Prepare gray clay:
- Soften and condition your gray polymer clay.
- Use a clay roller to roll out an even sheet of gray clay, about 3-4 mm thick.
- Wrap the mold:
- Carefully wrap your gray clay sheet around the silicone mold putty, completely covering the surface.
- Trim off any excess clay with your craft blade and use your fingers or a blending tool to gently blend and smooth the seams. This will form the outer shell of your pot.
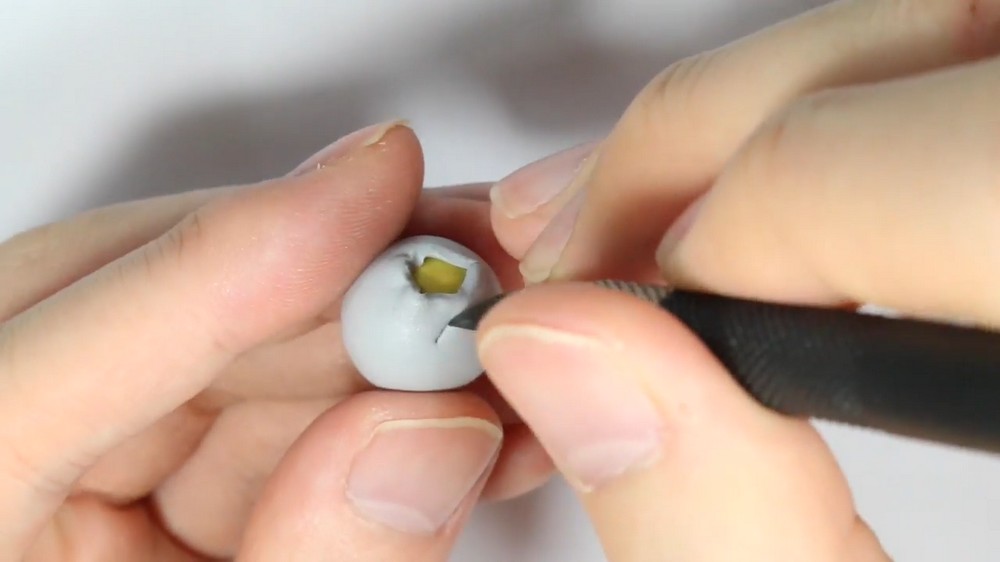
2. Shaping the Pusheen Design
Step 3: Add Cat Ears
- Create ear shapes:
- With your craft blade, cut two small triangles from the rim on opposite edges of the planter to make Pusheen’s signature cat ears.
- Cut away the clay between the ears, shaping the rim smoothly from one ear to the other.
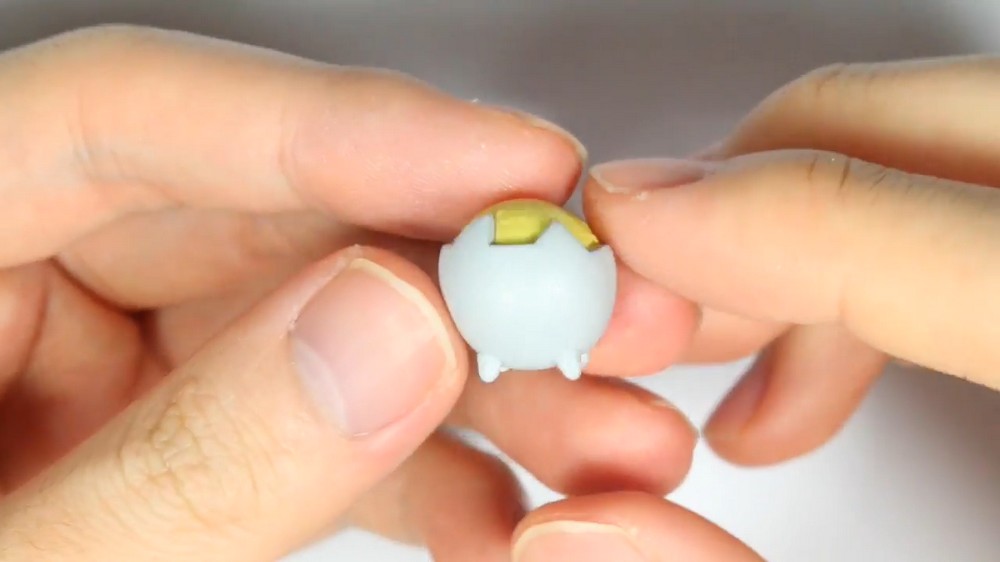
Step 4: Add a Decorative Base or “Lace”
- Create the base:
- Roll a small piece of gray clay into a pointed teardrop shape.
- Cut off the blunt end and blend the pointed (lace) edge onto the bottom of your planter pot for extra decoration or stability.
3. Baking and Demolding
Step 5: Bake the Planter
- Bake as directed:
- Place the sculpted piece (with silicone core inside) onto a baking tray.
- Bake according to your polymer clay's package instructions—most commonly at 265–275°F (130°C) for 15–30 minutes.
- Allow to fully cool before moving on.
Step 6: Remove the Silicone Core
- Demold:
- Once cooled, gently remove the silicone mold putty from inside the planter.
- If it’s snug, wiggle it gently or use a blunt tool to help loosen it.
4. Detailing Pusheen’s Face & Markings
Step 7: Paint the Face and Stripes
- Prepare to paint:
- With your dotting tool or small brush, paint two brown eyes on the planter’s front.
- Add two delicate arcs for the whiskers on each side of the face.
- Paint a tiny upside-down “Y” for the nose.
- Tail and stripes:
- On the back or side of the pot, paint Pusheen’s curly tail using brown paint.
- Add three short brown stripes on top of the head/forehead and a few stripes on the tail for authenticity.
- Let dry:
- Allow all painted details to dry thoroughly before moving on.
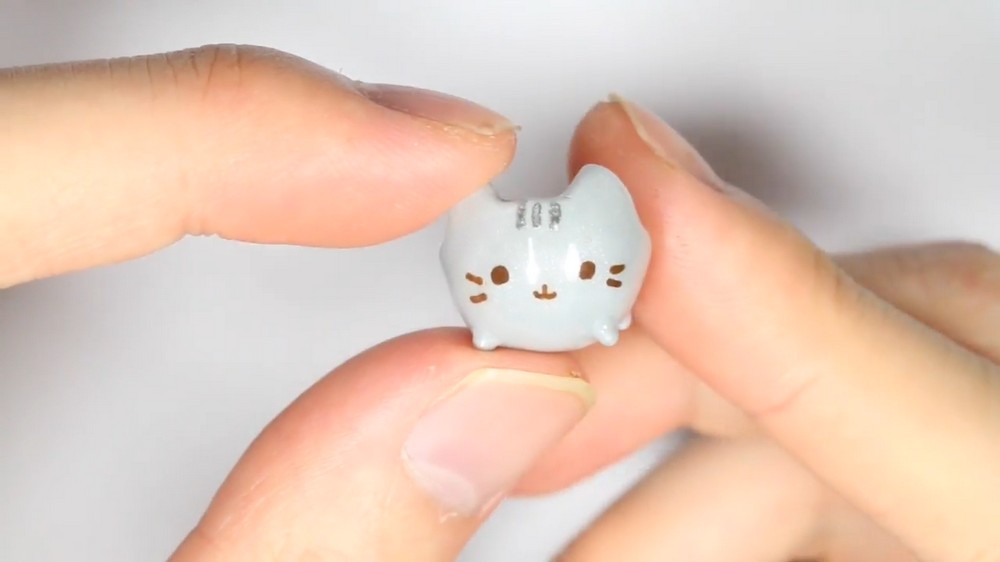
5. Glazing the Planter
Step 8: Apply Glaze for Shine and Protection
- Hold securely for glazing:
- Place a lump of scrap clay inside your planter. This makes it stable and easy to glaze while holding upside down or at odd angles.
- Glaze the exterior:
- Using a brush, apply a thin, even coat of clear glaze or varnish over the entire outside of the planter.
- Let dry and rotate as needed, ensuring an even, protective layer all around.
6. Filling and Final Touches
Step 9: Add Faux Plant or Soil (Optional)
- Faux soil:
- Roll some brown air-dry clay into a flat disc that fits snugly into the base of your planter.
- Insert it as a “soil” base.
- Make a sprout or plant:
- Sculpt a small green sprout with leaves from green polymer clay.
- Bake separately and glue or insert it on top of your faux soil, making it look like a tiny plant is growing inside your Pusheen pot.
Step 10: Use and Enjoy
- Versatile finished piece:
- Use the finished Pusheen planter to hold a small succulent (real or faux), desk supplies, or just as a cute decorative item!
Tips for Best Results
- Ensure seams are well blended: This helps achieve a clean and professional look.
- Be gentle when cutting the ears: Use a sharp blade and small cuts for a neat finish.
- Personalize your Pusheen: Try different poses, hats, or accessories for more character!
- Let paint dry fully before glazing: This prevents smudging and helps your details stand out.
- If using as a real planter: Line the inside with a waterproof barrier, and only use with dry soil/plants, as polymer clay is not waterproof on its own.
Conclusion
You now have an adorable Pusheen planter that's perfect for your desk, shelf, or as a charming gift. This project is both fun and practical—plus, it adds a sprinkle of kawaii to any space. Use your imagination to customize with different colors or add other Pusheen friends for a playful collection!