Capture the magic of Disney with a cute Jasmine clay chibi, featuring intricate details and a playful style that fans will adore.
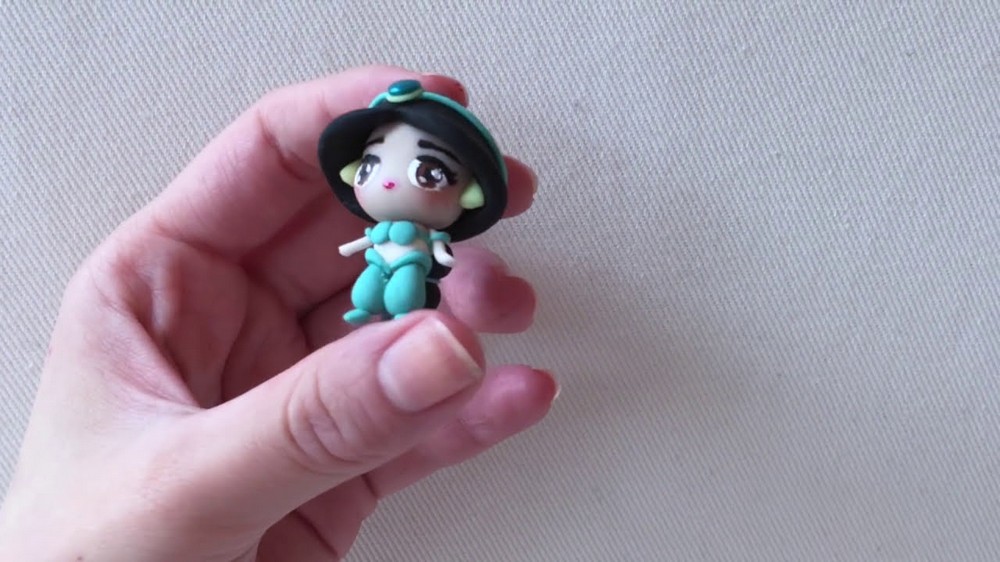
Soft, dreamy, and instantly recognizable, this tiny Jasmine figure captures the magic of a fairy-tale princess in chibi form. The DIY Disney Jasmine Clay Chibi features a stylized oversized head, wide expressive eyes, and a sweet, rounded face that gives her a charming, childlike look. Her signature teal outfit, golden accents, and flowing dark hair are all reimagined in a simplified, cartoonish style that still feels true to the original character, making her both adorable and nostalgic for Disney fans.
Unique DIY Disney Jasmine Clay Chibi to Add to Your Collection
This charming princess design comes from Flying Mio, a YouTube creator known for cute, character-inspired miniatures and figures. On the Mio channel, you’ll find more adorable clay characters and creative ideas packed into approachable, visually engaging videos:
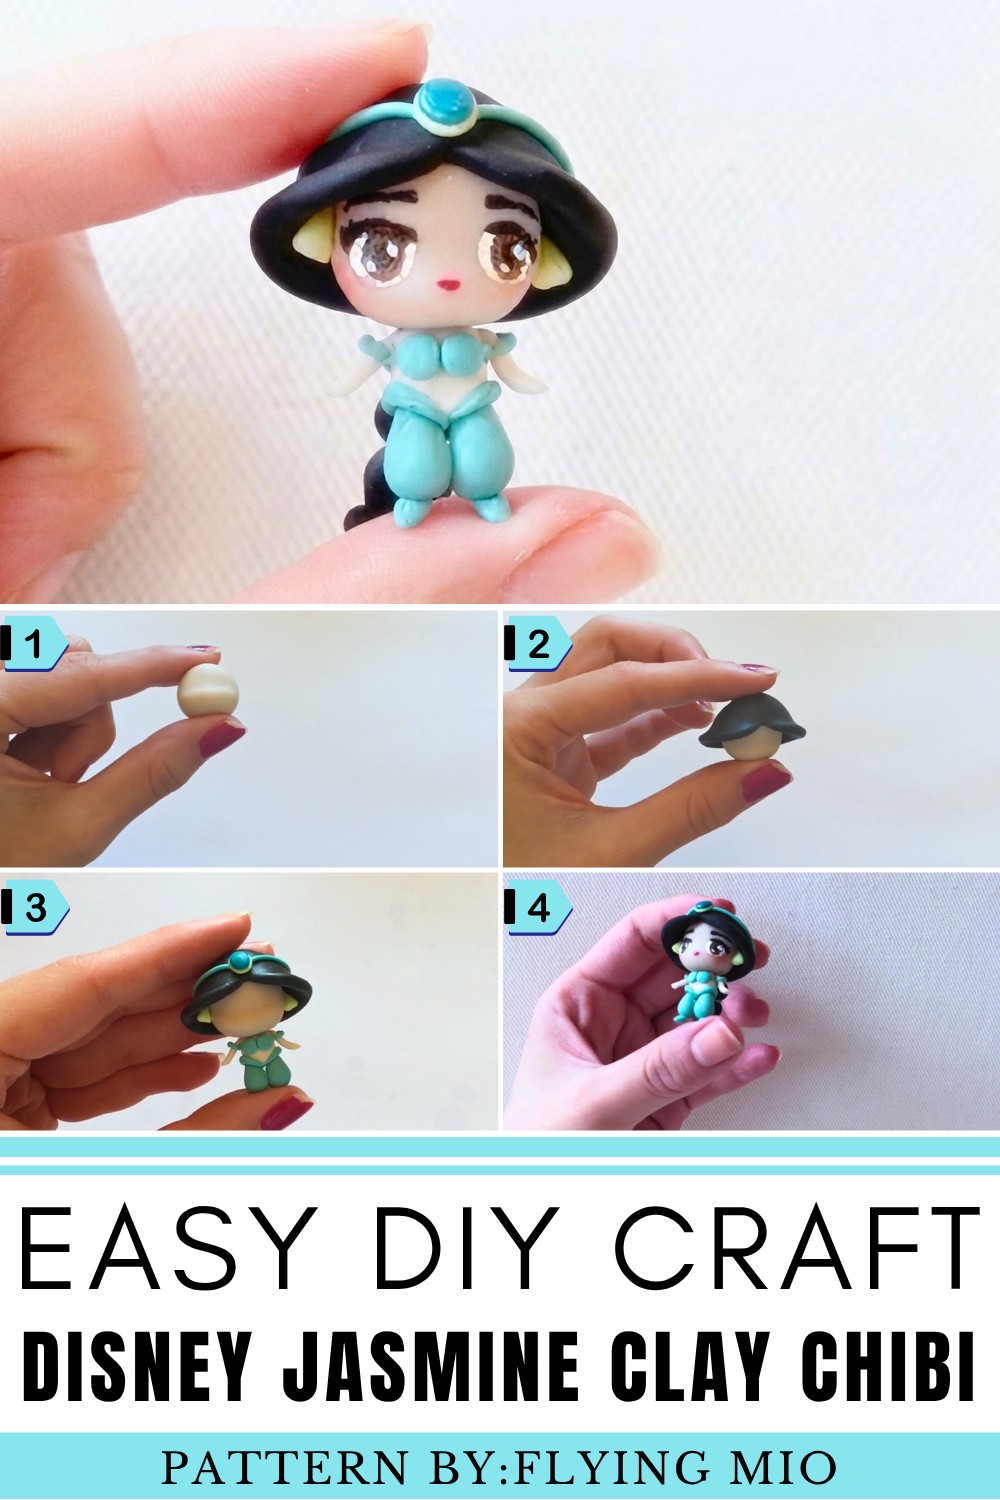
This miniature Jasmine stands out as a display piece that can sit neatly on a desk, shelf, or in a themed collection, turning any small corner into a slice of Agrabah. As a DIY Disney Jasmine Clay Chibi, she’s designed with an emphasis on personality and cuteness rather than realism, giving her a playful, collectible vibe that pairs perfectly with other chibi characters or handmade figures. Her pose and expression give off a confident yet gentle energy, ideal for anyone who loves strong princess characters in a softer, kawaii style.
The overall look is polished yet whimsical, the kind of piece that feels equally at home in a fan’s collection, a child’s room, or as a unique handmade gift. It’s the tiny details—like her hair shape, dress curves, and subtle facial features—that make this chibi Jasmine so fun to look at, inviting closer inspection and appreciation.
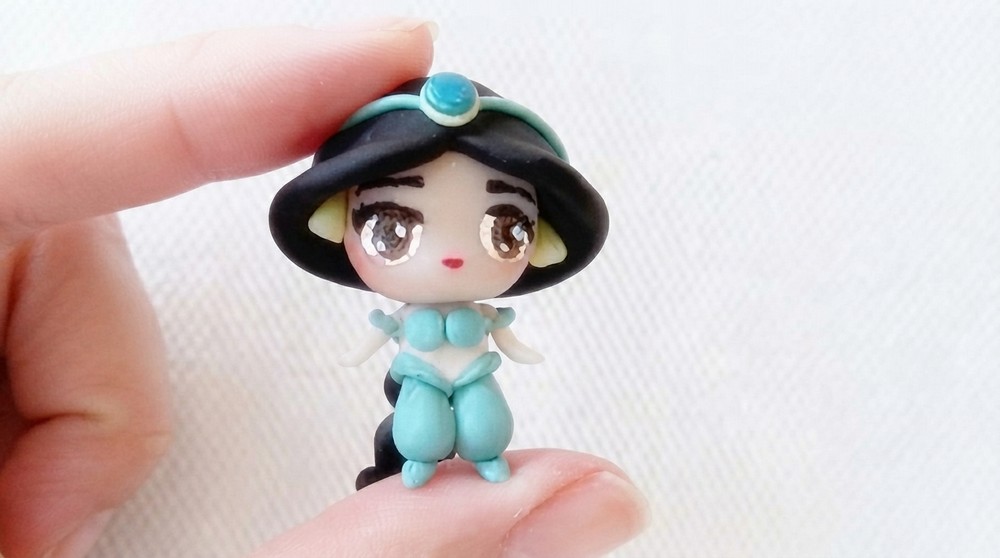
DIY Disney Jasmine Figurine from Polymer Clay
Recreate the elegance of Disney’s Jasmine in miniature form using polymer clay. This tutorial guides you through every step to craft a charming Jasmine figure, complete with her signature hairstyle, outfit, and jewel details. It's simple, fun, and perfect for fans of Disney's "Aladdin."
Materials You'll Need
Clay Colors
- Nude-colored clay (for skin tone)
- Black clay (for hair)
- Turquoise clay (for outfit and crown details)
- Yellow clay (for earrings and jewel base)
- Blue-green clay (for crown jewel)
Optional Extras
- Metal wire or jewelry pins (to secure pieces while baking)
- Chalk pastels (red) (for blush details)
- Turquoise nail polish (for added shimmer and shine on the jewel)
Painting and Tools
- Acrylic paints (for eyes and lips)
- Small paintbrushes (for details)
- Clay tools (for smoothing and shaping)
Step-by-Step Instructions
Step 1: Make Jasmine’s Head
- Form the Base:
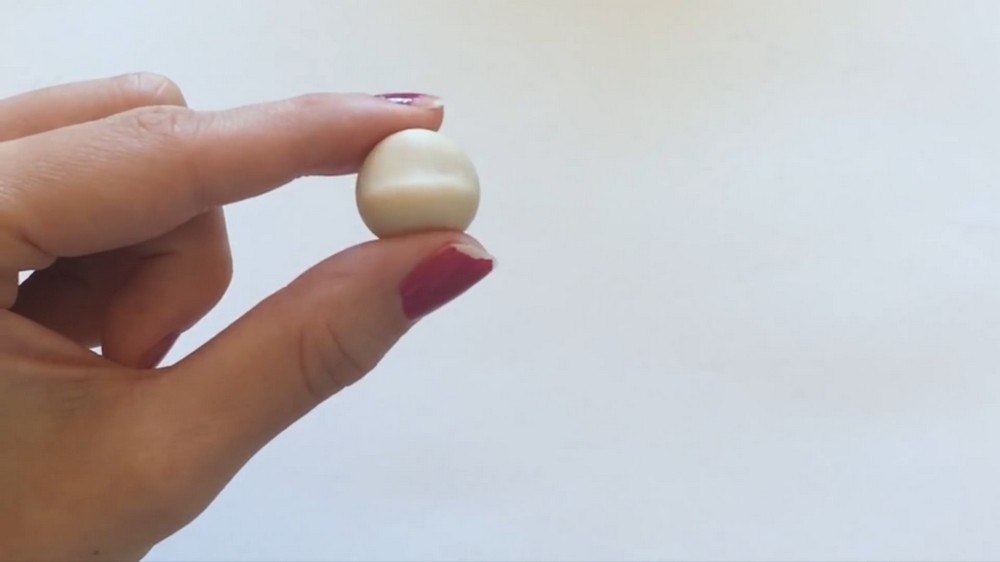
- Roll a ball of nude-colored clay and flatten the upper two-thirds to make Jasmine’s nose and cheeks stand out in a three-dimensional style.
- Prepare the Bangs:
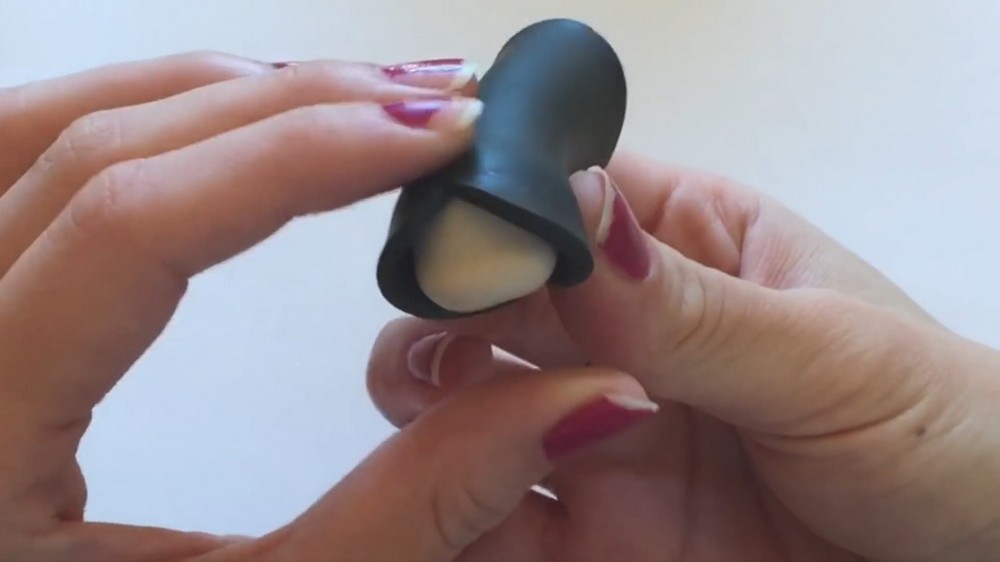
- Roll out a thin sheet of black clay (3–4 mm thick).
- Cut out a rounded triangle and smooth the edges with your fingers.
- Attach the Hair:
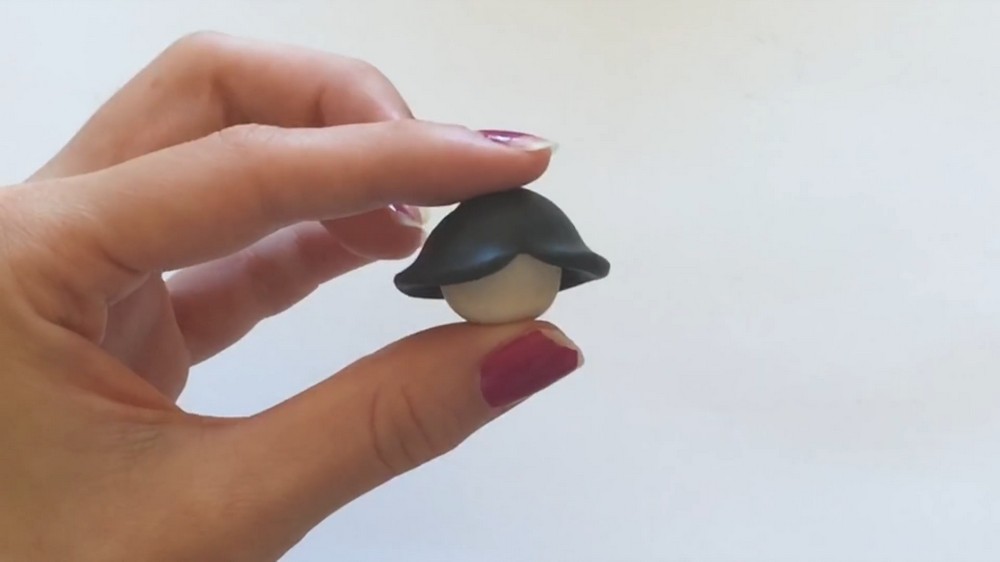
- Position the triangle cutout on the front of Jasmine’s head for her bangs. Wrap the black clay around the sides and back of the head.
- Smooth out any visible seams at the back using clay tools or fingers.
Step 2: Add Jasmine’s Crown
- Make the Headband:
- Roll turquoise clay into a thin snake approximately 1 mm in diameter and wrap it around Jasmine’s forehead.
- Add the Jewel:
- Roll a small oval of yellow clay (for the jewel base) and flatten it slightly.
- Roll a smaller oval of blue-green clay and place it in the middle of the yellow base. Attach this jewel to the center of the turquoise headband.
- Create Earrings:
- Roll two small triangles of yellow clay and attach them near the sides of Jasmine’s head to mimic dangling earrings.
Step 3: Make Jasmine’s Hair
- Create the Braid Base:
- Roll a small teardrop shape of black clay, curling the narrow end slightly to mimic the tip of the braid.
- Form the Hair Segments:
- Roll two small black balls (for the sections above the braid tip) and stack them vertically, connecting them with a piece of metal wire for secure assembly.
- Decorate the Braid:
- Wrap each segment of the braid with turquoise clay, creating bands around the black clay hair.
- Attach the Hair to the Head:
- Position the finalized braid behind Jasmine’s head and secure it using a piece of metal wire.
Step 4: Create Jasmine’s Outfit
- Make the Pants:
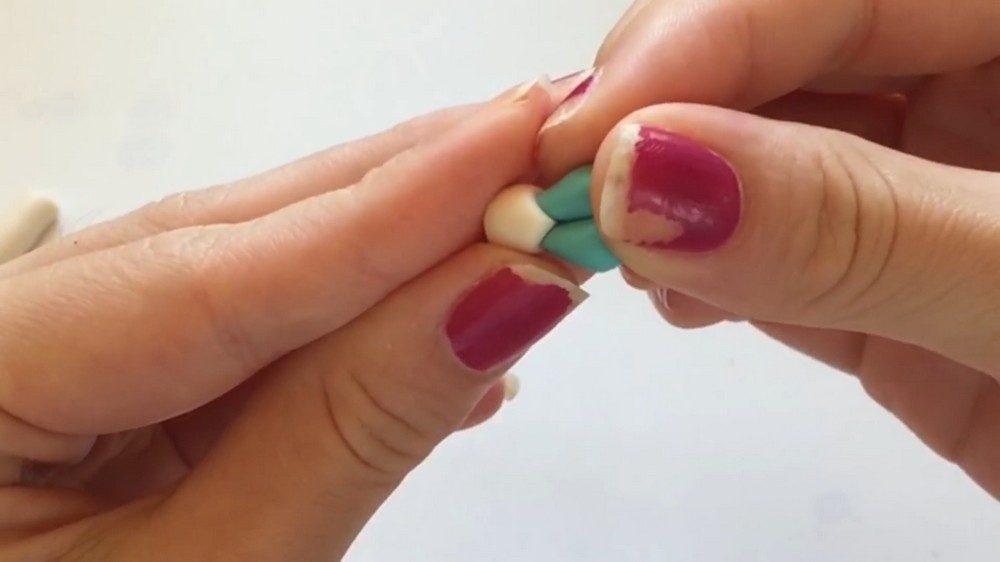
- Roll two tiny, teardrop-shaped pieces of turquoise clay and position them as pants.
- Form the Torso:
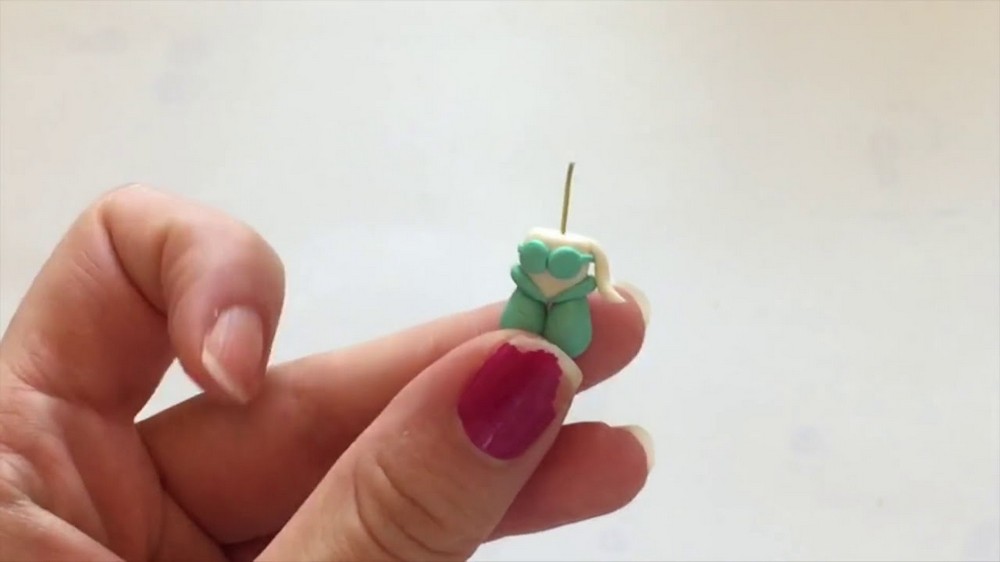
- Roll a thick snake of nude-colored clay for the torso. Flatten the top slightly and taper the base into a triangle shape for attachment to the pants.
- Add Details to the Pants:
- Line the top of the pants with a thin roll of gray turquoise clay, smoothing it gently to create a decorative waistband.
- Create the Top:
- Roll two small circles of turquoise clay. Press these onto the torso to imitate Jasmine’s cropped top.
-
Add the Sleeves:
- Wrap thin pieces of turquoise clay around the top of each arm near the shoulders. Jasmine’s outfit has an off-the-shoulder design, so ensure this detail is visible.
Step 5: Attach the Arms, Feet, and Finalize Assembly
- Add the Arms:
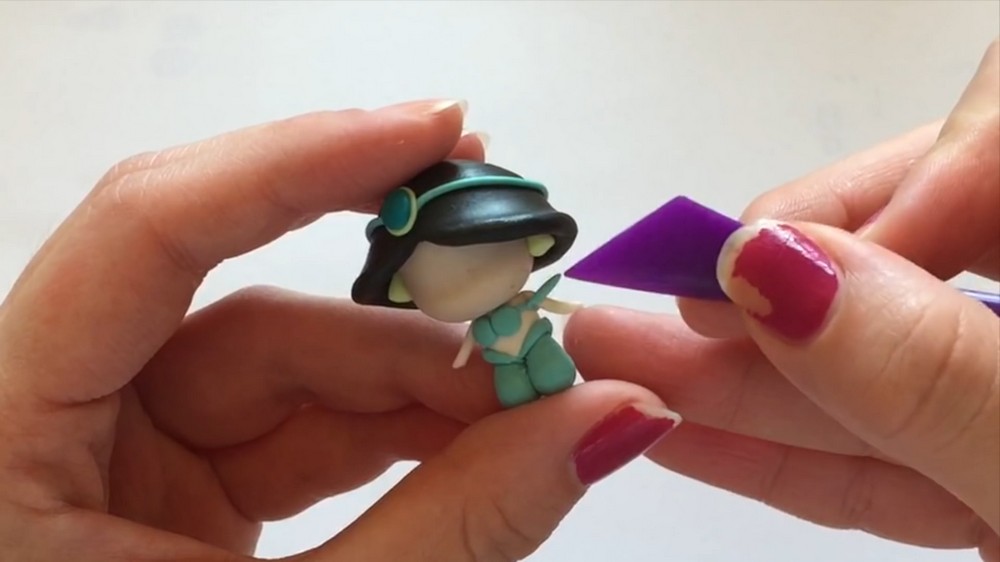
- Roll two small snakes of nude-colored clay and attach them to either side of the torso for arms.
- Smooth the joints with a clay tool for a seamless look.
- Add the Feet:
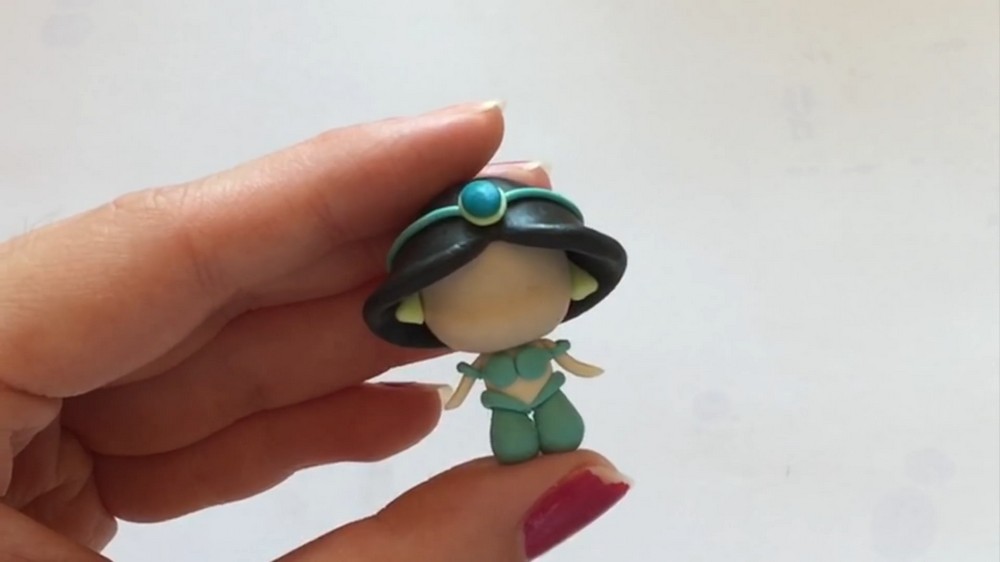
- Roll two tiny teardrop shapes of turquoise clay for Jasmine’s shoes and attach them beneath the pants.
- Secure with Wire:
- Use a metal wire to connect Jasmine’s head, torso, and legs so the character stays intact during baking.
Step 6: Add Facial Details
- Paint Her Eyes:
- Use acrylic paint to create Jasmine’s signature almond-shaped eyes. Choose dark brown for the irises, white for the sclera, and black for the pupils.
- Add small white sparkles near the pupils to create dimension.
- Paint Her Lips:
- Use a thin brush dipped in pink or red paint to add a tiny smile to Jasmine’s face.
Step 7: Add Blush and Jewel Highlights
- Blush the Cheeks (Optional):
- Use red chalk pastel and a paintbrush to lightly dust Jasmine’s cheeks for a rosy effect.
- Polish the Jewel (Optional):
- Apply a coat of turquoise nail polish over the crown jewel for a glittery, glossy finish.
Step 8: Bake Your Character
- Preheat Your Oven:
- Follow the instructions on your polymer clay packaging. Typically, bake at 250°F (120°C) for 20 minutes.
- Cool Completely:
- Allow your piece to cool once baked before handling or displaying it.
Final Notes
You’ve now crafted a miniature, hand-sculpted Jasmine figurine! This Disney-inspired piece can be displayed, gifted, or turned into a charm by adding an eyelet before baking. With each character, your sculpting skills will only continue to grow—so feel free to experiment with different outfits and poses!