Try a DIY Sleeping Jellyfish With Polymer Clay project featuring a calm little ocean friend, soft shapes, and a lovely look for shelves or thoughtful gifts.
Ocean animals have a calm, peaceful feeling, and a tiny figure with closed eyes captures that mood especially well. DIY Sleeping Jellyfish With Polymer Clay turns a familiar sea creature into a soft-looking miniature that can brighten a quiet corner of the home.
Gentle Sleeping Jellyfish Clay Figure for Ocean Lovers
Meet the Creative Artist
Instead of treating clay as a plain material, PolymomoTea uses it to tell little visual stories. Alex Lee shares tutorials featuring animals, characters, and imaginative scenes. His work shows how a few carefully shaped pieces can form a recognizable miniature, giving viewers new ideas for their own small decorative projects.
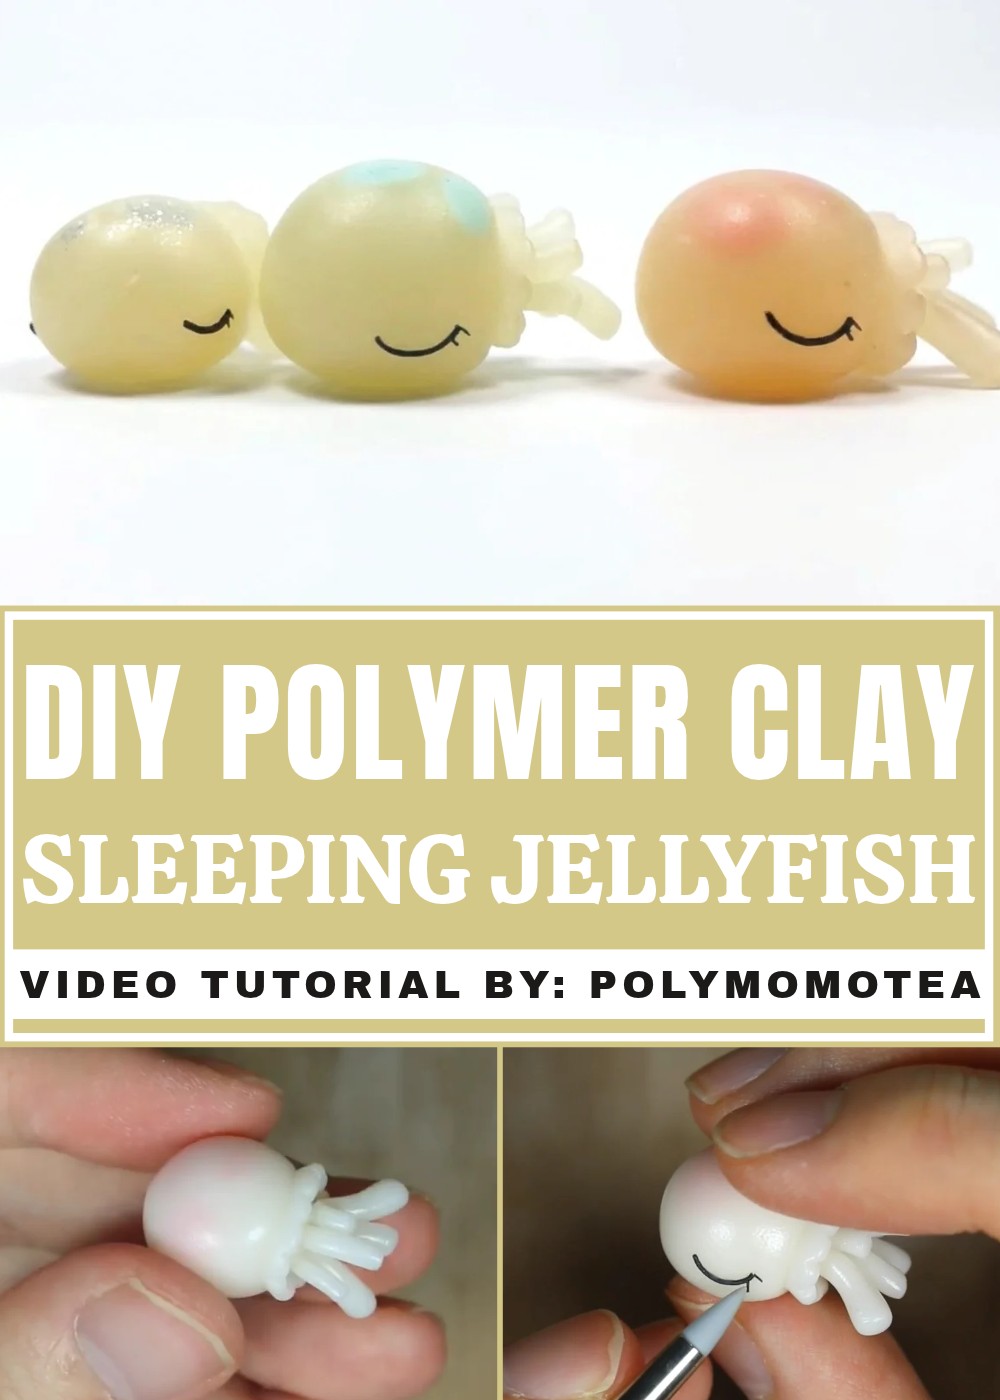
The main shape is a rounded bell, with little tentacles hanging beneath it. A sleeping expression gives the figure a sweet personality, while the curved lower pieces help it look like it is floating. Rather than filling the surface with lots of marks, a simple face can become the most noticeable detail. Smooth lines and even spacing help the whole design feel gentle.
Color choice changes the mood of this little jellyfish. Pale pink, lavender, or light blue can suggest a peaceful underwater setting, although other shades can work just as nicely. Several figures in different colors could form a small ocean-themed group, while one on its own is enough for a neat shelf display.
For someone new to clay miniatures, this idea offers a chance to practice basic rounded forms and small attached pieces. It also suits anyone who likes cute sea animals or unusual handmade presents. Place the finished jellyfish on a bookcase, near a small photo frame, or alongside other ocean decorations. Its resting face and flowing shape give it a quiet charm that feels easy to love.
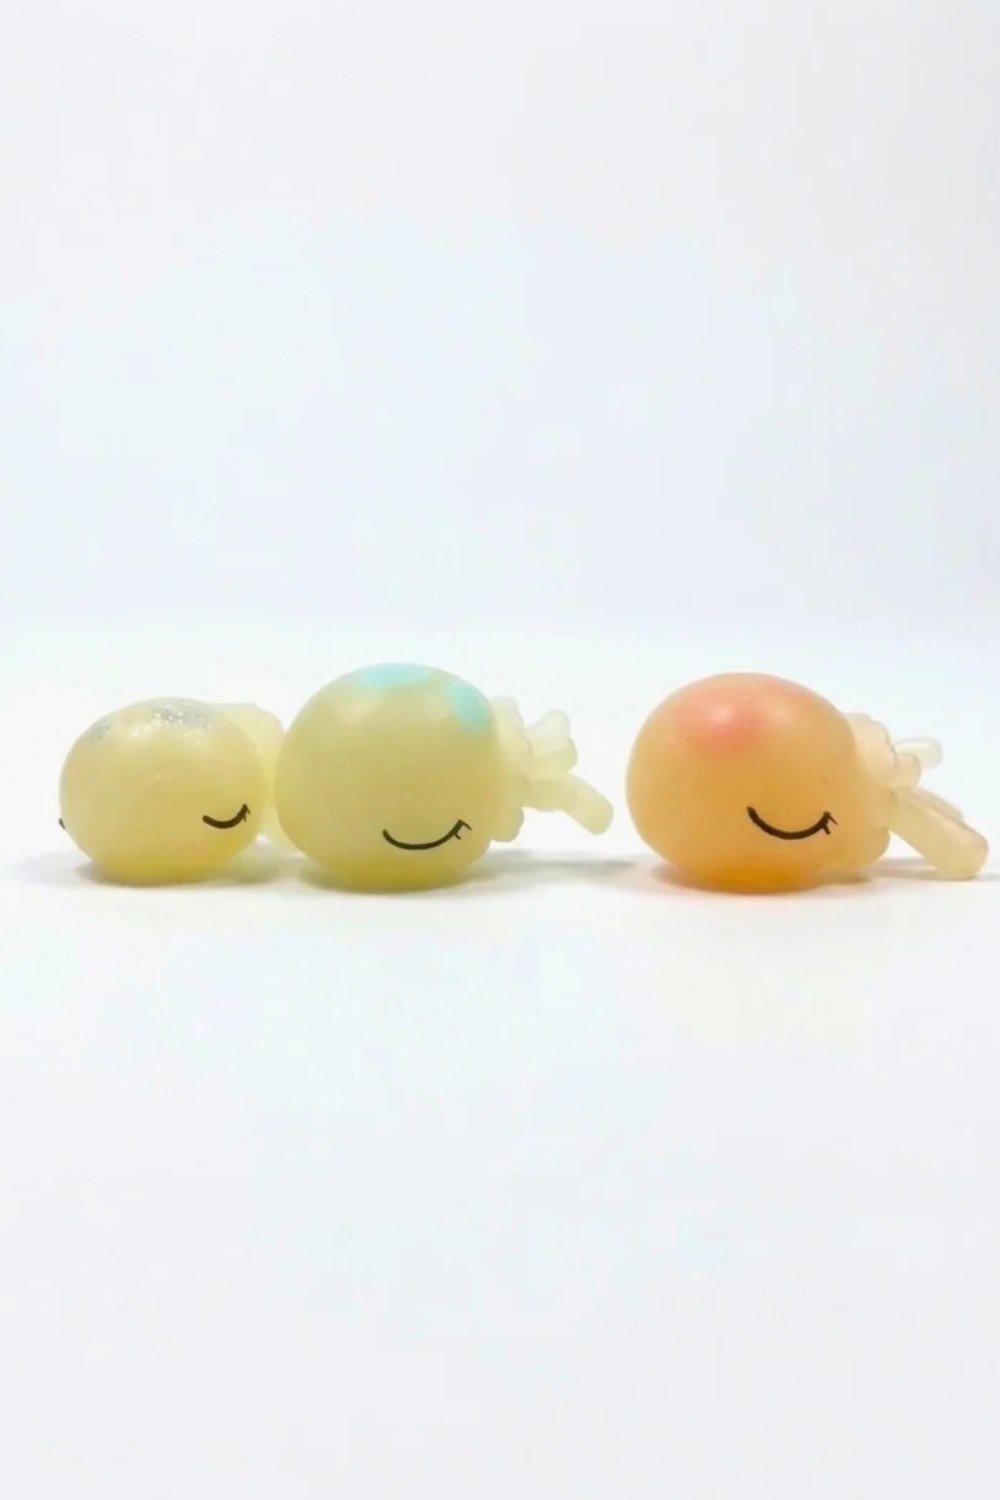
DIY Sleeping Jellyfish Polymer Clay Charm Tutorial
Jellyfish are some of the ocean’s most magical creatures, with their flowing tentacles and translucent domes. What if you could bring a little piece of that magic to your craft table? In this tutorial, you’ll learn how to sculpt an adorable sleeping jellyfish charm from polymer clay! This project features a soft, dreamy expression and a see-through effect that mimics a real jellyfish’s head. The instructions are clear, detailed, and ideal for beginners, so you can start making your own sea-inspired charms, gifts, or desk buddies right away.
Essential Materials & Tools
Gather these items before you start:
Materials
- Polymer clay:
- Translucent (for head and covering)
- Bright colored clay (for spots—pink, blue, mint, gold, or any shade you like)
- Black or dark clay (for facial details)
- Optional: Glitter or metallic clay for a shimmery effect
- Polymer clay glaze or varnish (optional, for a glossy finish)
Tools
- Clay roller or smooth round pen (for flattening clay)
- Blunt edge blade (for cutting, texturing, and making indents)
- Blending tool (a silicone brush or finger for smoothing seams)
- Dotting tool, needle, or toothpick (for fine detail)
- Baking tray + parchment or foil (for oven baking)
- Oven (follow your clay’s package guidelines; usually 265–275°F/130°C)
- Clean work surface
- Tweezers (optional, for placing small pieces)
Step-by-Step Instructions
These steps are designed to be easy to follow, even for those new to working with polymer clay. Take your time, enjoy the process, and remember: handmade means every charm will be unique!
1. Form the Jellyfish Head
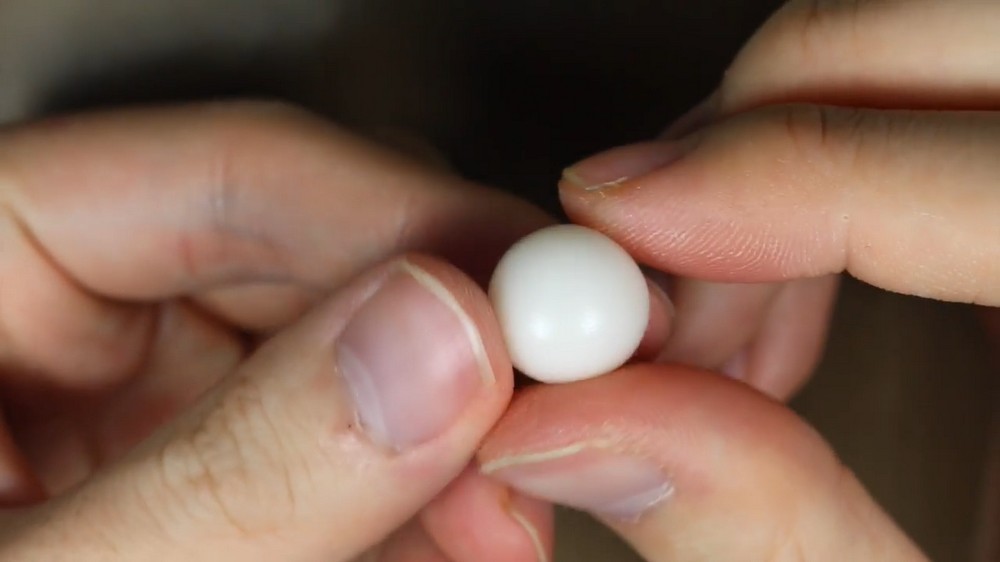
- Roll a ball:
Take a lump of translucent polymer clay and roll it into a nice, smooth ball. This will be the rounded “bell” or head of your jellyfish.Tip: Roll between your palms with light pressure to avoid fingerprints.
2. Add Colorful Spots
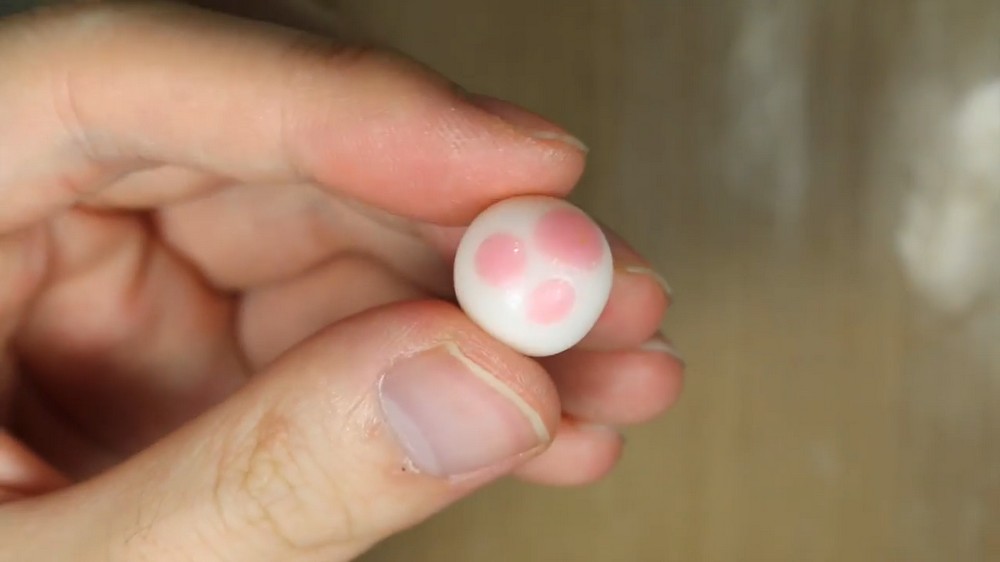
- Create spots:
Choose your bright colored clay. Tear off several small pieces and flatten them into tiny circles or irregular blobs. - Attach to head:
Gently press these colorful spots onto the outside of your translucent dome—it doesn’t matter whether they’re random or in a pattern; have fun with color choices! - Flatten together:
Gently press the whole jellyfish head down on your work surface to form a slightly flattened dome. This both locks the spots in place and creates that classic jellyfish shape.Tip: The more colors you use, the more playful your jellyfish will look.
3. Create a Translucent Cover
- Roll out translucent clay:
Using your roller or a clean pen, roll out more translucent clay into a very thin, flat sheet (as thin as you can make it). This will mimic a jellyfish’s delicate, see-through skin. - Cover the head:
Carefully drape this sheet over your dome, making sure it hugs the surface and completely envelops the head with all the bright spots underneath. - Remove bubbles and trim:
With your fingers or a soft tool, gently press out any air bubbles. Use your blade to carefully cut away extra clay around the bottom edge.Tip: Work slowly here to avoid stretching or tearing the clay too much.
4. Make and Attach the Lacy Frill
- Roll out a frill snake:
Take more translucent clay and roll it into a thick snake (about 5–6 mm diameter, depending on your jellyfish’s size). - Flatten slightly:
Lightly flatten the snake into a wide strip. - Texture the edge:
With the dull side of your blade, make gentle indents all along one edge to create a ruffled, lace-like effect—the frill under the jellyfish head.
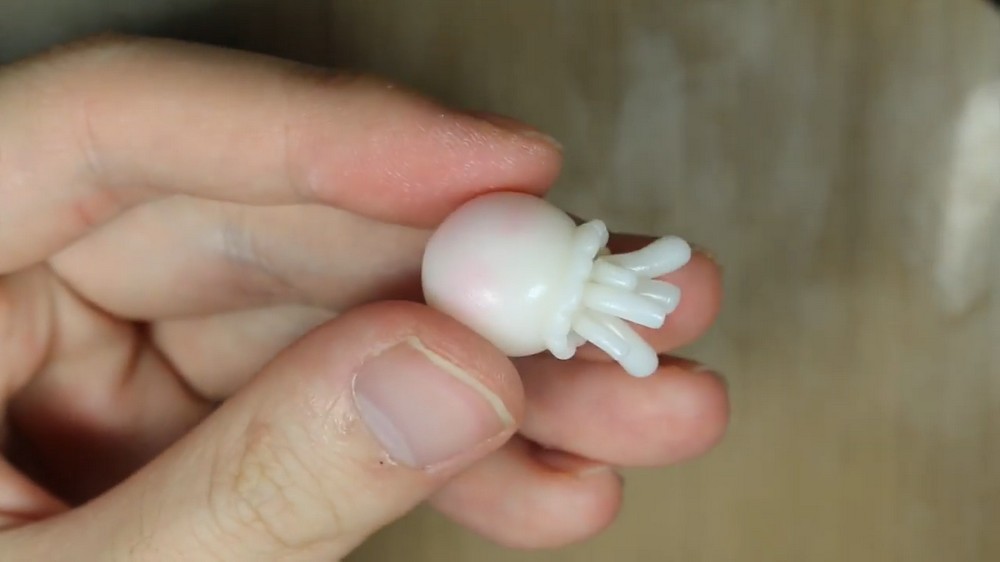
Attaching the Frill
- Wrap around head:
Gently wrap this textured strip around the edge of your jellyfish head, just where the dome meets the base. - Blend and adjust:
Use your blending tool (or carefully, your finger) to blend the top edge of the frill into the head for a seamless look. You can further emphasize the grooves in the lace by pressing them gently again with your tool. - Check the look:
The frill should stand out a bit, like a petticoat edge under the dome.
5. Shape and Place the Tentacles ("Legs")
- Form tentacles:
Roll six or seven thin snakes of translucent (or colored) clay, varying slightly in length and thickness for realism. They don’t need to be perfect! - Trim and arrange:
Trim every tentacle to your preferred length. Place them around the inside edge of the frill. - Attach and blend:
Press one end of each tentacle gently into place, blending slightly where it touches the body for a natural look. Let the rest of each tentacle hang free and loose.Tip: If tentacles are too thick, gently roll them thinner before attaching.
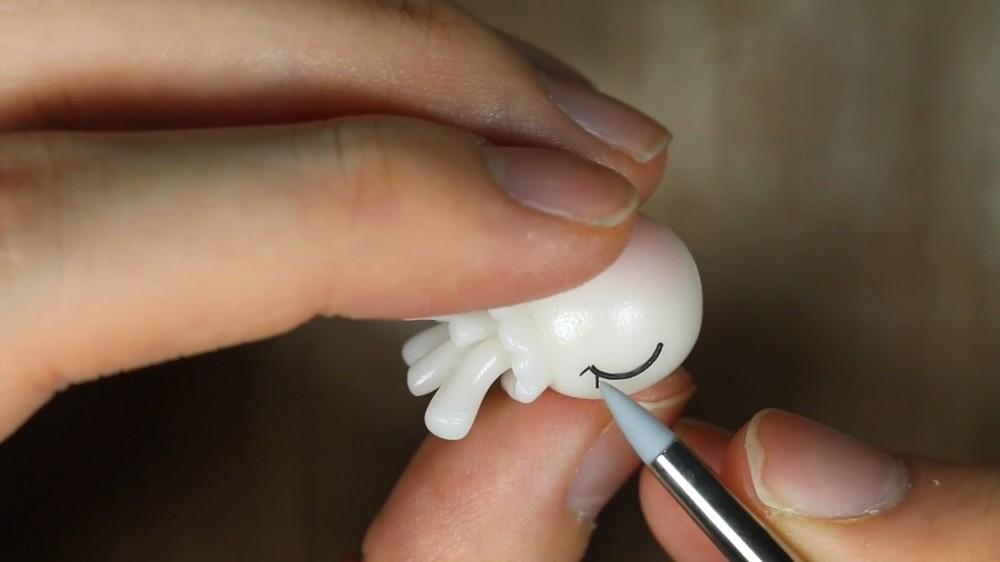
6. Add the Sleeping Face
- Roll thin snakes for eyes:
Take black or dark clay and roll into very, very thin snakes. - Shape "sleeping" eyes:
Form each snake into a gentle half-circle, like a closed eyelid for a sleepy kawaii expression. - Place on face:
Carefully position two half-circles in the upper part of the dome as eyes—let them curve slightly downward for a peaceful look. - Add eyelids/lashes:
Use even thinner clay bits to create teeny eyelid creases or tiny eyelashes at each eye’s end, for extra cuteness.Tip: Use tweezers to help with very thin pieces, if necessary.
7. Bake the Charm
- Prep for baking:
Carefully transfer your charm to a lined baking tray. - Bake:
Bake according to your clay’s instructions (usually about 265–275°F, or 130°C, for 15–30 minutes depending on size). - Cool completely:
Let your jellyfish cool fully before touching or glazing.
8. Optional: Glaze for Shine
- Apply glaze:
If desired, brush a thin layer of polymer clay glaze or varnish over the entire charm, especially if you want a glossy, watery jellyfish effect. - Let dry:
Follow product instructions for drying and curing.
Customization Ideas
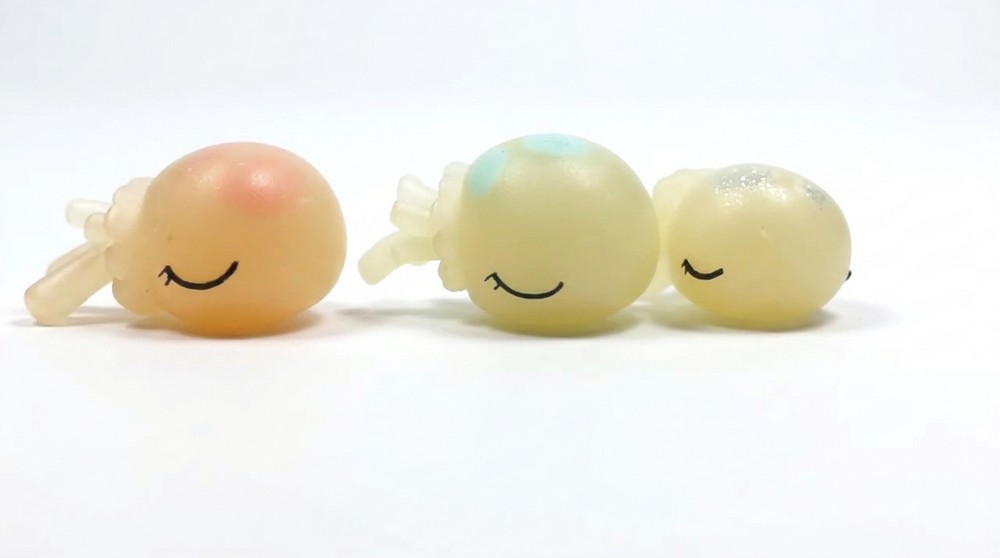
- Play with colors: Use pastels, mints, bright neons, or glitter clays for a unique look.
- Add more detail: Try blending color into the tentacles, or swirl two translucent colors for extra depth.
- Expression: Create “awake” jellyfish with open eyes or add a cute mouth!
Tips for Success
- Always work with clean hands to avoid dirt or lint in translucent clay.
- Keep clay pieces soft and dust-free by covering with plastic wrap when not in use.
- Smooth with a bit of rubbing alcohol (on a brush or cotton swab) to remove fingerprints before baking.
- Take your time with detailing: The cuter the face, the more charming your jellyfish!
Conclusion
You’ve now mastered the art of creating a dreamy sleeping jellyfish out of polymer clay, from its soft translucent dome to its whimsical lace and flowing tentacles. This project is perfect for charms, gifts, or display, and it’s easy to make your own with different color patterns or facial expressions. As you saw in the examples, you can experiment with tints, glitter, or even metallic clay for an ocean of charm variety.