Celebrate the festive spirit with a meticulously detailed Santa Claus in polymer clay—perfect for holiday décor or thoughtful handmade gifts.
Santa Claus comes to life in a heartwarming design that combines festive charm and attention to detail. Exquisitely crafted from polymer clay, this DIY Polymer Clay Santa Claus flaunts a jolly red suit, a snowy white beard, and a cheerful expression that radiates holiday magic. It serves as a perfect choice for holiday decorations or heartfelt, handmade gifts that capture the essence of Christmas joy.
DIY Polymer Clay Santa Claus for Beginners Step-by-Step
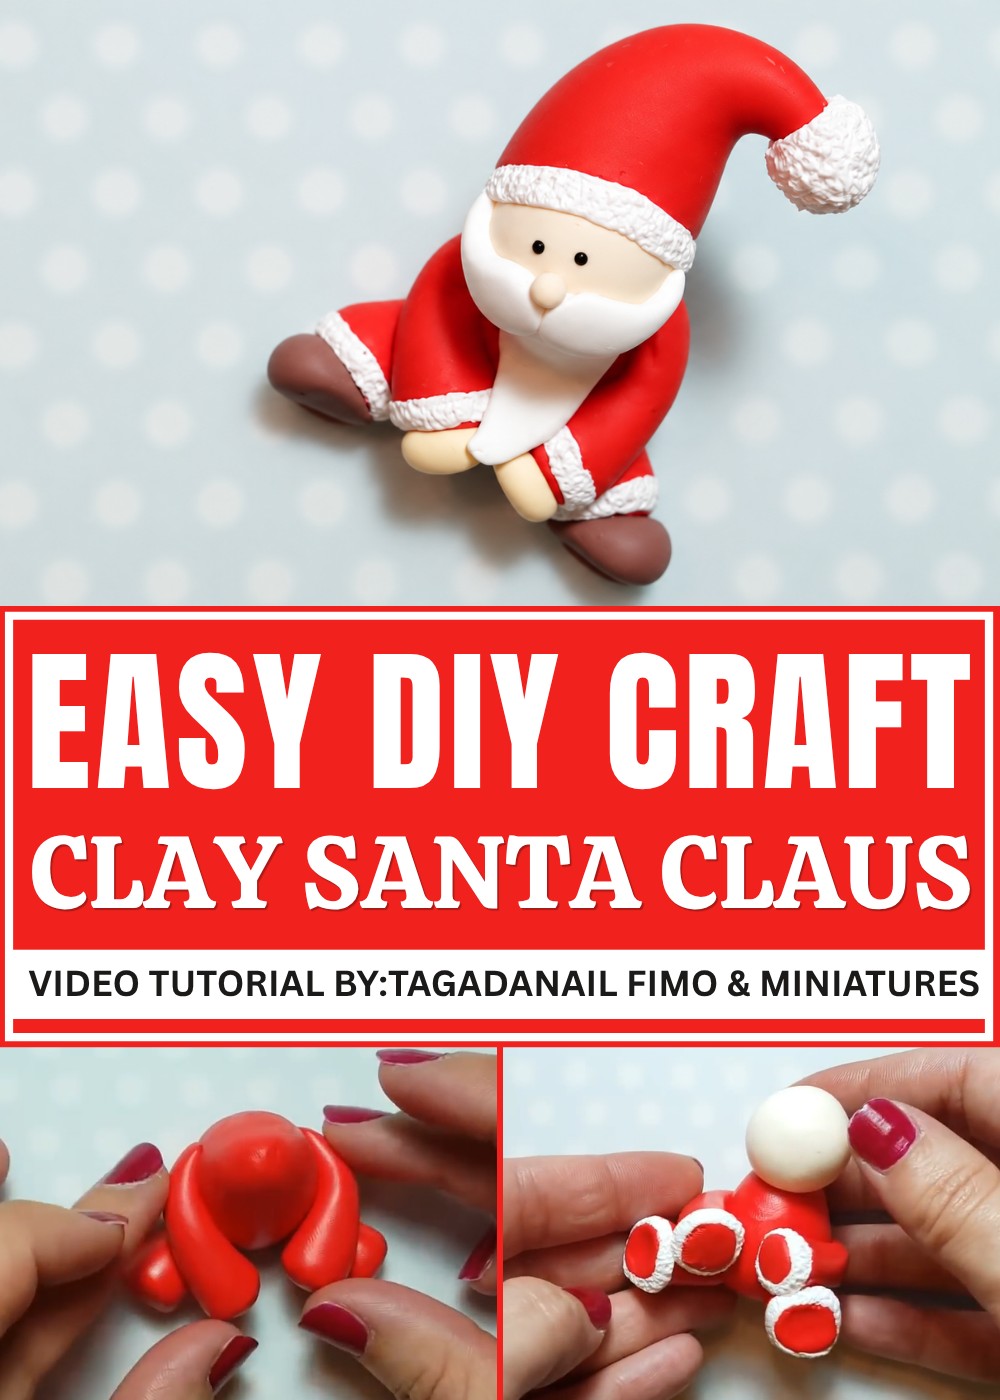
The completed design stands out with its lifelike features and vibrant colors, creating a whimsical yet elegant miniature piece. From the soft texture of his beard to the precise details of his playful hat, every element adds personality and warmth to this captivating creation. Its timeless appeal makes it an ideal addition to both modern and traditional holiday displays, embodying the festive spirit in every way.
About Designer:
Crafted by the talented artist behind Tagadanail Fimo & Miniatures, this miniature masterpiece showcases the creator’s dedication to polymer clay artistry. Discover more of their enchanting projects and tutorials on their channel here, and let your imagination be inspired.
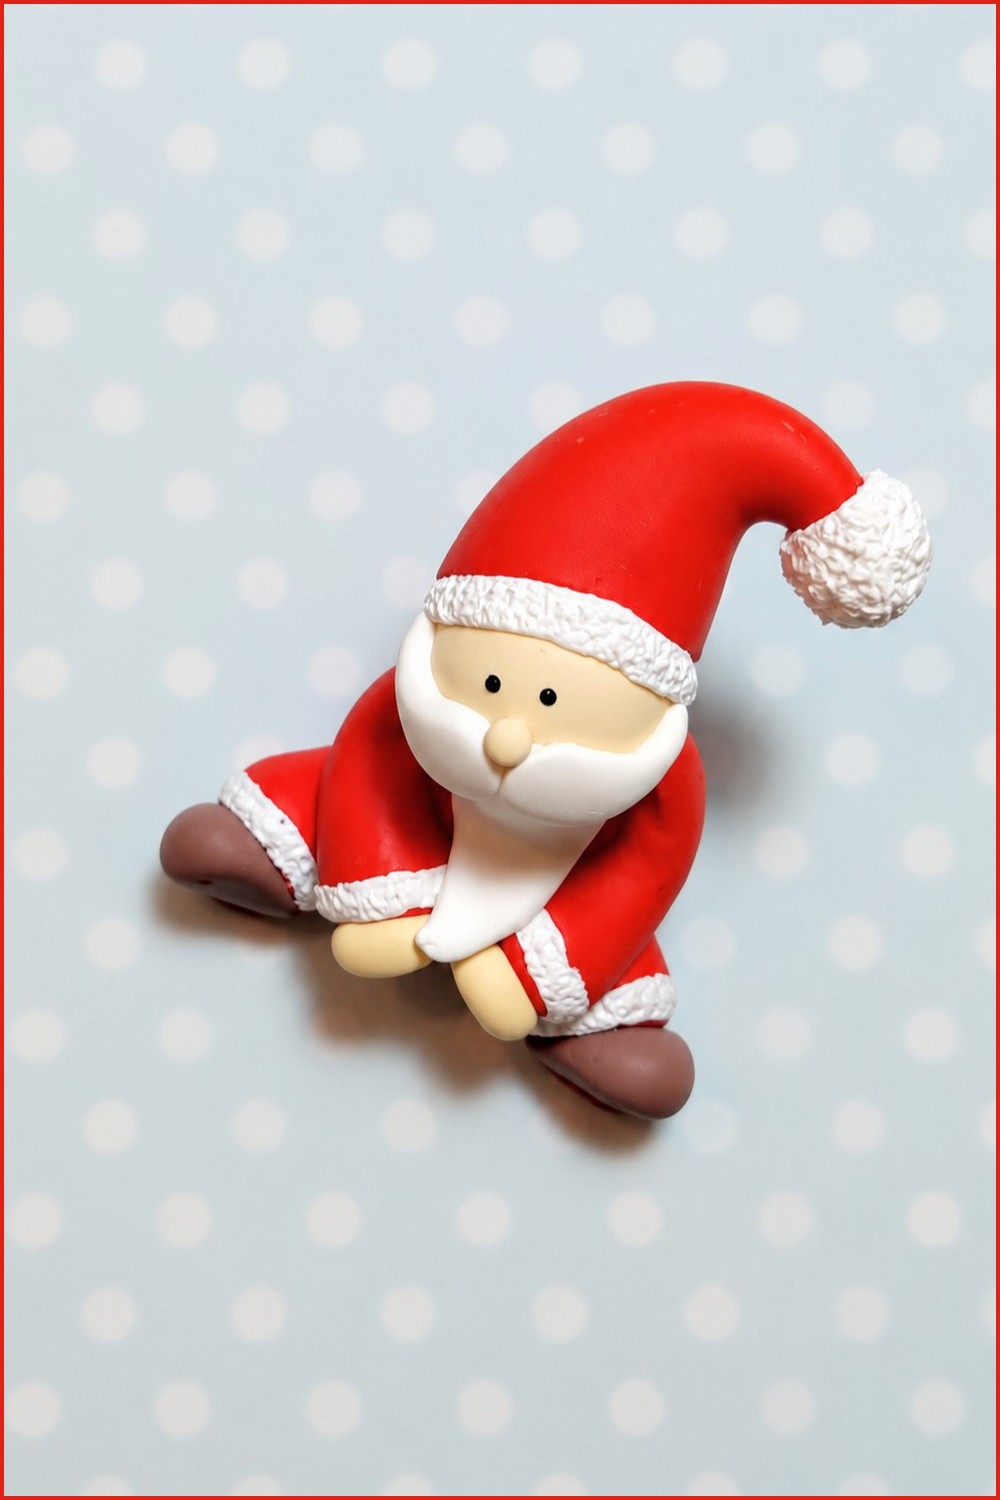

DIY Santa Claus Miniature Craft Tutorial
In this tutorial, we’ll learn to create an adorable miniature Santa Claus out of modeling dough or clay. This step-by-step guide is perfect for beginners and teaches you how to shape and assemble Santa’s body, head, and signature accessories like his beard and hat. Let’s begin crafting your festive Santa Claus decoration.
Materials You’ll Need
Here’s what you’ll need to make your miniature Santa Claus:
- Modeling clay or dough in red, white, flesh-colored, and brown
- Craft tools or a smooth toothpick for texturing
- A toothbrush (optional) for texturing small areas
- Small paintbrush for finishing details
- Black paint for the eyes
- Oven (for hardening clay, if required)
Step-by-Step Instructions
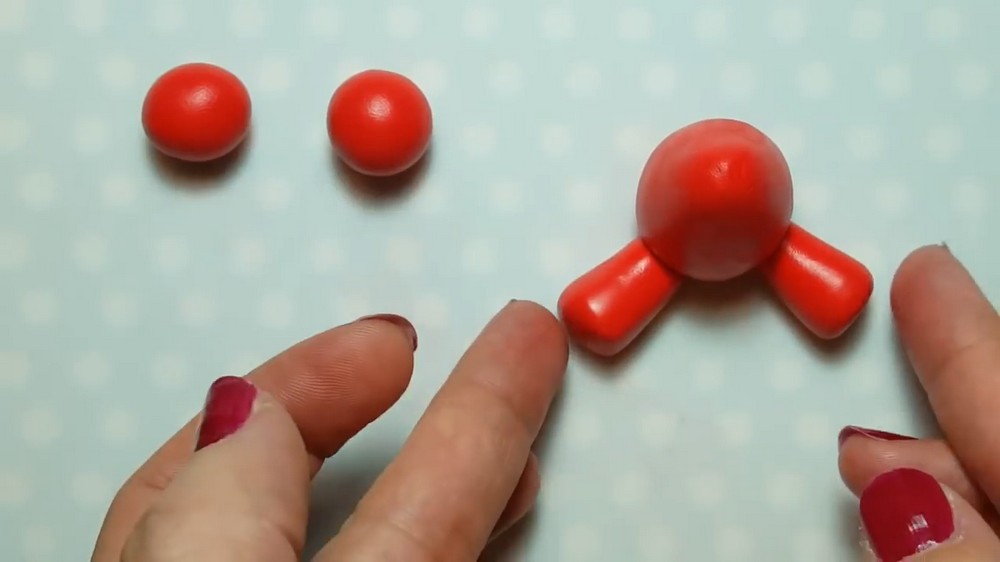
Step 1: Shaping Santa’s Body and Legs
- Form the Main Body:
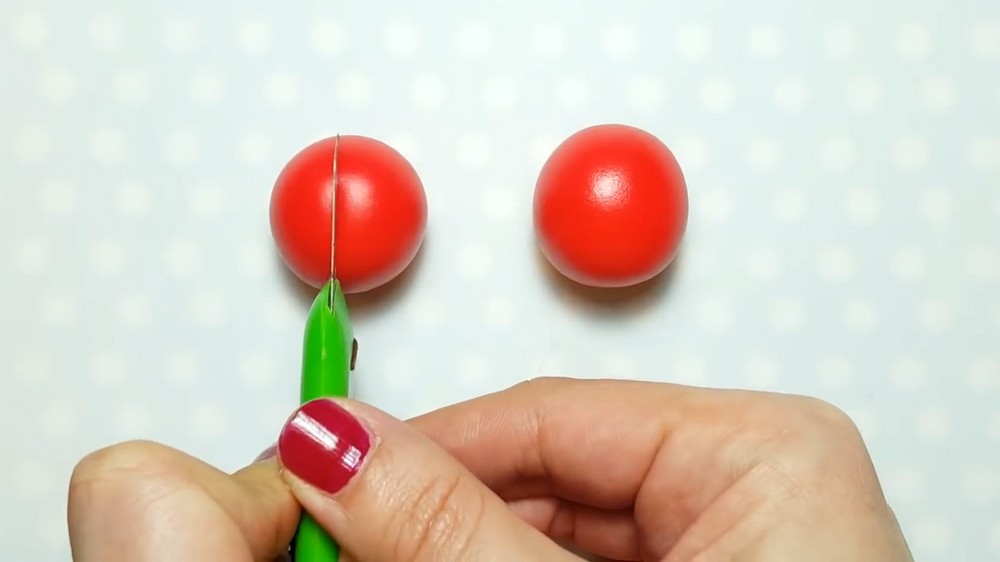
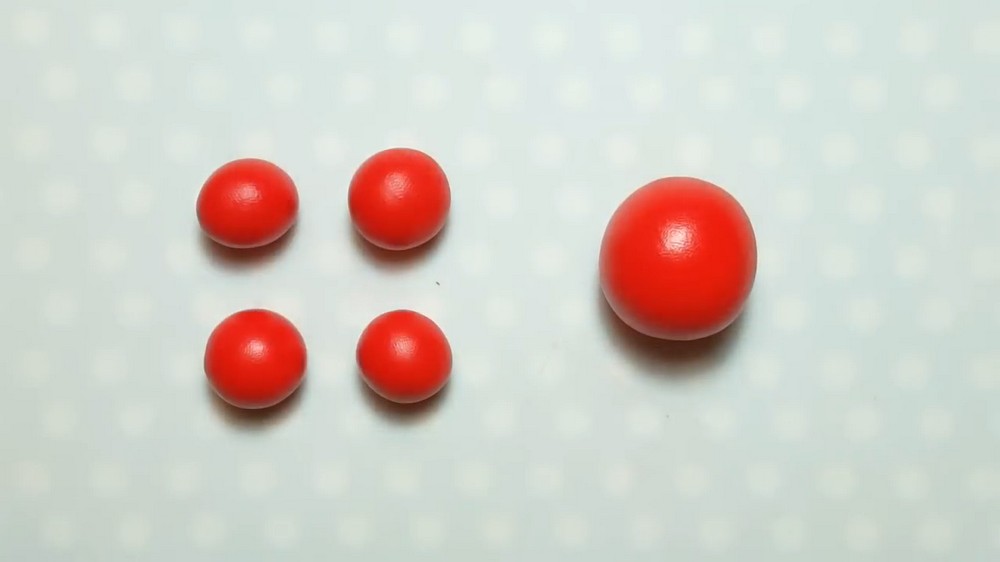
- Take two equal-sized red balls of dough.
- Leave one intact (for the main body) and cut the other into four equal parts (for legs and arms).
- Shape the Torso:
- Take the largest ball and roll it between your fingers to form a cone shape. This will be Santa’s torso.
- Make the Legs:
- From two of the smaller dough pieces, roll them into short, even cylinders (approximately the length of the torso’s bottom portion).
- Attach these legs to the wider end of the cone torso with slight pressure. Ensure they’re anchored securely against the body.
Step 2: Creating Santa’s Arms
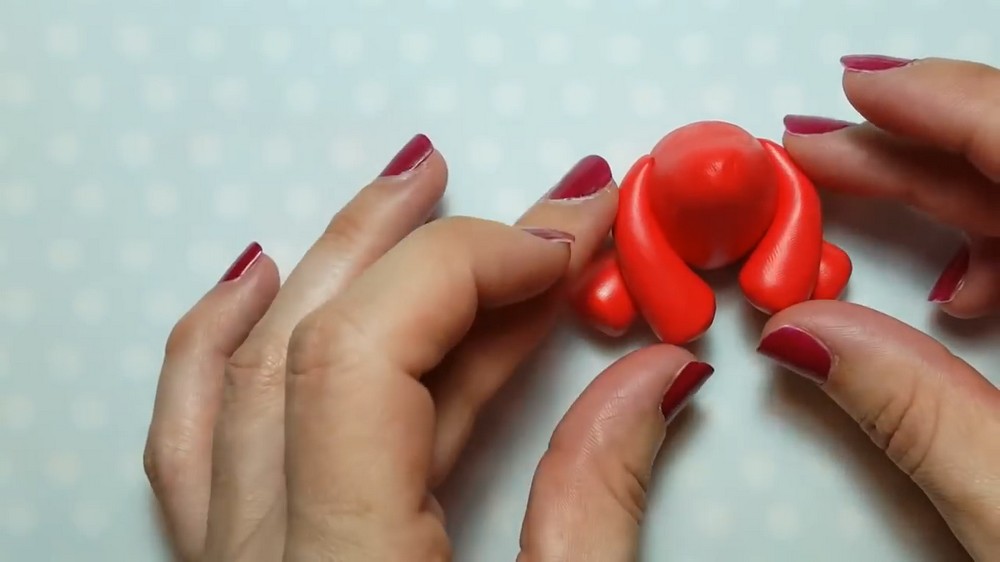
- Shape the Arms:
- Take the other two smaller dough pieces and roll them slightly longer than the legs to form Santa’s arms.
- Attach them to the upper portion of the cone torso by pressing gently. Place the arms at a slightly raised angle to ensure natural positioning.
- Adjust the Placement:
- If needed, reattach or reposition the arms to prevent them from lowering too far down toward the legs. Keep their placement proportional to the body.
Step 3: Adding Santa’s Head
- Shape the Head:
- Use a flesh-toned ball of dough (about the size of the upper section of the cone torso).
- Roll it into a smooth sphere, then attach it to the top of Santa’s torso.
- Refine the Look:
- Gently pinch the attachment point so the head is firmly connected, ensuring it sits proportionately above the arms.
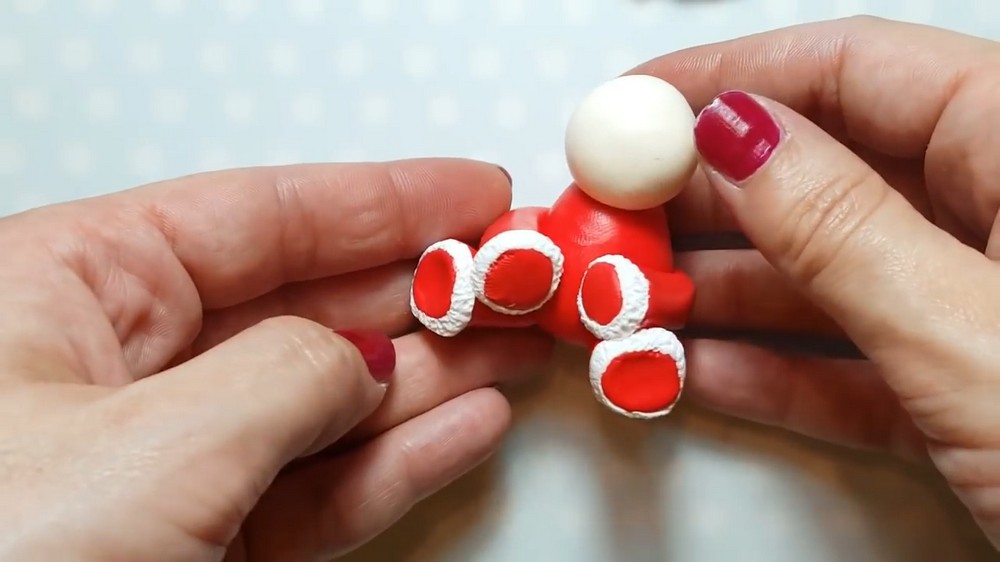
Step 4: Adding White Details
- Make the Trim for Arms and Legs:
- Roll out a thin strip of white dough and wrap it around the ends of the arms and legs to form cuffs.
- Use your fingers or a small tool to smooth the connection points.
- Texturize the Trim:
- Use a fine-point tool or a toothbrush to add texture to the white trim, giving it a fluffy, cotton-like appearance.
Step 5: Making Santa’s Beard
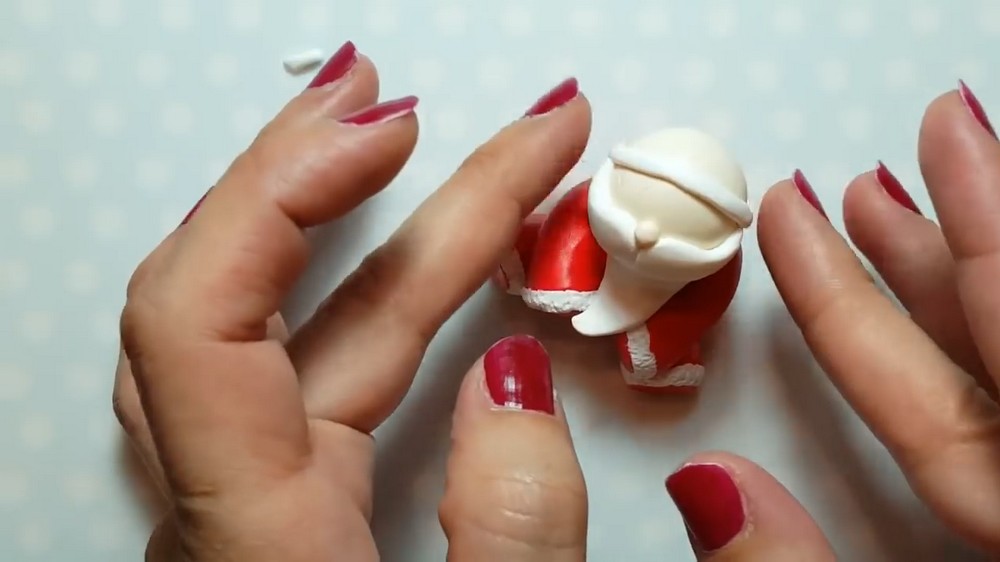
- Shape the Beard:
- Take a small white ball of dough and flatten it under your fingers until it’s thin but durable.
- Shape the piece into a long, curved triangle with a pointed bottom.
- Attach the Beard:
- Place the beard at the lower part of Santa’s face, ensuring it covers the chin. Adjust as needed to allow space for other facial features.
- Add Texture:
- Use a tool to create wavy or curved indentations all over the beard for a realistic effect.
Step 6: Adding Mustache and Nose
- Create and Attach the Mustache:
- Roll two small white balls of dough, flatten them slightly under your fingers, and shape them into almond-like ovals.
- Press the mustache pieces onto the face, slightly above the beard. Angle the ends outward for a whimsical look.
- Add the Nose:
- Roll a tiny ball of flesh-colored dough and place it just above the mustache, pressing gently to secure.
Step 7: Crafting Santa’s Hat
- Shape the Red Hat:
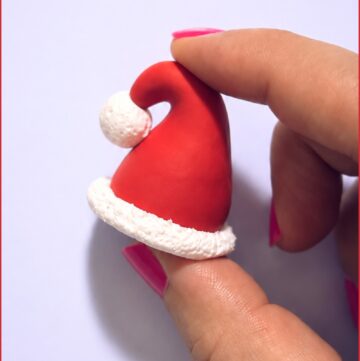
- Roll a medium-sized red ball of dough into a cone shape.
- Flatten and curve the cone slightly, so it bends either to the side or over the face.
- Attach the White Trim and Pom Pom:
- Roll a thin strip of white dough and wrap it around the base of the red cone to create the hat’s trim.
- Add a small white ball to the tip of the hat to create the pom-pom.
- Texturize the Trim and Pom Pom:
- Use a fine-point tool to make the white elements look fluffy and soft.
- Secure the Hat:
- If working with soft dough or clay, bake the head first for 15 minutes to harden it, making it easier to attach the hat without losing its shape.
- Once hardened, attach the hat to the top of the head by pressing lightly.
Step 8: Adding Shoes and Hands
- Shape the Shoes:
- Roll two equal-sized brown balls of dough. Flatten one side slightly to form the base of Santa’s shoes.
- Attach them to the bottom of the legs, positioning them securely.
- Shape the Hands:
- Roll two small white balls of dough and flatten them slightly for the hands.
- Attach the hands to the ends of Santa’s arms.
Step 9: Adding Final Details
- Paint the Eyes:
- Use black paint or a very fine marker to add two small dots above the nose for Santa’s eyes.
- Bake or Set Your Santa Claus:
- If using oven bake clay, bake your creation at 110°C (230°F) for 30 minutes to harden.
- If using air-dry clay, allow it to set for 24 hours or as per the instructions provided with your clay.
Step 10: Final Touches
- Inspect your Santa for any smudges or imperfections and clean them up if necessary.
- Display your miniature Santa Claus as part of your holiday decor or gift it as a handmade keepsake.
This little Santa Claus is a thoughtful and festive addition to your holiday season. Have fun creating and experimenting with different details to give it your unique touch.