Celebrate the holiday spirit with a step-by-step tutorial for a vibrant and colorful Rainbow Loom bracelet, ideal as a festive accessory or thoughtful gift.
Bright, festive, and brimming with holiday charm, this accessory is the perfect way to add a cheerful touch to the season. The DIY Christmas Rainbow Loom bracelet brings together classic holiday colors—red, green, and white—in a playful yet elegant braided design. Its lightweight and comfortable fit make it ideal for daily wear, whether you're attending a festive party or simply embracing the holiday spirit. The bracelet’s intricate loops, combined with its handmade feel, turn it into a meaningful accessory that’s great for gifting or creating in multiples for family and friends.
Unique Christmas Rainbow Loom Bracelet Tutorial to Try This Holiday Season
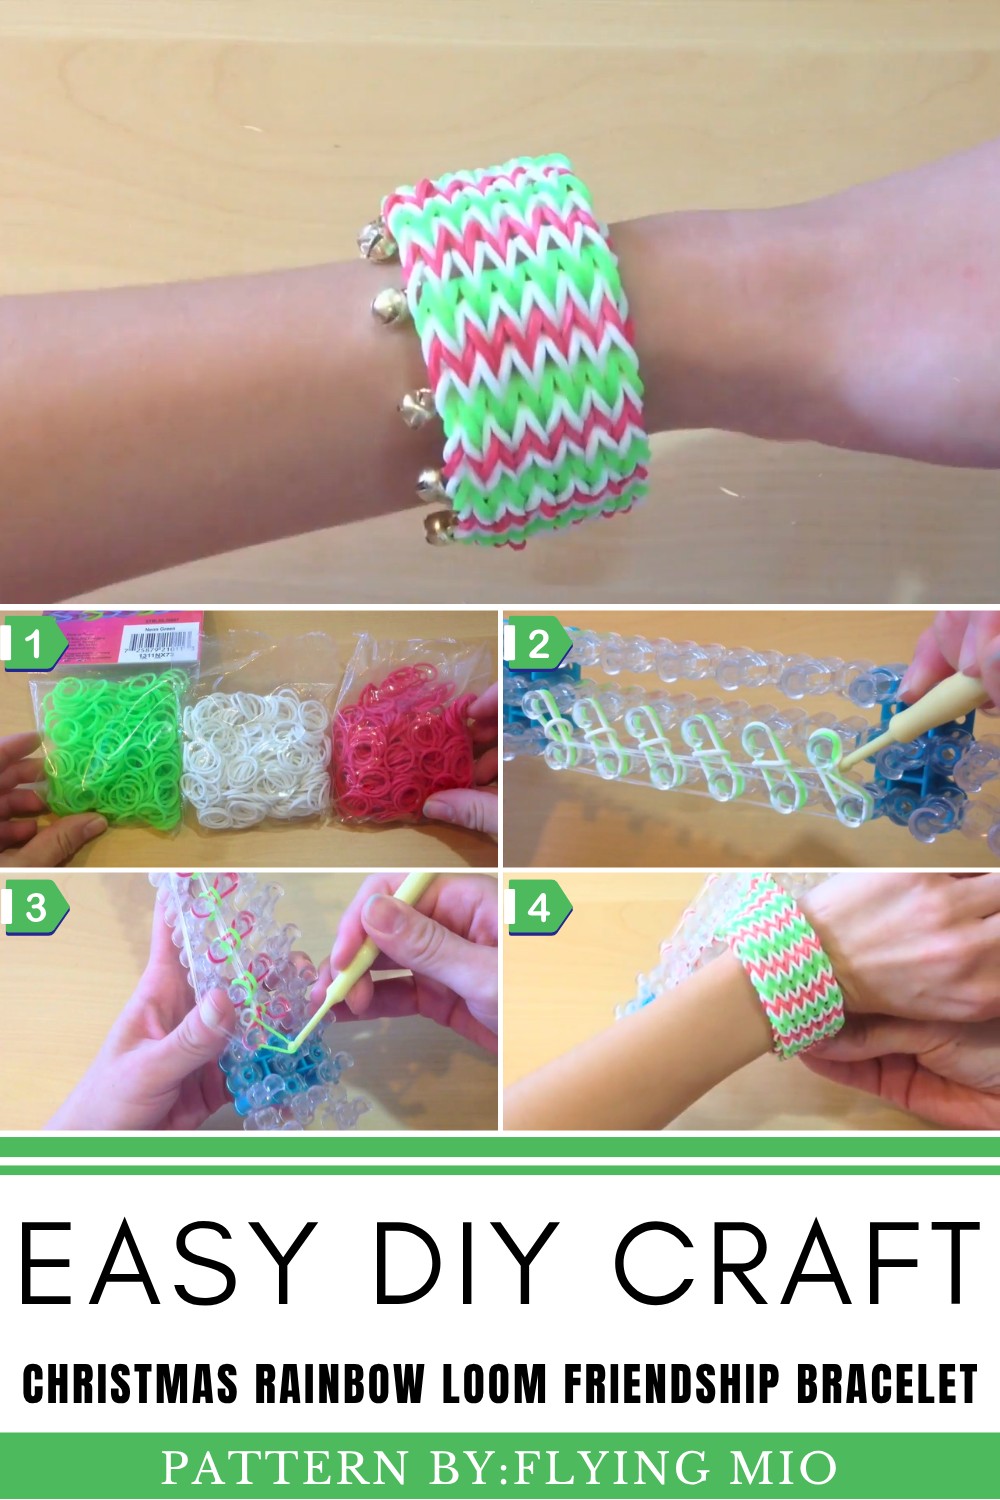
What makes this piece stand out is its versatility; it works as a simple statement of holiday cheer, but with optional embellishments like tiny jingle bells, it transforms into a fun and musical addition to your festive look. The thoughtful design brings a sense of joy and vibrancy that simply can’t be matched.
Behind this colorful creation is Flying Mio, a talented designer with a knack for crafting unique and creative DIY projects. Check out her YouTube channel Flying Mio for tutorials that inspire your creativity throughout the holidays and beyond.
Uses of the DIY Christmas Rainbow Loom Bracelet
The DIY Christmas Rainbow Loom bracelet is more than just a colorful holiday accessory—it serves multiple creative and thoughtful purposes. Here’s how it can be used:
1. Festive Wear
Add a cheerful holiday touch to your outfit with this bracelet. Its red, green, and white design complements any Christmas-themed attire, making it the perfect addition to your festive wardrobe.
2. Thoughtful Gifts
Handmade accessories always carry a special charm. These bracelets make meaningful holiday presents for friends, family, or coworkers, showcasing effort and creativity in an item they’ll treasure. Pair them with a handwritten note for a personal touch.
3. Party Favors
Craft several bracelets and use them as fun party favors for holiday gatherings. Their playful design is perfect for kids, teens, and adults alike. Guests will love receiving this merry token of appreciation.
4. Stocking Stuffer
Thanks to their compact size, these bracelets are perfect for slipping into Christmas stockings. They’re a sweet surprise that adds handmade cheer to a holiday tradition.
5. Craft Therapy
Making these bracelets can be a relaxing and fulfilling activity for the crafter. Whether you’re creating them solo or as a family project, the process itself becomes a meaningful way to embrace the holidays.
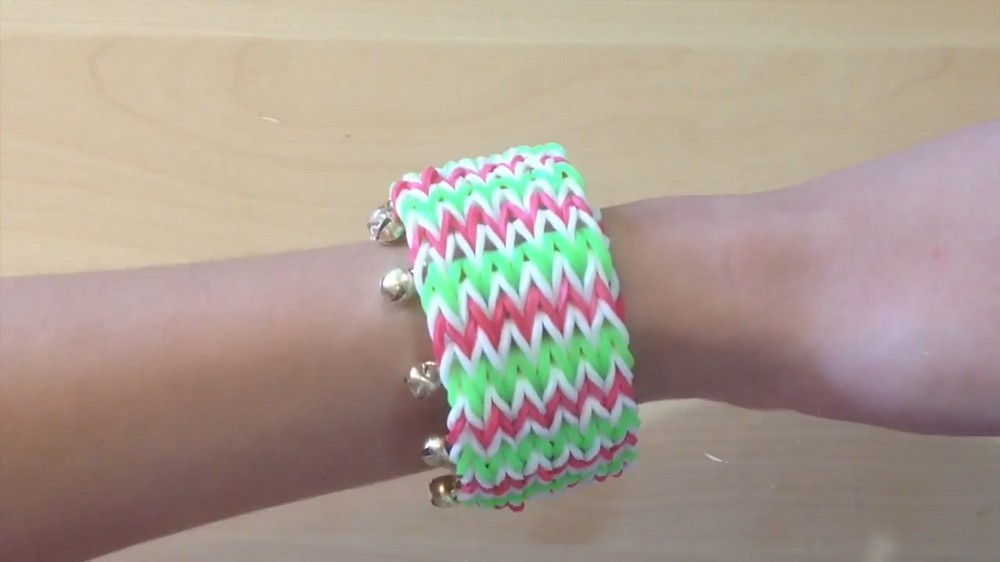
How to Make a Festive Christmas Bracelet with Rainbow Loom Rubber Bands
Celebrate the holidays with a colorful and cheerful bracelet made using Rainbow Loom rubber bands! This craft is perfect for showing off holiday spirit or even as a gift for friends and family. It’s easy to customize with your favorite colors and accessories like bells or charms. Whether you’re a beginner to Rainbow Loom or have some experience, this tutorial will help you create a stunning bracelet step by step.
Materials You'll Need
- Rainbow Loom (available at craft stores like Walmart or Michaels)
- Rubber bands in Christmas colors (red, green, white) or any colors of your choice
- Clear rubber bands (for hidden horizontal layers)
- Rainbow Loom hook (to loop the rubber bands)
- C-clips or S-clips (used to secure the bracelet at the end)
- Bells or other holiday charms (optional)
- Jump rings (optional, for attaching charms or decorations)
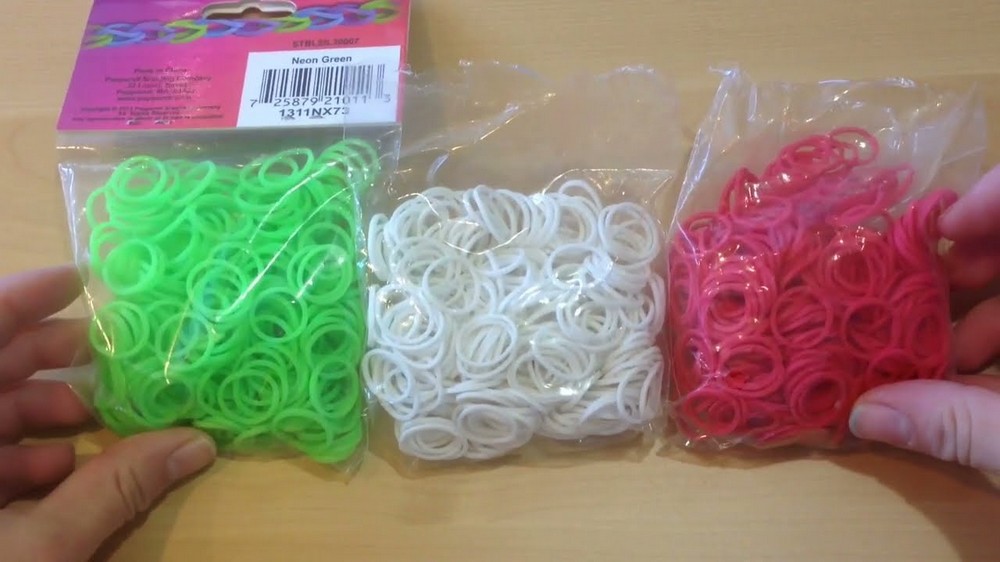
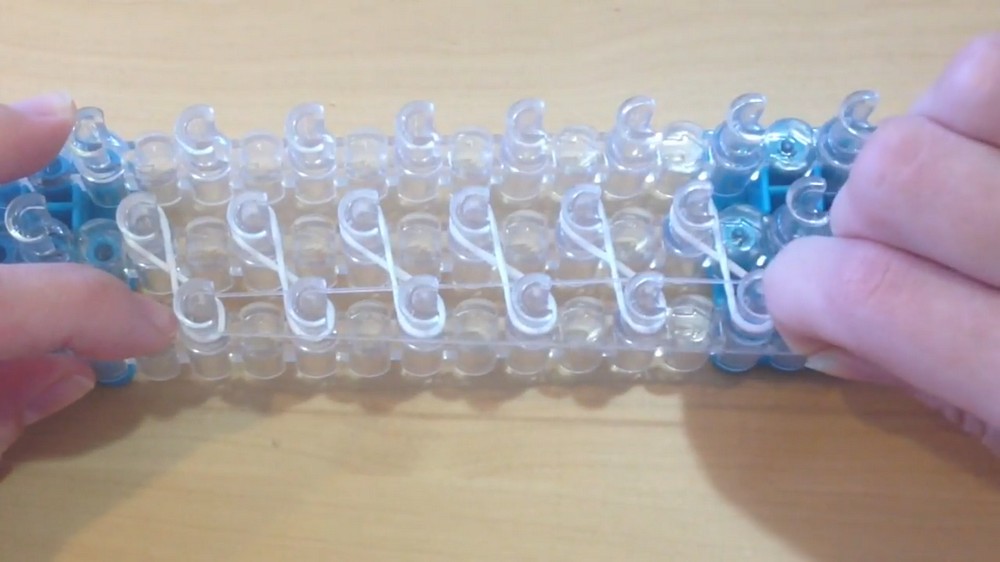
Step 1: Setting Up the Loom and First Row
- Arrange your Rainbow Loom so the pegs are aligned straight and parallel. Make sure the open ends of the pegs face you.
- Choose your first color—in this case, white—and twist each rubber band into a figure-eight shape before placing it across two pegs. Repeat for all six rows to make the base of your bracelet.
- Once you’ve placed one full row of white rubber bands, place a horizontal band (clear or hidden color) across all six pegs. This band creates structure and will remain hidden in the bracelet.
Step 2: Adding Layers of Color
- Select your next color—for example, green—and place the bands straight across the same pegs on top of the first layer. This time, don’t twist them.
- Repeat the process: after placing one row of green bands, add another horizontal band (clear or hidden) across all six pegs.
- Add your third layer using white rubber bands on top of the green layer in the same way, followed by a horizontal band across your pegs.
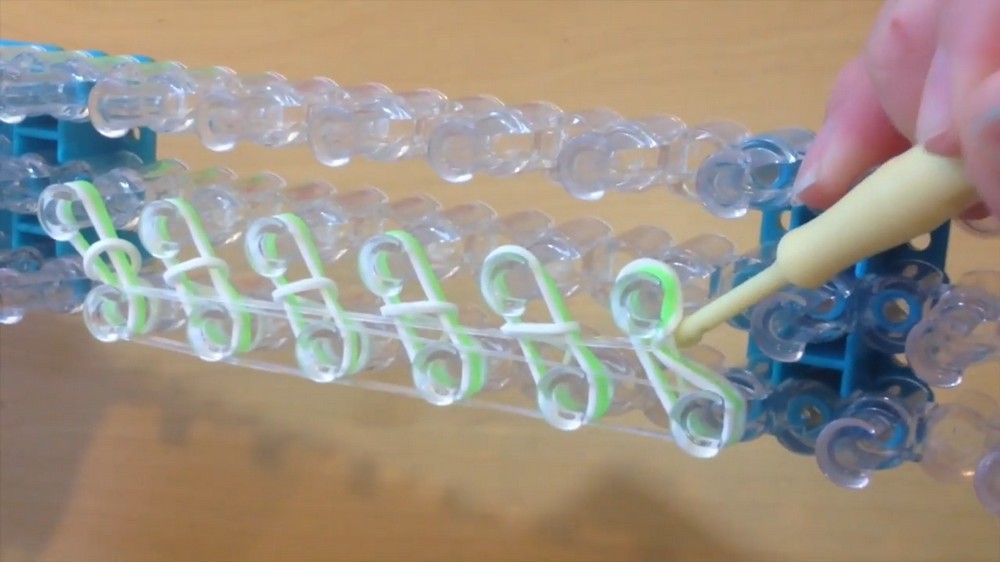
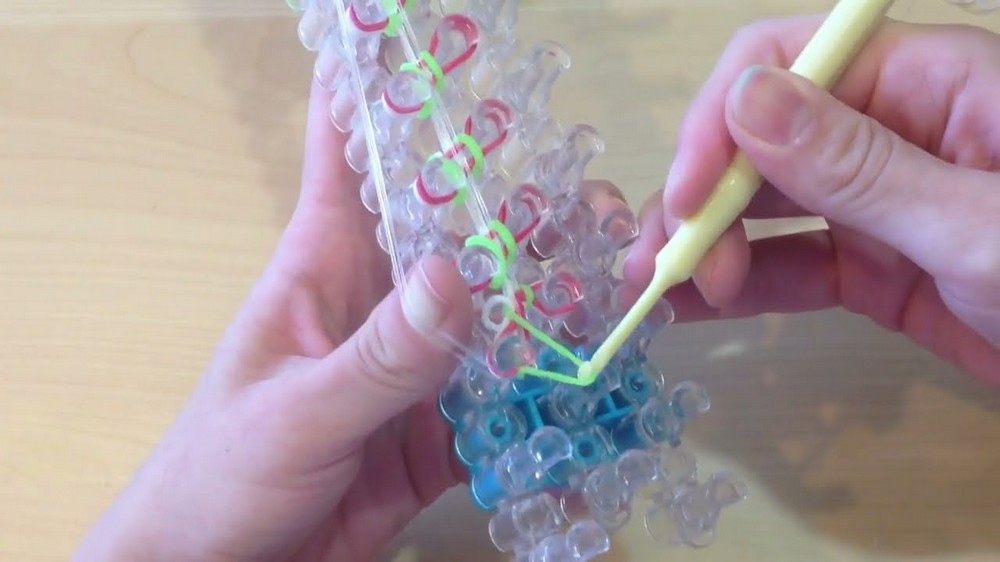
Step 3: Using the Hook to Lift Bands
- After placing three rows of rubber bands, take your Rainbow Loom hook and insert it under the bottom horizontal band. Scoop it over the pegs to release it from all six pegs.
- Take the bottom color layer (the first layer you placed) and carefully pull it over the top of the peg. Make sure your hook passes under the horizontal band when scooping the bottom color. This is crucial for keeping the bracelet’s structure intact. Repeat this process for all pegs on the top and bottom rows.
Step 4: Continuing the Pattern
- Place a new layer of rubber bands in your chosen color (e.g., red), along with a horizontal band across all pegs.
- Use the hook to remove the previous bottom horizontal band from all six pegs, then scoop the current bottom color layer over the pegs.
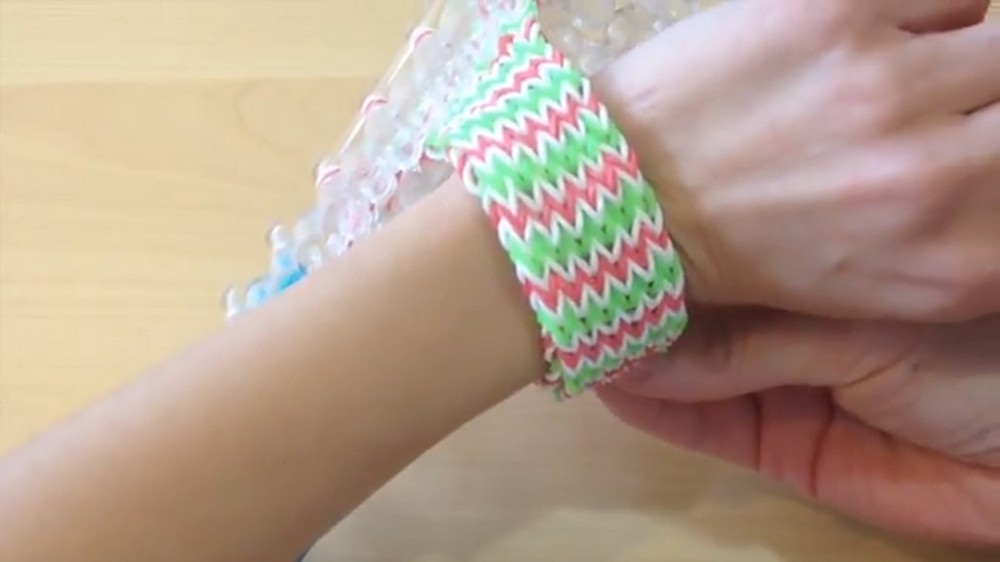
- Repeat these steps (new layer + horizontal band + scooping bottom bands) until your bracelet reaches the desired length. Measure your progress by wrapping the bracelet around your wrist as you go.
Step 5: Finishing the Bracelet
- Once you’re ready to finish, stop adding new layers, ensuring there are only two colored layers and one horizontal band on your pegs.
- Remove the top horizontal band completely.
- Use your hook to scoop the bottom colored layer over the pegs and leave just one layer on the loom.
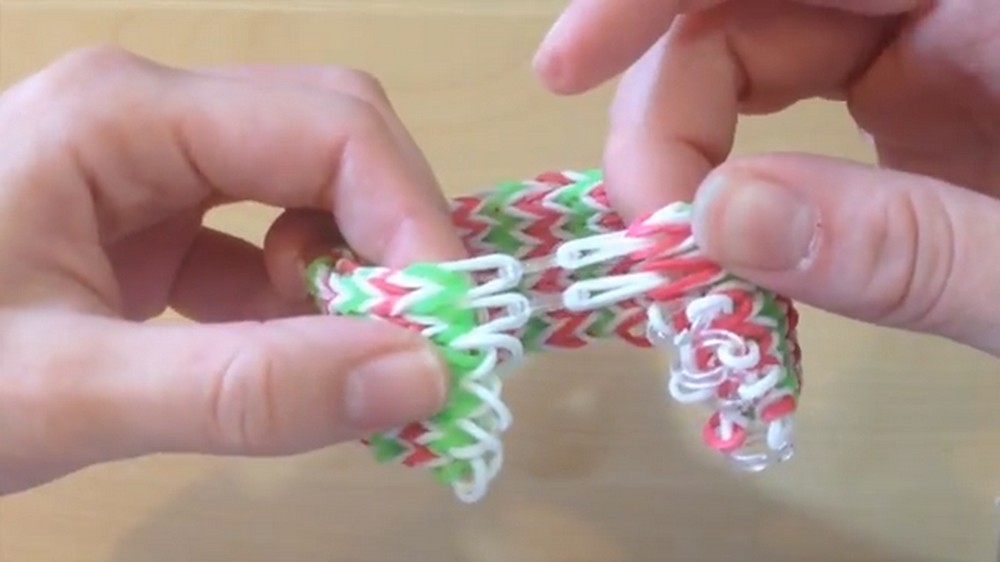
- Remove the bracelet from the loom by attaching each remaining rubber band to a C-clip or S-clip. Use one clip per two rubber bands. Move along the row until the entire bracelet is detached from the loom and secured with clips.
- Connect the two ends of your bracelet using the clips to close the loop.
Step 6: Optional Charm Decorations
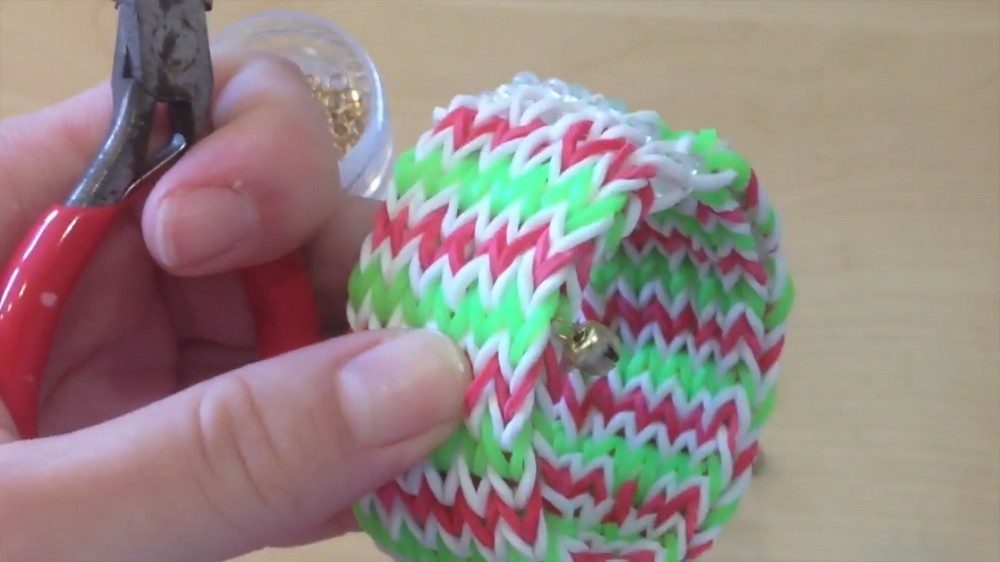
- To make it extra festive, you can add bells or small charms. Use jump rings to attach these to individual bands in the bracelet.
- Spread the charms evenly across the bracelet to ensure a balanced and eye-catching look.
This holiday bracelet is a simple and fun way to share some Christmas cheer. With a combination of colors and accessories, you can express yourself and impress your friends with this creative and festive DIY.