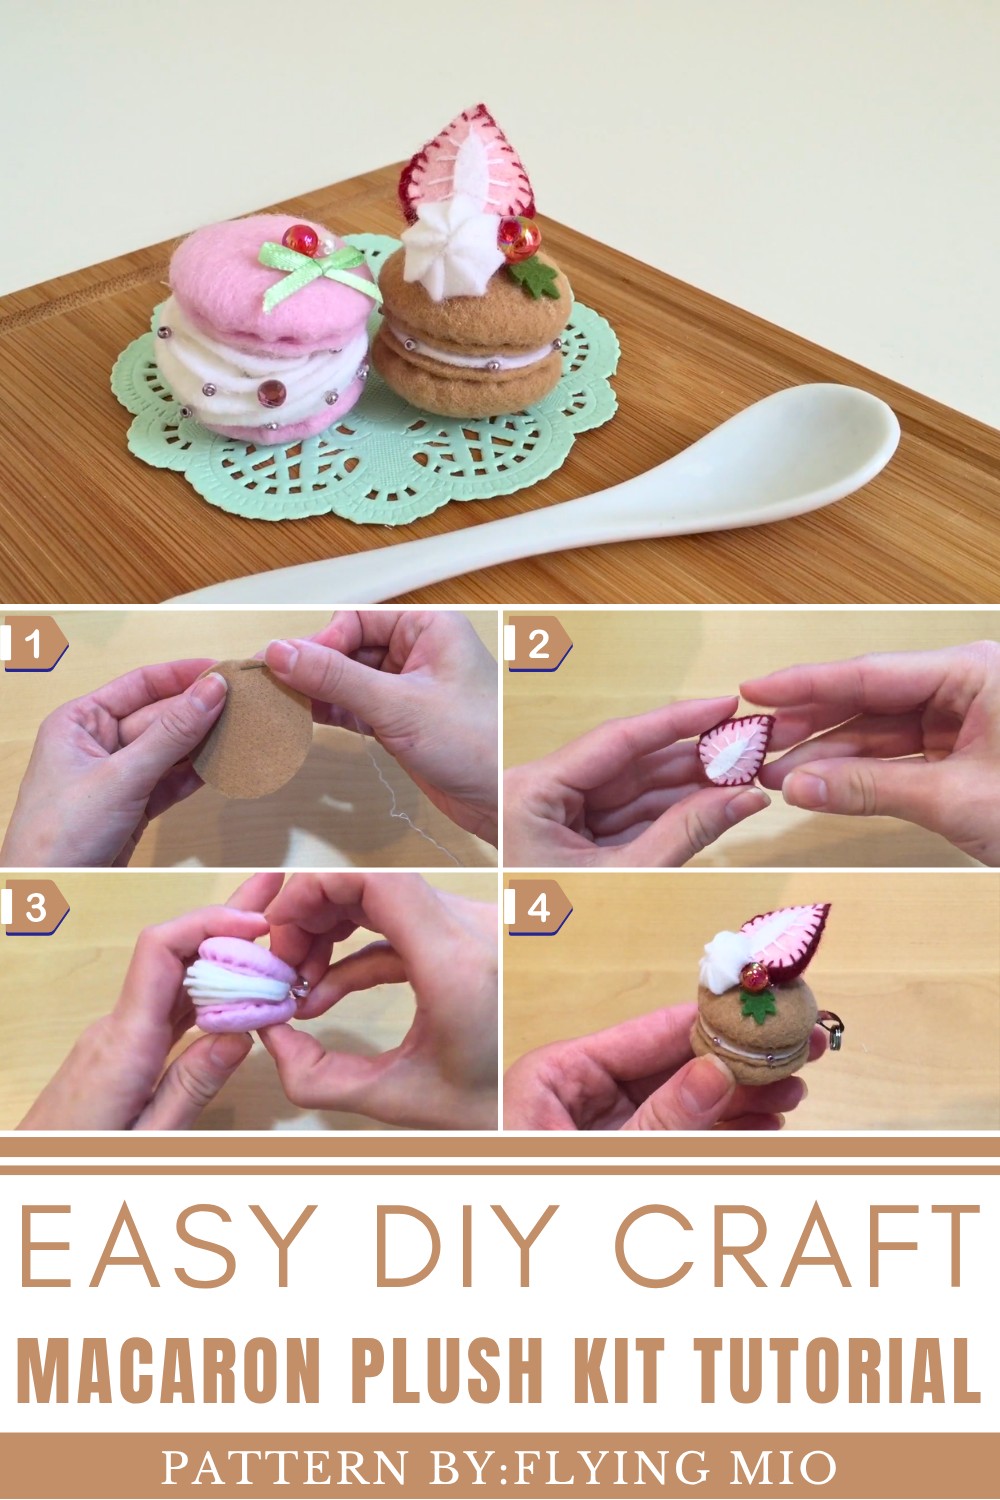
Make adorable plush macarons with this simple kit that’s perfect for beginners and sewing enthusiasts alike, featuring soft materials and easy instructions.
Bring a dash of cuteness to your craft collection with the DIY Easy Macaron Plush Kit! These irresistibly charming plush creations mimic the delicate details of classic French macarons, complete with lifelike layers and vibrant pops of color. With fun additions like tiny whipped cream accents and decorative strawberries, each plush macaron exudes personality and charm. Compact and versatile, they’re perfect as keychains, bag accessories, or playful decor for your favorite spaces. The plush kit strikes the perfect balance between stylish and whimsical, making it ideal for gifting or simply brightening your day with its sweet, handcrafted aesthetic.
Quick and Easy DIY Macaron Plush Kits for Beginners and Pros
Known The Designer!
Flying Mio is a talented DIY enthusiast who loves sharing creative and uniquely fun craft ideas. Visit her channel for more imaginative projects that unleash your artistic side!
Features of the DIY Easy Macaron Plush Kit
The DIY Easy Macaron Plush Kit is packed with charming features that make it a delightful addition to your crafting projects. Here’s what sets it apart:
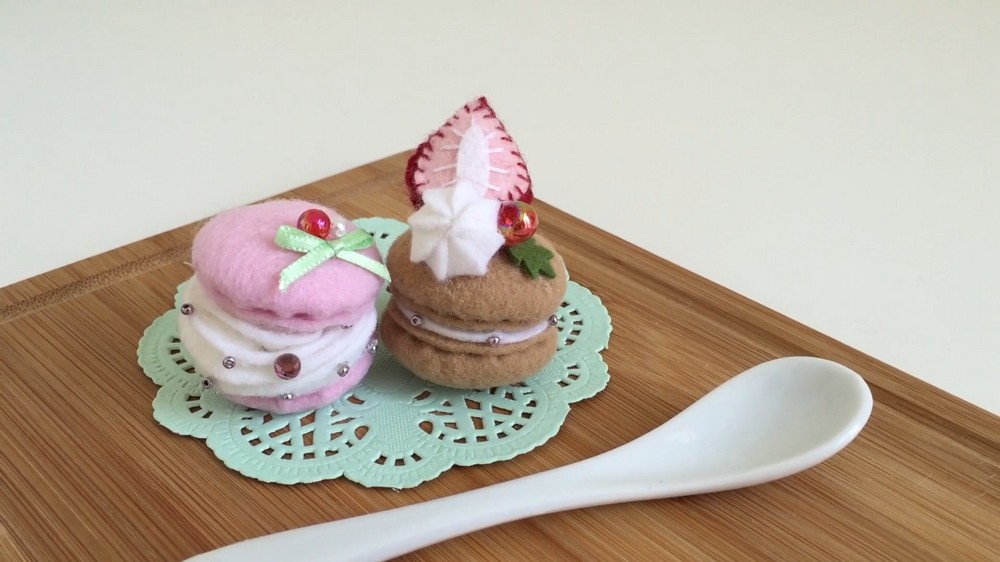
- Realistic Macaron Design: The finished plushies are crafted to resemble the iconic French delicacies, complete with their signature rounded shell and creamy filling layers.
- Vibrant and Customizable Colors: The kit offers an array of color options, allowing for personalized creations that reflect your unique style.
- Playful Decorative Elements: From mini whipped cream accents to tiny strawberries and beads, these adorable details bring the plush macarons to life.
- Compact and Versatile Size: The plushies are designed in a convenient size, making them perfect for keychains, bag accessories, or desk decor.
- Soft and Durable Material: Made with soft, high-quality fabric, the plush kit ensures a comfortable feel while being durable enough to last.
- Fun and Easy to Use: Ideal for crafters of all skill levels, the kit is designed to provide a straightforward and enjoyable experience for both beginners and enthusiasts.
DIY Plush Macarons: Step-by-Step Guide
Create adorable plush macarons with a Japanese craft kit! Perfect for keychains, decorations, or gifts, these soft felt creations are simple, fun, and customizable. With detailed instructions, headings, and stitches highlighted, this guide will make it easy to get started.
Materials You’ll Need
Included in the Kit:
- Large felt circles (for macaron shells)
- Smaller felt circles (for covering shells and inner filling)
- Cardboard circles (for structure)
- Stuffing (polyester fiber)
- Pre-cut decorative pieces:
- Strawberry parts (red, pink, and white felt for the topper)
- Leaves
- Whipped cream shapes (flower petals or strips)
- Ribbon and small metal ring (optional for charm hardware)
- Beads (for added decoration)
Extra Supplies:
- Sewing needle
- Thread (matching the felt colors)
- Scissors
- Craft glue or hot glue gun
Optional:
- Additional felt for color swaps
Step 1: Sew the Macaron Shell Shape
Create the Shells
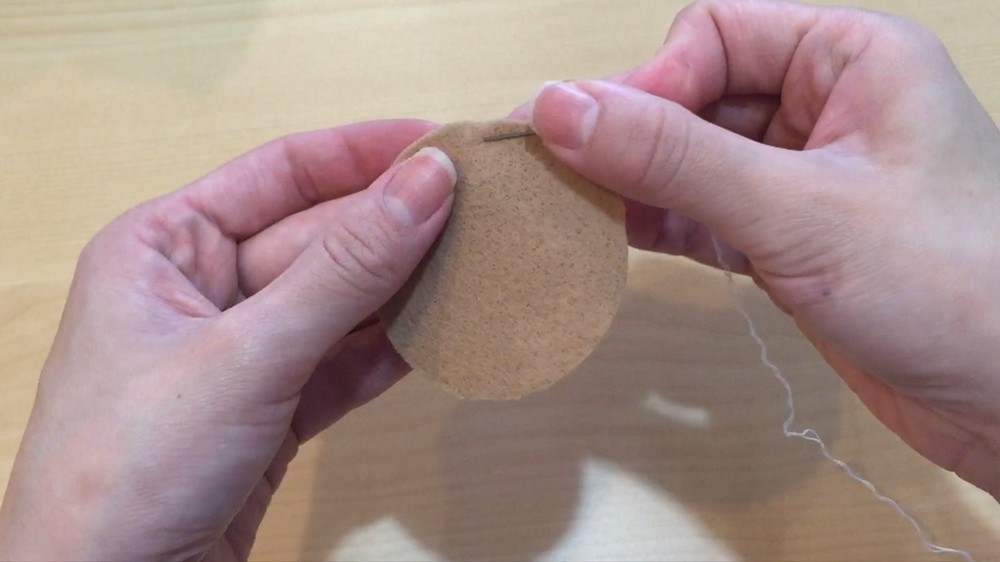
- Take one large felt circle from the kit.
- Thread your sewing needle with matching thread and knot the end.
- Using a running stitch:
- Insert the needle up and down along the edge of the felt circle.
- Stitches should be small, about ½ cm long, with a ½ cm distance from the edge.
- Complete the running stitch around the entire circle and leave the thread untouched for now.
Step 2: Add Cardboard and Stuffing
Prep the Shell Structure
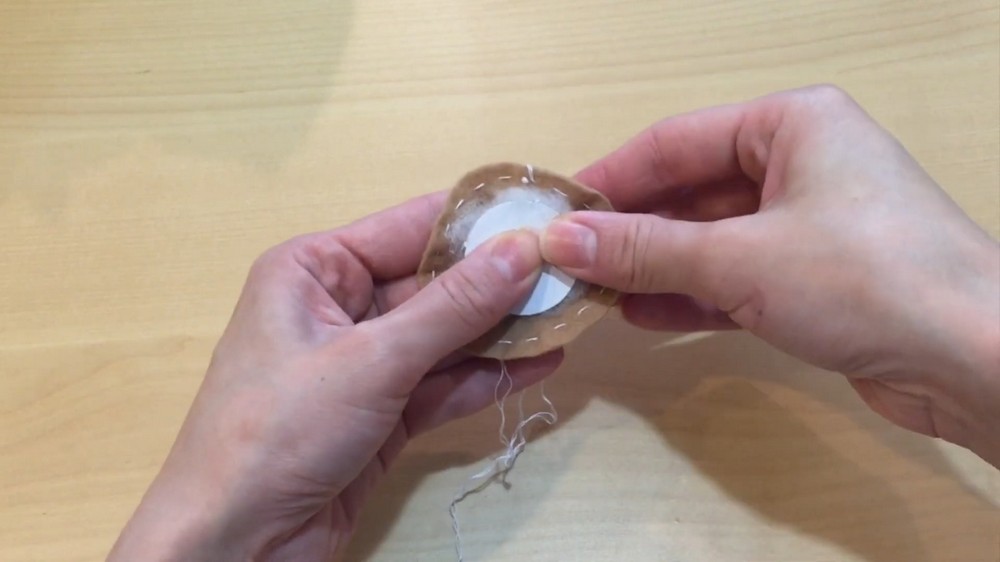
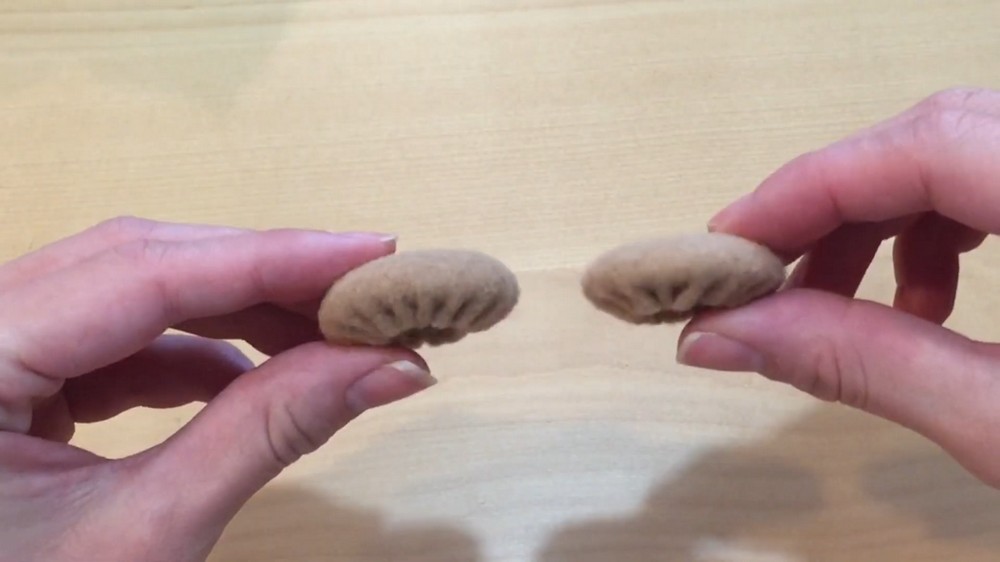
- Place one cardboard circle and half the stuffing at the center of the stitched felt circle.
- Hold the stuffing and cardboard in place with your fingers, then gently pull the sewing thread to gather the edges of the circle around the filling.
Secure the Shell
- Once you have a neat, rounded macaron shell, tie the thread tightly with a good knot.
- Trim off any extra thread.
Repeat for the Second Shell
Follow Steps 1 and 2 again to create the second macaron shell — you’ll need one for the top and one for the bottom.
Step 3: Attach the Inner Felt Circles
Cover the Flat Side
- Place a small felt circle over the flat side of one macaron shell.
- Secure it with craft glue or hot glue to cover the gathered edges and achieve a finished look.
- Repeat for the second shell.
Step 4: Add Charm Hardware (Optional)
Turn Your Macaron into a Charm
- Take the ribbon and metal ring from the kit.
- Sew or glue the ribbon onto one of the small inner felt circles, allowing the ring to dangle through the ribbon.
- Attach this felt circle to one of the macaron shells before assembly.
Step 5: Make the Decorative Strawberry
Create the Inner Strawberry Center
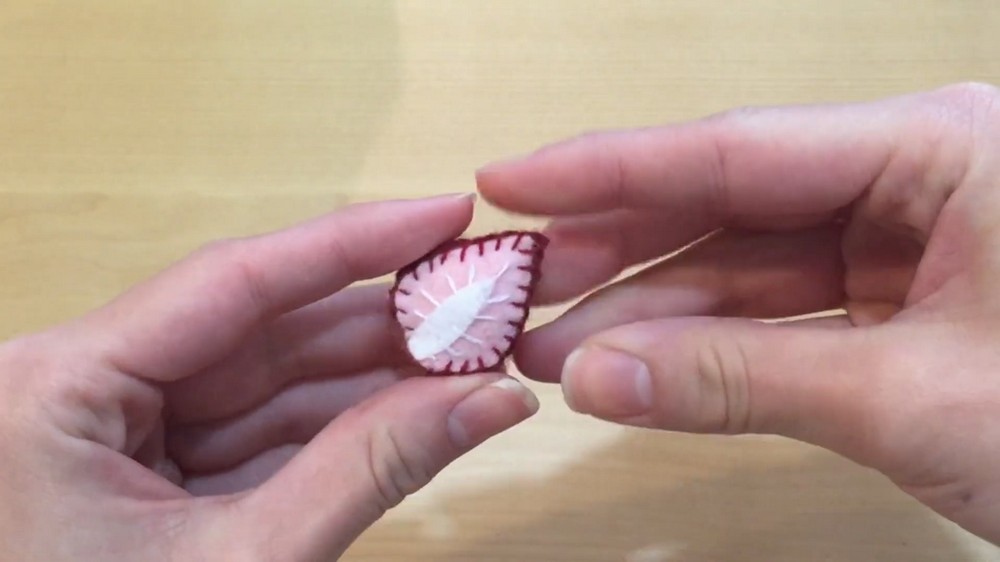
- Choose the white felt circle included in the kit.
- Using a thread (red or pink), create stitched lines in a starburst pattern radiating outward from the center.
Assemble the Strawberry Shape
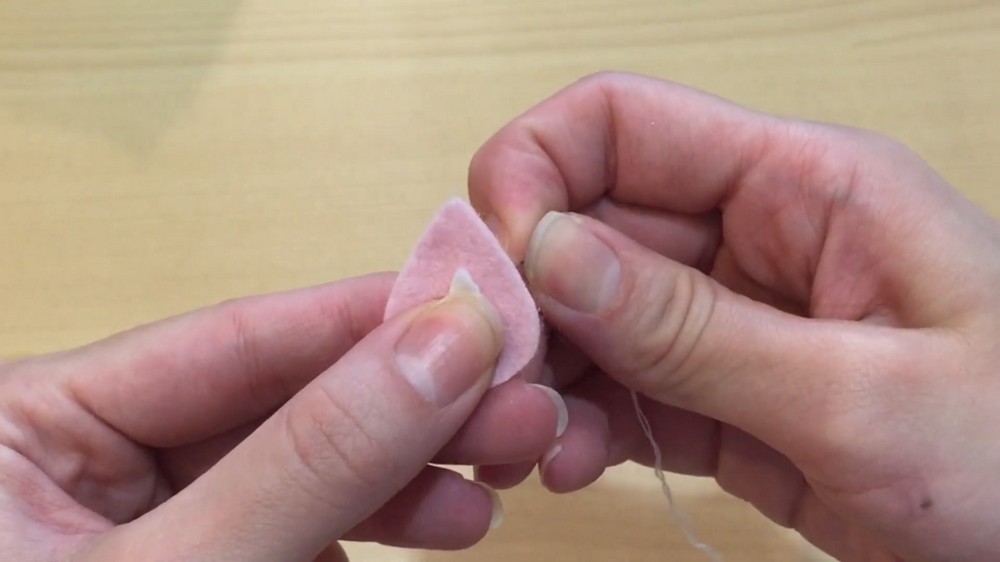
- Take the red wedge-shaped felt piece (quarter-circle shape).
- Sew along the rounded edge using a running stitch.
- Gather the stitches by pulling the thread tight. This will form the red felt into a rounded 3D strawberry shape.
- Insert the stitched white center into the red strawberry shape and sew them together carefully.
- Add a small amount of stuffing to plump the strawberry before closing and tying off the thread.
Step 6: Create the Whipped Cream Decoration
Flat Petal-Style Whipped Cream
- Take the flower-shaped felt piece from the kit.
- Fold or gather each petal inward toward the center to create a raised whipped cream effect.
- Sew or glue the petals together to secure the shape.
Strip-Style Whipped Cream
- Use the long white felt strips included in the strawberry macaron kit.
- Gather one side of the strips and glue them together, forming a fan-like effect.
- Twist the glued strips gently to shape them into organic-looking whipped cream.
Step 7: Assemble the Macaron Filling and Toppings
Chocolate Macaron Toppings
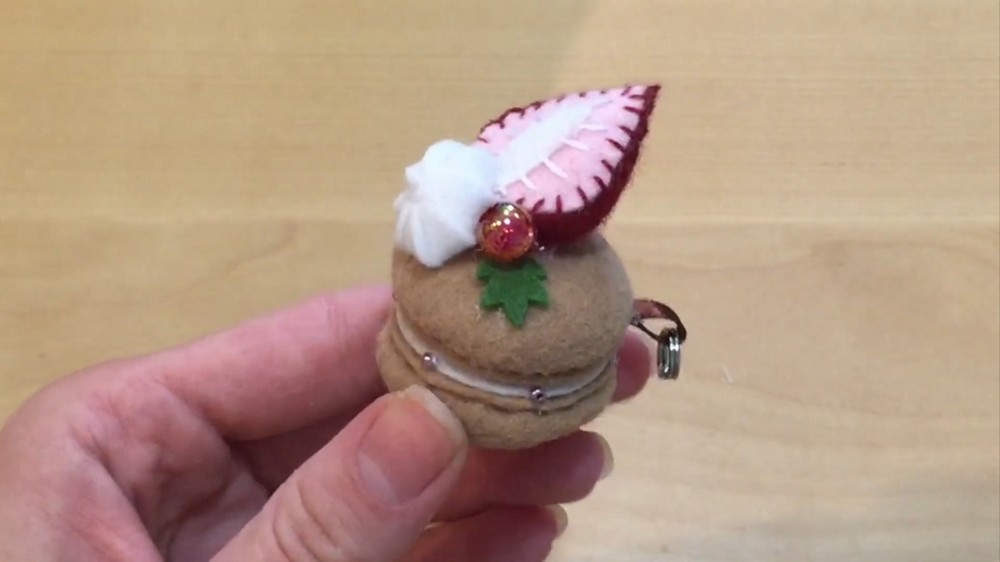
- Position the decorative pieces (strawberry, whipped cream, leaves, and beads) on one macaron shell.
- Use hot glue or craft glue to attach each piece carefully.
Strawberry Macaron Filling
- Arrange the twisted whipped cream strips between the two macaron shells if it’s a half-open design.
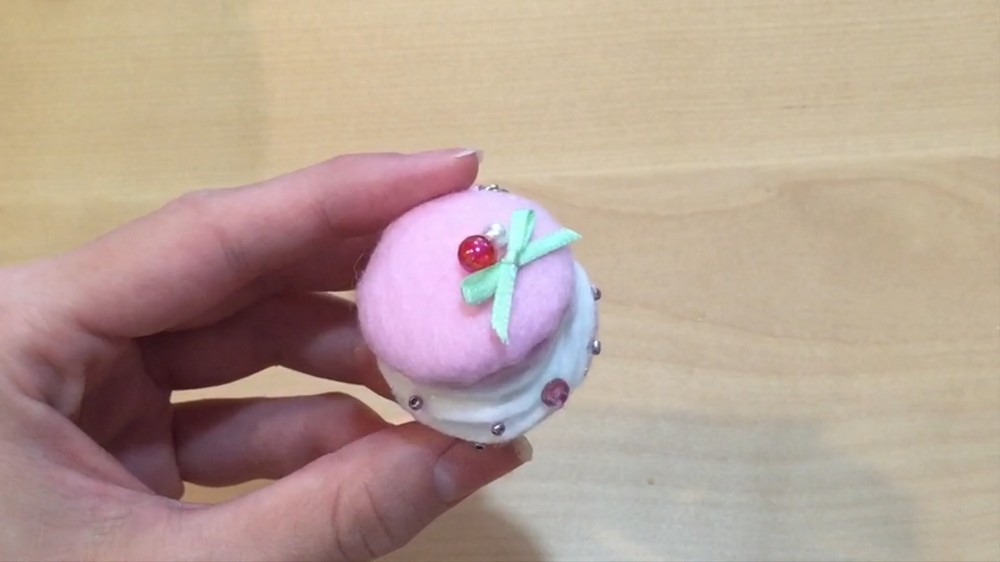
- Add beads and decorative pieces on top or around the whipped cream.
- Glue everything securely in place.
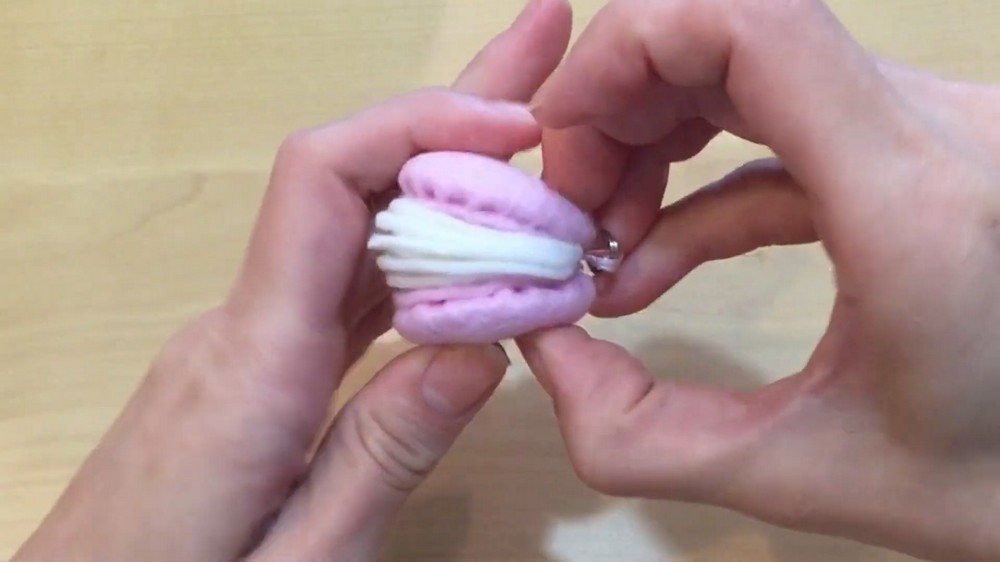
Step 8: Attach the Macaron Shells
Close or Half-Open Assembly
- Glue the top and bottom shells together at the inner edges for a closed macaron.
- Alternatively, glue partially to leave a gap if your macaron is meant to look half-open and display the filling.
Step 9: Finish with Beads and Details
- Arrange and glue small beads or leaves as finishing touches.
- Check that all glued pieces are secure and the macaron topping looks neat and polished.
Final Thoughts
These plush macarons blend craft and creativity into delightful soft treats. With colorful felt, stitching, and unique decorations, they make perfect gifts, colorful keychains, or whimsical desk decor. Filled with love and handmade charm, they’re fun for all ages.