Brighten your style with a colorful rainbow pastel unicorn that combines soft hues and delicate details for a charming and playful accessory.
This charming miniature unicorn brooch captivates with its soft pastel hues and delicate detailing, showcasing a perfect balance of whimsy and elegance. The piece features a beautifully sculpted head and a flowing mane adorned with an array of pastel raindrop shapes, accented by subtle pearl embellishments which add a sophisticated dimension to its overall design. Its playful yet refined character makes it an ideal accessory for personalizing clothing and accessories, such as denim jackets or backpacks, lending a personalized touch that blends fantasy with everyday style.
Step-by-Step Rainbow Pastel Unicorn Tutorial with Pattern
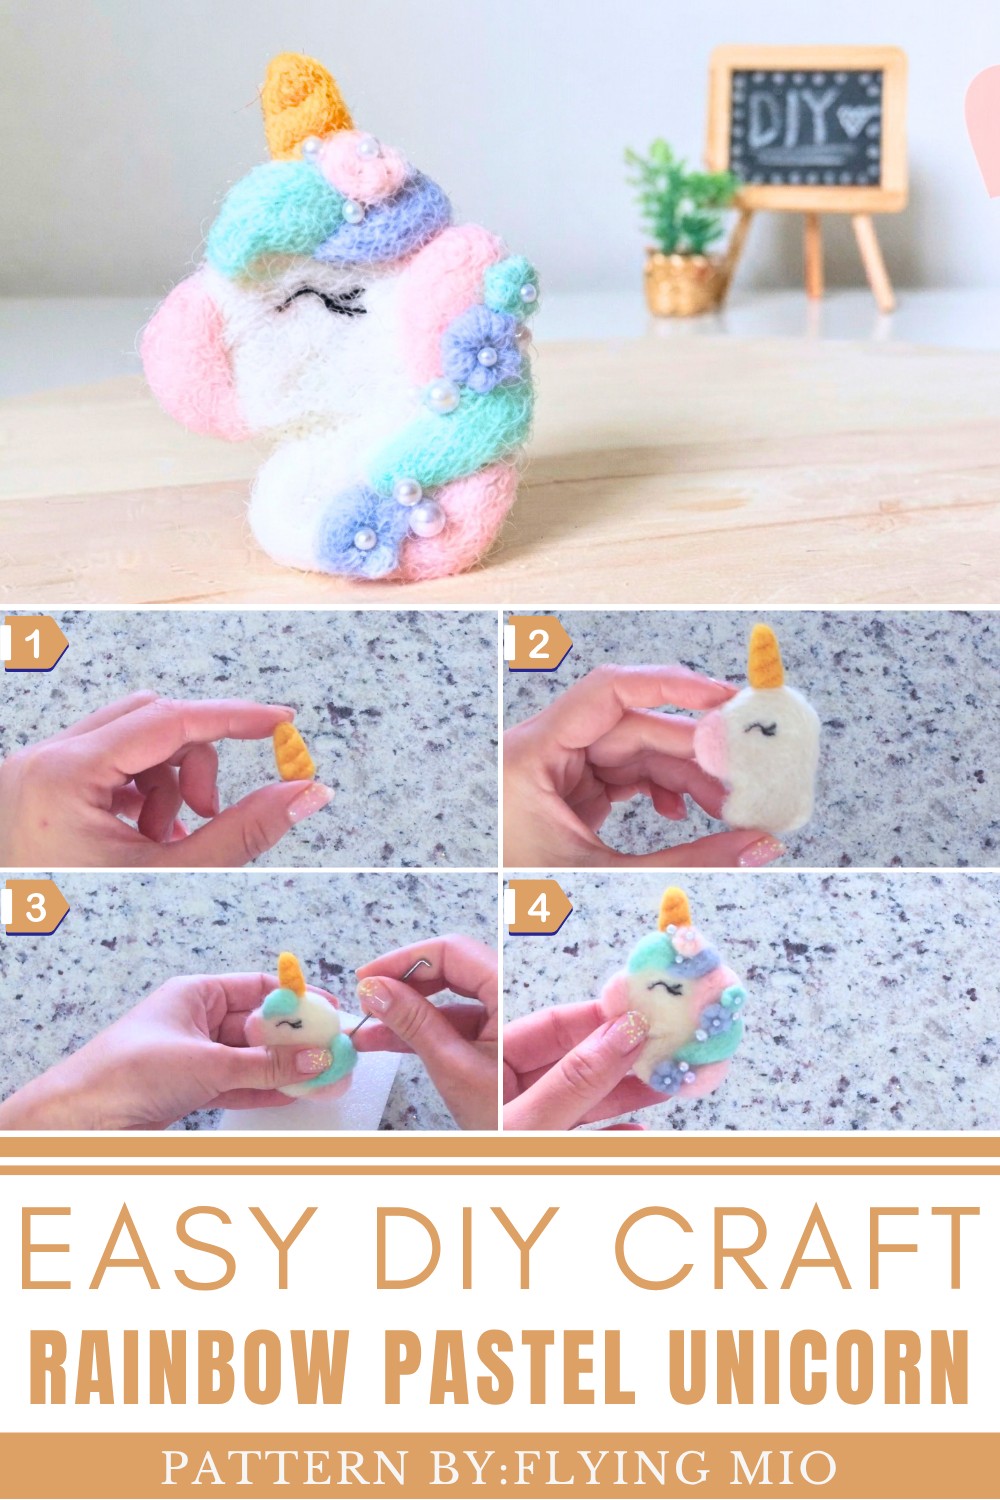
Mio, the artist behind this delightful creation, shares a variety of innovative and engaging DIY projects on her YouTube channel. Her content is perfect for crafters seeking inspiration and fresh ideas. Check out more of her imaginative work at Flying Mio.
The DIY Rainbow Pastel Unicorn stands out due to its harmonious color palette and meticulous arrangement, ensuring each pastel shade complements the others while maintaining a naturally organic flow. This decorative item is more than a mere accessory; it embodies a cheerful and creative spirit that resonates with lovers of handcrafted art and unique fashion statements. Its versatility and eye-catching pastel rainbow theme offer an inviting charm, suitable for those looking to brighten their wardrobe or accessories with an enchanting flair.
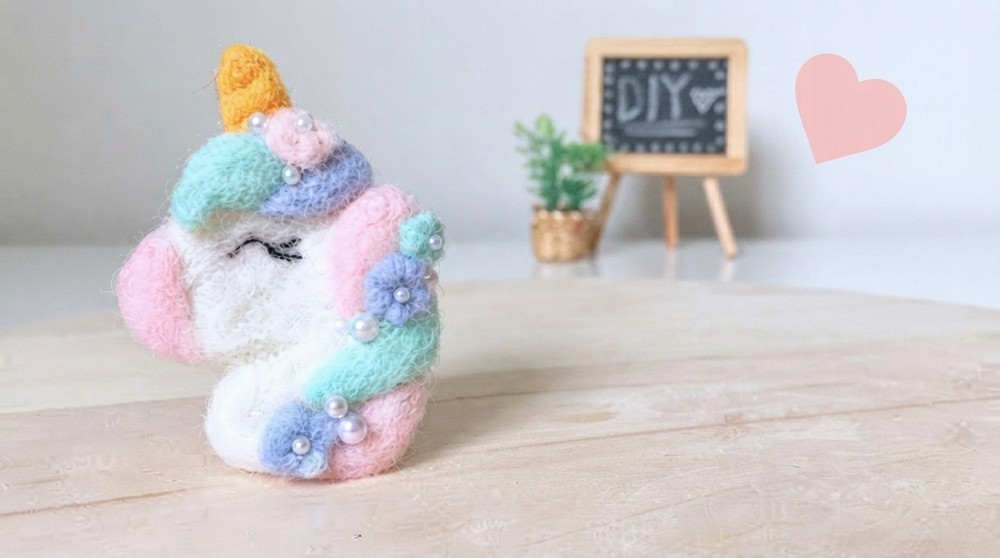
How to Make a Needle Felted Unicorn Brooch: A Complete Beginner's Guide
There is something truly magical about turning a simple piece of wool into a detailed work of art using nothing but a needle and a little patience. Needle felting might sound intimidating if you have never tried it before, but it is honestly one of the most relaxing and rewarding crafts you can pick up. This tutorial will walk you through making an adorable pastel unicorn brooch that you can wear on a denim jacket, pin onto a backpack, or use to decorate any bag or clothing item you love. It is small, it is charming, and it is entirely made by your own hands which makes it even more special.
What You Will Need
Tools
- A felting needle (this is a special needle made specifically for needle felting and a regular sewing needle will not work)
- A foam board or a thick household sponge (this is what you poke your needle into while working so you do not damage your table or hurt yourself)
- A pair of scissors
- A brooch pin or safety pin (for the back of the finished piece)
- Craft glue (for attaching beads at the end)
- A piece of paper and a pencil (for drawing your unicorn head shape as a guide)
Materials
- White wool (for the main unicorn head and body)
- Yellow wool (for the horn)
- Pink wool (for the muzzle area)
- Black wool (for the eye)
- Pastel colored wool in pink, mint green, lavender, and blue (for the mane)
- Small pearl beads (optional but highly recommended for extra detail)
Where to Buy Supplies
- Felting needles and wool can be found at craft stores like Hobby Lobby or Daiso
- A starter pack of wool in multiple colors typically costs around one dollar fifty and gives you several different colors to work with
- You can also order everything online if you do not have a craft store nearby
Understanding How Needle Felting Works
Before you dive in it helps to understand the basic principle behind needle felting so you know what you are actually doing with each poke of the needle.
- Wool fibers have tiny invisible cross links inside them
- When you poke a felting needle repeatedly through the wool, those cross links tangle and lock together
- The more you poke in a certain area, the more compact and firm that area becomes
- This means you can shape wool into almost any form just by controlling where you place your needle
- No glue is needed to join pieces of wool together since the needle causes the fibers of different pieces to interlock with each other
- Always work on top of your foam board or sponge so the needle has somewhere safe to go after it passes through the wool
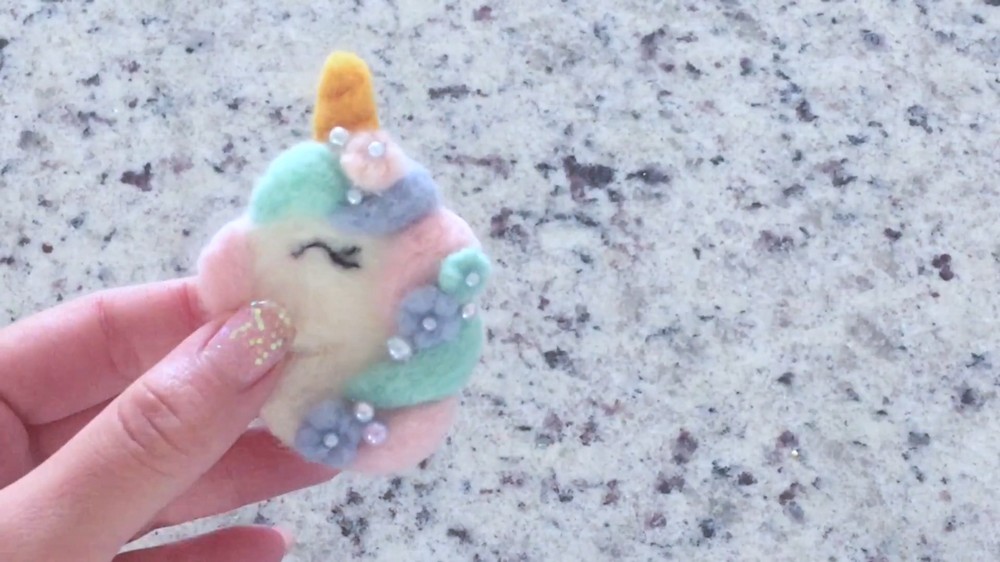
Part 1: Creating the Unicorn Head
This is the base of your entire brooch and everything else will be built on top of it so take your time here.
Step 1: Draw Your Guide Shape
- Take a piece of paper and a pencil
- Draw the outline of a unicorn head in the size you want your brooch to be
- Keep it simple with a rounded head shape, a slightly pointed muzzle area, and a gentle curve for the neck
- This drawing will act as your guide while you shape the wool so you do not have to freestyle everything from memory
Step 2: Roll Your White Wool Into a Base Shape
- Take a generous amount of white wool and loosely roll it into a small flat ball
- Place it on top of your foam board
- Begin poking the needle repeatedly all over the surface of the wool
- You are not aiming for a shape just yet, you are simply starting to compact the fibers together
Step 3: Flatten the Wool Into a Pancake
- Continue needle felting one side until it starts to flatten out into a roughly circular pancake shape
- Once one side is flat enough, flip the wool over and needle felt the other side the same way
- Keep flipping and felting until both sides are flat and the wool feels fairly firm and compact throughout
Step 4: Shape It Into a Unicorn Head
- Place your paper guide drawing next to your foam board for reference
- Using the tip of your felting needle, gently push and tuck the edges of the wool inward or outward to match the outline of your unicorn head drawing
- Work slowly around the entire edge of the wool piece
- For the muzzle area, push the wool gently to create a slightly rounded protruding shape at the front of the face
- For the neck, tuck and flatten the bottom section so it tapers into a neck shape
- Step back frequently to compare your wool shape to your drawing and make adjustments as needed
Part 2: Adding the Muzzle
Step 1: Prepare the Pink Wool
- Pull off a small amount of pink wool
- Roll it very loosely between your fingers just enough so it holds together a little
Step 2: Felt the Muzzle Onto the Face
- Place the small piece of pink wool gently onto the lower front area of your unicorn head where the mouth and nose would be
- Begin poking the needle carefully around the edges of the pink wool to attach it to the white base
- Work your way from the outside edges inward
- The pink fibers will interlock with the white fibers underneath and hold themselves in place without any glue
- Keep felting until the pink muzzle looks smooth and firmly attached
Part 3: Making the Unicorn Horn
Step 1: Shape the Yellow Wool Into a Cone
- Pull off a small amount of yellow wool
- Begin rolling and folding it with your fingers into a rough cone shape with a pointed top and a wider base
- Place it on your foam board and needle felt all around the surface to compact it into a firm cone shape
- Rotate it as you work so all sides get felted evenly
- Keep going until the cone holds its shape firmly and feels solid
Step 2: Add the Spiral Detail Lines
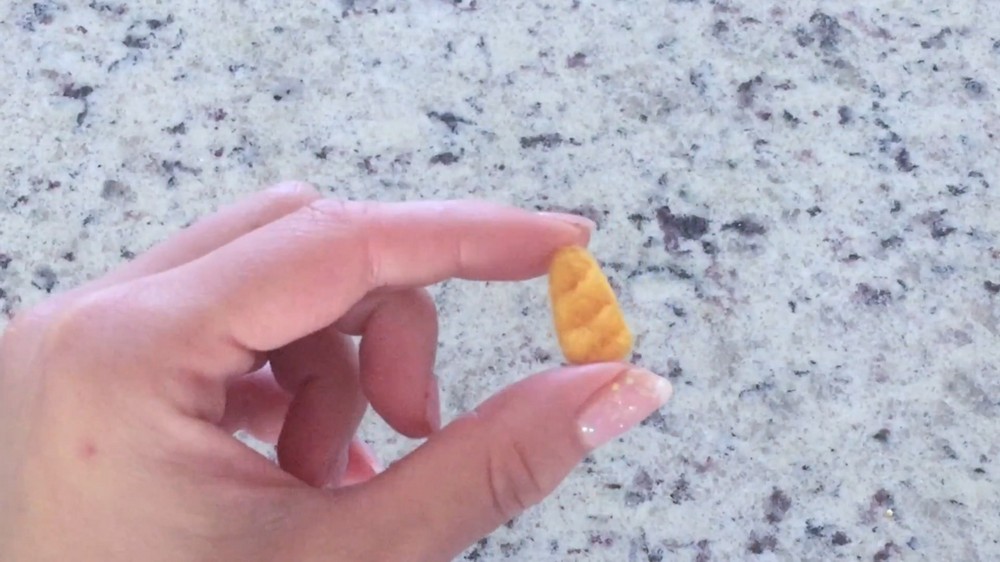
- Once your cone is firm, you are going to add the characteristic twisted line detail that makes it look like a real unicorn horn
- Using the tip of your needle, press the needle along a diagonal line going from the base of the cone up toward the tip
- Press repeatedly along this line so it creates a slight indented groove in the surface of the cone
- Repeat this two more times at evenly spaced intervals around the cone
- You should end up with three spiral groove lines running up the horn giving it that classic unicorn look
Step 3: Attach the Horn to the Head
- Position the horn at the top center of your unicorn head
- Hold it in place and begin needle felting around the base of the horn where it meets the white wool head
- Work all the way around the base, poking repeatedly until the horn feels completely secure
- Give it a gentle tug to make sure it does not come loose before moving on
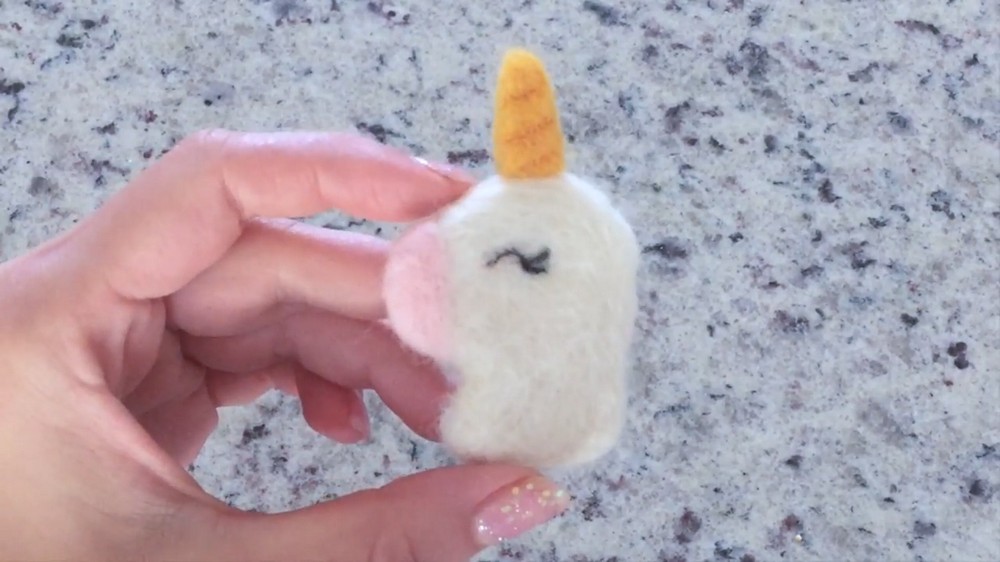
Part 4: Creating the Eye
This is one of the most delicate steps so patience is your best friend here.
Step 1: Prepare the Black Wool
- Pull off a tiny amount of black wool
- Roll it very gently between your fingers into a thin string or thread-like strip
Step 2: Felt the Eye Onto the Face
- Place the tiny black wool strip onto the face of your unicorn where the eye should be
- Classic unicorn eyes have a gently curved closed shape with a slight downward curve and tiny lash details
- Carefully needle felt along the shape of the eye, pressing very lightly and precisely
- This step takes the most time and care out of everything in this project so go very slowly
- Make tiny adjustments as you go until the eye shape looks clean and defined
- If the shape is not quite right, you can gently tease the wool with the needle tip to nudge it into a better position
Part 5: Making the Mane
The mane is where the pastel rainbow magic happens and it is also where you get to be the most creative.
Step 1: Create the Teardrop Shapes
- Pull off small amounts of each pastel color one at a time
- Roll each piece loosely into a teardrop or raindrop shape
- Place each piece on your foam board and needle felt it into a firm teardrop shape
- Make a variety of sizes ranging from very small ones about a centimeter long for the bangs area to larger ones about an inch long for the main body of the mane
- You will need several teardrops in each color so make a small collection before you start attaching them
Step 2: Plan Your Color Layout
- Before attaching anything, lay all your teardrop shapes out on top of your unicorn head and arrange them the way you want
- A rainbow order works beautifully such as pink, mint green, lavender, and blue repeated across the mane
- Make sure all four colors are evenly spaced and equally represented throughout the mane
- Having a plan before you commit to felting everything down will save you a lot of time
Step 3: Attach the Bang Pieces First
- Start with the smallest teardrop shapes and position them at the front of the head above the face area to create the bangs
- Needle felt each piece down by poking around its edges and then across its surface
- Make sure each piece is firmly attached before moving on to the next one
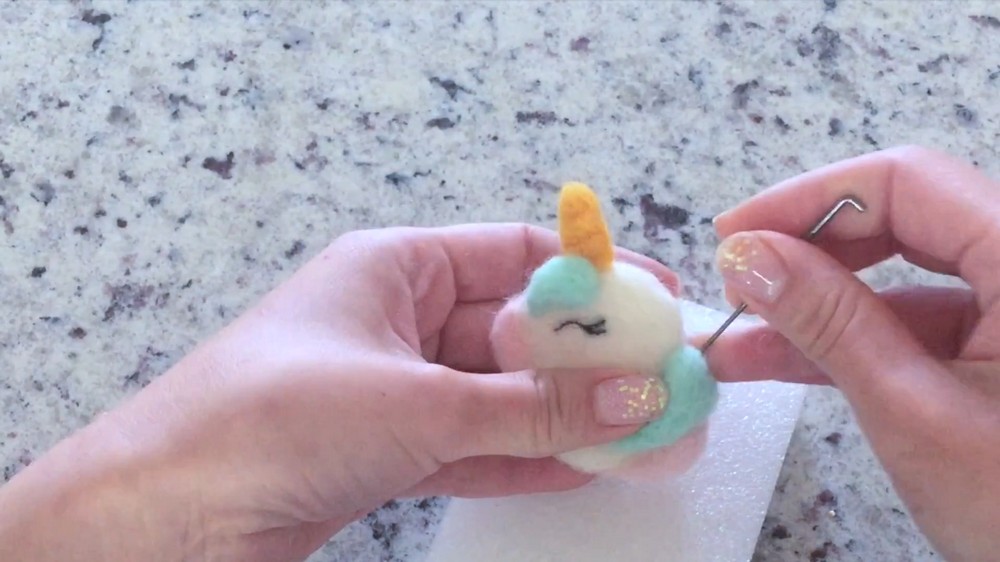
Step 4: Build the Rest of the Mane
- Work your way from the front of the head toward the back and down along the neck
- Position each teardrop and needle felt it firmly into place one at a time
- Most of the teardrops should point toward the face of the unicorn following a natural flowing direction
- However, mix in a few pieces that face slightly different directions such as curving toward the back of the head
- This variation makes the mane look more organic, natural, and full of movement rather than stiff and uniform
Part 6: Adding the Flower Details
Step 1: Make Small Flower Shapes
- Take small balls of felted wool in any of your pastel colors
- Place each ball on your foam board and needle felt small lines radiating outward from the center of the ball
- These lines will create indentations that make the ball look like a little flower with petals
- Make several flowers in different colors so you have enough to scatter across the mane
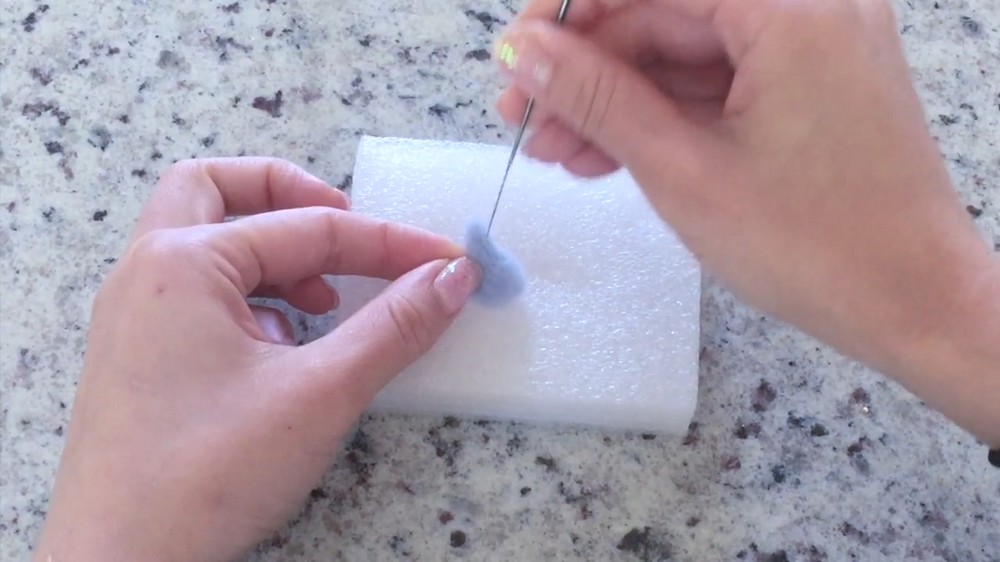
Step 2: Attach the Flowers to the Mane
- Place each flower at different spots throughout the mane
- Make sure the colors complement each other and that no two flowers of the same color sit right next to each other
- Needle felt each flower firmly into the mane pieces beneath it
- Space them out naturally so they look like they are blooming organically throughout the hair
Step 3: Add Pearl Beads (Optional)
- If you want to add a little extra sparkle and texture, place a small pearl bead in the center of each flower
- Apply a tiny drop of craft glue to the back of each bead and press it firmly into the center of the flower
- You can also scatter a few beads throughout the mane between the flowers for an even more decorative look
- Allow the glue to dry completely before touching the beads
Part 7: Finishing Your Brooch
Step 1: Trim Any Loose Wool
- Take your scissors and carefully trim away any loose or stray fibers you can see sticking out from the edges of the unicorn or from the mane pieces
- Go around the entire piece and snip anything that looks untidy
- Be careful not to cut into the main body of the wool piece, just the stray ends
Step 2: Attach the Brooch Pin
- Flip your finished unicorn over to the back
- Apply a small amount of craft glue to the back of a brooch pin or safety pin
- Press it firmly onto the center back of your unicorn piece
- Allow it to dry completely before wearing or handling the piece
Step 3: Style and Display Your Unicorn
- Pin your finished unicorn brooch onto a denim jacket for a personalized street style look
- Clip it onto the strap or front pocket of a backpack
- Attach it to a tote bag, a cardigan, a blazer, or any fabric item you want to brighten up
- There is really no wrong way to wear it
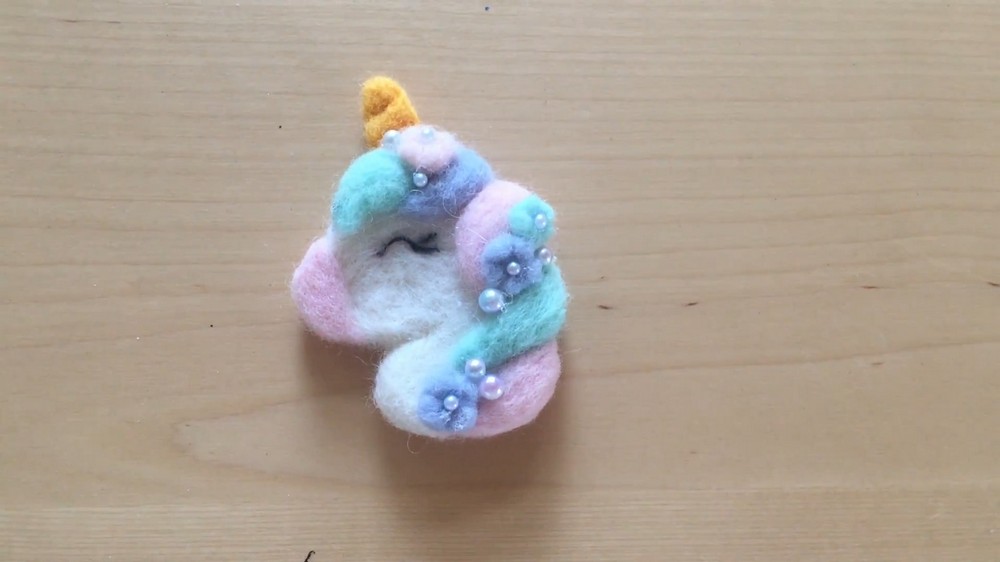
Quick Tips to Remember
- Always work on a foam board or sponge and never needle felt directly on your lap or a hard surface
- Go slowly with the eye since it is the smallest and most detailed part of the whole project
- Vary the size and direction of your mane teardrops so the finished piece looks natural and full of movement
- Let the glue dry fully before attaching beads or pinning the brooch to anything
- Needle felting takes time so do not rush through any step, the more you poke the firmer and neater your shapes will become
Needle felting is one of those crafts that quietly becomes a part of your life once you try it for the first time. There is something deeply satisfying about watching a loose pile of wool slowly transform into something detailed and beautiful purely through the repetitive motion of a needle. Your unicorn brooch will carry that story with it everywhere you pin it, a tiny handmade piece of art that belongs entirely to you.