
Turn yarn into a playful and adorable crochet hanging toy with this free pattern, perfect for brightening up gifts, spaces, and your favorite accessories.
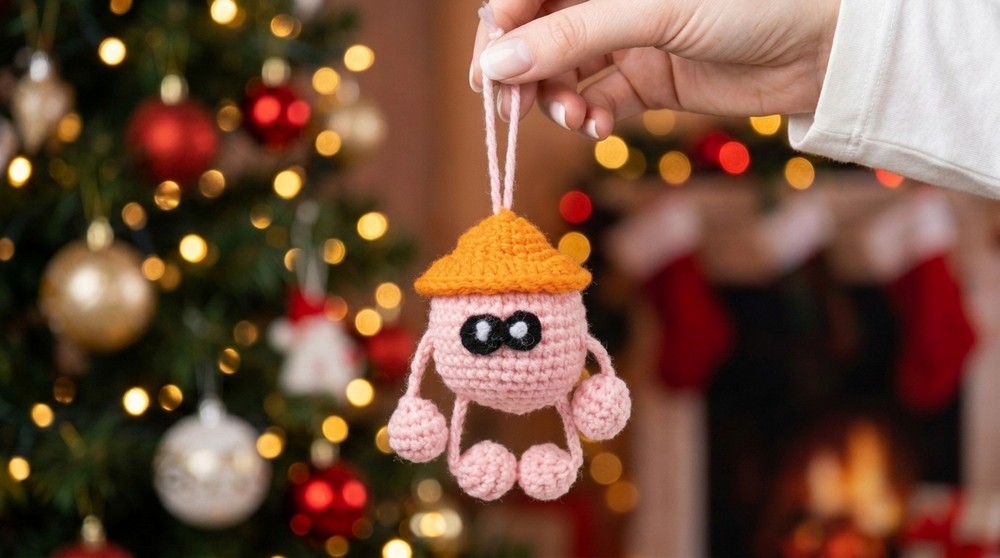
A mischievous ball of yarn always carries the promise of something fun, and this Free Crochet Hanging Toy Pattern proves just how playful those promises can be. Shaped like a chubby little buddy, this tiny treasure oozes personality with its soft texture, squishy appearance, and lovable details. Whether it dangles from a keychain, decorates a backpack, or cheers up a corner of the house, its cheerful charm refuses to go unnoticed. The toy brings together a rounded, cuddly shape and whimsical features like tiny arms, legs, and the cutest little hat. The texture is plush yet sturdy, making it an ideal companion for everyday use.
Free Crochet Hanging Toy Pattern That Makes Everyone Smile
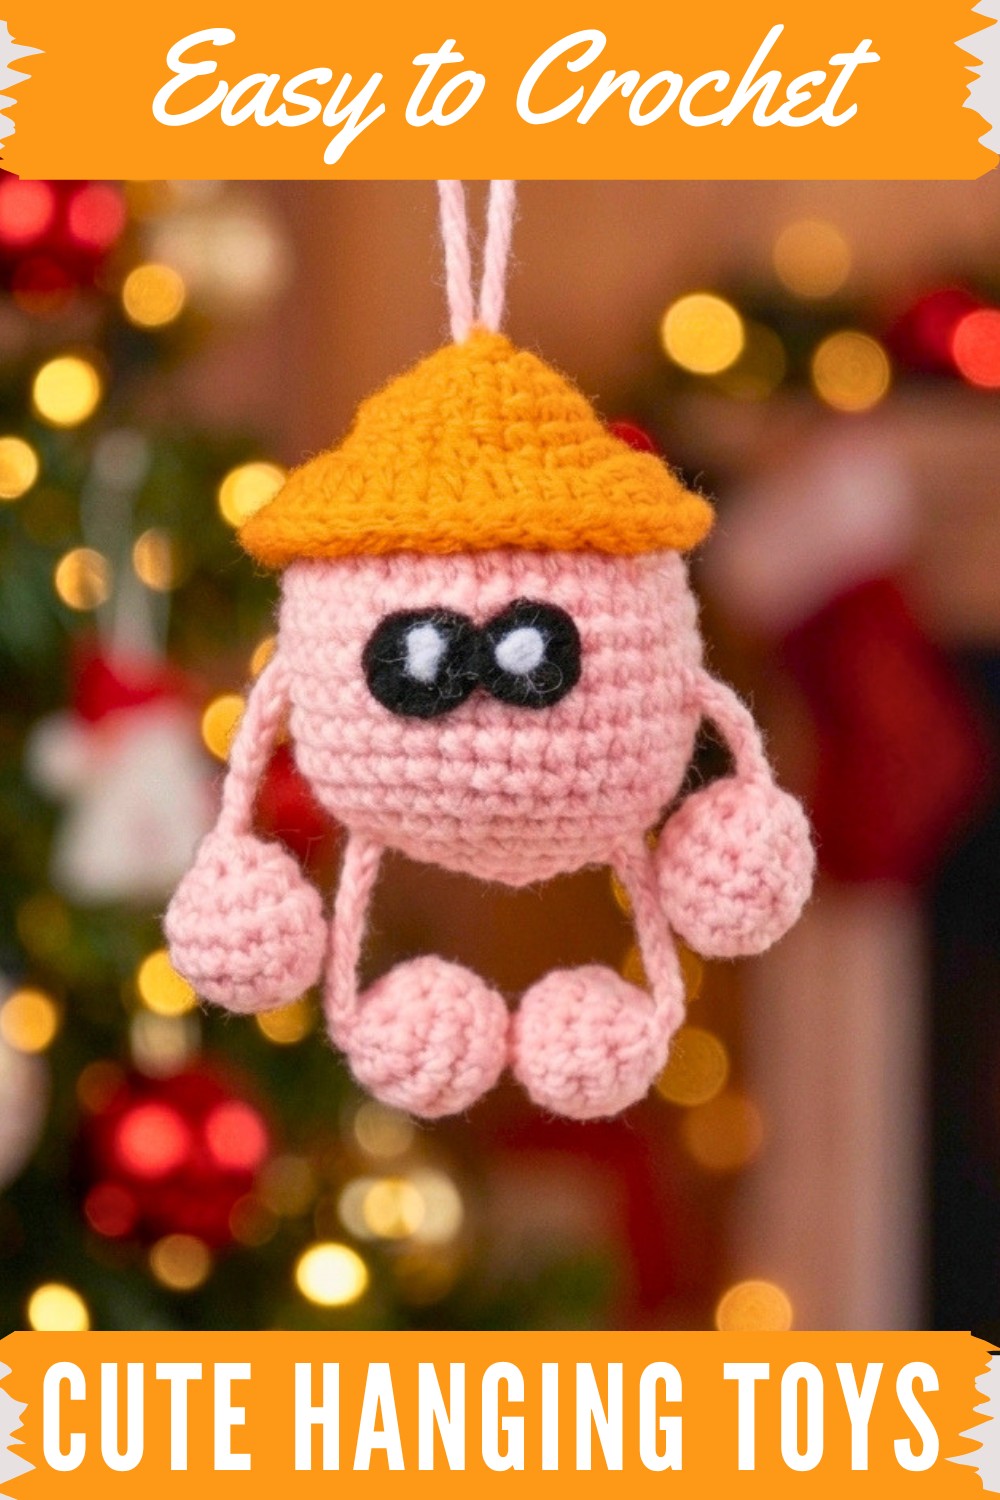
Customization adds to the magic, bright pops of color make it lively, while softer shades turn it into a soothing little keepsake. There's room to get as creative as desired; this toy can be made in an array of sizes by swapping out yarn weights and hook sizes. The construction focuses on simple, rhythmic stitching, mostly single crochets worked in the round. For best results, a 4 ply acrylic or cotton yarn works wonderfully. These yarn types enhance the stitch definition while ensuring durability, giving the toy that perfect squish factor. Stuffing the body just enough keeps the shape intact, while glue secured eyes or embroidered detailing add the finishing touches.
As a project, this hanging toy promises more than just cuteness; it carries the joy of gifting something handmade. Throw in a pom pom, some fun embroidery, or even themed colors, and the little toy becomes a one of a kind creation ready to bring smiles wherever it goes.
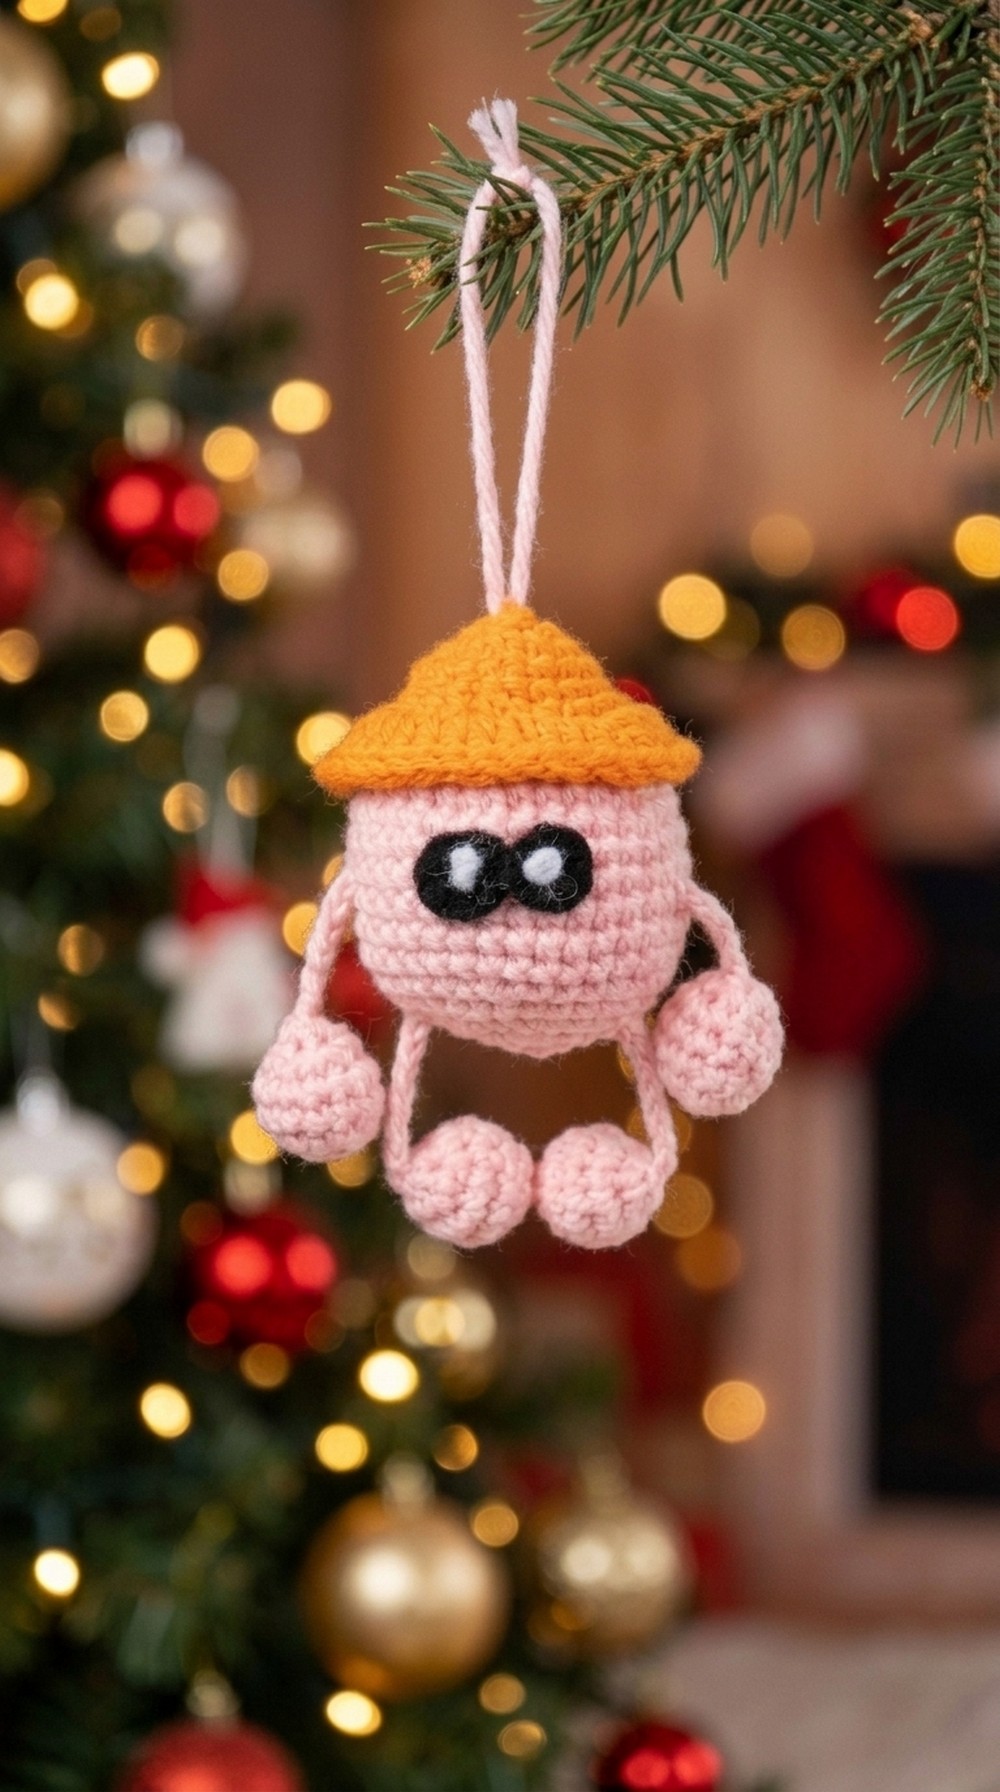
Crochet Pattern: Charming Hanging Toy – A Crunchy Keychain
This detailed step by step pattern will guide you through creating Crochet Hanging Toys Pattern , a cute crunchy toy that can serve as a keychain, bag charm, or decorative hanging. It’s a fun, beginner friendly project that’s perfect for gifting on special occasions like birthdays or festivals. Following the transcription, you’ll create individual components, assemble the project, and finish it with personal touches like a cap and tassel.
Quick Overview of Pattern
- Body: Create the chubby body using pink yarn with single crochet stitches and shape it using increases and decreases.
- Limbs: Crochet the hands and legs separately and join them to the body.
- Eyes: Create eye embellishments with embroidery thread or use safety eyes for convenience.
- Cap: Make a custom orange colored cap for Hanging Toy for added character.
- Tassel: Add a tassel to the top for easy hanging.
- Assembly: Attach all components to complete Hanging Toy.
Notes
- Magic Ring: Ensure the ring is tightly secured at the start of each component to avoid holes forming.
- Consistent Tension: Maintain an even tension throughout to ensure uniformity.
- Safety Eyes: If available, use safety eyes instead of embroidered ones for better durability.
- Customization: Choose your preferred colors and make variations to suit your design preferences.
Skill Level
Beginner – This pattern utilizes basic crochet stitches (single crochet, double crochet, chains, slip stitches) along with simple increases and decreases.
Materials
- Yarn:
- Pink 4 ply acrylic yarn (e.g., Vardhman Four Ply Acrylic Yarn – Body, hands, and legs)
- Orange 4 ply acrylic yarn (for the cap)
- Black embroidery thread (for eyes)
- White embroidery thread (for dots above the eyes)
- Crochet Hook: 2.5 mm.
- Stuffing Material: Cotton or polyester fiber filling.
- Tapestry Needle: For sewing, closing gaps, and embroidery.
- Scissors
- Glue: For attaching eyes.
- Safety Eyes: Optional, as a replacement for embroidered ones.
Measurements/Sizing
Finished Crochet Hanging Toy is approximately 3–4 inches tall, depending on gauge and tension.
Gauge
Gauge is not critical for this project. You can adjust size slightly with different hook sizes or yarn thickness.
Stitch Abbreviations
| Abbreviation | Stitch Name |
|---|---|
| Ch | Chain |
| SC | Single crochet |
| Sl st | Slip stitch |
| Inc | Increase (2 SC in the same stitch) |
| Dec | Decrease (combining 2 stitches into 1 stitch) |
Special Stitches
Magic Ring
- Wrap the yarn once around two fingers, crossing it at the back.
- Insert the hook under the first wrapped loop to grab the yarn.
- Pull the loop and chain one to secure it, forming a circle (magic ring).
Invisible Decrease
- Insert the hook into the front loop of the first stitch.
- Insert the hook into the front loop of the second stitch.
- Grab yarn and pull through both loops.
- Crochet as you normally would for a single crochet.
The Crochet Pattern
Body
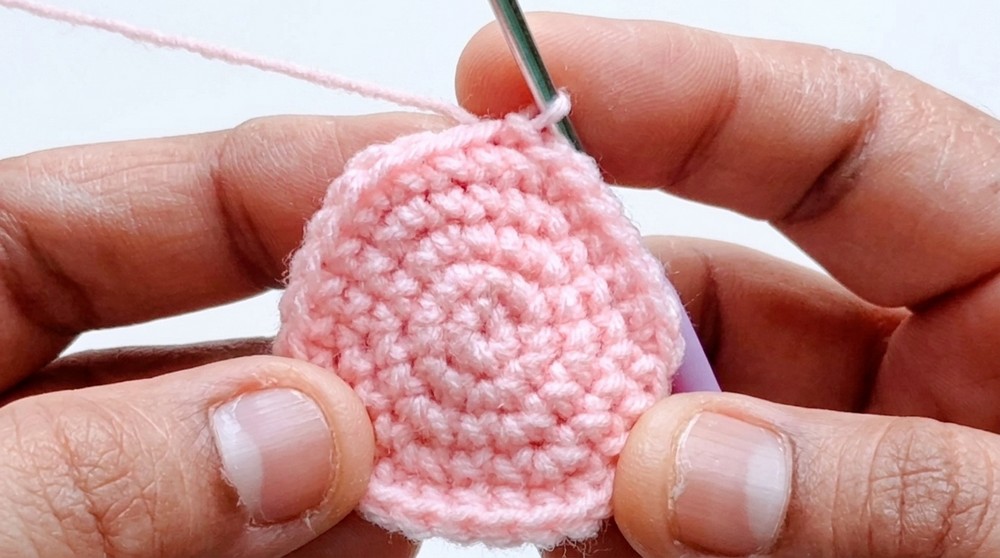
- Round 1: Create a magic ring using pink yarn. Crochet 6 SC into the magic ring. Tighten the ring and Sl st into the first SC to close the round. [6 SC]
- Round 2: Chain 1 (not counted), and work 2 SC in each stitch (increase) around. Close with a Sl st. [12 SC]
- Round 3: Chain 1 (not counted). Work (SC, Inc) around. Close with a slip stitch. [18 SC]
- Round 4: Chain 1 (not counted). Work: (SC, SC, Inc) around. Close with a Sl st. [24 SC]
- Round 5: Chain 1 (not counted). Work: (SC, SC, SC, Inc) around. [30 SC]
- Round 6: Chain 1 (not counted). Work: (SC, SC, SC, SC, Inc) around to shape the body. [36 SC]
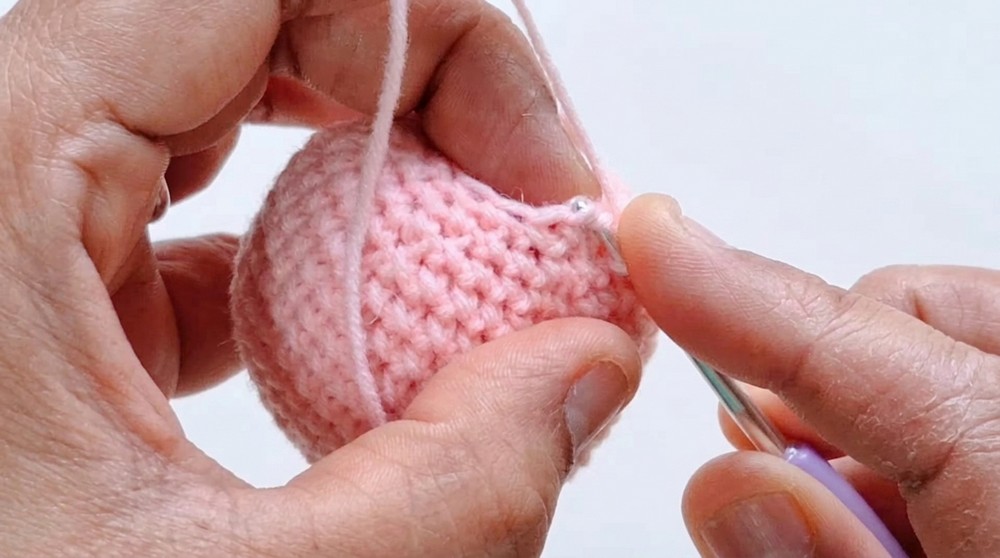
- Rounds 7–12: Chain 1. Work 36 SC in each stitch around. [36 SC per round]
- Round 13: Chain 1 (not counted). Work (SC, SC, SC, SC, Dec) around. [30 SC]
- Round 14: Chain 1 (not counted). Work (SC, SC, SC, Dec) around. [24 SC]
- Round 15: Chain 1 (not counted). Work (SC, SC, Dec) around. [18 SC]
- Round 16: Chain 1 (not counted). Work (SC, Dec) around. [12 SC]
- Add fiber filling before continuing to close the body.
- Round 17: Work 6 Dec, reducing the stitch count to 6 SC.
- Use a tapestry needle to close the hole by weaving through the remaining stitches. Tighten the thread securely.
Limbs: Hands & Legs (Make 4)
Rounds (Same for Both):
- Round 1: Create a magic ring using pink yarn. Work 6 SC into the ring. Sl st into the first SC to close the round. [6 SC]
- Round 2: Chain 1 and increase in every stitch (2 SC in each stitch). [12 SC]
- Rounds 3–4: Chain 1 and work 1 SC in every stitch for both rounds. [12 SC per round]
- Round 5: Decrease across each pair of stitches. [6 SC]
Chain Stitches:
- Hands: Add 8 chains for each arm.
- Legs: Add 10 chains for each leg.
Fill the hands and legs lightly with cotton and close the holes using a tapestry needle.
Eyes
Making Eyes:
- Create a magic ring with black thread. Work 8 SC into the ring.
- Close the ring by pulling the tail tightly and secure using a tapestry needle for a clean finish.
Adding White Dots:
- Take white embroidery thread. From the back, bring your needle to the front of the eye.
- Wrap the thread around the needle 5 times and pull gently to form a dot.
- Insert the needle back near the dot and tie off securely.
Cap
- Create a slip knot with orange yarn and chain 4 stitches. Slip stitch to make a circular hole.
- Round 1: Chain 1 and crochet 6 SC into the circle. [6 SC]
- Round 2: Increase every stitch (2 SC in each stitch). [12 SC]
- Round 3: Work: (SC, Inc). [18 SC]
- Rounds 4–5: Work 1 SC in every stitch. [18 SC per round]
- Round 6: Work (SC in the front loop, Inc in the front loop) pattern to shape the cap. [27 SC]
- Round 7: Use double crochet (DC) and follow: (DC, DC, Inc). [36 DC]
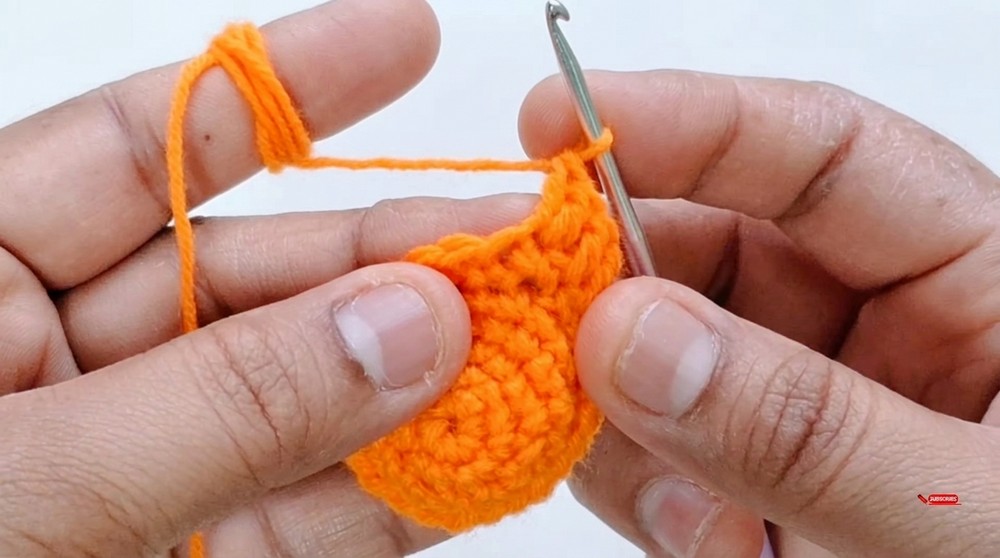
Complete the edge with slip stitches for a neat border.
Assembly & Finished Size
- Assembling the Eyes: Stick the eyes using glue. Place them aligned between the 7th and 10th rows for symmetry.
- Attach Limbs:
- Legs: Attach between the 3rd and 4th rounds of the body using the leftover limb thread. Secure and hide the thread.
- Hands: Attach between the 9th and 10th rows and centered on either side of the body, leaving 4 stitches from the center.
- Tassel: Make 40 chains using orange yarn. Attach to the top center of the head near the magic ring.
- Add the Cap: After securing the tassel, slide the cap onto Crochet Hanging Toy head and let it rest securely.
Conclusion
Congratulations on completing your Crochet Hanging Toy Pattern Keychain. It’s a fun, customizable project suitable for beginners and intermediate crocheters alike. Play around with colors to suit your unique style, and share the joy of this adorable creation with your loved ones.
If you enjoyed this pattern, don’t forget to share your creation and spread the word to fellow crocheting enthusiasts.



