
Stitch a trendy crochet crossbody bag with this simple and functional guide, offering you a stylish accessory for everyday use or special outings.
When I first picked up this free crochet crossbody bag pattern, I was looking for a project that was both fun and useful—and this bag did not disappoint. As a handmade accessory, it's perfect for carrying essentials while adding a lovely touch of personality to any outfit. If you’ve been wanting a stylish yet simple bag to make yourself, this project is definitely worth exploring.
Crochet Crossbody Bag Pattern for Accessories
This crossbody bag is beautiful in its simplicity. It features a neat rectangular shape with a long strap that’s perfect for wearing across the body, keeping your hands free. The texture is soft but sturdy, thanks to the dense stitch pattern that holds the bag’s shape well. Its style is casual and versatile, suitable for daily errands, casual outings, or even as a lightweight travel companion. A standout feature is its subtle detailing, like the clean edges and firm strap, which give it a polished look without being too complicated.
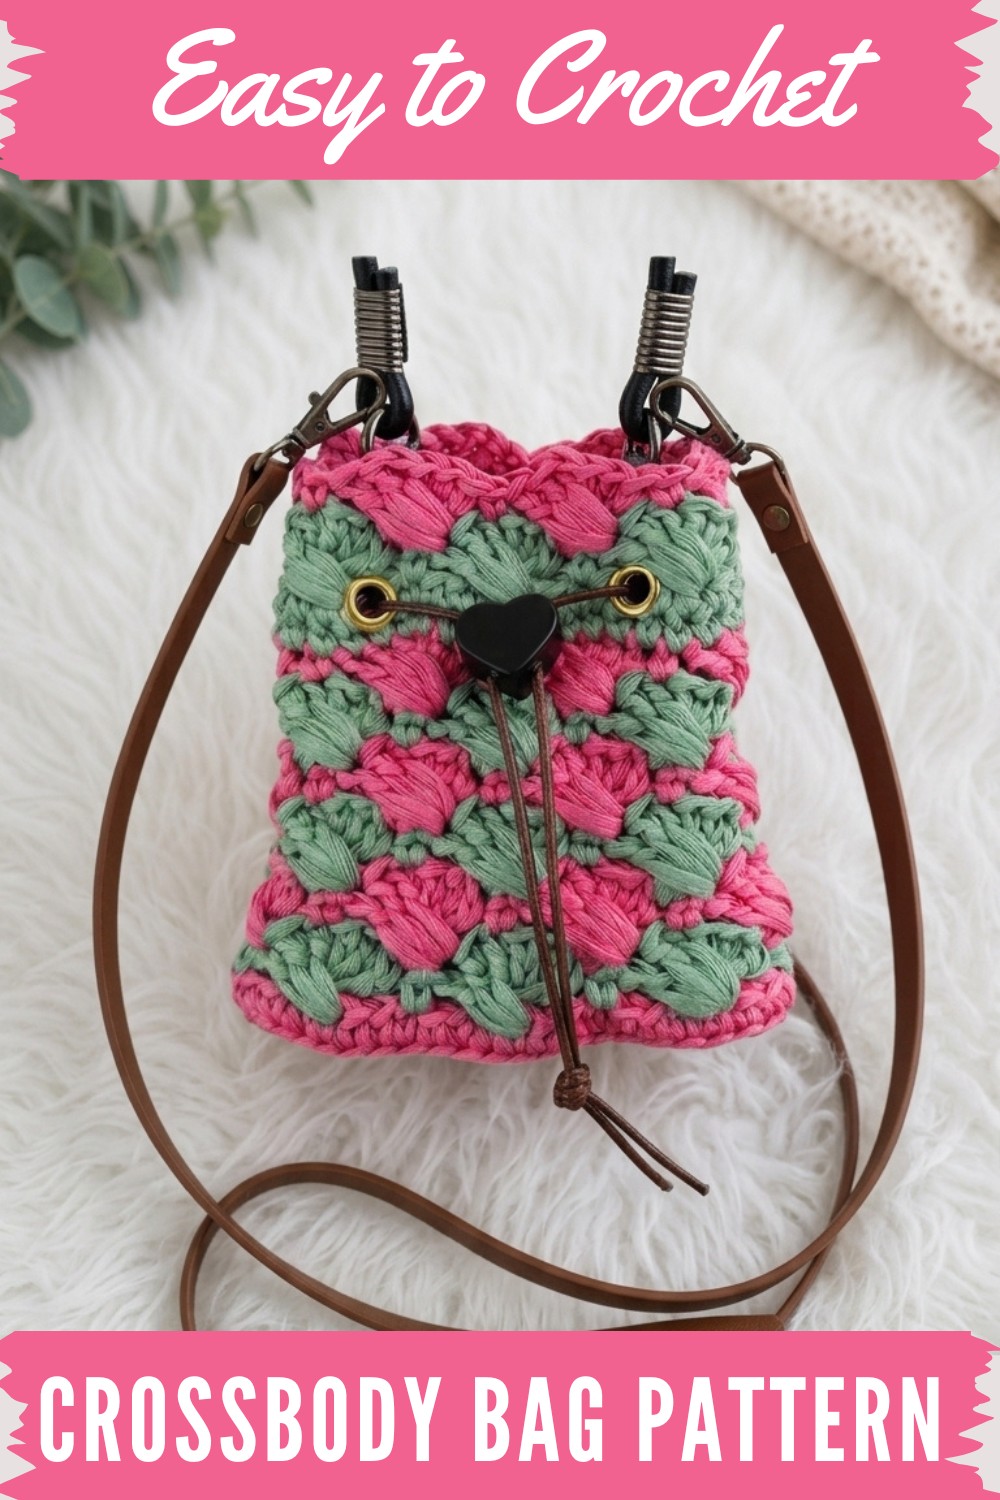
This project is great for beginners and intermediate crocheters alike. The main stitch used is the single crochet, which is easy to learn and creates a dense fabric ideal for bags. The pattern mainly involves working back and forth in rows, with simple stitches and straightforward shaping, making it beginner-friendly but still fun for those with some experience.
Besides being a fantastic bag for yourself, this crochet crossbody bag also makes a thoughtful handmade gift that anyone would appreciate. It’s a stylish and practical accessory that adds charm to any outfit, perfect for daily use or special occasions. If you’re looking for a project that’s both useful and enjoyable to make, this free crochet crossbody bag pattern is definitely worth trying.
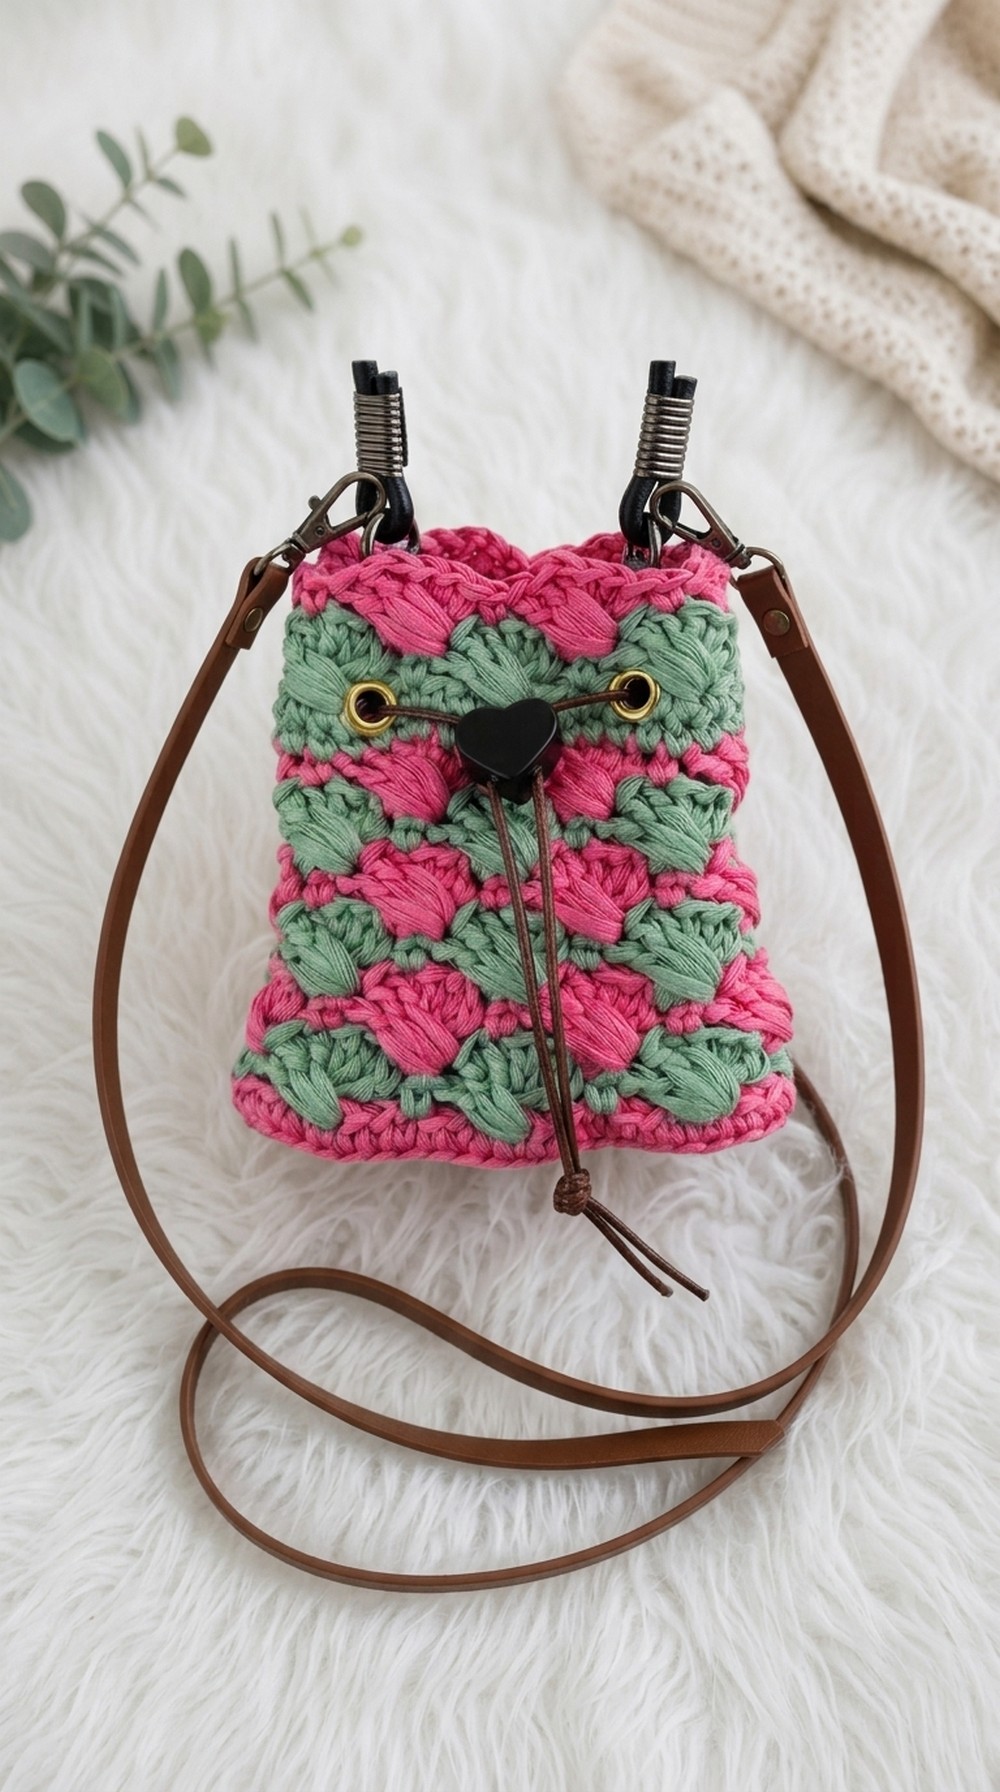
Stylish Mini Crossbody Bag (Handbag) Crochet Pattern
Create a chic and functional mini crossbody bag using two strands of raffia or cotton yarn! This step-by-step pattern guides you through forming a sturdy oval base, then building a cylindrical body with elegant alternating colorwork and unique crossed double crochet motifs. The bag is finished with simple assembly, grommet eyelets, and a practical drawstring closure. This project is perfect for confident beginners eager to try new stitch techniques and those looking for a quick yet impressive handmade accessory.
Pattern Notes
- Construction: The bag is worked in continuous joined rounds, starting at the base and working upward in one piece.
- Yarn: Pattern uses two strands of raffia or cotton held together for strength and stability. Substitute with any two medium-weight smooth yarns if raffia is not available.
- Stitch Markers: Essential for tracking increases and pattern repeats, especially where the base rounds grow into the side walls.
- Stitch Patterns: Single crochet is used for the base and top/bottom border; the unique “crossed double crochet” motif is featured mid-body for visual interest.
- Color Changes: Alternate between two colors as desired, following the round instructions for proper placement.
- Finishing: Grommet eyelets and a drawstring give secure closure and a modern look. Hand sewing or simple tools needed for eyelets.
Skill Level
Confident Beginner to Intermediate
(Stitches: foundation chain, single crochet, double crochet, working in the round, increasing, color changes, installing grommets)
Materials
- Raffia or cotton yarn, two contrasting colors, used held double (approx. 80–120g total)
- Crochet hook (recommended: 4.0–5.0mm or suitable for yarn weight)
- 2–3 stitch markers
- Scissors
- Yarn needle for weaving in ends
- Grommet eyelets and spring cord lock for drawstring closure
- Matching drawstring cord (approx. 24–30 inches)
- Optional: Measuring tape, bag lining fabric, hand-sewing needle & thread (for lining)
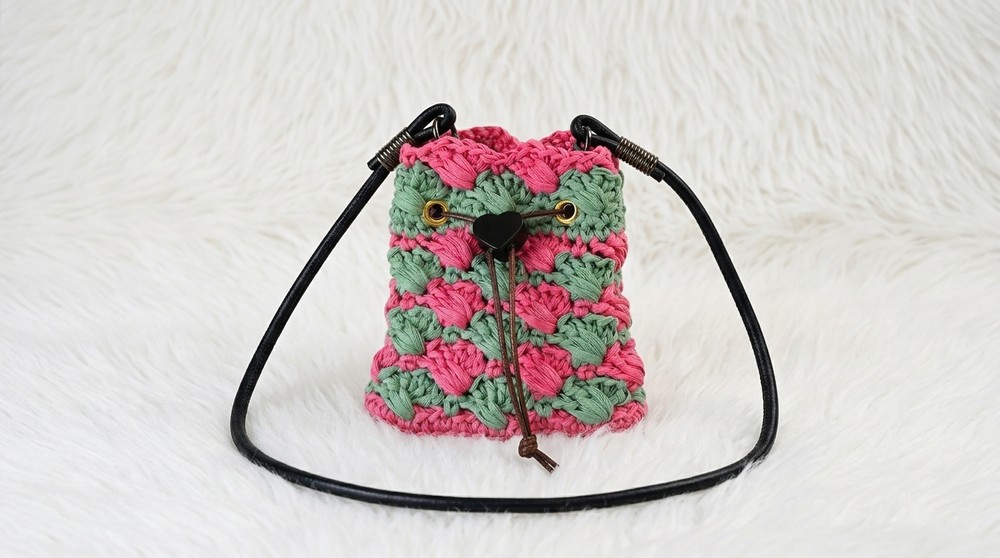
Measurements / Sizing
- Finished bag dimensions:
- Bottom base: approx. 3" x 6" (8 x 15 cm)
- Height: approx. 5–6" (13–15 cm)
- Circumference at opening: approx. 20–22" (50–56 cm)
- Size can be easily adjusted by adding or subtracting rounds in the base or sides.
Gauge
- Approx. 18 sc x 20 rows = 4" (10 cm) with yarn held double.
- Gauge is not critical, but try to keep your stitches tight and even for bag structure.
Stitch Abbreviations
| Abbreviation | Meaning |
|---|---|
| ch | Chain |
| sc | Single Crochet |
| dc | Double Crochet |
| BLO | Back Loops Only |
| sl st | Slip Stitch |
| st(s) | Stitch(es) |
| MC | Main Color |
| CC | Contrasting Color |
Special Stitches
- Cross Double Crochet Cluster:
Skip 3 sts, work 3 dc in next st. Then go back and work 3 dc in the first skipped st (crosses over).
This creates a distinctive "X" or basket-like pattern. - Working into Back Loops Only (BLO):
Insert hook only into the back loop of each sc, leaving the front loop unworked. This creates subtle ridges and structure.
The Crochet Pattern
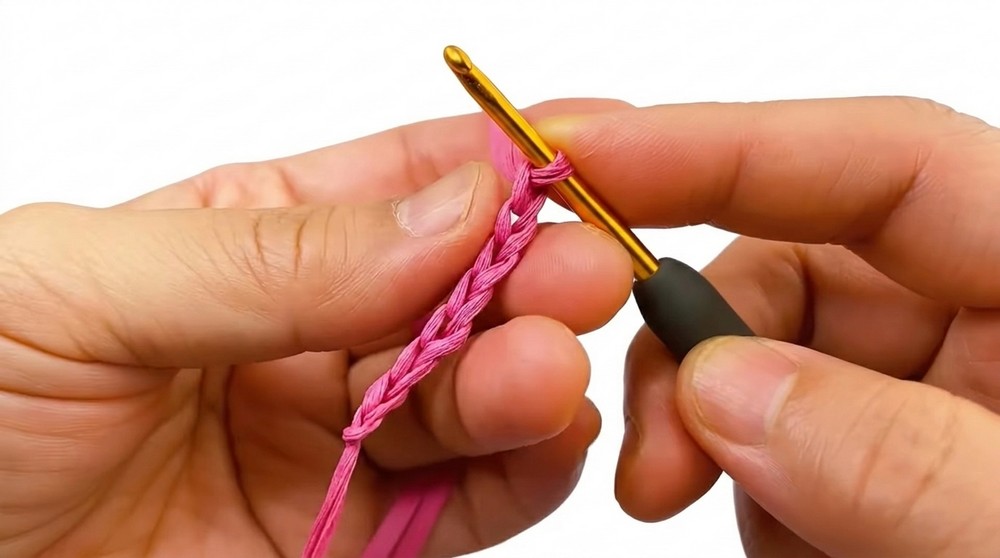
1. Base (Oval Shape)
- With two strands MC, make a slip knot.
- Ch 7.
- Turn, work 1 sc in 2nd back bump from hook, then 1 sc in each of next 4 bumps.
(5 sc completed) - Work 3 sc in last bump.
Place stitch markers in the first and third of these 3 scs. - Turn to work along the other side of the foundation chain.
1 sc in next 4 bumps. - Work 2 sc in last bump.
Place stitch marker in first of the 2 scs. - Do not join; continue in rounds.
2. Base Rounds 2–8 (Shaping the Base)
Round 2:
- Sl st in first st to join.
- Ch 1.
- 3 sc in the first st (corner).
Place marker in middle of these 3 scs. - 1 sc in next 4 sts.
- 3 sc in marked st (corner).
Place marker in middle of this 3 scs. - 1 sc in next st.
- 3 sc in marked st (corner).
Place marker in middle. - 1 sc in next 4 sts.
- 3 sc in marked st (corner).
Place marker in middle. - 1 sc in next st.
Subsequent Rounds 3–8:
- In every round, slip stitch in first st, ch 1.
- Place 3 sc into every st previously marked as the "middle" of 3-sc groups (corners), moving marker to the new center st each time.
- Work 1 sc in every side st between corners.
- Continue until 8 rounds or until the base reaches the desired length (approx. 6" / 15cm).
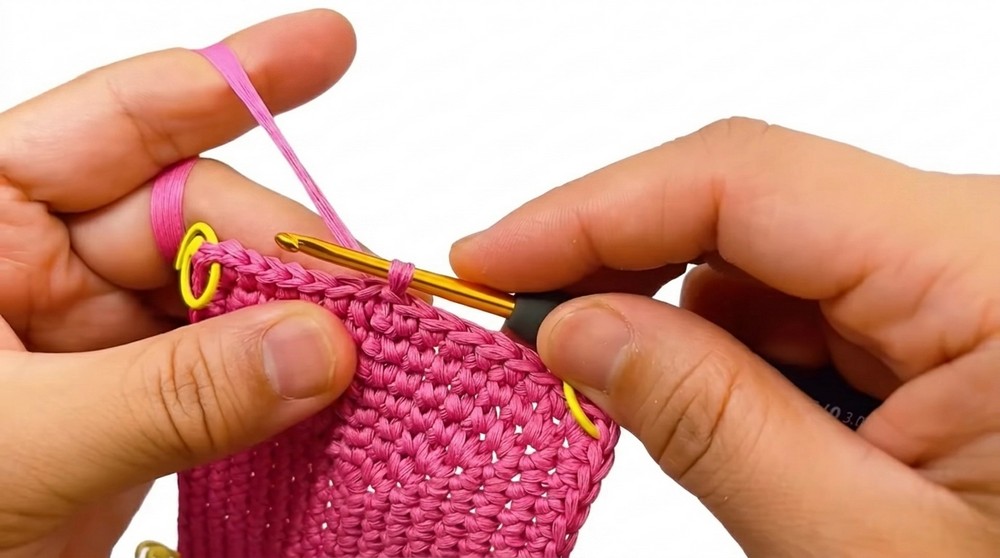
3. Starting the Body (Round 9: BLO)
- Ch 1.
- Work 1 sc in the back loop only (BLO) of each stitch around (should have about 70 sts; adjust to your bag’s count).
- At the last st, switch to CC (contrasting color).
- Sl st in first st to close round.
4. Body Cross Cluster Pattern (Rounds 10–15)
Round 10 (With CC):
- Ch 1, sc in first st.
- Cross Double Crochet Cluster:
- Skip next 3 sts, 3 dc in 5th st, then go back and work 3 dc in first skipped st (4th st).
- Skip 2 sts, sc in next st.
- Repeat the cross cluster pattern to end (should have 10 groups).
- Sl st to first st, fasten off round.
Round 11 (With MC):
- Join MC to third-to-last dc of any dc cluster.
- Ch 1, sc in same st.
- Skip next 3 sts, 3 dc in next st.
- Go back, skip 1 sc, work 3 dc in the last dc of previous cluster.
- Skip 2 sts, sc in next st.
- Repeat as in previous round (10 groups).
- Sl st to join, fasten off round.
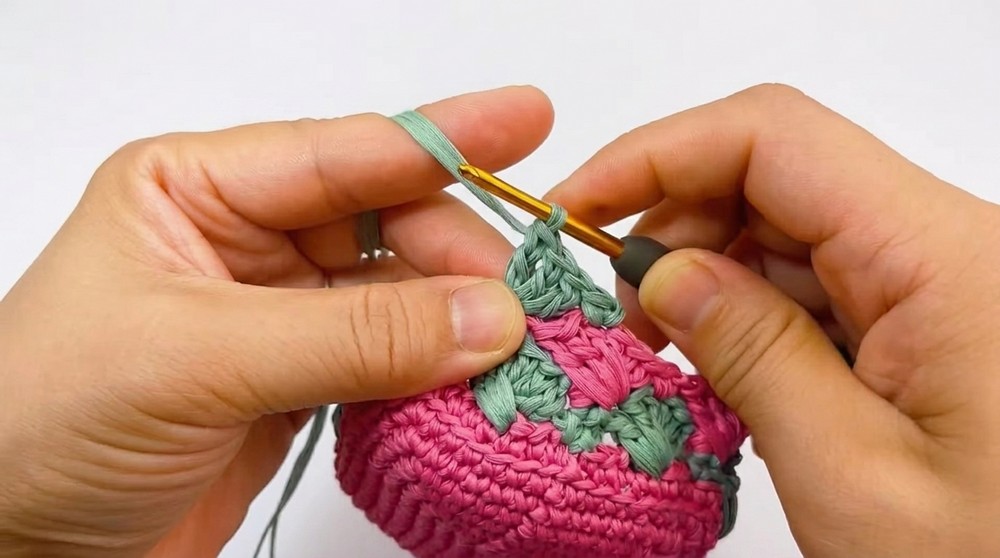
Rounds 12–15:
- Repeat round 11, continuing to alternate colors MC and CC every round.
- Fasten off each round, pulling tails to the back and tying off.
5. Bag Top Rounds (Rounds 16–17)
- With MC, join to third-to-last dc of any cluster.
- Ch 1, work 1 sc in each st around.
- Total: 70 sc per round (adjust to your actual count).
- Repeat one more round.
- Sl st to join, fasten off, and weave in all ends.
6. Final Cluster Round (Optional Height/Design Accent)
Round 18:
- (MC or CC as desired)
- Repeat cluster pattern as in rounds 10–15 for one more accent round.
- Fasten off, weave in ends.
Assembly & Finished Size
- Weave in all yarn tails securely to wrong side with yarn needle.
- Install grommet eyelets evenly spaced (suggest 6–8 along bag opening, according to personal style or kit instructions).
- Thread drawstring cord through eyelets and attach spring cord lock for secure closure.
- Add optional lining for extra strength and polish.
- Finished size: approx. 6" wide x 5.5" tall with a 20" circumference at opening.
Quick Overview for Beginners
- Make a foundation chain and oval single crochet base, increasing at corners.
- Build up sides with single crochet in back loops only.
- Work colorwork body using the cross double crochet cluster pattern, alternating colors every round.
- Top with two rounds of single crochet for a sturdy rim.
- Add extra cluster or single crochet rounds as desired for height.
- Install metal eyelets along top. Thread drawstring and cord lock.
- Weave in ends—done.



