Admire adorable woodland charm with Free Crochet Owl Amigurumi Pattern featuring sweet details perfect for playful decor & cozy collections.
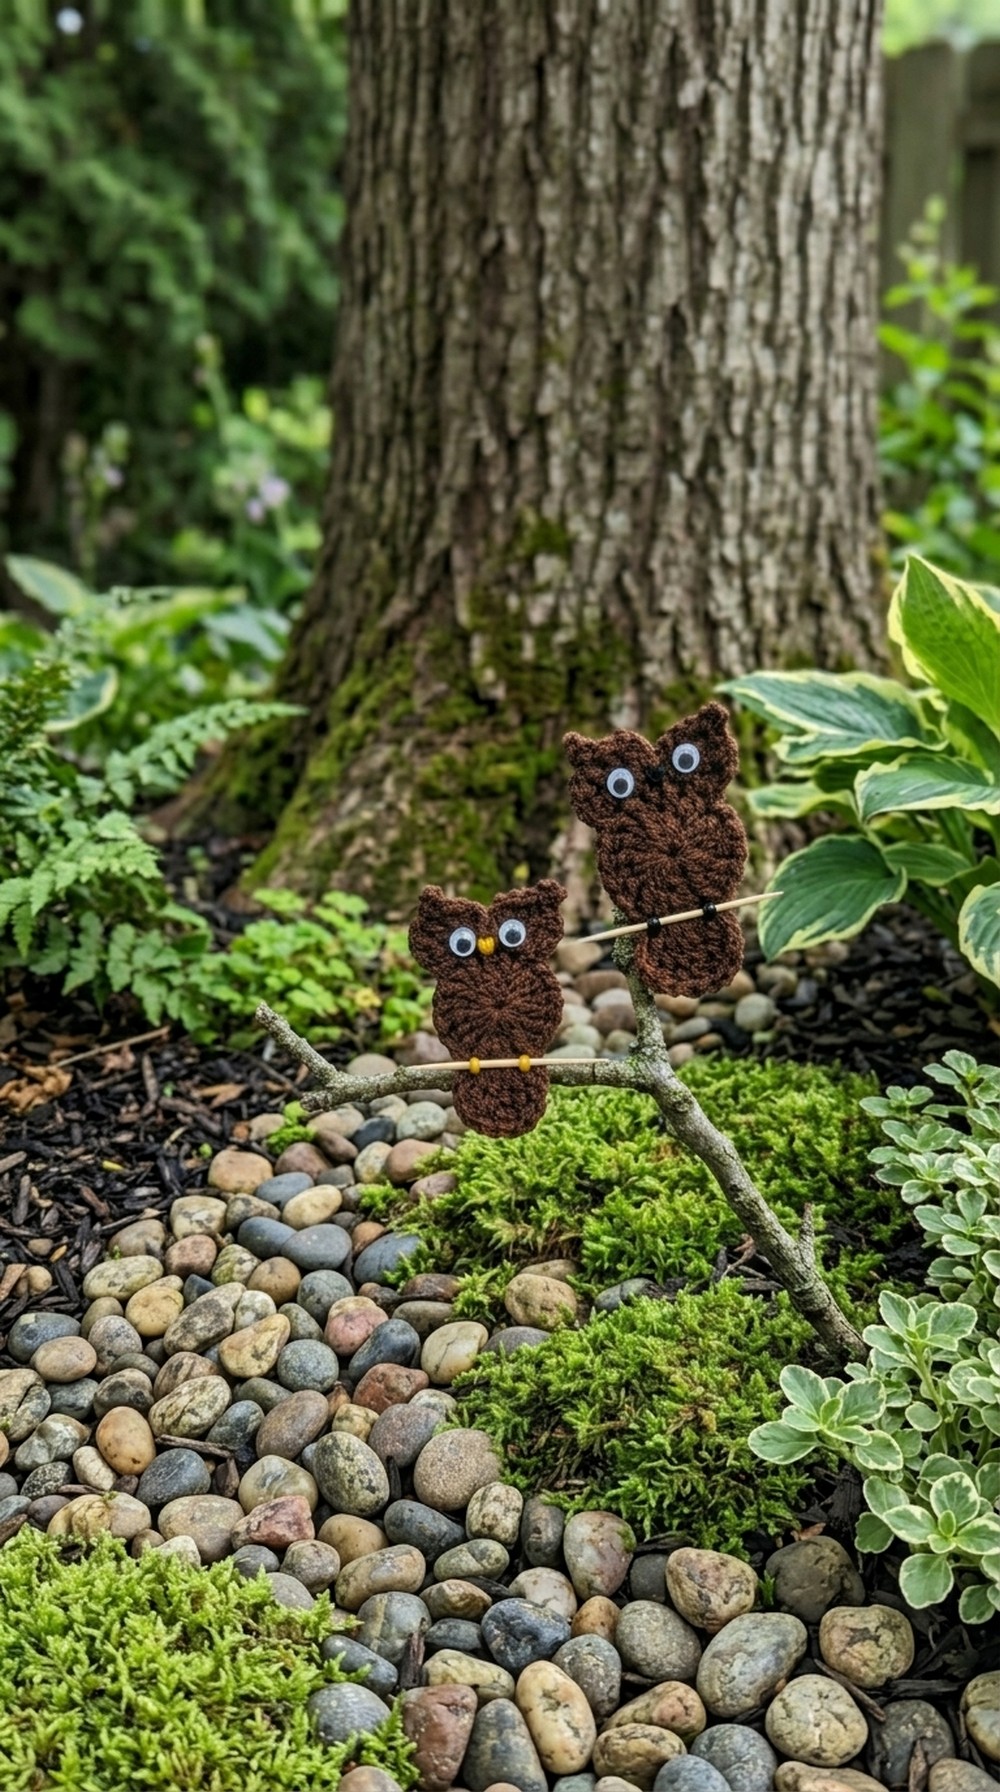
I love making crochet toys and a little owl project really caught my attention. This free crochet owl pattern helps you make a handmade stuffed owl that is great as a gift or decoration. You can change the colors or size to make animals or fun keychains, which makes this pattern really flexible and fun to try. The owl has a rounded shape with big bright eyes that give it a lot of personality.
The yarn feels soft and cozy so the toy is pleasant to hold or display in your home. Its small wings and tiny beak add details that make the owl look full of character. The design is playful and inviting perfect for kids or anyone who likes cute animals.
Owl Amigurumi Crochet Pattern with Big Eyes
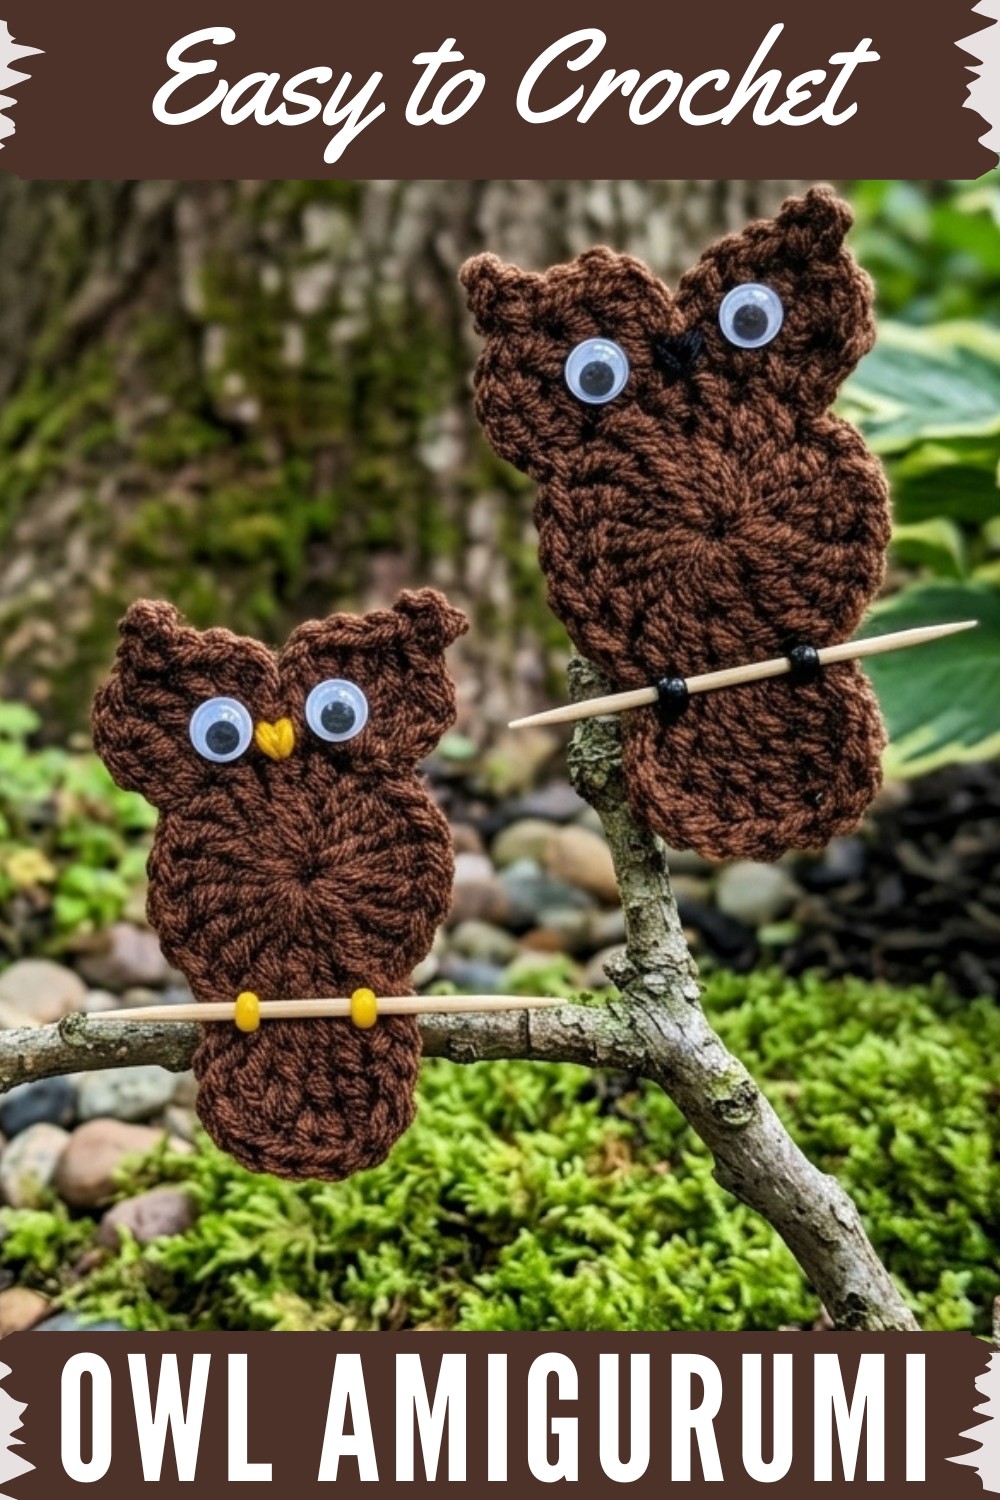
The expressive eyes and stitched wings make this little owl special. The pattern is great for beginners and those with some crochet experience. It mainly uses crochet stitches, which are easy to learn and create a firm fabric that keeps the stuffing inside. You will also practice shaping techniques through simple increases and decreases.
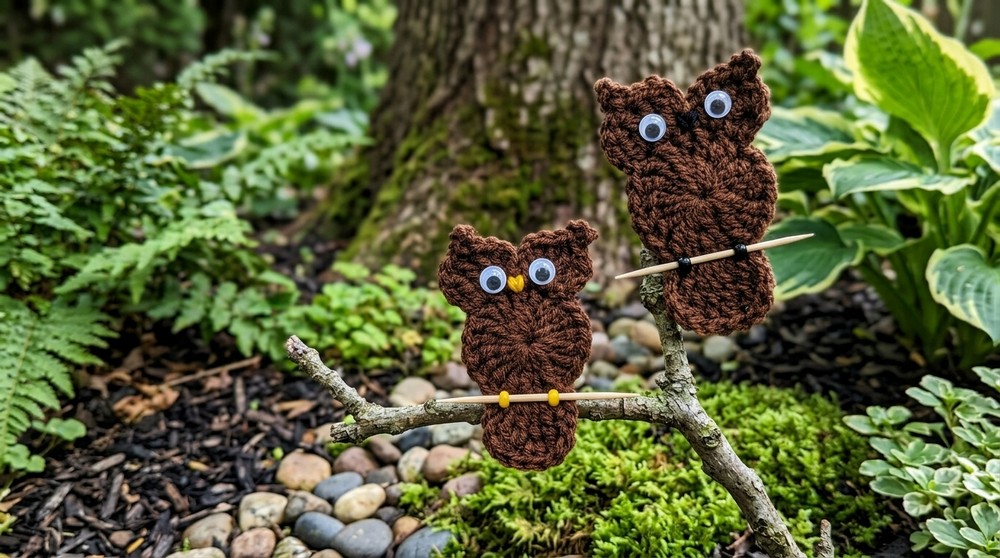
This is a way to develop your amigurumi skills. This free crochet owl is a handmade gift or a charming addition to your home décor. It is small, lovable and quick to make. It is ideal, for anyone who enjoys satisfying projects. If you want something cute, simple and rewarding this pattern is definitely worth trying!
Crochet Cute Little Owl – Detailed Step-by-Step Pattern
Summary
This delightful crochet owl is a fun and rewarding project, perfect for crocheters looking to create charming amigurumi-style decor or gifts. Using basic stitches such as triple crochet and slip stitch, the owl is worked from the body upwards, incorporating textured ears and a neat tail section. It is finished with a sewn-on beak and googly eyes to add personality and character. This pattern uses simple steps but results in a detailed and adorable finished piece.
Pattern Notes
- The owl is worked primarily using triple crochet (tr), with increases and chains to shape the body.
- It starts with a magic ring to create a tight center, avoiding holes.
- Stitch markers are not required, but counting stitches carefully throughout is important.
- The tail and ears are created by chaining and working triple crochet clusters and slip stitches, giving a nice textured silhouette.
- Embellishments such as the beak and googly eyes are sewn on after completion for detail.
- The pattern is provided in US terms.
Skill Level
- Skill Level: Intermediate Beginner
The pattern involves basic crochet stitches but the use of triple crochet and working multiple stitches in the same stitch for shaping requires some understanding of stitch counts and tension control.
Materials
- Yarn: Any type of yarn can be used; medium weight yarn is recommended
- Crochet hook: 3 mm (or equivalent size matched to yarn)
- Tapestry needle for sewing in ends and attaching parts
- Scissors
- Small amount of yellow yarn or thread (for beak)
- Small toothpick or similar (for shaping beak)
- Googly eyes and craft glue (or safety eyes)
Measurements / Sizing (Optional)
- Size varies according to yarn and hook used but generally, the finished owl fits comfortably in the palm of your hand (~4-5 inches tall).
Gauge & Stitch Pattern
- Gauge is flexible since this is an amigurumi-style project.
- Use a tightly worked triple crochet (tr) to maintain firmness and shape.
- The body is worked in continuous rounds with increases, flat and even.
Gauge Swatch Tips
- Practice triple crochet stitches to smooth out tension; uneven tension can affect shape.
- Aim for consistent stitch height and width throughout the piece.
Stitch Abbreviations
- ch = chain
- tr = triple crochet
- sl st = slip stitch
- st = stitch
- MR = magic ring (magic circle)
- ... = repeat instructions between asterisks
Special Stitches
Triple Crochet (tr)
- Yarn over twice, insert hook into stitch, yarn over and pull through (4 loops on hook)
- Yarn over, pull through 2 loops (3 loops left)
- Yarn over, pull through 2 loops (2 loops left)
- Yarn over, pull through final 2 loops to complete stitch
Body and Face
- Start: Make a magic ring (MR).
- Chain 3 (counts as the first triple crochet).
- Work 19 triple crochets (tr) into the magic ring. Total 20 stitches including chains.
- Pull the tail of the magic ring tight to close the hole.
- Slip stitch (sl st) into the top of the initial chain 3 to join the round.
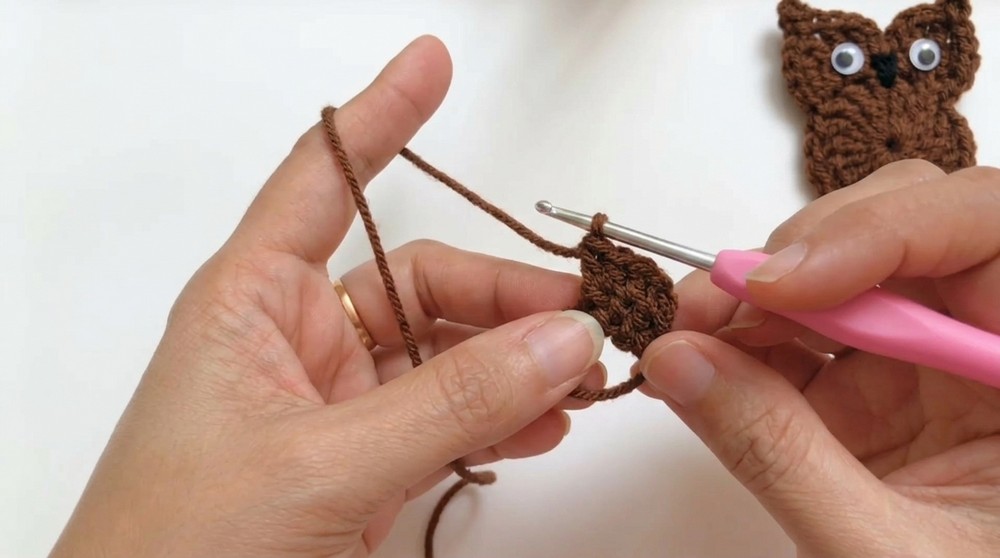
You have created a tight, flat circle forming the owl’s body.
Ears (Right Side of Round)
- Chain 3 (starting height for the ear).
- Work 2 triple crochets (tr) into the same stitch where the chain 3 was made.
- Chain 4.
- Slip stitch into the base stitch below the chain 4 (not the very last chain).
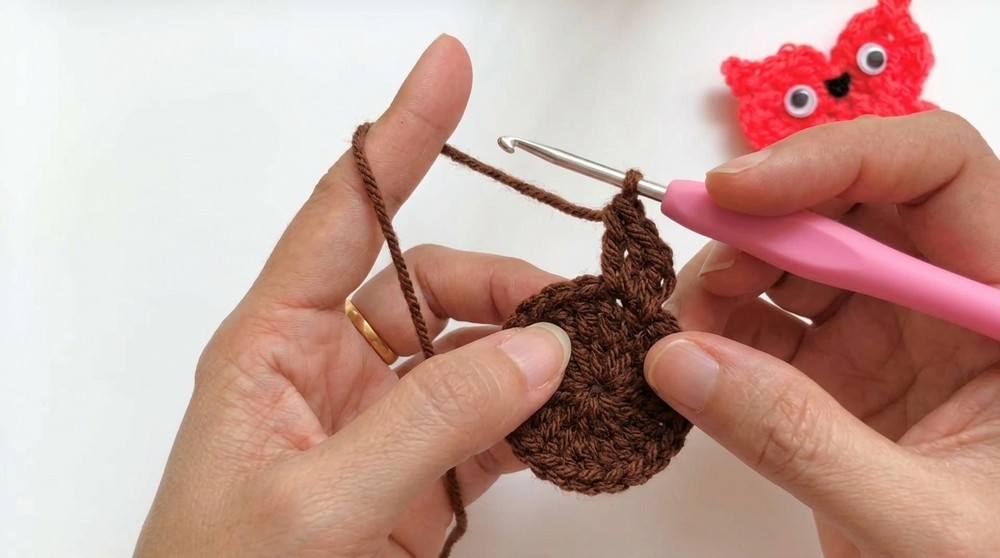
This forms one pointed ear shape.
- Work 2 triple crochets (tr) into the next stitch.
- Chain 3.
- Slip stitch into the same stitch where the two triple crochets were made.
You have finished the right ear and part of the face edge.
Other Side of the Round (Left Ear)
- Chain 3.
- Work 2 triple crochets (tr) into the next stitch.
- Chain 4.
- Slip stitch to the base stitch below the chain 4.
- Work 2 triple crochets (tr) into the next stitch.
- Chain 3.
- Slip stitch into the same stitch where these last triple crochets were made.
Now both ears frame the top of the owl body.
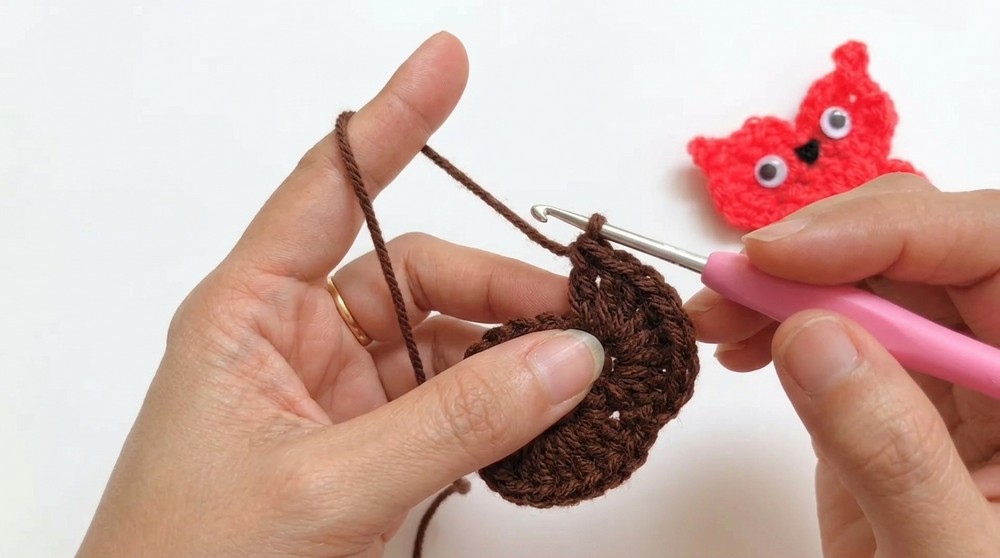
- Chain 1 and fasten off the working yarn. Tighten the tail and neatly weave in ends with a crochet hook or darning needle.
Tail Section
- Begin at the sixth chain from the start of the owl body’s initial chains, working across 4 chains only.
- Make a slip knot and insert the hook into the sixth chain, pulling the slip knot through to join.
- Chain 3 (counts as first double triple crochet).
The tail starts here, working down the owl’s body.
- Work 1 double triple crochet (dtr) into the same stitch where chain 3 was made.
- Into the next stitch, work 2 double triple crochets (dtr).
- Into the following stitch, work 2 double triple crochets.
- Work 1 double triple crochet into the next stitch.
- Chain 3.
- Slip stitch into the same stitch where the last double triple crochet was made.
- Chain 1 and fasten off, pull the tail taut and hide the yarn end inside the stitches.
Beak
- Using yellow yarn or thread and a needle, create a small triangular beak.
- Insert a small toothpick or similar thin object to help shape and secure the beak.
- Stitch the beak in place at the appropriate position on the front of the owl.
Eyes
- Glue on small googly eyes or safety eyes securely on the owl’s face, one on each side.
Assembly & Finishing
- Ensure all yarn ends are woven in neatly inside the work to prevent unraveling.
- Shape the ears and tail as needed by gently adjusting the stitches.
- Allow glue on eyes to dry completely before handling.
- Optionally, add embellishments or embroidery to personalize your owl.
Finished Size
- The completed owl stands approximately 4-5 inches tall, depending on yarn thickness and hook size.
Conclusion & Tips
- The pattern uses mainly triple crochet (tr) and slip stitch (sl st), making it a great project to practice these stitches.
- Starting with a magic ring creates a tight, hole-free center for the owl body.
- The ears and tail are built by clusters of triple crochets and slip stitches for texture and shape.
- Finishing accessories such as the beak and eyes add character and charm.
- This pattern offers a satisfying balance between simplicity and detail, making it perfect for intermediate beginners looking to expand their skills.