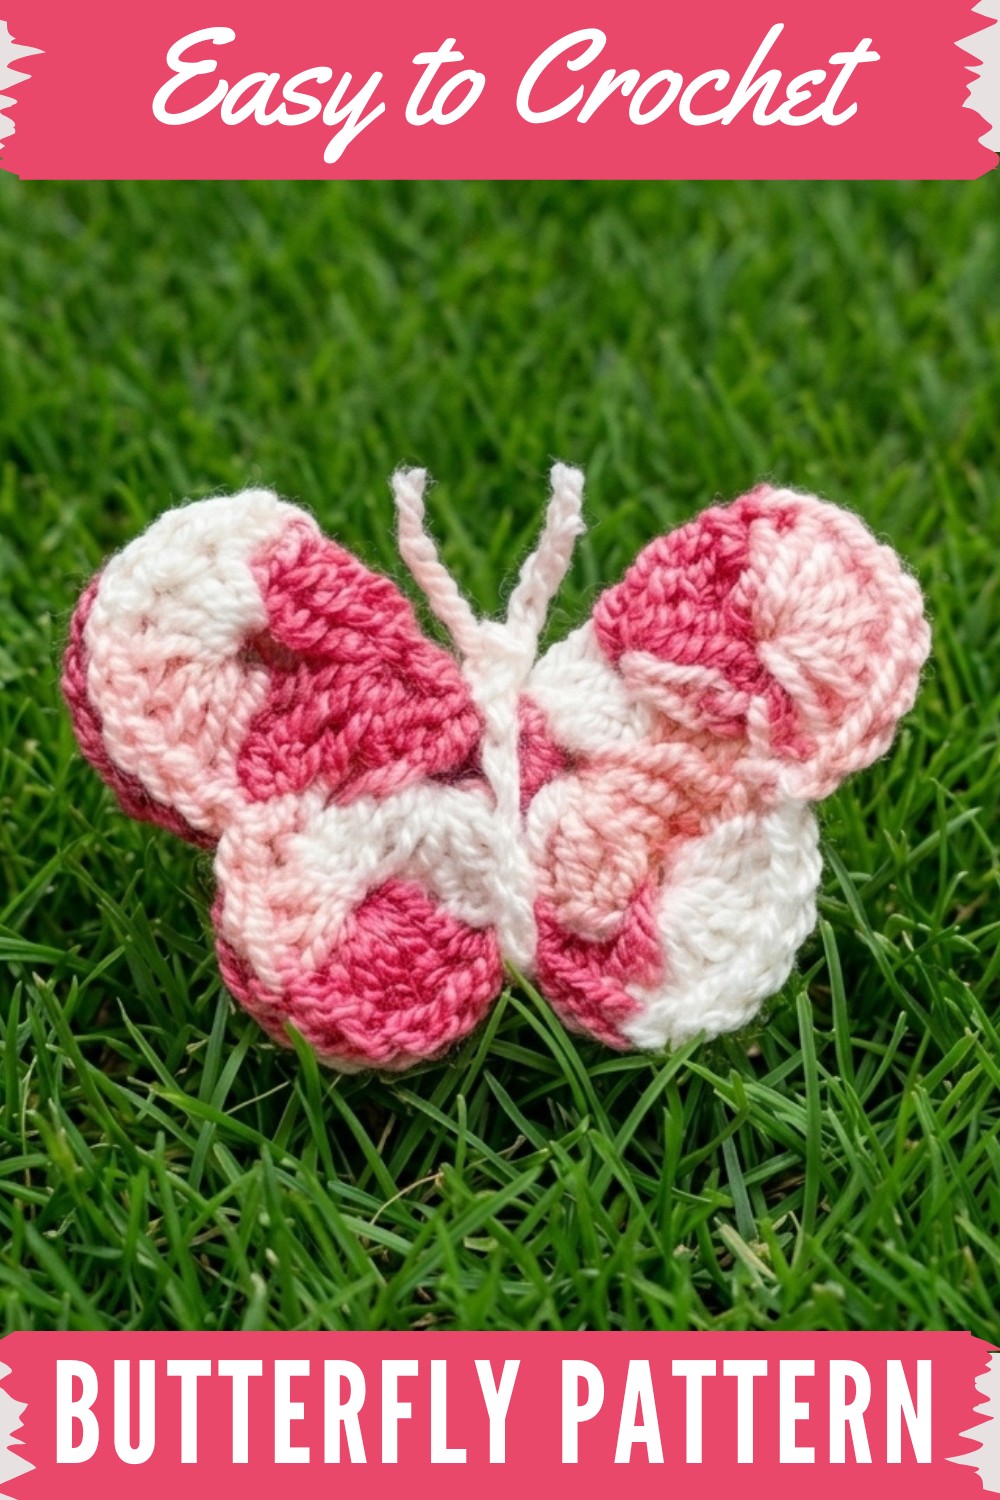
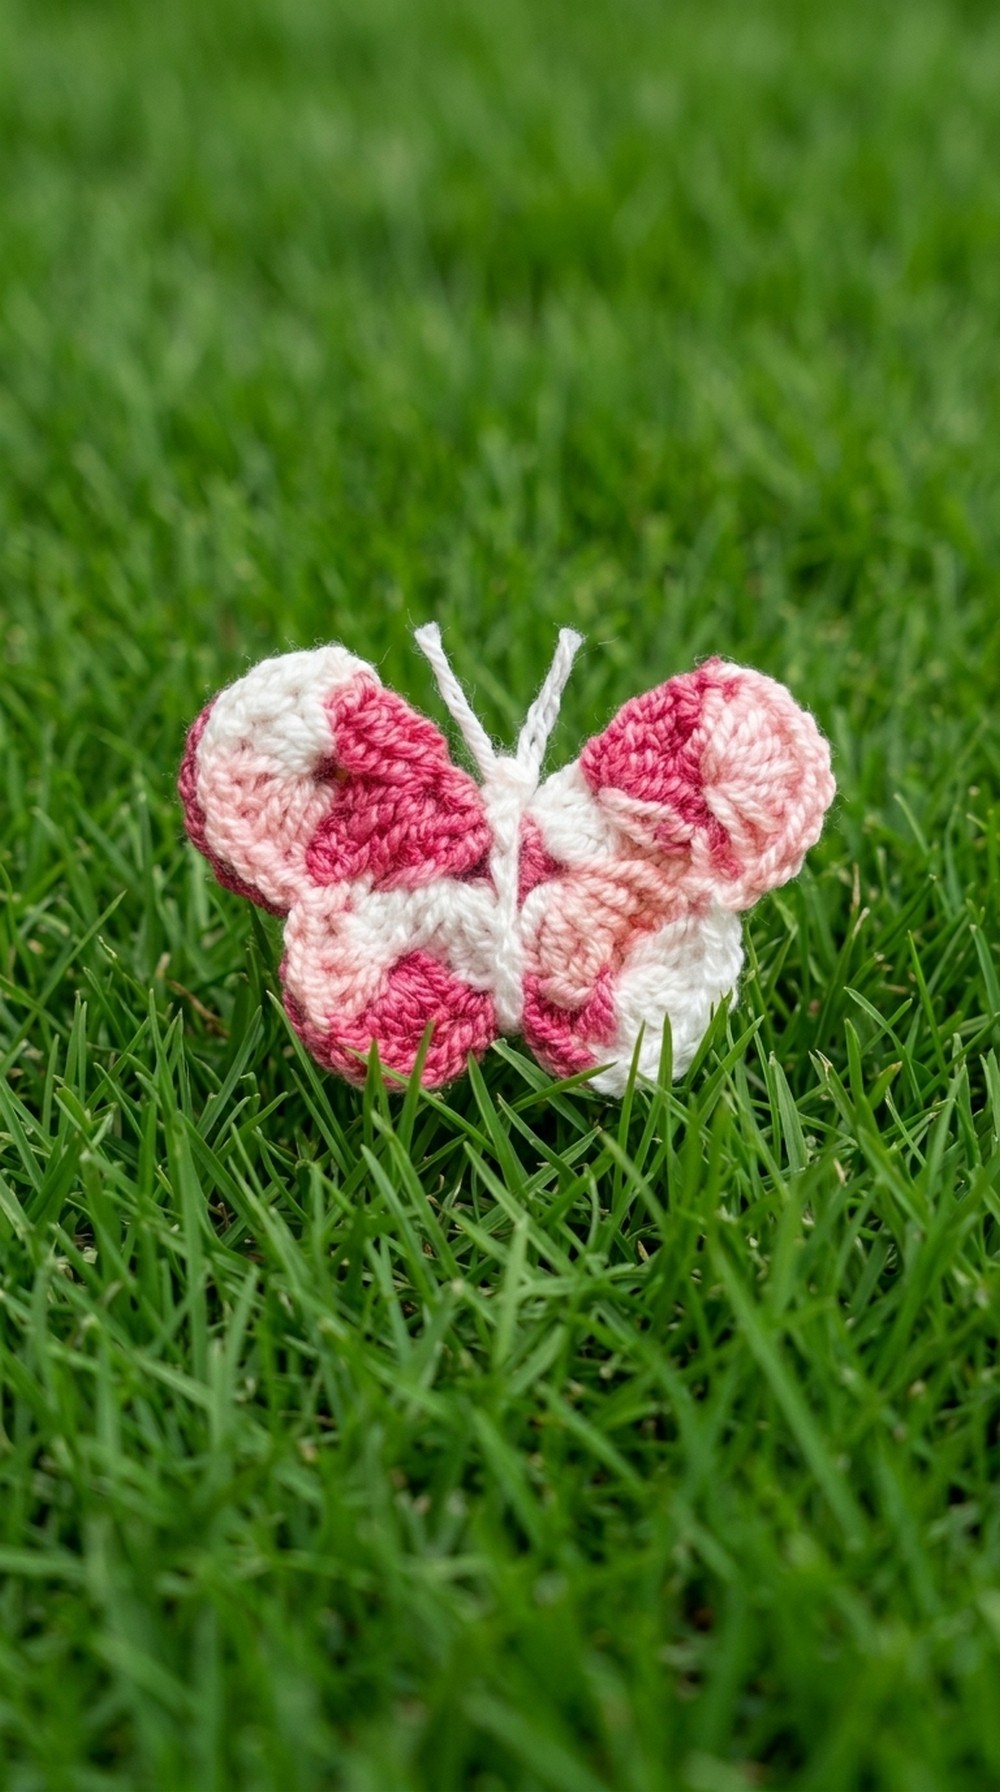
Create stunning decorations accessories with this Free Crochet Butterfly Pattern, featuring easy steps to craft colorful, versatile designs quickly.
When you're looking for a project that works up quickly, this crochet pattern is a great choice. The result is a sweet butterfly motif with soft, airy wings, rounded edges, and a playful set of antennae. Using lightweight two-ply acrylic yarn, each butterfly can feature a spectrum of colors from soft solids to vibrant variegated hues—allowing for endless color combinations.
The wings stand out with their textured look, which comes from repeating groups of double crochet stitches in the round, separated by chain spaces. The shape is achieved by folding the completed circle of wings in half and securing the center with a simple chain that doubles as the butterfly’s antennae. For added detail, a border of single crochet in a contrasting color defines the edge and provides structure. These design elements set this motif apart, giving it a lively and cheerful appearance.
Free Crochet Butterfly Pattern for Accessories
Techniques featured in this butterfly project include chains, double crochet, slip stitches, and straightforward joining. The steps of grouping stitches, folding, fastening, and edging serve as useful practice for foundational crochet skills. Quick assembly and uncomplicated construction make this an accessible choice for newer crocheters, while the option of adding borders or switching colors can add interest for those with more experience.
Finished butterflies suit a range of decorative and functional uses, attach them to hair clips, stick on magnets, embellish accessories, or use as festive décor. Their small size and speed make them an excellent option for gifts, last-minute accents, or personal touches on larger projects. Those working on this cheerful butterfly strengthen fundamental crochet techniques, experiment with color pairing, and complete a project with satisfying results in minimal time. Suitable for all experience levels, this free crochet butterfly pattern adds bright and beautiful accents wherever used.
Vibrant Crochet Butterfly Motif – Step By Step Pattern
Delight in creating these quick, charming crochet butterflies! Suitable for accessories, decorations, or creative projects, these butterflies are simple enough for beginners and beautiful enough for every level. Follow the clear instructions for perfect results every time.
Preparatory Steps
- Choose your favorite colors—solid, variegated, or contrasting for unique effects.
- Make sure your hook matches your yarn weight; the sample uses a 1.75 mm hook.
- Decide how you want to use your butterflies (hair clips, applique, magnets, etc.) before you start, so you can adjust yarn or finishing accordingly.
- Gather all tools (see below) and keep small scissors and a tapestry needle nearby for finishing touches.
- Arrange your working area in good lighting, as motifs are small and detailed.
Key Project Details
- Each butterfly is worked as a flat circle, then folded and tied for the shape.
- Groups of double crochet (dc) form wings, and chains create the body and antennae.
- Small projects like this are great for using up leftover yarn.
- Gauge is not critical, but using similar weight yarn throughout ensures an even look.
- The pattern allows adding a finishing edge in a second color for variation.
My Creative Outline
- Began with a magic ring or small hoop as the base.
- Worked two simple rounds of grouped stitches to build wings.
- Folded the motif in half and tied with a chain to form the butterfly body and antennae.
- Provided options for decorative edgings and various ways to use the finished motif.
Experience Needed
Beginner/Confident Beginner
- Must know chain (ch) and double crochet (dc), and work in the round.
- Some experience with slip stitch (sl st) and basic assembly is helpful.
Final Dimensions
- Finished butterfly: approximately 6 cm (2.4") wide by 4.5 cm (1.75") tall (using sport weight yarn and 1.75 mm hook).
- Antennae length: adjustable (sample uses 30 ch).
Required Tools & Supplies
- 2-ply acrylic or cotton yarn (any preferred color, scrap amounts)
- 1.75 mm crochet hook (adjust hook size to your yarn)
- Scissors
- Tapestry needle
- Optional: contrasting yarn for edging, glue/magnetic back/hair clip base/pearl beads
Measuring & Sizing Chart
- For largest butterflies, use thicker yarn and a larger hook.
- Adjust size by substituting thinner yarn or reducing hook size.
- Finished size depends on yarn weight and your tension—measure after round 3 (before folding) to check.
Stitch Gauge & Sample Pattern
- Gauge is not essential for this project.
- For reference, one motif should measure about 6 cm across flat before folding.
- Pattern built on basic stitches: ch and dc in the round.
Abbreviation Reference
| Abbreviation | Definition |
|---|---|
| ch | chain |
| dc | double crochet |
| sl st | slip stitch |
| sp | space |
| st(s) | stitch(es) |
| rep | repeat |
Highlight: Special Techniques
- Magic Ring: For a tidy center; substitute with a 4-chain ring if preferred.
- Grouped Double Crochets: Form "fans" for wings.
- Simple Edging: Optionally, add single crochets around the finished butterfly for extra texture and stability.
- Antennae Chain: Attach a long chain at the folded center and knot to form decorative feelers.
Stepwise Instructions
A. Base Ring and Wings (First and Second Rounds)
- Form the Center:
- Make a magic ring, or ch 4 and join with sl st to form a ring.
- Ch 3 (counts as first dc).
- Work 2 dc into the ring, then ch 2 for a space.
- (2 dc, ch 2) – Repeat 7 times; you should have 8 groups of 2 dc, each separated by 2 ch.
- Join with a sl st to the third ch of starting ch-3.

For those unfamiliar with the pattern: Start with a loop and fill it with 8 sets of 2 double crochets separated by 2 chains each, closing into a circle.
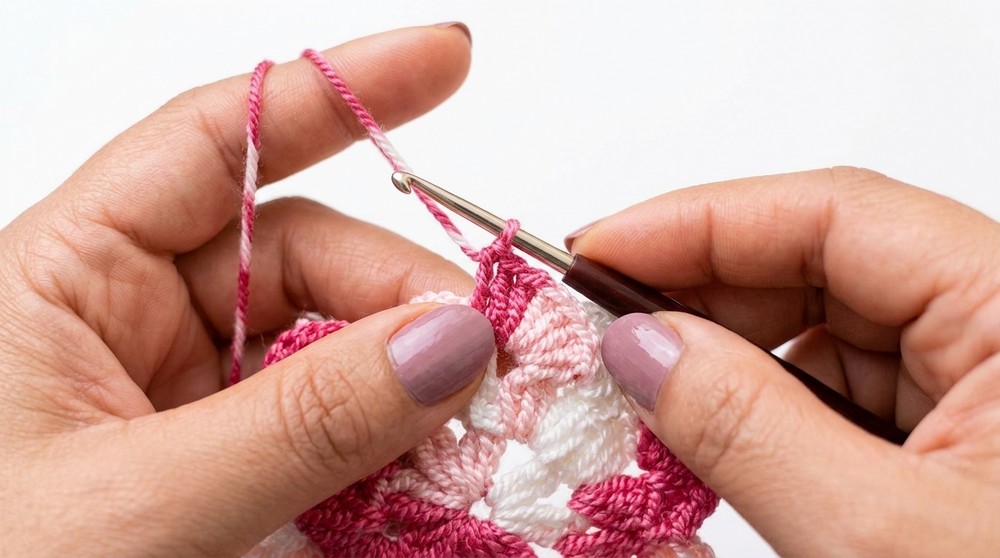
- Create Fan Wings (Second Round):
- Sl st through next dc and into nearest ch-2 space.
- In each ch-2 space: (ch 3, 2 dc, ch 2, 3 dc, ch 1) — this forms a "fan."
- Repeat in all 8 ch-2 spaces.
- Finish with a sl st into starting ch-3.
You are filling each open space with two groups of 3 double crochets, separated by 2 chains, separated by chain-1 spaces for definition.
B. Final Wings Round (Optional)
- Widening the Wings:
- Sl st into next ch-2 space (center of one fan).
- (Ch 3, then 7 dc) in the same space – 8 dc total in each.
- Slip stitch to next ch-2 space, and repeat for all 8 spaces.
- Finish off, cut yarn, and weave ends.
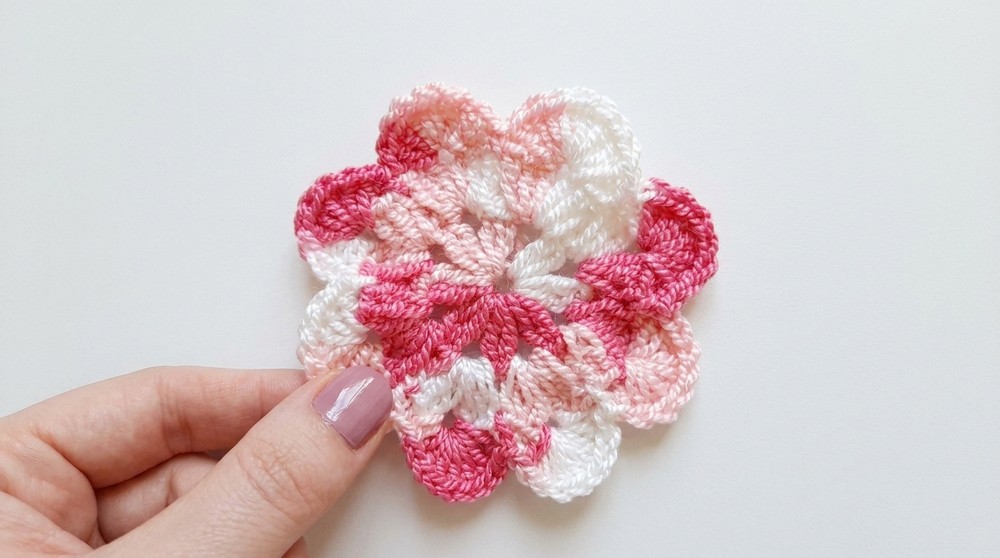
Each wing is now bold and full with eight double crochets in each space.
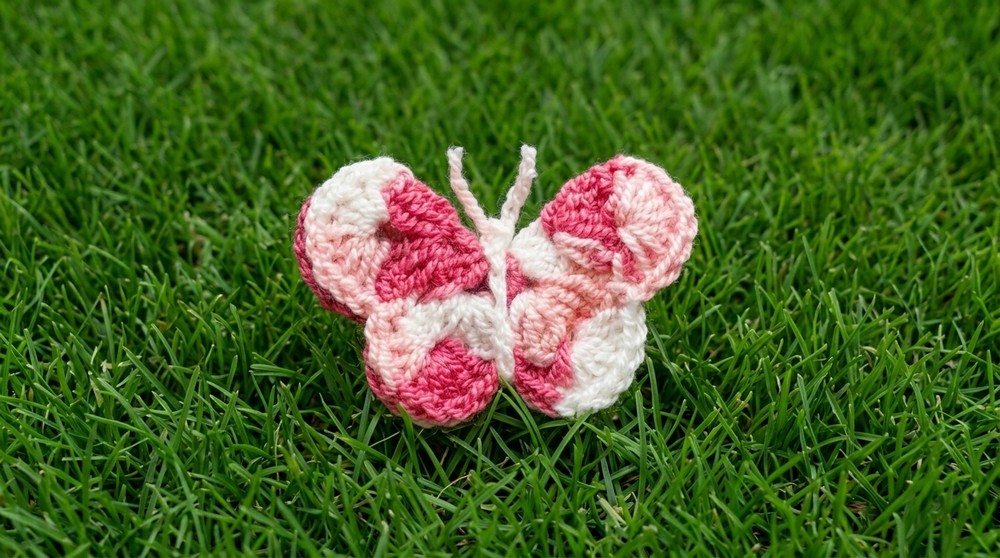
C. Shaping and Assembling Your Butterfly
- Folding:
- Lay your flat motif with the "fans" facing up.
- Fold the circle evenly in half, so you have four "wings" on each side.
- Antennae and Body:
- With a contrasting or same yarn, leave a long tail, then ch 30.
- Cut yarn and pull through last loop to fasten.
- Fold chain in half and thread through the center fold, so antennae are even on top.
- Tighten, then tie a double knot to secure the butterfly's shape.
- Trim antennae ends as desired.
The chain both ties the middle and acts as butterfly antennae.
D. (Optional) Edging Variation
- With a different color:
- Attach yarn anywhere along an outer edge.
- Sc evenly around entire motif for a defining border.
- Join with sl st, fasten off and weave in ends.
You now have a butterfly with a crisp, colorful edge.
Construction & Polishing
- Ensure your knots are secure so butterfly shape remains.
- Add beads or pearls to the body or wings for style.
- Attach to a hair clip, magnet, or backing as needed using glue or by sewing.
- Block gently if motif curls, but gentle spritzing will suffice if using acrylic yarn.
Troubleshooting (and Solutions)
Problem: Butterfly does not hold its shape or looks lopsided.
Solution:
Make sure your stitches are even. When folding, ensure the motif is exactly in half. Always knot the center firmly, and run the chain-body snugly around the middle before tying the antennae. For floppiness, use slightly stiffer yarn or block your butterfly gently.
Further Creative Uses
- Hair clips and headbands for kids or adults
- Embellishment for hats, scarves, and bags
- Decorative magnets for refrigerators or boards
- Gift wrap toppers or greeting card applique
- Party or room decorations (string into a garland!)
- Scrapbook or diary embellishments
Easy Explanation for All
Make a small crocheted circle, add groups of double crochets for wings, fold in half, tie around the middle with a chain, and knot securely to shape your butterfly. Add feelers at the top, finish the edges how you like, and you’re done—perfect for decorating anything you like.