Join the fun and learn how to make realistic DIY mini donuts using polymer clay with easy and simple steps that are great for beginners.
Tiny donuts are a fun way to turn simple clay into something that looks like real food. They may be small, but their lovely shapes and colorful toppings can easily catch anyone’s attention. DIY Mini Donut With Polymer Clay is a cute project that shows how to give ordinary clay the look of delicious little donuts. The original YouTube channel, Clueless Crafts, deserves full credit for the creative design and helpful tutorial. This idea is especially nice for people who love tiny food items and want to try something different at home.
Making This Easy DIY Mini Donut Charm with Polymer Clay
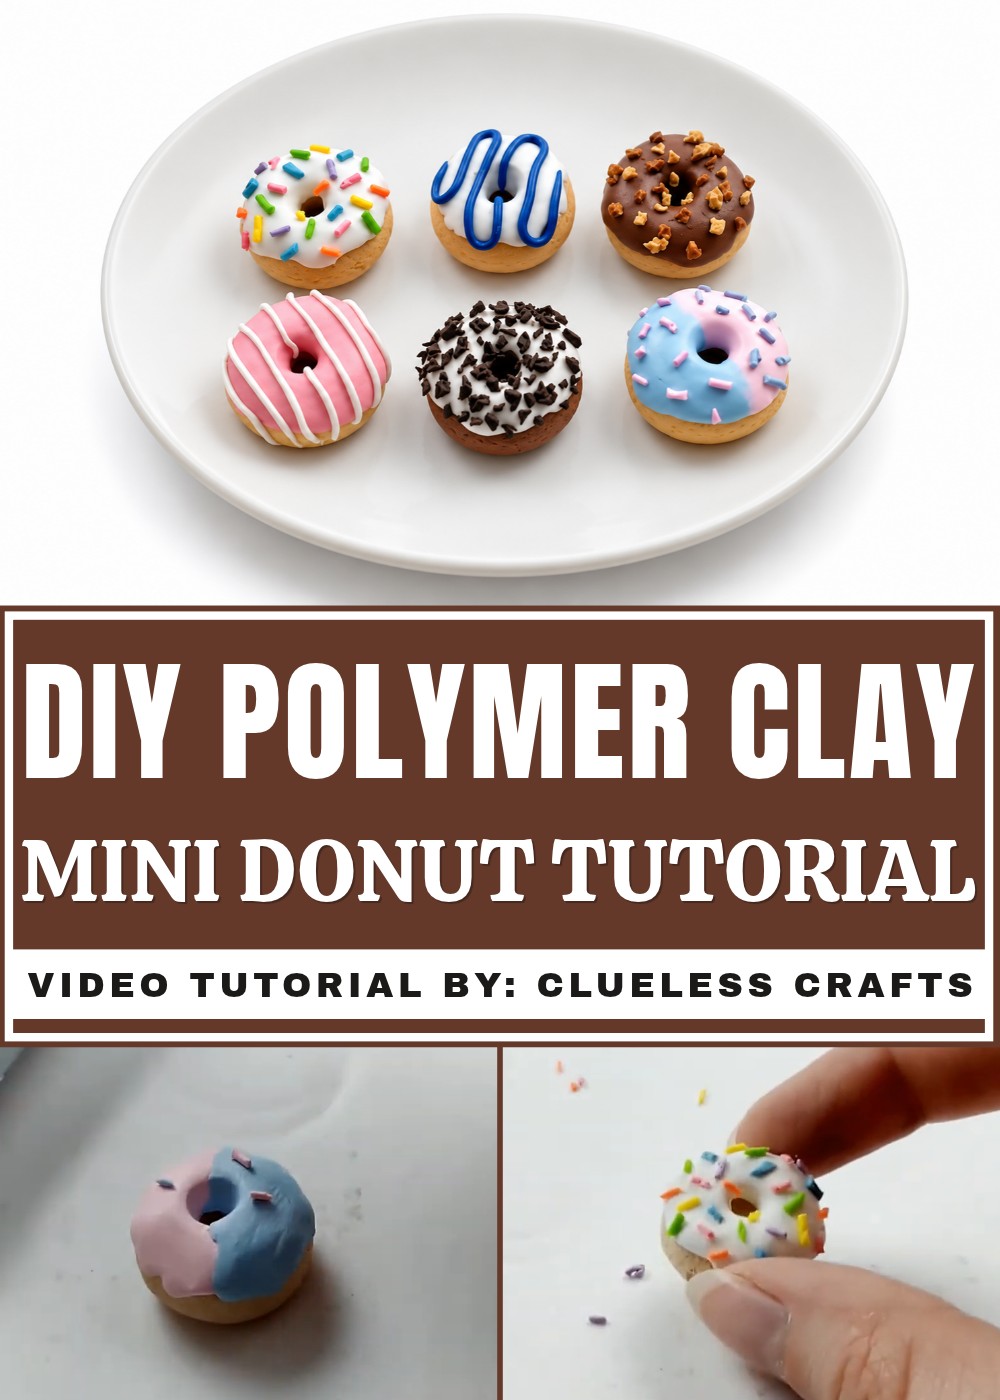
These miniature donuts have a round shape with a little hole in the middle, just like the ones found in a bakery. Their smooth surface, sweet-looking icing, and tiny decorations give them a realistic appearance. You can use different clay colors to form the donut base and add colorful details on top. The best part is seeing how a few small pieces of clay can turn into something so cute. Every little detail helps the finished donut look more like a real treat.
This project is also a lovely choice for beginners who want to try simple clay work. The tiny donuts can be used as small decorations, pretend food for dolls, or cute additions to a miniature food collection. Since the donuts are small, they are easy to display without taking up much space. The finished pieces look cheerful and playful, making this a fun idea for anyone who likes working with polymer clay.
DIY Mini Donut Using Polymer Clay Tutorial
This project shows you how to make adorable miniature clay donuts and a cute bakery-style box from start to finish. Using simple polymer clay techniques, you will craft six different donuts, each with unique icing, sprinkles, and realistic textures that look almost good enough to eat. The step-by-step process gives you lots of options to personalize your donuts with favorite colors and creative toppings, making every donut special. To complete your set, the guide also includes instructions for building a small cardboard display box with a clear window so your mini masterpieces can be shown off just like treats in a real bakery. These mini donuts are perfect as gifts, jewelry charms, dollhouse accessories, or fun decorations. The instructions are easy to follow, even if you have never worked with clay before. Start crafting, and enjoy making your own tiny bakery collection.
Materials and Tools
Clay & Decorating Supplies
- Polymer Clay: Gold, White, Dark Brown, Light Brown, Blue, Light Blue, Pink, and other colors for sprinkles
- Finishing Agent: Acetone
- Q-tips
Tools
- Texturing Tool: Toothbrush
- Shaping Tool: Pointed clay tool for making holes
- Cutting Tool: Clay cutter or blade
- Baking: Oven

Donut Box Supplies
- Thin cardboard
- Plastic window (cut from an old envelope)
- Scissors
- Ruler and pencil for measuring and drawing
Step-by-Step Instructions
Making the Clay Donut Bases
Mix and Shape the Dough
- Start by mixing gold and white clay together to create a warm, light brown shade for your donut dough.
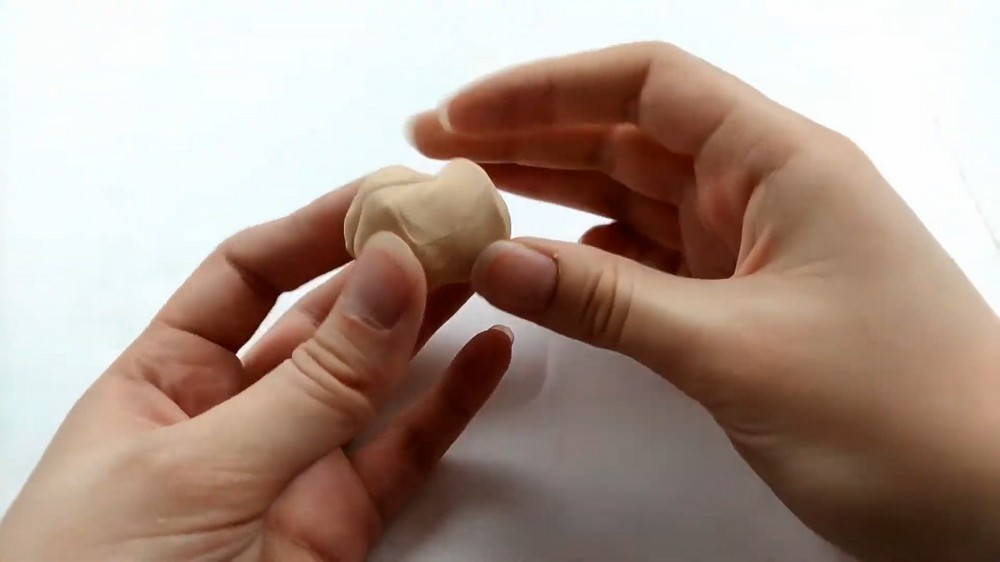
- Take a pinch of this mix and roll it into a small ball with your hands. Do this until you have six balls.
- Lightly press each ball to flatten it into a donut shape—about the size of a marble.
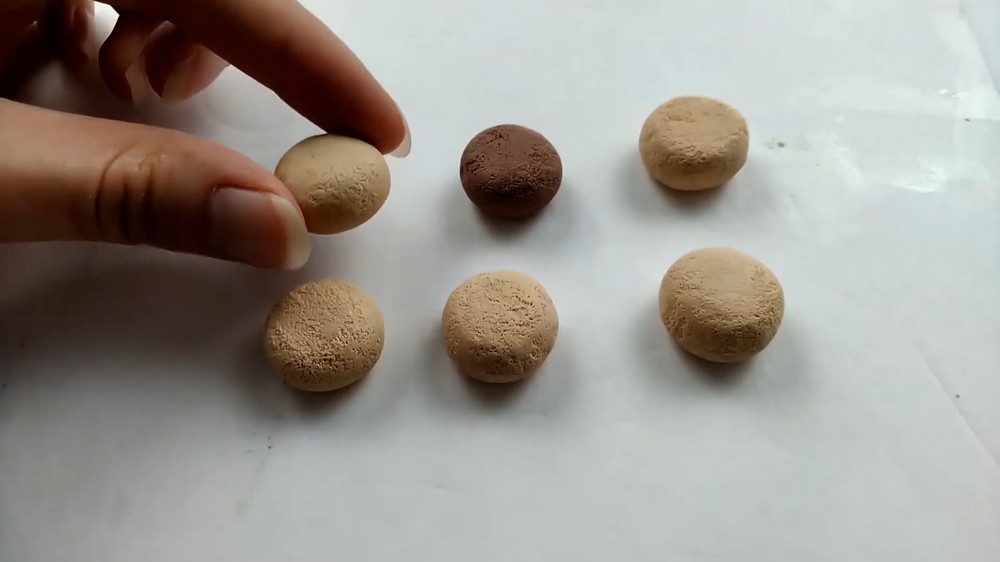
- Set aside five light brown bases. For the sixth donut, use dark brown clay for a chocolate base.
Add Dough Texture
- Take a clean toothbrush and gently tap or roll it across the surface of each clay base.
- This adds a realistic, baked look as if the donuts are fresh out of the oven.
- Repeat with all six donuts.
Make the Donut Holes
- Use a pointed clay tool to pierce the center of each donut base.
- Flip it over and pierce from the other side. Keep flipping and poking until a neat round hole forms in the middle.
- Repeat with all six donuts.
Decorating Your Mini Donuts
- Let’s make each donut unique and colorful, just like in a real bakery.
Donut 1: Blueberry Drizzle
- Roll a white clay into thin, flat strip for cream layer.
- Place it on the donut and make hole from th center.
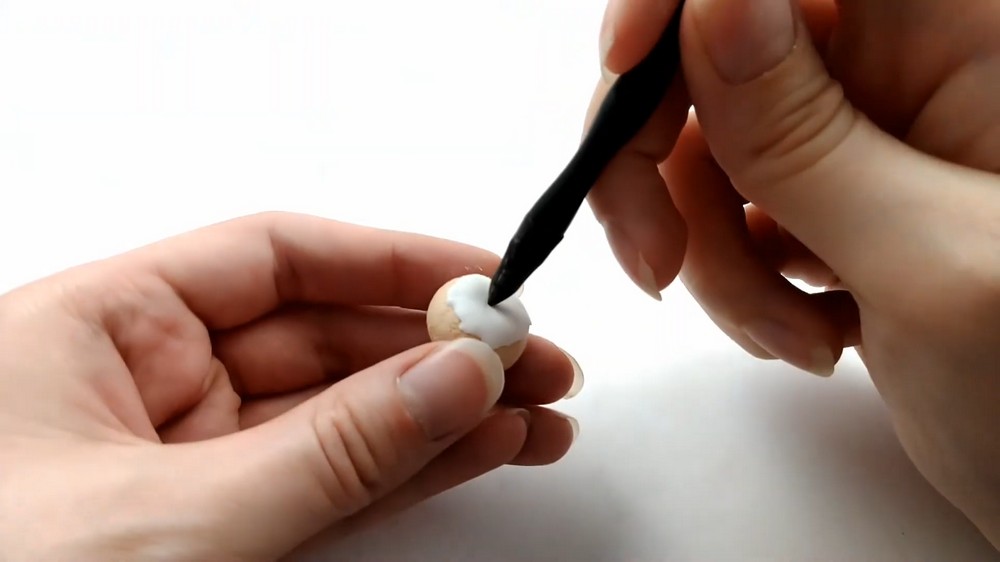
- Roll a small ball of blue clay and flatten it into a thin rope.
- Arrange it across a light brown donut in a zigzag pattern, as though drizzling blueberry glaze on top.
- Use your tool to clear the center hole if the clay covers it.
Donut 2: Maple Bacon
- Roll out light brown clay into a thin, flat strip for the icing.
- Place it on a light brown base.
- Chop up tiny rectangles of dark brown clay to represent bacon bits.
- Scatter and press these pieces gently over the icing.
Donut 3: Rainbow Sprinkle
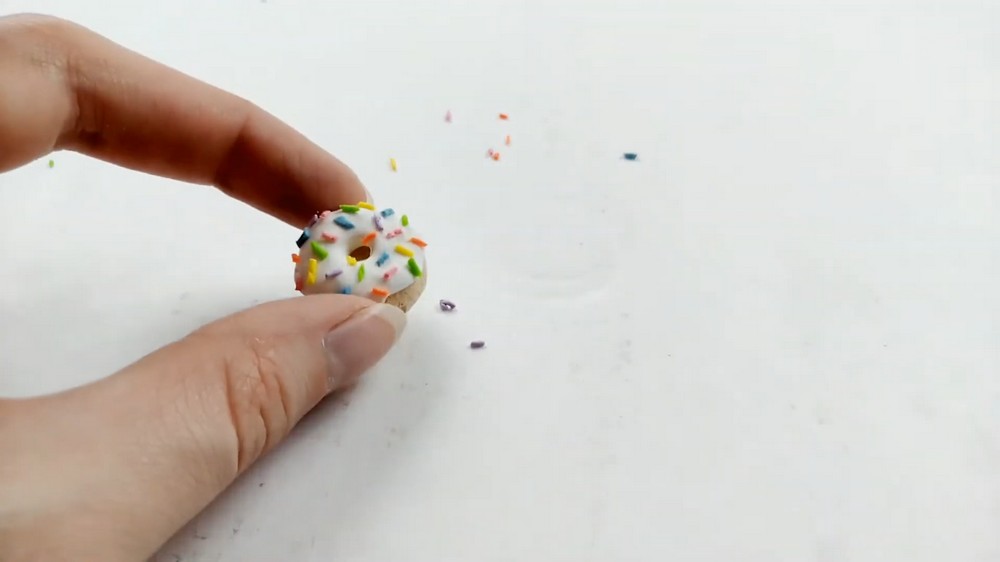
- Take white clay and stretch it into a flat layer for the glaze.
- Drape it over another light brown base. Smooth the glaze with a Q-tip dipped in acetone to erase any fingerprints and give the icing a shiny look.
- To make sprinkles, roll out very thin logs of clay in bright colors and slice them into small pieces. Place them one by one across the white glaze.
Donut 4: Strawberry Vanilla Drizzle
- Roll and flatten pink clay for the strawberry glaze. Place it on another light brown base and smooth the edges with an acetone-dipped Q-tip.
- For the vanilla drizzle, roll out thin white clay logs and lay them across the pink glaze in parallel lines, giving your donut a classic bakery look.
Donut 5: Cookies and Cream
- Use the dark brown (chocolate) donut base.
- Thinly stretch white clay and pat it down for icing, clearing the center hole as needed.
- Chop bits of dark brown clay and scatter them across the icing to mimic crushed cookies.
Donut 6: Cotton Candy
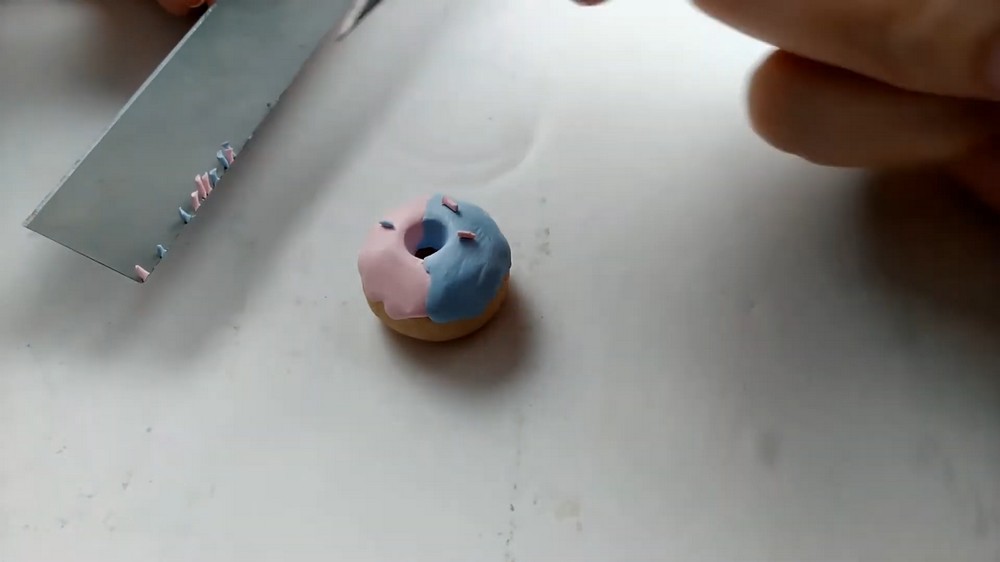
- Take equal parts light blue and pink clay. Flatten each into half-circle shapes and press together to create a dual-colored icing. Place it on a light brown donut, blend the edges carefully, and clear the hole if needed. Smooth with a Q-tip and acetone.
- For sprinkles, roll out tiny logs of light pink and light blue clay, slice, and place pink sprinkles on the blue side and blue sprinkles on the pink side.
Baking the Donuts
- Set your oven according to the instructions on your polymer clay packaging. Arrange the decorated mini donuts gently on a baking sheet.
- Bake them for the recommended time—usually between 15 to 30 minutes, depending on the size and brand of clay. Once done, let the donuts cool completely before handling.
Making the Mini Donut Box
- Show off your mini donuts with a custom bakery box!
Measure and Cut the Cardboard
- Decide how big your box should be to fit the six mini donuts. Use a ruler and pencil to outline a box template on the thin cardboard. Draw sections for the base, sides, and flaps.
- Carefully cut along the lines with scissors. At each corner, make small slits to help with folding.
Add the Plastic Window
- To make a display window, cut a rectangle out of the front panel of your box template. Cut a matching piece from the plastic envelope window.
- Glue or tape the plastic piece to the inside of the box so the window becomes clear from outside. This gives your mini box the look of a real bakery display.
Assemble the Box
- Fold along all the score lines, making sure the edges are crisp. Fold up the sides and use glue or tape to secure the flaps at the corners.
- Now you have a sturdy mini donut box with a cute display window.
Final Display
- Once your mini donuts are completely cooled, arrange them neatly inside your finished donut box. Adjust them so that the toppings are visible from the display window.
- If you like, you can add a bakery logo or decorative stickers to the box lid. Your mini clay donut set is now ready for display, gifting, or play!
Tips for Success
- Keep your hands clean and dust-free to avoid marks on the clay.
- Handle clay gently when smoothing and shaping.
- Use acetone sparingly; just a little on the Q-tip is enough for a smooth, shiny finish.
- If the clay becomes too soft, chill it briefly in the refrigerator.
- Always bake according to the polymer clay manufacturer’s guidelines for best results.
Ideas for Use
- Give your mini donuts as a handmade gift.
- Use them as charms for keychains or jewelry by adding small hooks before baking.
- Display them as cute decorations in a dollhouse or on your desk.
- Customize your box with stickers or labels for extra flair.