Beautify your wardrobe with this cozy crochet distressed sweater that offers a stylish oversized fit and textured details perfect for any occasion.
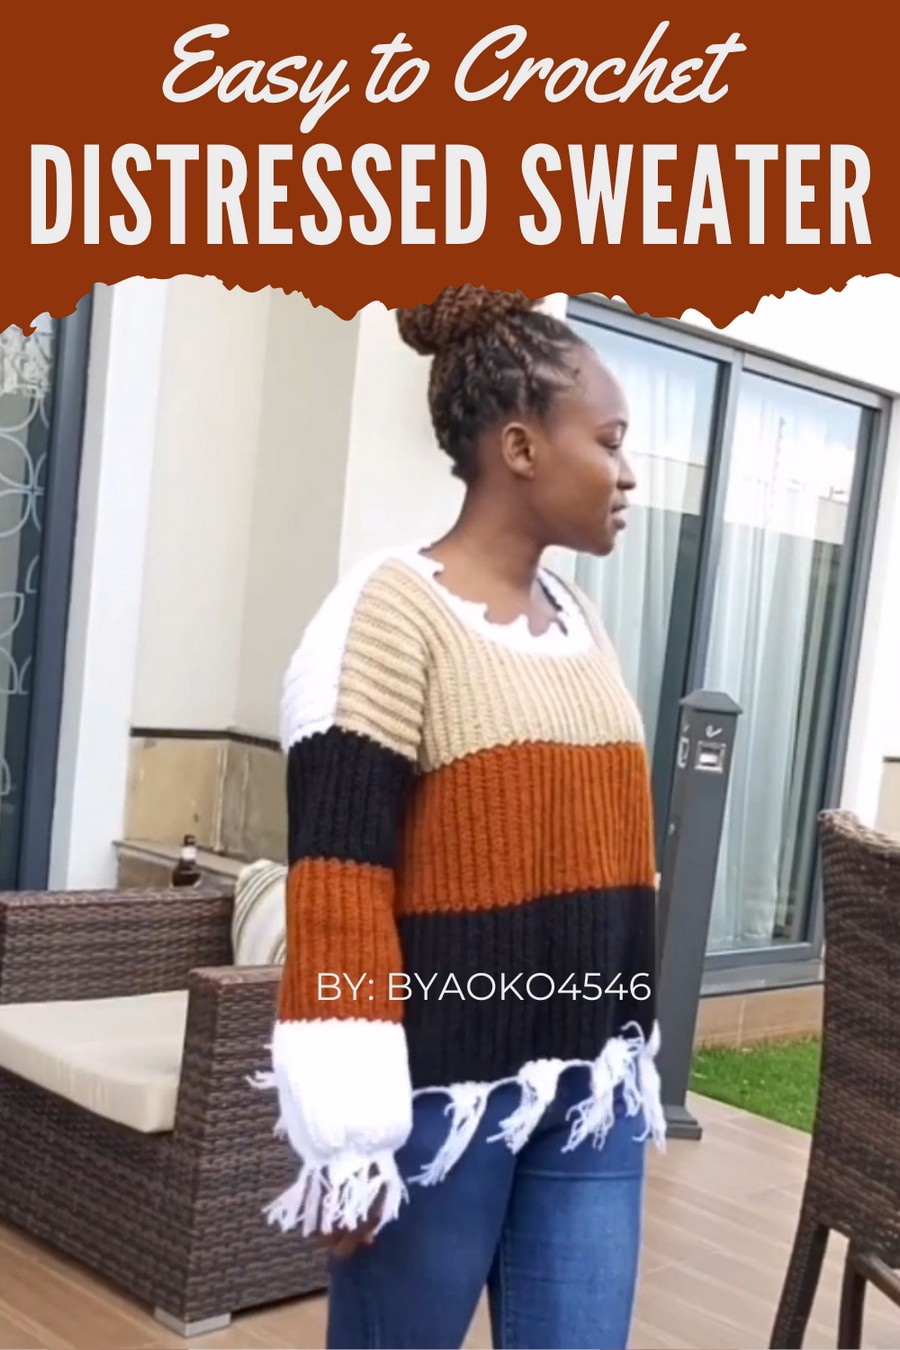
This cozy and stylish sweater is a perfect blend of comfort and fashion, making it ideal for everyday wear or a casual outing. With its unique distressed look and bold color-block design, it adds a trendy and artistic touch to any outfit. The sweater’s oversized fit provides maximum comfort, while the textured ribbing and tassels give it a modern twist.
Stunning Distressed Crochet Sweater Pattern You’ll Love
Whether paired with jeans for a relaxed look or layered for colder days, it's versatile for all occasions. Easy to customize in colors and size, this sweater stands out with its handmade charm and unique appearance, offering style and warmth.
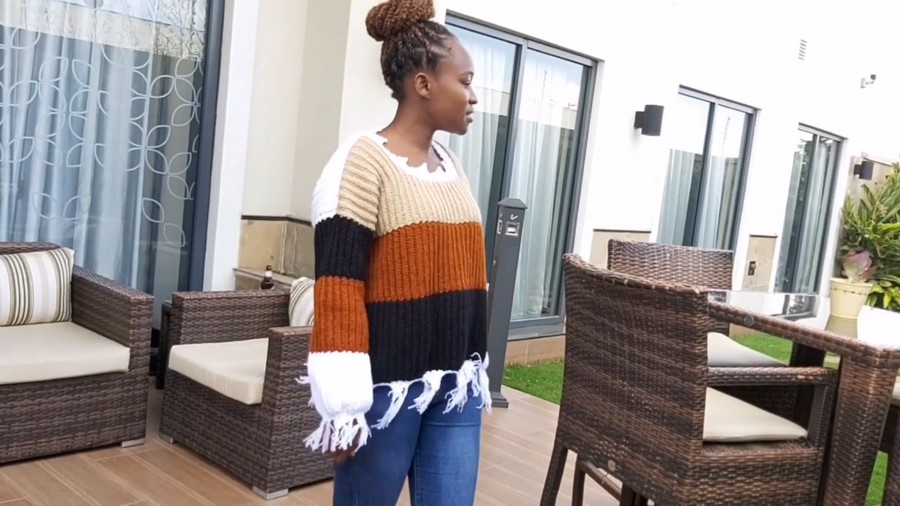
This stylish and beginner-friendly crochet sweater is the perfect cozy addition to your wardrobe. Designed with a distressed ribbed hem and fun color-block sections, the sweater uses simple stitches and a unique construction technique to achieve a trendy yet handmade aesthetic. The sweater can be easily customized for size, sleeve length, and color arrangements, making it a versatile project for everyone.
Materials
Yarn
- Type: 100% Acrylic Fingering Weight Yarn, doubled to create a medium-weight texture.
(Alternative: Any medium-weight yarn of your choice, cotton or acrylic blends work best). - Colors Needed:
- Black (Main body color)
- Burnt Orange (Secondary contrast color)
- Beige (Third contrast color)
- White (Ribbing and decorative features)
- Total Yarn Needed: Approximately 8-10 skeins (depending on size). Adjust based on yarn thickness.
Hook
- 5 mm crochet hook
Additional Supplies
- Measuring Tape
- Scissors
- Tapestry Needle (for weaving in ends and seaming)
- Stitch Markers (optional, for consistent alignment during joining).
Skill Level
Intermediate to Advanced
- Simple stitches make this accessible for beginners eager to advance their skills, but experience with basic down-the-side joining techniques is recommended.
Key Abbreviations (US Crochet Terminology)
- ch: Chain
- sl st: Slip Stitch
- hdc: Half Double Crochet
- bl: Back Loop (used for ribbing)
Special Notes
- Construction Style: Worked in panels, then joined at the sides and shoulders. Sleeves and neckline are crocheted separately and attached later.
- Measurement-Based Pattern: Use a measuring tape to ensure an accurate fit and make adjustments as needed for larger/smaller sizes.
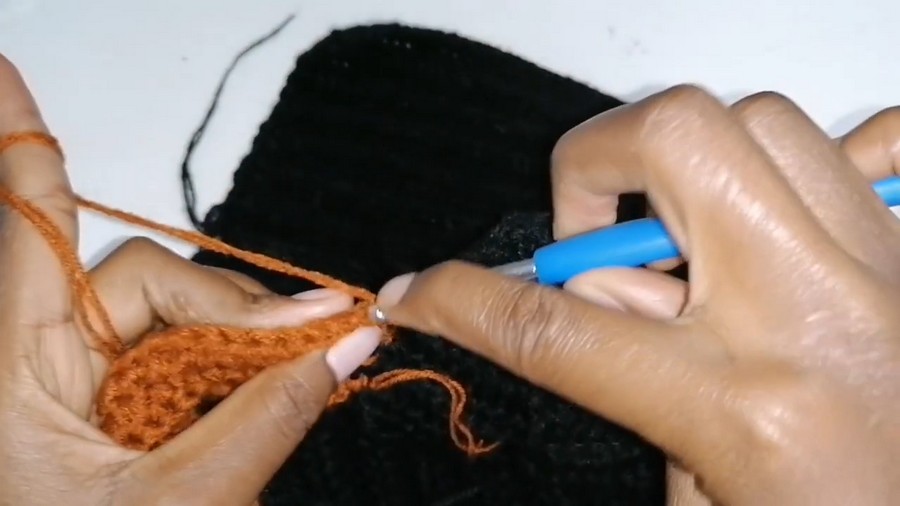
- Using Multiple Colors: Always attach new colors on the wrong side of the project to keep your seam invisible.
Pattern
Step 1: Front Panel
- Foundation Chain and Measurements:
- Use a measuring tape to determine the desired width and height of the sweater's front panel. The width depends on how loose or fitted you want the design to be.
- For the tutorial example: Width = 24 inches (front panel only) and Height = 20 inches. Adjust these measurements based on your preferences.
- Create a slip knot, then chain (ch) 31 (or more based on your measurement and gauge).
- Always chain loosely to make it easier to work in the back loops.
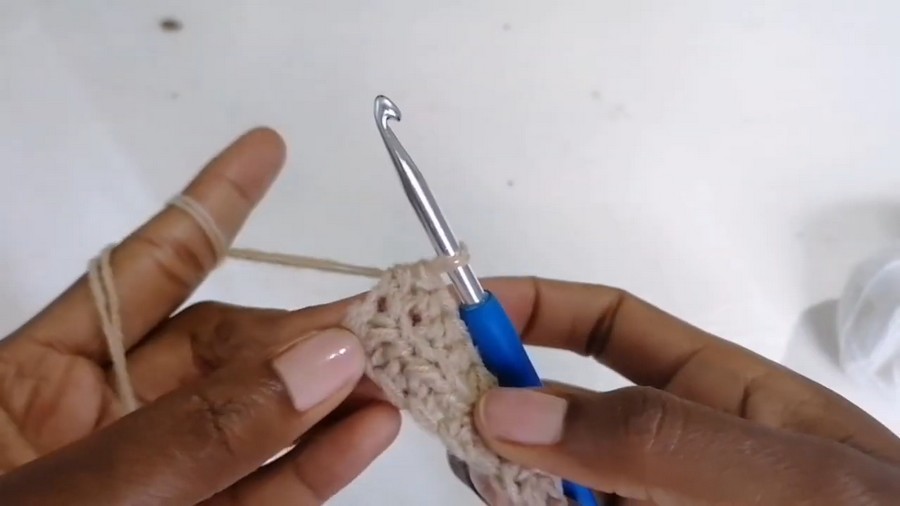
- Row 1:
- Skip the first chain, then work 1 hdc through the back loop of the second chain from the hook.
- Continue working 1 hdc in the back loop only (bl) across all remaining chains.
- Row 2 and Beyond:
- For the next row, ch 1 and turn your work (ch 1 does not count as a stitch).
- Work hdc through both loops in the first stitch of the row to maintain straight edges.
- Work hdc through the back loop only (bl) for the rest of the row.
- Continue this pattern, ensuring to work through both loops on the last stitch of every row.
- Building Height:
- Repeat until the panel measures your desired height, e.g., 20 inches for the tutorial example.
- Cut your yarn and fasten off.
Step 2: Back Panel
- Create the Back Panel using the same method as described for the Front Panel in Step 1, working to the same width and height.
- Note: The Back Panel does not require shaping for the neckline; simply work in straight rows.
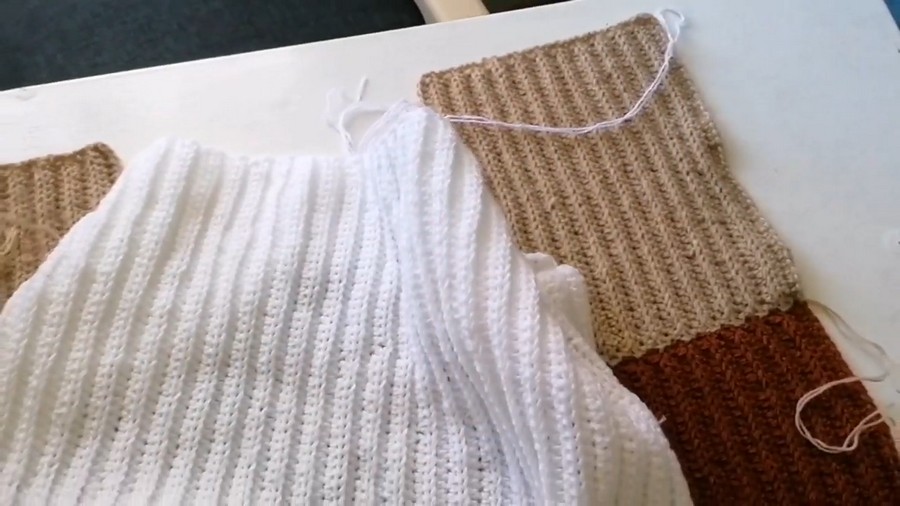
Step 3: Joining Panels
- Align Panels:
- Place the front and back panels together with the right sides facing inward (wrong sides facing outward).
- Shoulder Seams:
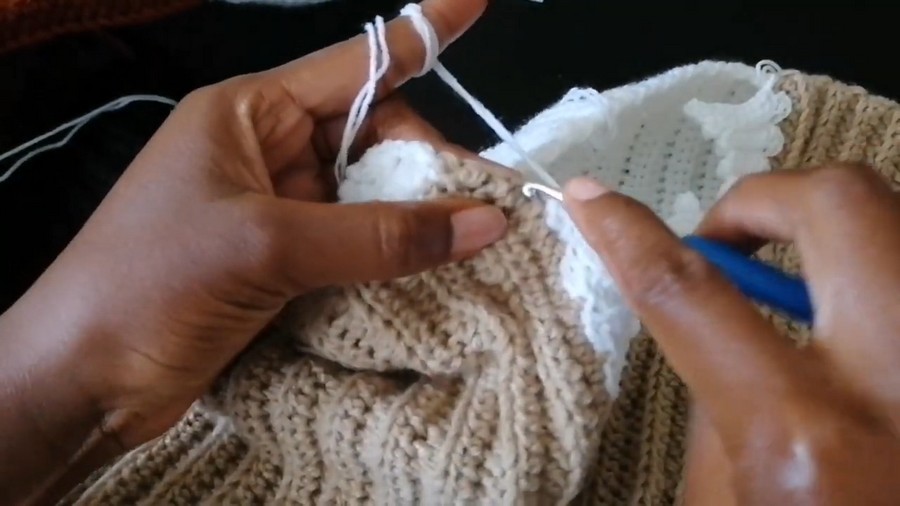
- Starting at the top edges (shoulders) of the panels, use a sl st seaming method or a darning needle to join the front and back panels together row by row.
- Leave a gap in the middle for the neckline (based on the desired neckline width; e.g., ~9 inches in the tutorial).
- Side Seams:
- Seam the sides of the panels together using a tapestry needle (or sl st), row by row.
- Leave an opening at the top for the armhole (~9 inches for a total circumference of ~18 inches).
Step 4: Adding Sleeves
- Sleeve Base Measurement:
- Use measuring tape to determine the desired length and width of your sleeve. The width of the sleeve’s top edge (circumference) should match the armhole circumference.
- First Sleeve Section:
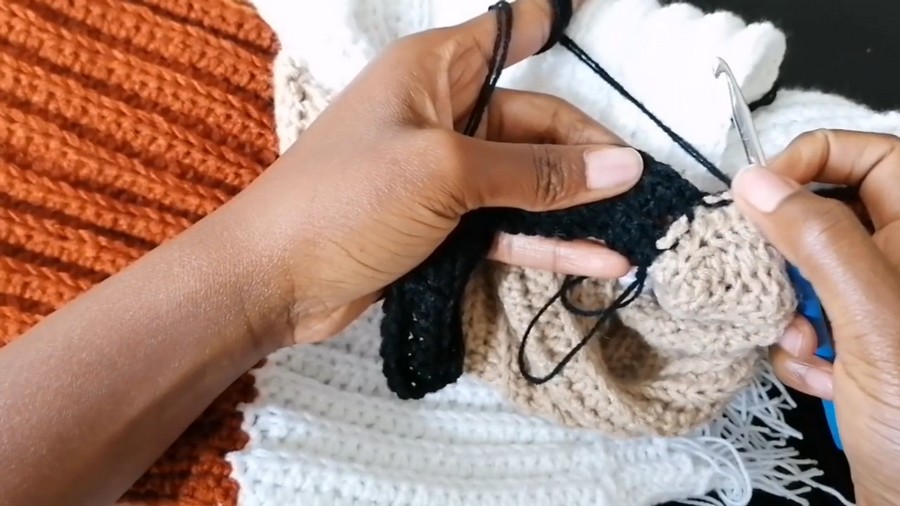
- Using the black yarn, make a foundation chain equal to the width of the sleeve (e.g., 23 chains for the tutorial example).
- Follow the hdc through the back loop pattern described in the panel steps, working evenly to build the first sleeve section's height (adjust colors to match the body sections).
- Distressed/Ribbed Sleeve Hem:
- Work slip stitch ribbing for the decorative section:
- Chain 11 for ribbing, then work a sl st in the second chain from the hook and in each chain back across.
- Attach the ribbing to the sleeve with a sl st, then turn your work and repeat for a textured finish.
- Work slip stitch ribbing for the decorative section:
- Attach Sleeves:
- Seam the sides of each sleeve to form a tube.
- Attach the sleeve to the armhole using a sl st or tapestry needle, ensuring even alignment for a smooth finish.
Step 5: Neckline
- Reattach yarn at the back neckline.
- Work slip stitch ribbing or a scalloped edge in the round to finish off the neckline design.
Step 6: Decorative Hem (Optional)
- Add a distressed look to the base of the sweater by attaching slip-stitch ribbing at the bottom, similar to the sleeve cuffs.
- Extend with tassels for an artistic, rugged look.
Conclusion
The color-block distressed sweater combines basic crochet stitches with an edgy, fashionable aesthetic. The beginner-friendly yet intricate appearance makes it a satisfying project for both beginners and intermediate crocheters. Measuring frequently and experimenting with color sections allows for endless customization opportunities to suit your style!
Customization Options
- Customize Colors: Choose different combinations of colors to match your wardrobe. For a more neutral look, use monochrome or gradient yarn.
- Adjust Sizes: Modify the width of the panels, sleeve lengths, or neckline size to fit the recipient.
Tips for Success
- Maintain Consistent Tension: This will create a smooth texture, especially in the slip stitch ribbed sections.
- Measure Often: Adjusting the width of each section ensures the final product fits perfectly.
- Check Seams: Use stitch markers before seaming to ensure sleeves, panels, and ribbing are evenly aligned.
Pattern Variations
- Colors: Try pastels for a softer aesthetic or bold hues for a vibrant look.
- Distressed Details: Add multiple rows of unfinished ribbing for a more dramatic effect.